

Professional Visual Studio 2005 (2006) [eng]
.pdfChapter 12
How to Add XML Comments
XML comments are added immediately before the member or procedure they are associated with. To specify that a comment should be picked up by the XML comment processor in C#, use the /// prefix. By default, Visual Studio will automatically add the summary section when you first use the /// indicator for a member, and in some instances XML comments will already be present in code generated by the supplied project templates (see Figure 12-1).
Figure 12-1
The automatic insertion of the summary section can be turned off in the Advanced page for C# in the Text Editor group of options.
Adding XML comments to Visual Basic is achieved by using the triple apostrophe command, as a single apostrophe normally indicates comments. In this way it replicates the way C# documentation is generated.
In both languages, once the comments have been added, the Visual Studio IDE will automatically add a collapse button to the left margin so you can hide the documentation when you’re busy writing code. Hovering over the collapsed area will display a tooltip message containing the first few lines of the comment block.
J# doesn’t support XML comments in the same way C# and Visual Basic do. Instead, J# uses the Javadoc standard.
XML Comment Tags
While you can use any kind of XML comment structure you like, including your own custom XML tags, Visual Studio’s XML comment processor recognizes a number of predefined tags and will automatically
156
XML Comments
format them appropriately. You can supplement these with your own XML schema document so that tags not recognized by Visual Studio 2005 are also formatted in your reports, but using the default tags simplifies the process of creating elegant documentation.
Because documentation is so important, the bulk of this chapter details each of these predefined tags, their syntax, and how you would use them in your own documentation.
The <c> Tag
The <c> tag indicates that the enclosed text should be formatted as code, rather than normal text. It’s used for code that is included in a normal text block. The structure of <c> is simple, with any text appearing between the opening and closing tags being marked for formatting in the code style:
<c>code-formatted text</c>
The following example shows how <c> might be used in the description of a subroutine in C#:
///<summary>
///The <c>sender</c> object is used to identify who invoked the procedure.
///</summary>
///<param name=”sender”></param>
private void MyLoad(object sender)
{
...code...
}
The result of generating the documentation based on the summary section with a simple XSL definition could appear as follows:
The sender object is used to identify who invoked the procedure.
The <code> Tag
If the amount of text in the documentation you need to format as code is more than just a phrase within a normal text block, you can use the <code> tag instead of <c>. This tag marks everything within it as code, but it’s a block-level tag, rather than a character-level tag. The syntax of this tag is a simple opening and closing tag with the text to be formatted inside like so:
<code> Code-formatted text
Code-formatted text </code>
The <code> tag can be embedded inside any other XML comment tag. The following listing shows an example of how it could be used in the summary section of a property definition in Visual Basic:
‘’’ <summary>
‘’’ The <c>MyName</c> property is used in conjunction with other properties
‘’’ to setup a user properly. Remember to include the <c>MyPassword</c> field too:
157

Chapter 12
‘’’ <code>
‘’’ theObject.MyName = “Name”
‘’’ theObject.MyPassword = “x4*@v” ‘’’ </code>
‘’’ </summary>
Public ReadOnly Property MyName() As String
Get
Return mMyName
End Get
End Property
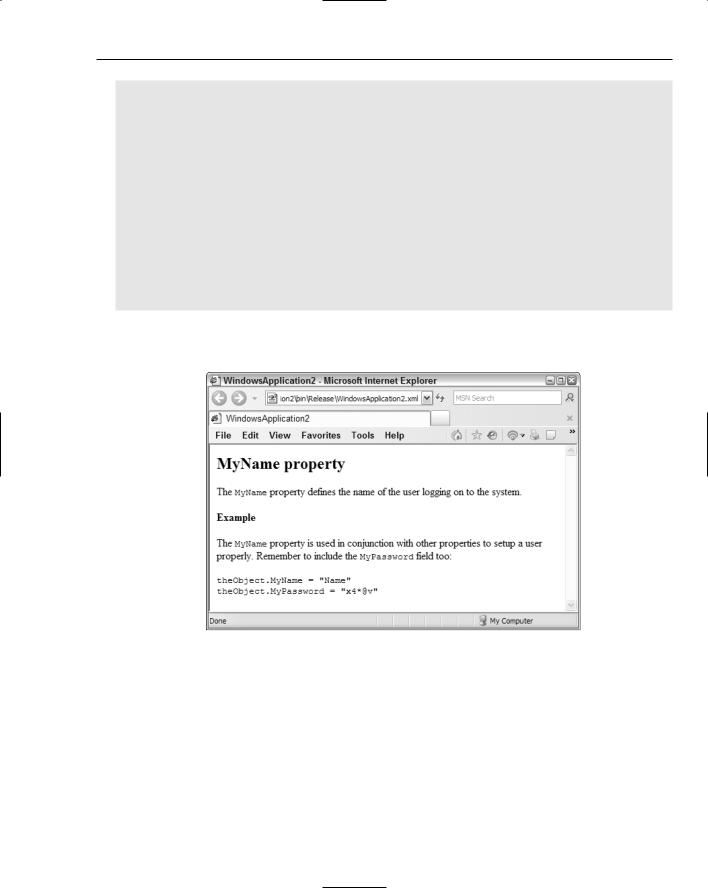
Generating this documentation and viewing it with a basic transformation will produce something similar to what is shown in Figure 12-2.
Figure 12-2
The <example> Tag
A common requirement for internal documentation is to provide an example of how a particular procedure or member can be used. The <example> tags indicate that the enclosed block should be treated as a discrete section of the documentation, dealing with a sample for the associated member. Effectively, this doesn’t do anything more than help organize the documentation, but used in conjunction with an appropriately designed XML style sheet or processing instructions, the example can be formatted properly.
The other XML comment tags, such as <c> and <code>, can be included in the text inside the <example> tags to give you a comprehensively documented sample. The syntax of this block-level tag is simple:
<example>
Any sample text goes here. </example>
Using the example from the previous discussion, the following listing moves the <code> formatted text to an <example> section:
158
XML Comments
‘’’ <summary>
‘’’ The <c>MyName</c> property defines the name of the user logging on to the system.
‘’’ </summary> ‘’’ <example>
‘’’ The <c>MyName</c> property is used in conjunction with other properties
‘’’ to setup a user properly. Remember to include the <c>MyPassword</c> field too: ‘’’ <code>
‘’’ theObject.MyName = “Name”
‘’’ theObject.MyPassword = “x4*@v” ‘’’ </code>
‘’’ </example>
Public ReadOnly Property MyName() As String Get
Return mMyName End Get
End Property
Figure 12-3 shows how this sample XML comment block could be formatted with an XSL transformation template that includes adding a heading for the Example section.
Figure 12-3
The <exception> Tag
The <exception> tag is used to define any exceptions that could be thrown from within the member associated with the current block of XML documentation. Each exception that can be thrown should be defined with its own <exception> block, with an attribute of cref identifying the type of exception that can occur. Note that the Visual Studio 2005 XML comment processor will check the syntax of the exception block to enforce the inclusion of this attribute. It will also ensure that you don’t have multiple <exception> blocks with the same attribute value. The full syntax is as follows:
159

Chapter 12
<exception cref=”exceptionName”> Exception description. </exception>
Extending the Visual Basic example from the previous tag discussions, the following listing adds two exception definitions to the XML comments associated with the MyName property: System.TimeoutException, and System.UnauthorizedAccessException. It would be expected that inside the associated member code, exceptions of these types would indeed be thrown at appropriate times:
‘’’ <summary>
‘’’ The <c>MyName</c> property defines the name of the user logging on to the system.
‘’’ </summary>
‘’’ <exception cref=”System.TimeoutException”>
‘’’ Thrown when the code cannot determine if the user is valid within a reasonable ‘’’ amount of time.
‘’’ </exception>
‘’’ <exception cref=”System.UnauthorizedAccessException”>
‘’’ Thrown when the user identifier is not valid within the current context. ‘’’ </exception>
‘’’ <example>
‘’’ The <c>MyName</c> property is used in conjunction with other properties
‘’’ to setup a user properly. Remember to include the <c>MyPassword</c> field too: ‘’’ <code>
‘’’ theObject.MyName = “Name”
‘’’ theObject.MyPassword = “x4*@v” ‘’’ </code>
‘’’ </example>
Public ReadOnly Property MyName() As String Get
Return mMyName End Get
End Property
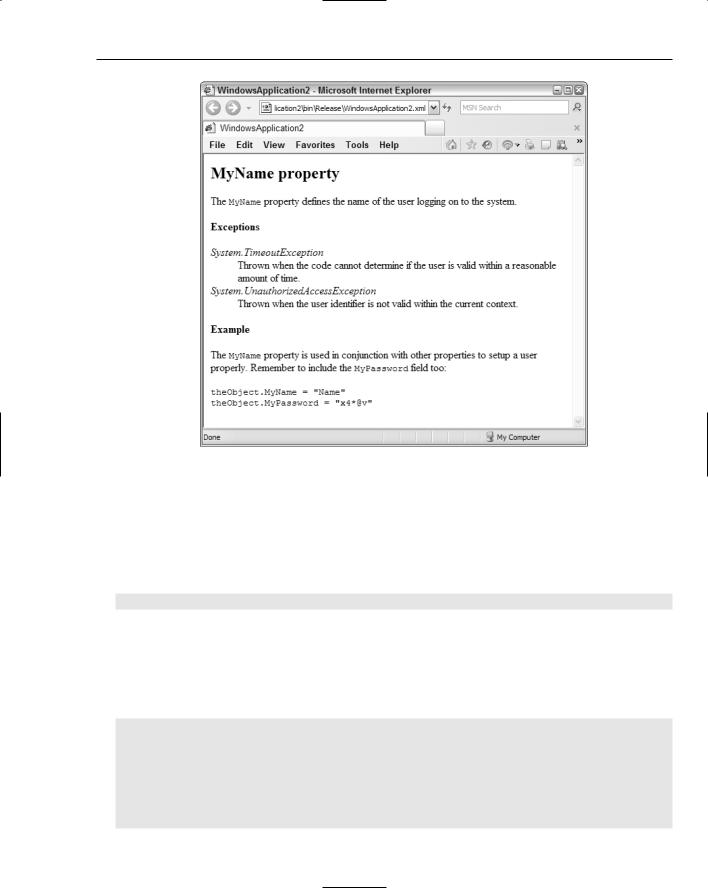
Using the same XSL transformation as before, the documentation would be generated with an additional block containing an Exceptions heading, and each exception would be clearly formatted, as shown in Figure 12-4.
The <include> Tag
You’ll often have documentation that needs to be shared across multiple projects. In other situations, one person may be responsible for the documentation while others are doing the coding. Either way, the <include> tag will prove useful. The <include> tag enables you to refer to comments in a separate XML file so they are brought inline with the rest of your documentation. Using this method, you can move the actual documentation out of the code listing, which can be handy when the comments are extensive.
The syntax of <include> requires that you specify which part of the external file is to be used in the current context. The path attribute is used to identify the path to the XML node, and uses standard XPath terminology:
<include file==”externalFile.xml” path=”xmlNodePath[@name=’nodeID’]/*” />
160
XML Comments
Figure 12-4
The external XML file containing the additional documentation must have a path that can be navigated with the attribute you specify, with the end node containing an attribute of name to uniquely identify the specific section of the XML document to be included.
You can include files in either Visual Basic or C# using the same tag. The following listing takes the C# sample used in the <c> tag discussion and moves the documentation to an external file:
/// <include file=”externalFile.xml” path=”MyDoc/Procedures[@name=’MyLoad’]/*” /> private void MyLoad(object sender)
{
...code...
}
The external file’s contents would be populated with the following XML document structure to synchronize it with what the <include> tag processing expects to find:
<MyDoc>
<Procedures name=”MyLoad”> <summary>
The <c>sender</c> object is used to identify who invoked the procedure.
</summary>
<param name=”sender”></param> </Procedures>
</MyDoc>
161

Chapter 12
The <list> Tag
Some documentation requires lists of various descriptions, and with the <list> tag you can generate numbered and unnumbered lists along with two-column tables. All three take two parameters for each entry in the list — a term and a description — represented by individual XML tags, but they instruct the processor to generate the documentation in different ways.
To create a list in the documentation, use the following syntax, where type can be one of the following values — bullet, numbered, or table:
<list type=”type”> <listheader>
<term>termName</term>
<description>description</description>
</listheader>
<item>
<term>myTerm</term>
<description>myDescription</description>
</item>
</list>
The <listheader> block is optional, and is usually used for table-formatted lists. Depending on the list type, you can actually omit the term tag within each item as well.
The XML for each type of list can be formatted differently using an XML style sheet. An example of how to use the <list> tag in Visual Basic appears in the following code. Note how the sample has omitted the listheader tag, as it was unnecessary for the bullet list:
‘’’ <summary>
‘’’ Some function. ‘’’ </summary> ‘’’ <returns>
‘’’ This function returns either: ‘’’ <list type=”bullet”>
‘’’ <item>
‘’’ <term>True</term>
‘’’ <description>Indicates that the routine was executed successfully. ‘’’ </description>
‘’’ </item> ‘’’ <item>
‘’’ <term>False</term>
‘’’ <description>Indicates that the routine functionality failed.</description> ‘’’ </item>
‘’’ </list> ‘’’ </returns>
Public Function MyFunction() As Boolean
...code...
Return False End Function
The results shown in Figure 12-5 used an XSL transformation file that included a heading to mark the Returns section.
162

XML Comments
Figure 12-5
The <para> Tag
Without using the various internal block-level XML comments such as <list> and <code>, the text you add to the main <summary>, <remarks>, and <returns> sections all just runs together. To break it up into readable chunks, you can use the <para> tag, which simply indicates that the text enclosed should be treated as a discrete paragraph. The syntax is simple:
<para>This text will appear in a separate paragraph.</para>
The <param> Tag
To explain the purpose of any parameters in a function declaration, you can use the <param> tag. This tag will be processed by the Visual Studio XML comment processor with each instance requiring a name attribute that has a value equal to the name of one of the properties. Enclosed within the opening and closing <param> tags is the description of the parameter:
<param name=”parameterName”>Definition of parameter.</param>
The XML processor will not allow you to create multiple <param> tags for the one parameter, producing warnings that are added to the Error List in Visual Studio if you try. The following Visual Basic example shows how the <param> tag is used to describe two parameters of a function:
‘’’ <param name=”MyName”>The Name of the user to log on.</param>
‘’’ <param name=”MyPassword”>The Password of the user to log on.</param> ‘’’ <remarks>Uses <see cref=”MyName”/> and <see cref=”MyPassword”/> to ‘’’ attempt to log on to the system.
‘’’ </remarks>
Public Function LoginProc(ByVal MyName As String, ByVal MyPassword As String) _ As Boolean
‘...code...
Return False End Function
163

Chapter 12
Generating the XML based on this definition with a simple XSL file will produce a result similar to that shown in Figure 12-6. Note that the cref attributes in the comment block refer to properties of the form elsewhere in the class definition. While they have the same name as the parameters of the function, the XML comment compiler will correctly resolve the values to the appropriate entry points, as shown in Figure 12-6.
Figure 12-6
The <paramref> Tag
If you are referring to the parameters of the method definition elsewhere in the documentation other than the <param> tag, you can use the <paramref> tag to format the value, or even link to the parameter information depending on how you code the XML transformation. The XML compiler does not require that the name of the parameter exist, but you must specify the text to be used in the name attribute, as the following syntax shows:
<paramref name=”parameterName”
Normally, <paramref> tags are used when you are referring to parameters in the larger sections of documentation such as the <summary> or <remarks> tags, as the following C# example demonstrates:
///<summary>
///The <paramref name=”sender” /> object is used to identify who
///invoked the procedure.
///</summary>
///<param name=”sender”>Who invoked this routine</param>
///<param name=”e”>Any additional arguments to this instance of the event.</param> private void Form1_Load(object sender, EventArgs e)
{
}
164

XML Comments
The <permission> Tag
To describe the security permission set required by a particular method, use the <permission> tag. This tag requires a cref attribute to refer to a specific permission type:
‘’’ <permission cref=”permissionName”> ‘’’ description goes here
‘’’ </permission>
If the function requires more than one permission, use multiple <permission> blocks, as shown in the following Visual Basic example:
‘’’ <permission cref=”System.Security.Permissions.RegistryPermission”> ‘’’ Needs full access to the Windows Registry.
‘’’ </permission>
‘’’ <permission cref=”System.Security.Permissions.FileIOPermission”>
‘’’ Needs full access to the .config file containing application information. ‘’’ </permission>
Public Function LoginProc(ByVal MyName As String, ByVal MyPassword As String) _ As Boolean
‘...code...
Return False End Function
The <remarks> Tag
The <remarks> tag is used to add an additional comment block to the documentation associated with a particular method. Discussion on previous tags has shown the <remarks> tag in action, but the syntax is as follows:
<remarks>
Any further remarks go here </remarks>
Normally, you would create a summary section, briefly outline the method or type, and then include the detailed information inside the <remarks> tag, explaining what each parameter is for along with the expected outcomes of accessing the member.
The <returns> Tag
When a method returns a value to the calling code, you can use the <returns> tag to describe what it could be. The syntax of <returns> is like most of the other block-level tags, consisting of an opening and closing tag with any information detailing the return value enclosed within:
<returns>
Description of the return value. </returns>
A simple implementation of <returns> in Visual Basic might appear like the following code:
‘’’ <returns>
‘’’ This function returns either:
165