

Professional Visual Studio 2005 (2006) [eng]
.pdfChapter 3
CheckedListBox: Using the CheckedListBox, you can present users with a list of items from which they can select A property in this control allows you to control whether users can select multiple items simultaneously or if only one list entry can be chosen at a time.
ComboBox: Used commonly to present a list of options from which the user can choose only one, the ComboBox is a powerful yet simple control to use in your application. You can control the style of each ComboBox control in your application to either allow user entries or force users to choose from a preset list.
Label: An informational control only, the Label doesn’t normally allow any user interaction. It is commonly used to inform end users about the various parts of your application’s form and state.
LinkLabel: Think of a LinkLabel as being the Windows application equivalent to a hyperlink on a web page. As hyperlinking has become more prevalent, Microsoft chose to include this extra control to avoid irregular use of the normal Label component.
DateTimePicker: Let your users select a date or a time using the DateTimePicker component. The example shown in Figure 3-6 is using the default format of the date only, but you can change the setting to a time value with a simple property change.
ListView: The ListView displays a list of items with an optional icon alongside each. The best example of a ListView is the right-hand side of Windows Explorer; and just like that interface, you can switch between multiple views, such as large and small icons and Detail view, to give your end users a consistent look and feel, similar to Windows.
MaskedTextBox: The MaskedTextBox is a type of TextBox (see below) that includes additional properties that control how the information can be entered into it. You can choose from several preset masks (the screenshot shows the standard short date and time mask) or you can build your own custom mask that the user must follow in order for the contents to be valid.
ProgressBar: The ProgressBar control should be immediately familiar as a component that gives feedback to users about the completion state of a long task.
MonthCalendar: This control is an alternative to the DateTimePicker discussed previously. The MonthCalendar component shows a single month at a time by default, but you can customize this using its CalendarDimensions property. A number of other properties enable you to add your own special dates in bold and specify how many dates the user can select at one time.
NumericUpDown: A common requirement is to enable users to pick a numeric value from a range. The NumericUpDown control allows you to do this with more control than a normal textbox, as it restricts the minimum and maximum values allowed and gives the user an easy way of incrementing and decrementing the value. You can change the increment as well as the minimum and maximum values to suit your own application’s requirements.
ListBox: Similar to the ListView mentioned previously, the ListBox component will present users with a list of items. It is a lot simpler than the ListView and only has one way of displaying entries, but it can be used when all the user needs to do is select items from a list.
RadioButton: A RadioButton control is normally used in conjunction with at least one other, and represents a single option from a mutually exclusive list of options. When the user selects one RadioButton, any others in the same container will be deactivated.
TextBox: The TextBox forms the basis for all data entry by the end user. There are two main types of TextBox: single-line and multi-line. All other text entry controls are inherited from this one, including the MaskedTextBox.
36

The Toolbox
PictureBox: The PictureBox is the component you can use to house images in your form. It is useful because it has its own extensive set of events and methods, enabling you to easily create a Paintlike program by capturing mouse clicks and movements.
RichTextBox: Extending the normal TextBox, the RichTextBox gives you the ability to host an RTF (Rich Text Format) document in your form. Adding buttons or menu commands to your form, the end user can format selections of text with the normal bold, italic, and color options available to them when editing an RTF file.
TreeView: When you look at the folder list in Windows Explorer, you’re looking at an advanced TreeView. Each TreeView control can have a hierarchy of nodes with a variety of icons and states.
In addition to those visible controls, you’ll notice a small area below the active form’s design surface. This tray area is used to contain components that do not have a graphical aspect to them, or that don’t display anything on the form itself. The two components listed in this area are the NotifyIcon, which is used to place an icon in the Windows notification area in the bottom right of the screen, and the ToolTip, which is a special component that adds additional properties to any other controls on the form, giving them the capability to display tooltips when the user hovers the mouse cursor over them during execution.
Besides these commonly used controls, you’ll find extensive groups of controls dedicated to database activity, various dialog windows that you can use in your applications, and system components such as timers and event logs. In addition, you’ll find a selection of container controls whose only purpose is to house other controls on your form and segregate them in some logical fashion. Chapter 7 goes into detail about how to use container controls in your application form design.
Summar y
You should now have your Toolbox customized and ready for development in your own way. Remember that any control or component can be placed into any group, even new groups of your own design. They can be named and positioned in any order, and each group can be viewed in either List or Icon view. The result is your own unique view of the available components, ready for use in your form and class designs.
In the next chapter you’ll look at how the Solution Explorer can be customized and used to keep track of your projects and solutions.
37

The Solution Explorer
Developing applications of any kind in Visual Studio 2005 requires first that a solution be created. Most of the time you’ll create a solution automatically when you pick the kind of application project you want to design, but you can also create a blank solution for which you can customize every aspect of your development efforts, and even use temporary solutions for a single session of Visual Studio 2005.
Over the next few pages you’ll take a look at one of the many windows in the Visual Studio 2005 IDE known as the Solution Explorer, where you can manage the various projects within a particular solution and view and maintain what files belong to each project.
Solution Explorer Structure
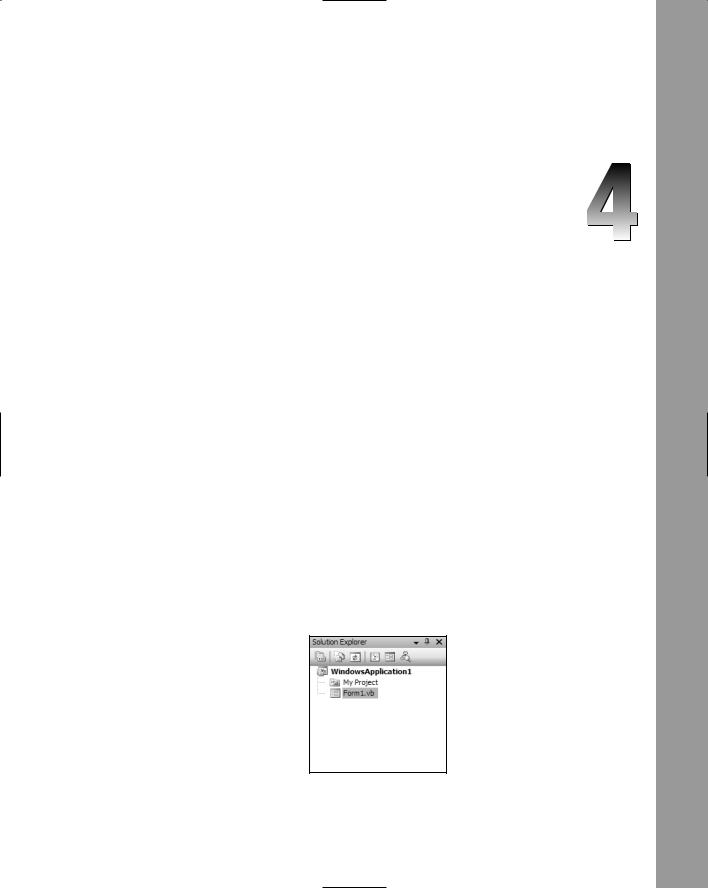
When you first start Visual Studio 2005 and create a simple project, the Solution Explorer will look something like what is shown in Figure 4-1. The top toolbar of the Solution Explorer enables you to customize the way the contents of the window appear to you, as well as giving you shortcuts to the different workspace views for individual files.
Figure 4-1

Chapter 4
The main space of the tool window contains a hierarchical list of the projects and files found within the currently open solution. When the solution contains only a single project, the Solution file itself does not appear in the tree, as shown in Figure 4-1. However, once multiple projects appear in the solution, the Solution entry is accessible within the tree so that you can easily modify the various properties of the solution (see Figure 4-2).
Figure 4-2
In the default view, the Solution is listed at the top of the tree view, with the number of projects that belong to it listed in parentheses. The next level down is the project level; each project has an entry containing its name and an icon representing what type of project it is. The icons in Figure 4-2 indicate that both projects are Visual Basic Windows applications.
The startup project is listed in bold to differentiate it from the other projects in the solution. To change the startup project to another one in the solution, right-click the desired project and choose Set As StartUp Project.
You can set multiple projects to be startup projects. You’ll learn how to do this later in this chapter.
Showing Hidden Items
The default view of the Solution Explorer is an excellent representation of your projects because it only displays the files you normally deal with. For instance, Figure 4-2 shows that WindowsApplication1 contains two entries: My Project and Form1.vb. The first entry is to access the various property pages for the project, whereas the second entry provides access to the form that belongs to the project — you can use this entry to access the Design, Code, and Class Diagram views of the form.
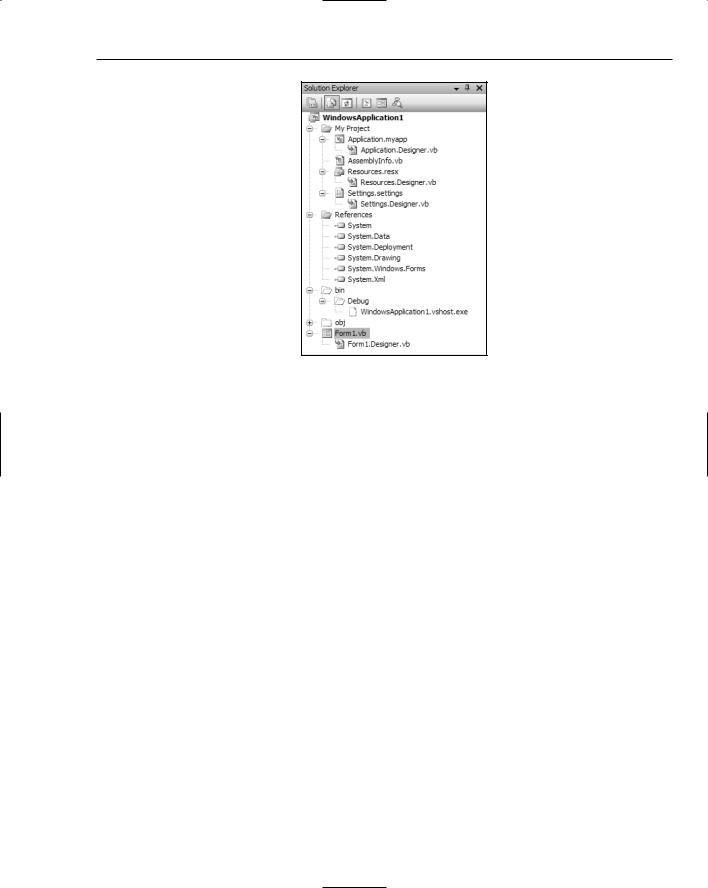
However, usually many more files and associations exist in the project than what is shown in this view, and sometimes it’s necessary to be able to get at other files within the project. Figure 4-3 shows this same project with the Show All Files toggle button activated and the various entries within the tree view expanded.
The first thing of note is the Form1.Designer.vb entry below Form1.vb. In previous versions of Visual Studio, the designer code for the form layout and contained controls was kept in the same file as your own code. As a result, many developers were tempted to manipulate the form design by editing the code when it was heavily advised not to. Another issue faced with this combined approach was that it was sometimes hard to get to your own code when the designer code kept being regenerated from Design view.
40
The Solution Explorer
Figure 4-3
Because Visual Studio 2005 is based on the .NET Framework 2.0, it was easy for Microsoft to separate the designer code from the custom code you build into your forms through the use of partial classes (which were introduced in this new version of the Framework). This extra entry that is only visible when you show all of the files associated with a project is that same designer code that Visual Studio 2005 generates for you as you create your form layouts (see Chapter 6).
You can still dive into the code and change it manually if you require, but because it’s hidden away and separated from your own code the temptation to do so unnecessarily is no longer there.
You can determine that Visual Studio 2005 is using the new partial class functionality by viewing this special “behind the scenes” designer file and looking at the top line. Partial Class indicates that the definition contained in this file is only part of the total definition of the form’s class, with the rest obviously being your own custom code.
Temporar y Solutions
In older development tools such as Microsoft Visual Basic 6, programmers were able to quickly create a temporary solution, write some test code, check the results, and then close the project without leaving vestigial files on the computer. When Visual Studio .NET was first released, this capability disappeared. Every time a developer created a new solution, the IDE would physically create the necessary files; and if the program was executed, even in debug mode, it would create a permanent executable file as well.
To delete these files, you needed to remove them using Windows Explorer after you successfully located them. It was a frustrating experience for many programmers who wanted to be able to create a temporary program, write their arbitrary code, and then be able to leave the IDE without leaving pointless files behind.
41

Chapter 4
Thankfully, Microsoft has introduced the concept of temporary projects and solutions with the release of Visual Studio 2005. Now, when you first create a solution, it is put into a special temporary state until you explicitly save it to a folder location. While in this state, Visual Studio 2005 still creates the files that it needs on the hard drive — including the debug executable in the event that you run the project — but stores them in a temporary folder.
If you leave Visual Studio 2005 or attempt to close the solution before first saving it, the IDE will prompt you to save your changes. If you do not save them at this point, Visual Studio will clean up the temporary files without you needing to do so manually.
Web Solutions
Previously, web applications were created in much the same way as any other project. The New Project dialog box was used to choose from Windows and web applications, as well as for differentiating between Web Services and Windows Controls and Services. Visual Studio 2005 has moved the web development side of things outside the New Project dialog to make the separation between web and Windows development a bit more distinct, but it can be frustrating if you don’t realize what happened.
To create a new web site, you use the File New Web Site menu command. This will display the New Web Site dialog from which you can select from half a dozen default project templates as well as custom ones you create yourself (see Chapter 25). Both ASP.NET web sites and web services can be created from this dialog in the language of your choice (see Figure 4-4), along with starter kits that generate a lot of additional code with which you can work.
Creating a web solution also enables you to specify the location where the project should be created. The default is the local file system but you can also now create web solutions based on HTTP and FTP URIs.
The Browse button next to the location displays a customized Find Location dialog window, providing individual windows for locating the correct spot on the file system, local Internet Information Server, or remote FTP or HTTP locations.
Figure 4-4
42
The Solution Explorer
Once the project has been created, Visual Studio 2005 presents it in a similar way in the Solution Explorer. The main difference is that the Show All Files toggle is no longer available and all associated files are displayed in the tool window.
Remember: If there’s only one web site, the Solution level won’t be displayed.
Common Project and Solution Tasks
Chapter 7 goes into detail about how to work with projects and solutions, but it’s worth looking at the fundamental tasks you often need to perform at this stage. The first task that’s often required is to add additional items to a project.
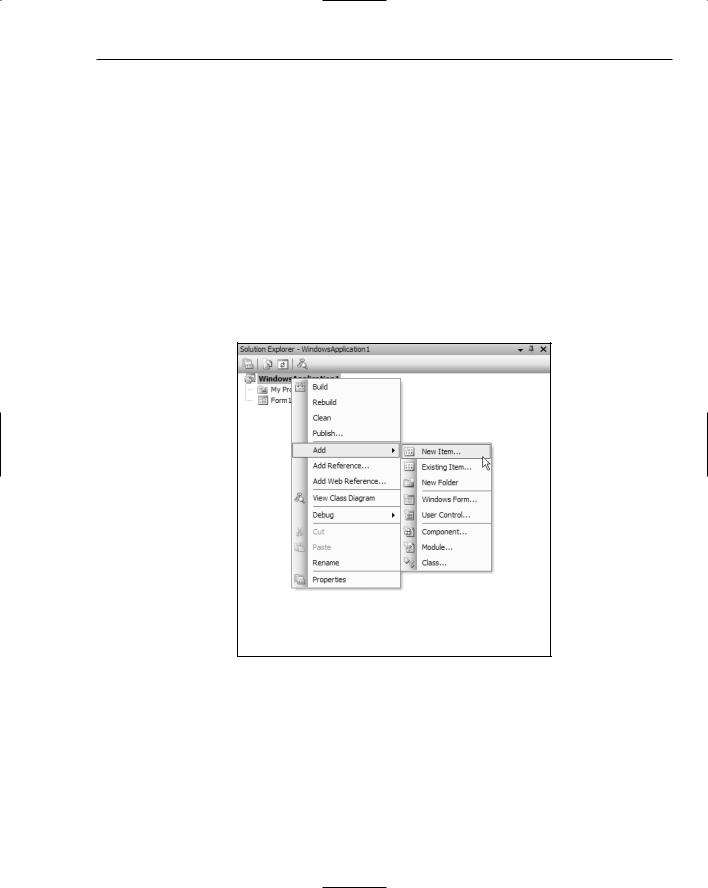
To add a new item to a project within the current solution, right-click on the project’s entry and choose Add New Item from the context menu that is displayed. You can add certain default items such as new forms and user controls by selecting their specific entry from the New Item menu (shown in Figure 4-5).
Figure 4-5
Note that selecting the default items from the Add menu will still bring up the New Item dialog, as you must select the filename that is used to set the default name for the item.
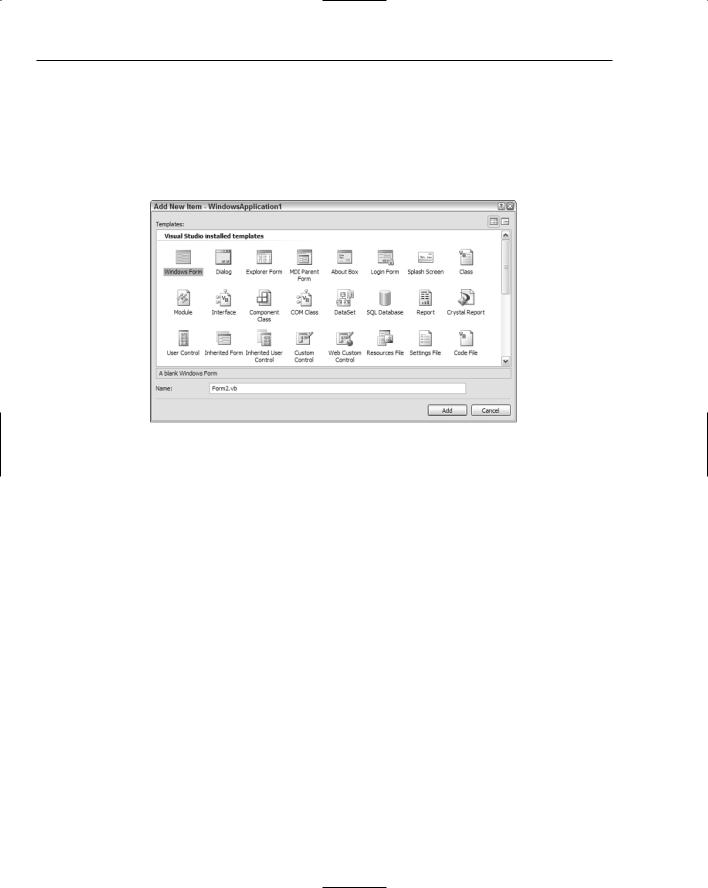
The Add New Item dialog is displayed, enabling you to choose from a vast array of default item templates. Figure 4-6 shows the extent of the Add New Item dialog in a default installation of Visual Studio 2005, with entries for new Windows forms, modules, classes, and user controls. All of these items are fairly standard requirements for a typical .NET application, but there are also several templates that shortcut the process of creating certain forms in a typical Windows application.
43
Chapter 4
Some templates (such as the Dialog) simply add a couple of controls to the form using Microsoft’s recommended layout, with one or two lines of code to handle the events behind them. Others, including the Explorer form, automatically generate a large amount of code, so you have a huge head start in creating these elements for your application.
Some items are not directly related to code. For instance, the Add New Item dialog also includes the capability to add icons, cursors, and bitmaps to your project, and then edit them with the built-in graphics editor.
Figure 4-6
Sometimes the file containing the item definition already exists. This might be the case when you have a form shared among projects, or a class or user control definition that you’ve defined in a previous project and want to use in a new one. In this situation, select Add Existing Item from the right-click context menu and Visual Studio 2005 will enable you to browse for the file’s location. Remember that an individual project must be developed in a single language, so you can only add existent Visual Basic files to a Visual Basic project, existent C# files to a C# project, and so on.
The default structure of a typical solution is quite flat. It begins with the solution file, which contains a list of project files. These in turn normally contain a list of individual files, such as form and class definitions and two subdirectories for the compiled output of the project (bin and obj). When you add items to the project, they’re added to that project’s main folder.
Of course, just because this is the default behavior doesn’t mean you need to live with it. The Add submenu from the context menu also has a command to add a new folder. This enables you to create a full folder hierarchy within a project, organizing different parts of the application into different sections. You can add new (or existing) files to these subfolders in the same way you would add to the root folder of the project, or you can simply drag and drop the files already in the project into them.
While there are menu commands that can perform these commonly used tasks, the Solution Explorer provides handy shortcuts in one centralized location.
44
The Solution Explorer
Adding Windows References
You can add to a project two types of items that are not physical files but instead work more as associations with existing items: Windows references and web references. Adding references to other items in this fashion enables you to use them in your code by creating objects and consuming public shared methods from within the associated item.
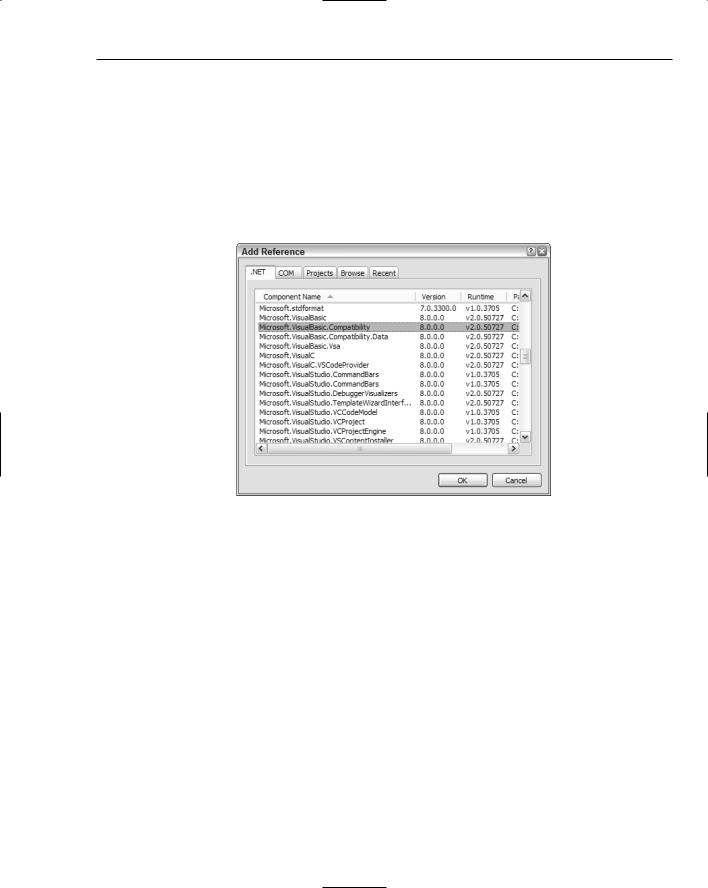
To add a normal Windows reference, locate the project that should take the new reference in the Solution Explorer and right-click its entry. From the context menu displayed, select the Add Reference command and the appropriate dialog will be displayed (see Figure 4-7).
Figure 4-7
Similar to adding items to the Toolbox, .NET and COM references are separated into different lists, as they come from different parts of the Windows system (the COM reference list comes from properly registered COM components found in the Windows registry, while .NET components are sourced from the Global Assembly Cache).
Like other project-based development environments going back as far as the first versions of Visual Basic, you can add references to actual projects, rather than the compiled binary components. The advantage to this model is that it’s easier to debug into the referenced component, but it does have a performance impact and you won’t want to distribute your final application with a project reference.
If the component you need to reference isn’t present in the appropriate list, you can choose the Browse tab, which enables you to locate the file containing the component directly in the file system, while the Recent tab shows a list of references you’ve added to recent projects so you don’t have to find them again (a boon in the often very large COM list!).
45