

Word 2010
.pdfwithout the original text being lost. The document displays all the changes in a special format. In the end, an administrator accepts or rejects the changes to create the final document.
By default, the changes appear in a different color from the original text. To track changes;
1.Open the My Letter.docx document. Click the Review tab;
2.Click the Track Changes button in the Tracking group.
3.Delete a text in the paragraph and type a new text.
Word keeps both text. Deleted text is displayed by strike though and a vertical bar appears in the left margin.
4.Share your documents with your friends. Allow them to make changes.
Tracked changes made by different authors appear in different colors.
Accepting and Rejecting Changes
Author 1
Author 2
The changes that are made by multiple authors
You may or may not agree with some of the changes other people make in the document. To accept or reject changes,
1.Click the lower part of the Accept button in the Changes group.
2.To accept all the changes, click Accept All Changes in Document. Or click Accept Change to approve the changes one by one.
Or right-click on the change. Select Accept or Reject Change on the menu.
The Accept button
Working with Long Documents |
111 |
After you accept or reject a change, Word removes the markup formatting, the vertical bar from the left margin, and the associated balloon, and moves to the next change.
The Final document
Starting Mail Merge
Selecting a document
Mail Merge
Mail Merge is used to send identical documents to different people at once, except for certain information such as name, surname, and address. By using Mail Merge, you can create mass e-mail and letter distributions, envelopes, labels, and faxes.
 A Mail Merge requires two documents: A Main Document and a Data source.
 The Main Document contains the information that is the same for each merged document.
 The Data List contains the information, address lists, or records, to be inserted into the Main Document during the Mail Merge.
Selecting the Document Type
In this exercise, you will select a document type that you will use to merge with your data source.
1.Create a blank document.
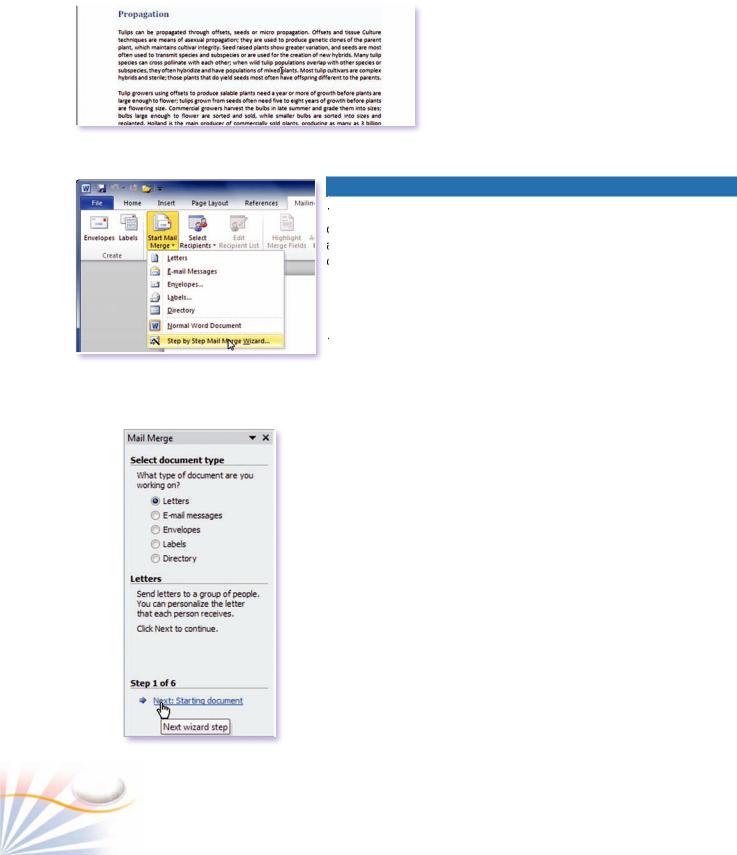
2.Click the Mailings tab; and then click the Start Mail Merge button in the Start Mail Merge group.
3.Click Step-by-Step Mail Merge command at the bottom of the menu.
The first step allows you to identify the document to be used as the main document.
4.Select the Letters document type.
This menu also enables you to select E-mail messages, Envelopes, Labels, and Directory document types. The Mail Merge Task Pane follows the same steps for each of these documents.
5.Click the Next: Starting document link to move on to the next step.
112 |
Chapter 9 |
Select a Starting Document
The Main Document contains the content that is the same on each letter you send. You can create the Main Document from your current document, from a template, or use an existing document.
6.Select Use the current document.
7.Click "Next: Select Recipient".
Select Recipients
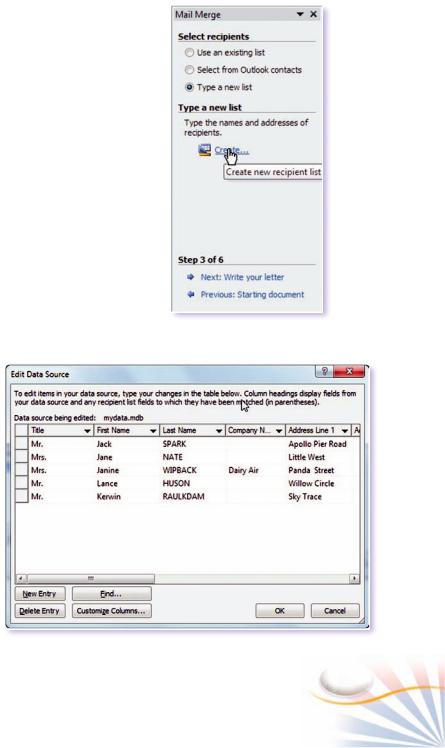
In the third step, you need to select the recipients for the mail merge.
You can get recipients from an existing data list, from Outlook contacts, or type a new list.
8.Select Type a new list.
The Create... link appears in the Type a new list section.
9.Click the Create... link.
The New Address List dialog box opens.
10.Enter the recipient's First Name, Last Name, and Address in the first row. To create a full profile, fill the remaining cells in the same row.
The Recipient is entered in the Data List.
11.Click the New Entry button to add another recipient. Enter the
data for each recipient. Click OK. |
Selecting recipients |
12.Save the Recipient list. By default, Word saves the file in your My Data Sources folder.
The Mail Merge Recipients dialog box opens.
The Mail Merge Recipients dialog box allows you select, sort, and filter the recipients that will be used in your Mail merge. You can include or deselect recipients by clicking the check box by the name.
13. Click OK.
14. The Ribbon displays the Edit Recipients List button and some other buttons. When you click the Edit Recipients List, The Mail Merge Recipients dialog box displays.
15. Click Next: Write your letter at the bottom of
the Mail Merge.
Entering recipients information
Working with Long Documents |
113 |
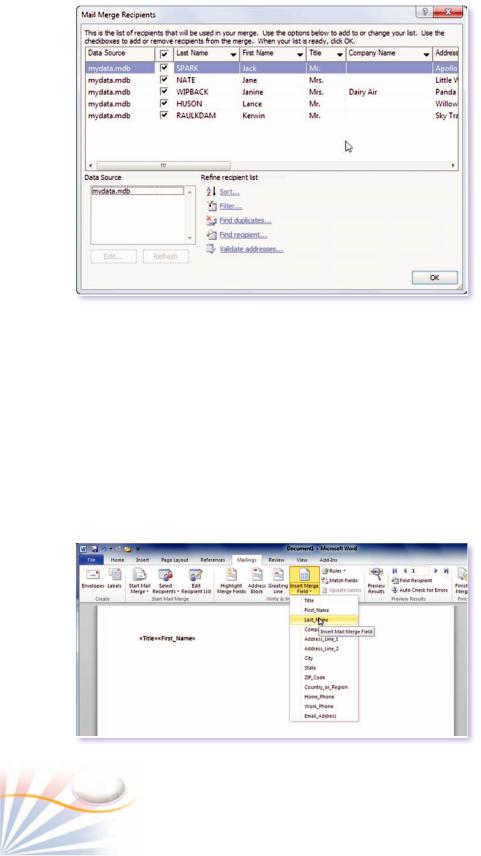
Mail Merge Recipients dialog box
The Ribbon shows Mail Merge commands
Write Your Letter
This step is used to type the body of your letter and to add fields that include recipient's information to the letter.
1.Place the insertion point where you want to start your letter.
2.Type the text "Dear" and press the space bar.
The Write & Insert Fields group allows you to insert fields for merging with the recipients list.
The Address Block button opens a dialog box; you can select or customize one of the preformatted address elements.
The Greeting Line allows you to insert and modify a greeting line.
The Insert Merge Field opens a menu to select various fields such as First Name, and Last Name.
3.Click the Insert Merge Field button.
4.Select the First Name field. Click Insert.
The << First_Name>> field appears next to the text "Dear".
5.Click Close to return to the document.
6.Press the Space bar. Insert the Last Name of the recipient from the Insert Merge Field.
7.Press the Enter key a couple of times. Start typing the body of the letter.
You can format the fields like a text in a document. When you are finished with typing, click "Next: Preview your letters" on the Mail Merge pane.
Preview Your Letters
The Preview Results enables you to view the merged documents, navigation
114 |
Chapter 9 |
through recipients and checking for errors. By clicking the Preview Result button, you can switch between the preview view and the merge field view.
1.Click the Navigation buttons to the right of Preview Results button to switch between merged letters.
Or click the buttons in the Preview your letters section on the Mail Merge pane.
2.In the make changes section, click the Exclude this recipient button to remove the current recipient from the mail merge.
3.Click "Next: Complete the merge" on the Mail Merge pane.
Or click the Finish & Merge button in the Finish group.
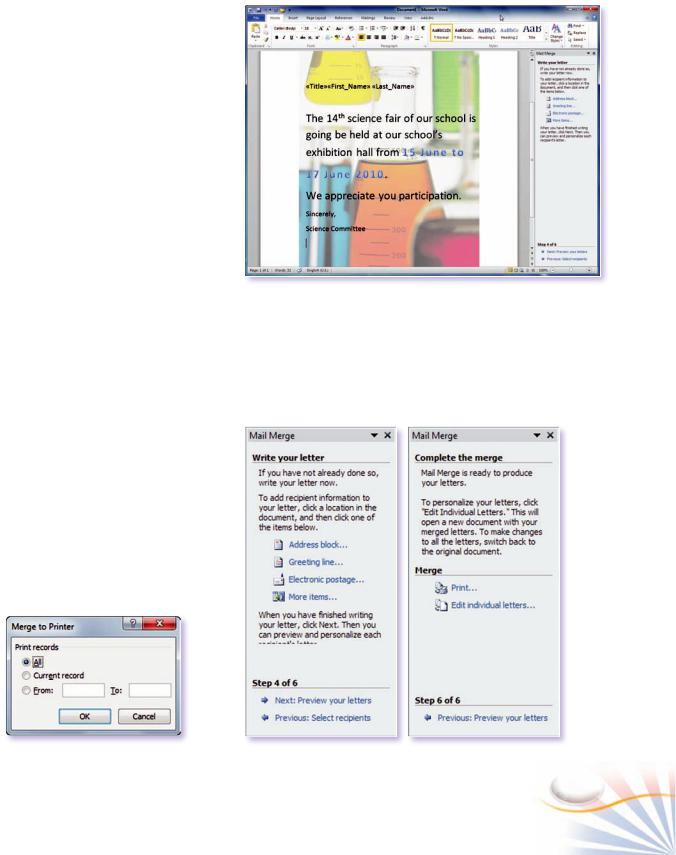
Complete the Merge
In the last step, you can print, send, or save your letters. If you want to print all merged letters;
1.Click Print on the Mail Merge pane.
The Merge to Printer dialog box will display so you can choose the letters you want to print.
2.Click the All option to print all the Letters. Click OK.
Merge to Printer
Mail Merge body letter
Previewing and completing Mail Merge
Working with Long Documents |
115 |
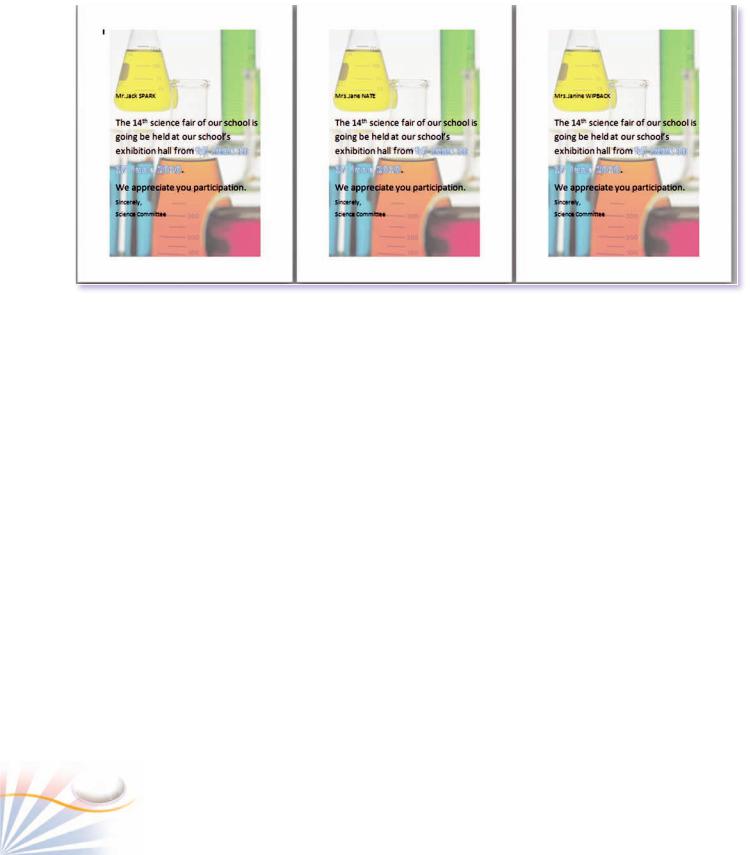
Mail Merge Letters
116 |
Chapter 9 |

Case Study
Creating Merged Letters |
Step-9 Print your letters. Save your document as |
|
Mailings.docx. |
Step-1 Type the text "Happy Birthday"
Creating sections
Step-1 Create a blank document.
Step-2 Start Mail Merge on the Mailings tab.
Step-3 Select the Letters document type. Click Next: Starting Document
Step-4 Select Use the current document. Click Next: Select Recipient.
Step-5 If you don't have an existing data list, select Type a new list otherwise select Use an existing list. Click Write your letter.
Step-6 Write a letter to celebrate your friends New Year. Leave the First Name,
Last Name, and Address areas empty.
Step-7 Use the Insert Merge Field button to insert these fields. Click Next: Preview Your Letter.
Step-8 Move between the merged letters, using the previous and next navigation buttons on the Mail Merge pane. Click Next: Complete the Mail Merge.
Step-1 Open a blank document.
Step-2 Title the document "Environmental Issues". Save the document as Sections.docx.
Step-3 Write a text with three paragraphs about Air, Soil, and Water pollution.
Use the same names as titles for each section.
Step-4 Insert Section breaks after each paragraph.
Step-5 Format each section with different margins, page layouts, and Headers and Footers.
Projects
1.Open the Business Flyer document you have created in the chapter 7. Send the document as a promotional letter by using mail merge.
2.Create a list of your friends with 20 entires. Include their addresses, home phones, and e-mail addresses in the letter. Use Mail Merge. Create a birthday party invitation. Send this letter to your classmates by e-mail.
Working with Long Documents |
117 |

Multiple Choice Questions
1.Which of the following documents contain all data records for Mail Merge?
a. Source document |
b. Data List |
c. Directory |
d. Data document |
7.What happens when a text is deleted or added in the Track Changes mode? (Choose two answers)
a.Added text is underlined.
b.Deleted text is marked up by strike through
c.A vertical bar appears in the left margin.
d.A change is explained in a red balloon.
2.Select the documents which are needed to create a mail merge. (Choose two answers)
a.Outline document
b.Main document with the content for each Mail Merge document.
c.Data List with recipients information
d.Body Document
3.Which of the following is not a document type created by using Mail Merge?
a. Faxes |
b. Folders |
c. Envelopes |
d. Letters |
4.____________ contains the information that is the same for each merged document.
a. Merge document |
b. Data source |
c. Main document |
d. Form letter |
5.Each data field has a unique name, called a______.
8.Which of the features provides references at the end of a page or at the end of a document?
a.Headers and Footers
b.Endnotes and Footnotes
c.Sections and Page Breaks
d.Main document and Data List
9.Select the options you can use in a Header. (Choose three answers)
a. Date and Time |
b. Page Numbers |
c. Page breaks |
d. Clip Art |
10.How can you create links inside a document for different sections of the same document?
a. Track Sections |
b. Inset Endnotes and |
|
Footnotes |
c. Use Bookmarks |
d. Use comments |
a. Data source |
b. Primary name |
c. Field name |
d. Title |
6.Why are Headers and Footers used in a document?
11.Which of the following feature enables you to create links to Internet pages?
a. Bookmarks |
b. Hyperlinks |
c. Anchors |
d. Jumpers |
a.To display information at the top or bottom of every page in a document
b.To mark the starting and ending of a page
c.To make large documents more readable
d.To allow track document changes
118 |
Chapter 9 |

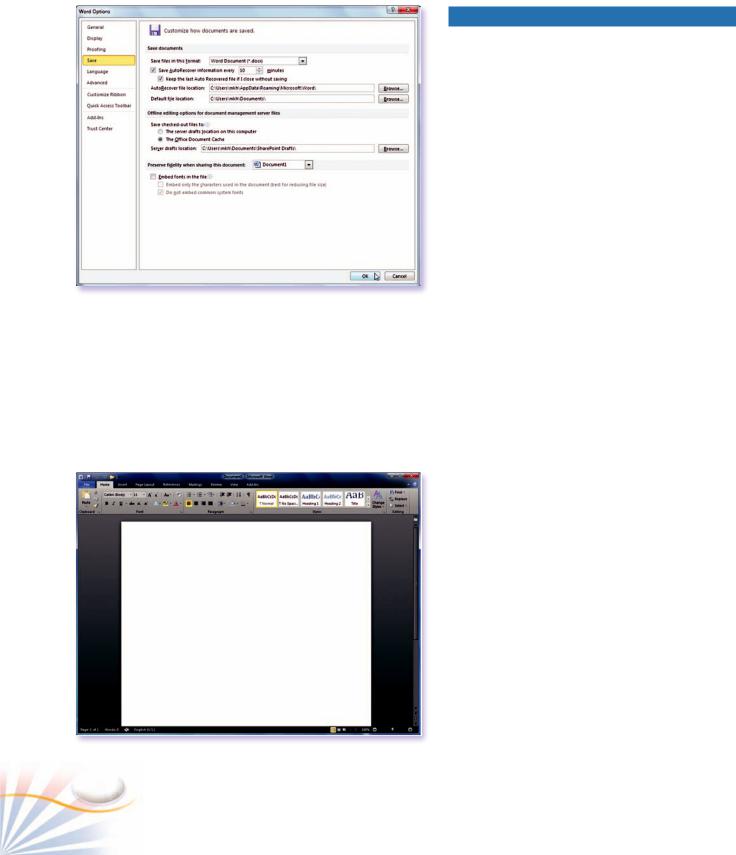
The Word Options dialog box.
Black color scheme
Customizing Word
You can customize Word to change how a document’s content is displayed on your screen, add autocorrect, and format change options, save options and etc…
1.Click the File tab.
2.At the bottom of the menu, click Word Options.
The Word Options dialog box opens.
The left pane displays the major file tasks. Popular, Display, and Advanced commands change how a document’s content is displayed on a screen.
1.In the Popular window, uncheck the Enable Live Preview checkbox.
The Live Preview feature is disabled.
You can change the colors of Word screen such as the Ribbon, document area, scroll bars, and etc…
2.Click the arrow next to the Color scheme box.
3.Select Black on the menu.
Word applies black color scheme.
4.Click the Save command on the left pane.
5.Click the arrow next to Save files in this format box.
6.Select Word 97 -2003 Document (*.doc) to save new documents as one of the previous versions of Word.
120 |
Chapter 10 |