

Word 2010
.pdfA quick way to search for online information for a text in the document is to press the Alt key and then click the text. The last service used, Thesaurus or Translation, will display results for the text you clicked.
4.To close the Research task pane; click the Research button in the Proofing group.
The Thesaurus
The Thesaurus provides a list of synonyms for the text in which you are looking up.
Practice
To use the Thesaurus;
In this exercise, you will find a synonym for a word.
1.Right-click the word “illness” in the My Letter.
2.Point to Synonyms on the pop-up menu.
3.Click to select a synonym.
If you need a more detailed search, the Thesaurus option in the Research task pane provides more details;
4.Click the Review tab, and click the Thesaurus button in the Proofing group.
Or press Shift + F7.
5.The Research task pane opens. A list of suggested synonyms will display. Move your mouse pointer on a suggested synonym in the list and click the arrow next to it. Select Insert.
Clicking Alt key on a text displays online results in the Research pane
Finding synonyms on the pop-up menu
Working With Text |
31 |
The Translation displays
Enabling the Mini Translator
The Mini Translator
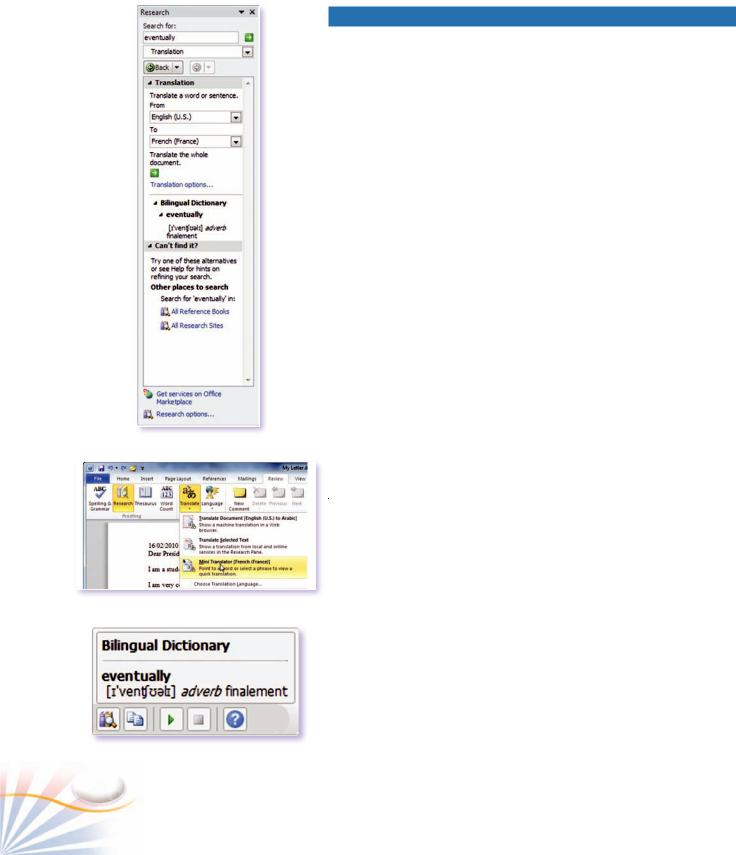
Translating Text
Word 2010 can easily translate a text into another language, such as English, French, and Spanish.
To translate a text;
1.Click on the text you want to translate.
2.Click the Translate button in the Proofing group.
Or right-click the text, select the Translate option from the pop-up menu, and choose Translate.
3.Select the languages in the From and To boxes in order to change the source languages. The results display in the Research task pane under Translation.
You can simply move your mouse over a word and a Mini Translator will show up and translate the text. By default, the option is turned off.
To enable the Mini Translator option;
1.Click the Translate button in the Proofing group
2.Select the language you want to translate into.
3.Move and hold your mouse on the text you want to translate.
Translating the whole document doesn’t necessarily give the whole meaning of a document. It should rather to be used to get an idea about the document.
In the following exercise you will translate the whole document to French. You need a connection to Internet to complete the task.
To translate all the text in a document;
1.Click on the text you want translate.
2.Click the Translate button in the Proofing group.
Or right-click the text, select the Translate option from the pop-up menu, and choose Translate.
3.Select the languages in the From and To in order to change the source and target languages. Select English in the From box and French in the To box.
The results display in the Research task pane under Translation.
You can simply move your mouse over a word and a Mini Translator will show up and translate the text. By default, the option is turned off.
32 |
Chapter 2 |
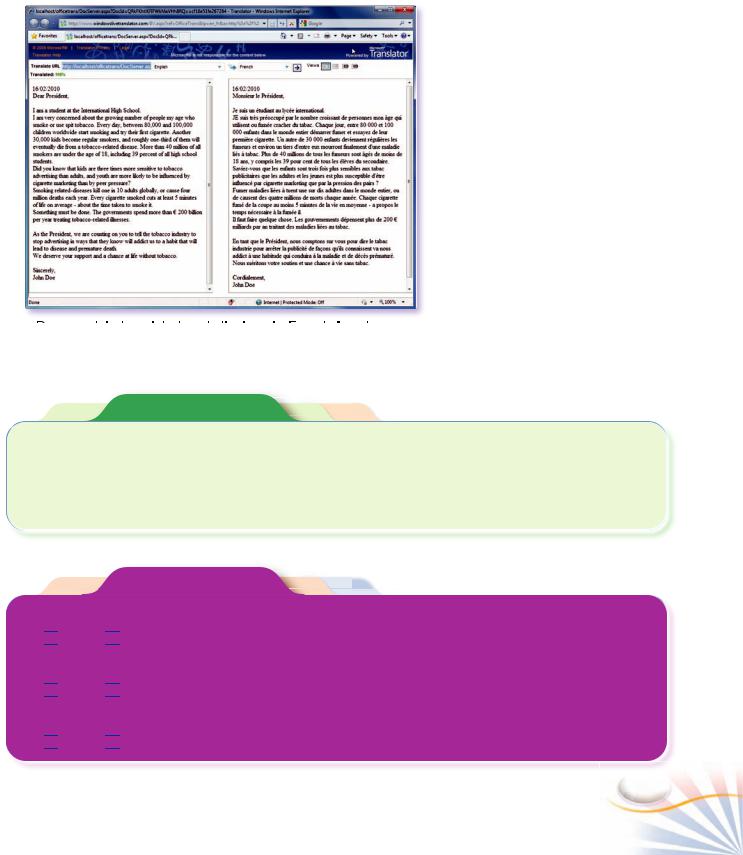
Online document translation
The Document is translated and displays in French in a browser window.
Fill In The Blank
1. |
To select a whole document, press |
3. To move text, press ____________, and then |
|
________________. |
____________ . |
2. |
To copy with drag and drop you must hold |
|
|
down ________________________ while you are |
|
|
dragging the selected text. |
|
|
|
|
True or False
1.If you want to undo your last action, press Ctrl + Z.

 True
True 
 False
False
2.You can select a paragraph by double-clicking anywhere in the paragraph.

 True
True 
 False
False
3.If you want to correct spelling and grammar errors you can use the Spelling and Grammar checker.

 True
True 
 False
False
Working With Text |
33 |

Multiple Choice Questions
1.How can you quickly recover a text that you just accidentally deleted? (Choose two answers)
a.Use the Clipboard pane.
b.Press Ctrl + Z.
c.Use the Undo button on the Quick Access toolbar.
d.Click the Find button, and then search for the deleted text.
2.If you want to Copy a text and Paste it to another place, which shortcut keys should you use?
a.Ctrl + Z and Ctrl + X
b.Ctrl + C and Ctrl + V
c.Ctrl + C and Ctrl + P
d.Alt + C and Alt + P
3.Select the spelling and grammar checking options available in Word 2010. (Choose three answers)
a.Contextual spell checking
b.Spell checking
c.Style checking
d.Grammar checking
4.How can you find and correct all the instances of a word which you mistyped in a document?
a.Press Ctrl + F shortcut keys.
b.Use the Research task pane, and look for all the instances of the text.
c.Select all text, and then click the Spelling & Grammar button.
d.Open the Replace dialog box, and then use Replace All command.
5.Select the ways you look for synonyms for a word. (Choose three answers)
a.Enable the Mini Translator and hold your mouse on the word.
b.Right-click the word, and then select Synonyms on the pop-up menu.
c.Hold down the Alt key and click on the word.
d.Select the Thesaurus in the Research pane,
type the word in the Search for box, and then press Enter.
6.You can replace a word in your document with another word that is more suitable and has nearly the same meaning by;
a.using the Spell Checking.
b.using the Grammar Checking.
c.using the Mini Translator.
d.using the Thesaurus feature.
7.A spelling error in a document is identified by:
a.A green highlight.
b.A red wavy underline.
c.A green wavy underline.
d.A blue wavy underline.
8.What options are available in the Find and Replace dialog box? (Choose two answers)
a. Find |
b. Synonyms |
c. Replace |
d. The Thesaurus |
9.How can you select all the text and the objects in a document? (Choose all that apply)
a.Drag your mouse from the beginning to the end of the document.
b.Press Ctrl + A.
c.In the Editing group, click the Select button, and then Select All.
d.Triple-click any word in the document.
10.As you read through an astronomy document, you encounter an astronomer named “Galileo”. How can you get online help about the astronomer without leaving the document and the Word screen?
a.Open Google web site in an internet browser, and make a search.
b.Use the Thesaurus, in the Research pane.
c.Hold down the Alt key and click on the word.
d.Open the Find and Replace dialog box, and click the Search on Internet option.
34 |
Chapter 2 |
Font Formatting
Font Formatting enables you to give the text in documents different looks and styles. You can change the font face, font size, underline text, and change the color and the spacing between letters.
A font is a set of characters and letters of the same look and styles.
Each font has a particular design. The size of a font is called font size.
The most preferred fonts are Times New Roman, Arial, and Courier
New, Calibri.
Changing the font face in the Font group
Practice
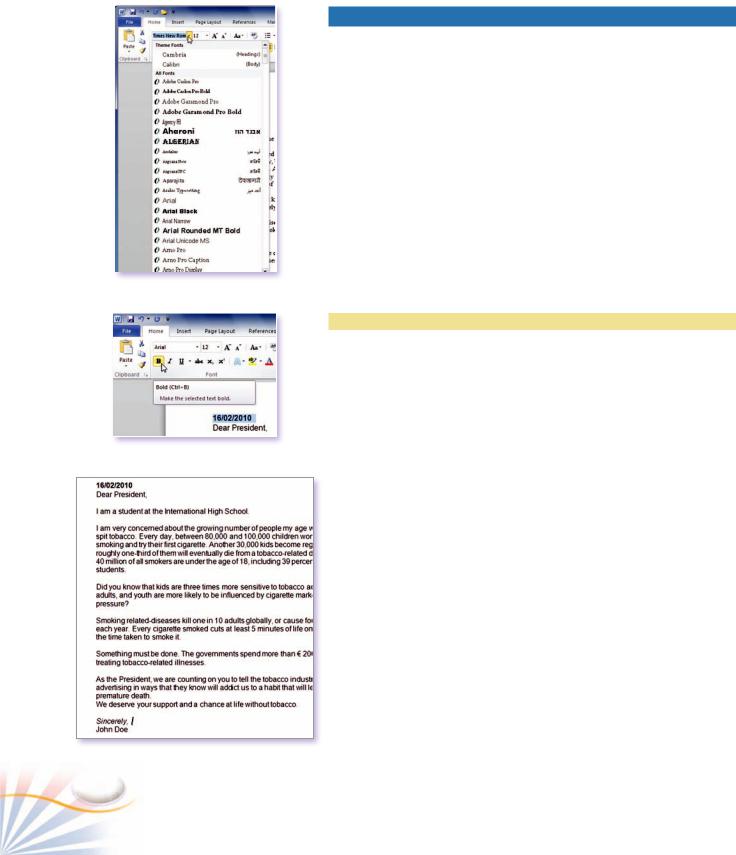
Change and Format the Font Face
In this exercise, you will change the font face and format the text as bold and italic in your document. (My Letter)
1.Select the text Date.
In the Font dialog box, change the font type to “Arial”
Formatting text in bold
On the Home tab, click the Bold button in the Font group.
2.Or on the Mini toolbar, click the Bold button. Or press Ctrl + B.
3.Click anywhere outside the selected text to cancel the selection.
4.Select the text “Sincerely”.
5.Click the Italic button in the Font group.
Or on the Mini toolbar, click the Italic button. Or press Ctrl + I.
6.Click anywhere outside the selected text to cancel the selection.
Whenever you select a text; the Mini toolbar displays just above the selection. It contains a set of formatting commands for changing fonts and paragraphs.
The document after the formatting
36 |
Chapter 3 |
To display the Mini toolbar;
1.Select the text and move the mouse pointer just above the selection.
2.Click the buttons on the Mini toolbar to apply formatting to the selection.
When you move the mouse away from the text; the Mini toolbar fades slowly and disappears.
Practice
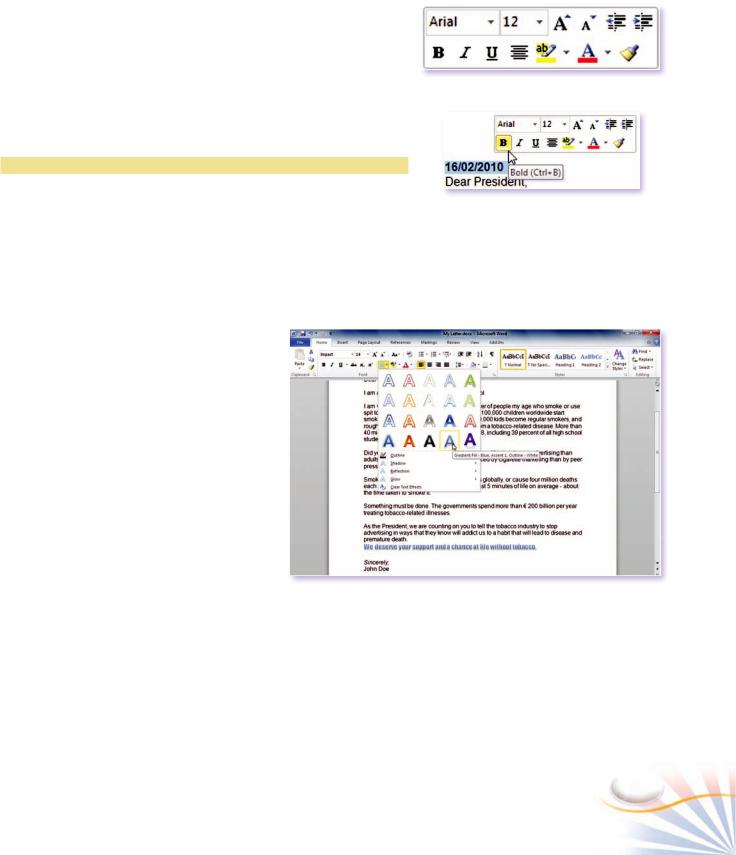
Change the Font Size and Apply Text Effects
In this exercise, you will change the font size of the text and apply a text effect.
1.Select the last paragraph of the document.
2.On the Home tab, click the arrow next to the Font box and in the Font group.
Or use the Mini toolbar.
3.Scroll down and select “Impact” in the list.
The selected text changes to the Impact font face.
In the Font group or on the Mini toolbar, click the arrow next to the Font Size box and, and then click “14” in the list.
Or use the Grow or Shrink Font buttons to change the font size gradually.
4.Click the Text Effects button in the Font group. Select an effect in the gallery.
The Mini toolbar
The Mini toolbar displays
|
Changing the font size and applying a text format |
|
|
|
|
|
|
|
|
TO |
DO THIS |
|
|
|
change the font color of a text, |
click the arrow next to the Font Color button in the Font group. |
|
||
Or use the Mini Toolbar. |
|
|
||
|
|
|
||
underline the text, |
select the style of underline from the Underline style list. |
|
|
|
apply any text effect, |
select them from the Effects in the Font dialog box. |
|
|
|
increase or decrease character spacing, |
use the Advanced tab in the Font dialog box. |
|
|
|
|
|
|
|
|
Formatting Characters and Paragraphs |
|
37 |
|
|
|
|
|
|
|
Clearing the text formatting
The Font dialog box launcher
Using the Font dialog box
Text after formatting
Live Preview
Live Preview enables you to see the formatting of a text without having to apply it first.
1.Select the Date.
2.In the Font group, click the arrow next to the Font Color button.
3.Move your mouse on the colors under the Theme Colors. Live Preview shows the colors on the text.
Clear Formatting
You can clear the formatting of a text in one step;
1.Select the text.
2.Click the Clear Formatting button in the Font group. Or press Ctrl + Space.
Dialog Box Launchers
In the lower-right corner of some command groups, there are Dialog Box Launcher buttons. The Dialog box launchers open dialog boxes with more commands.
 Practice
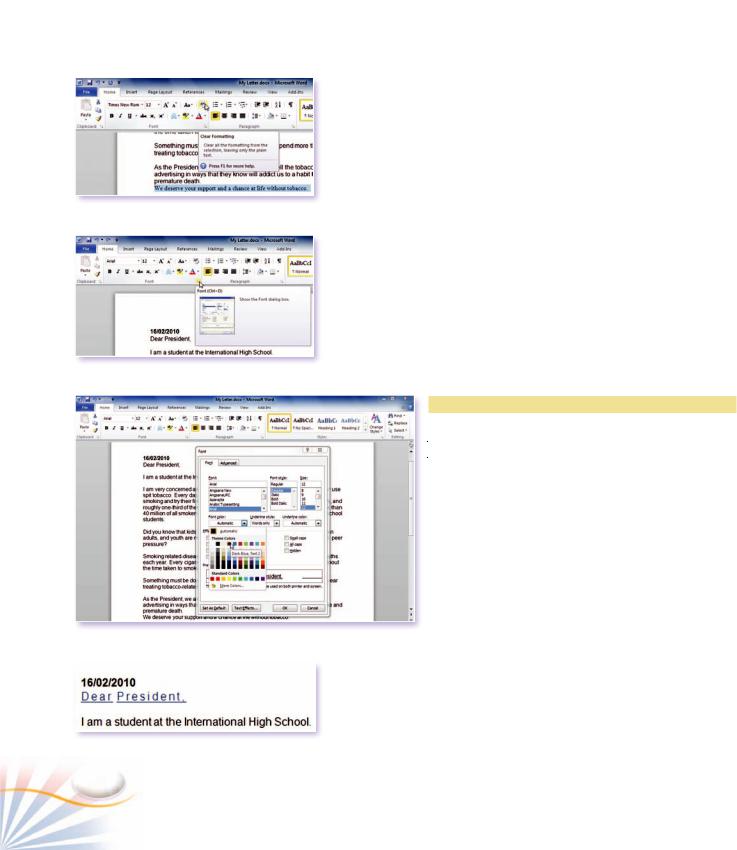
In this exercise, you will change the font color of a text, underline the text, apply text effect and increase the space between characters.
1.Select the text “Dear President”.
2.In the Font group, click the Font dialog box button.
Or press Ctrl + D.
The Font dialog box opens.
3.Click the arrow next to the Font Color and select the color blue.
4.Click the arrow next to the Underline Style box and select Words only.
5.Click the Advanced tab.
6.Click the arrow next to the Spacing box and select Expanded. In the By box, select 2 pt. and click OK.
38 |
Chapter 3 |
Change Case
The Change Case command changes the capitalization of a selected text.
1.Select an Lowercase text.
2.Click the Change Case button in the Font group.
3.Select an option on the menu.
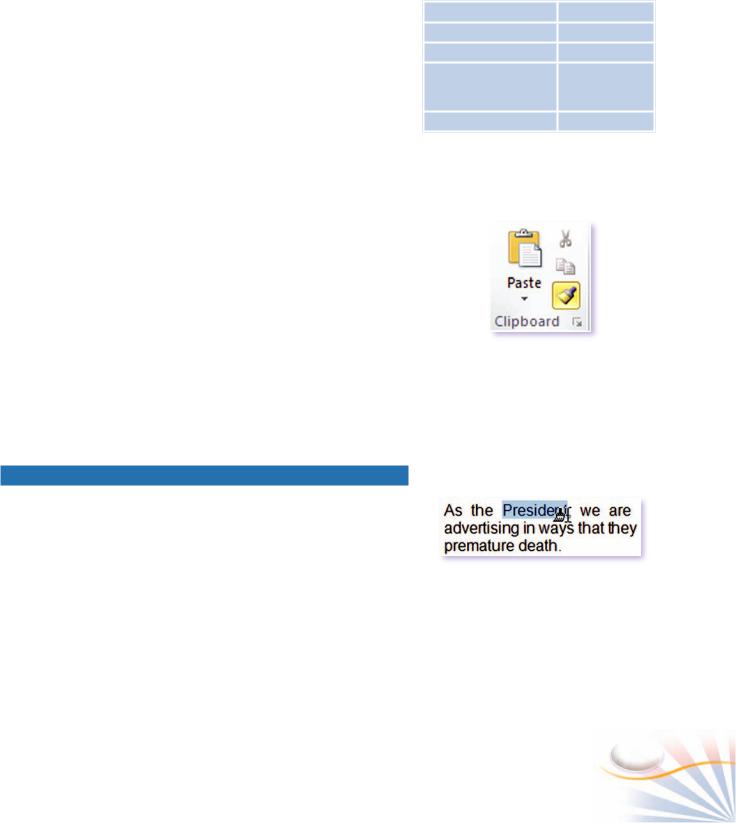
Format Painter
At the end of your document My Letter, there is a second text “President”. If you want to format this one like the first one, you must repeat the steps in the previous topic, or you can use a command that copies formatting from a text, then applies it to another text. This feature is called the Format Painter.
In this exercise, you will apply formatting using the Format Painter.
1.Click on the text Dear President.
2.In the Font group; double-click the Format Painter button if you're going to copy the formatting to several locations.
Or just click if you're going to copy the formatting only one time.
3.Click the Format Painter button. Move your mouse pointer to the second text “President”.
4.Click or drag on the text.
Format Painter applies the format of the first text to the destination text and turns off.
Microsoft word |
Sentence case |
|
microsoft word |
lowercase |
|
MICROSOFT WORD UPPERCASE |
||
Microsoft Word |
Capitalize Each |
|
Word |
||
|
||
mICROSOFT wORD tOGGLE cASE
Change Case options
The Format Painter in the Clipboard group
Paragraph Formatting
The format of a paragraph can be changed by setting tabs, indenting, aligning, changing line spacing within and between paragraphs, controlling page breaks etc. All these features allow you to enhance the appearance of your document.
Selecting text with Format Painter
Formatting Characters and Paragraphs |
39 |
Paragraph Alignment
There are four ways to align a paragraph.
The format of a paragraph |
The format of a paragraph |
The format of a paragraph |
The format of a paragraph |
can be changed by setting |
can be changed by setting |
can be changed by setting |
can be changed by setting |
tabs, indenting, aligning, |
tabs, indenting, aligning, |
tabs, indenting, aligning |
tabs, indenting, aligning, |
controlling page breaks. |
controlling page breaks. |
controlling page breaks |
controlling page breaks. |
|
|
|
|
LEFT |
|
|
CENTER |
|
|
RIGHT |
|
|
JUSTIFY |
Each line of text is |
Each line is centered. |
Each line is aligned right. |
Each line aligns with the |
||||||
aligned left. |
|
|
|
|
|
|
both sides of the typing |
||
|
|
|
|
|
|
|
|
area. |
|
|
|
|
|
|
|
|
|
|
|
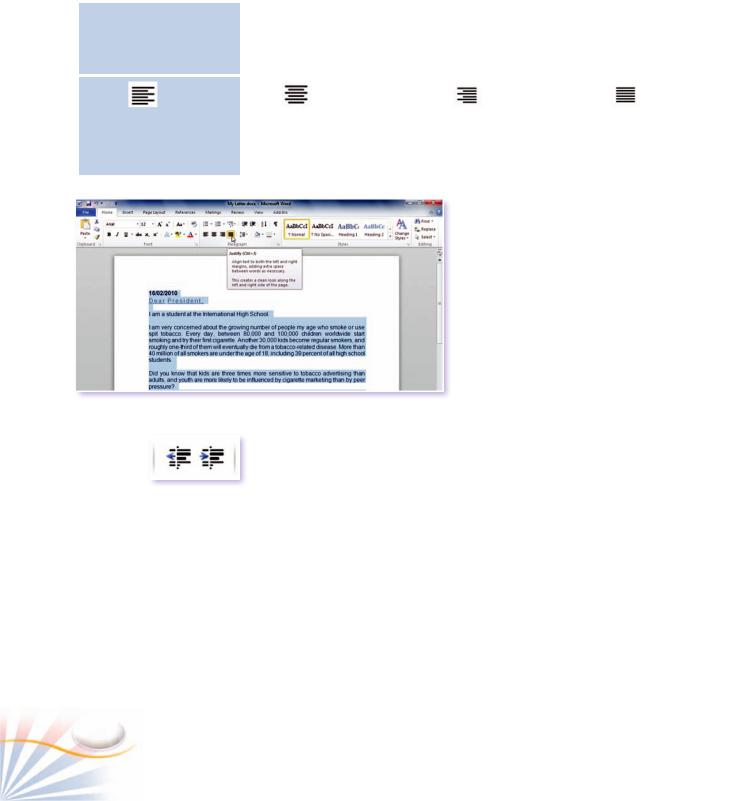
Justifying text
Decrease Indent and Increase Indent Buttons
In this exercise, you will justify the text in your document.
1.Select the whole document
2.Click the Justify button in the Paragraph group.
Or press Ctrl + J.
Or click the Paragraph dialog box button in the Paragraph group. Under the General section; click the Alignment drop-down arrow and select Justify.
3.Click OK.
Indenting
If you do not want all paragraphs to align with the borders of the typing area, you can use the indentation options to indent the text.
INDENTATION |
FORMAT |
|
Normal |
The format of a paragraph can be changed by setting tabs, |
|
indenting, aligning, controlling page breaks etc. |
||
|
||
Left: 1.25 cm |
The format of a paragraph can be changed by setting tabs, |
|
indenting, aligning, controlling page breaks etc. |
||
|
||
Right: 1.25 cm |
The format of a paragraph can be changed by setting tabs, |
|
indenting, aligning, controlling page breaks etc. |
||
|
||
First line |
The format of a paragraph can be changed by setting tabs, |
|
indenting, aligning, controlling page breaks etc. |
||
|
||
Hanging |
The format of a paragraph can be changed by setting tabs,indenting, |
|
aligning, controlling page breaks etc. |
||
|
||
|
|
40 |
Chapter 3 |