

Word 2010
.pdfFill In The Blank
1.Microsoft Word is ____________________ that lets you create a variety of different documents such as letters, single-file reports, multi-file reports, books, brochures, newsletters, and web pages.
2.Click the Save button or press _______________
shortcut to quickly save the document.
3.The short, vertical, blinking line at the top of the document is ____________.
True or False
1.If you want to save a previously saved document to a different location, you can use Save As command.

 True
True 
 False
False
2.The shortcut key for the Help command is F1.

 True
True 
 False
False
3.You can convert a Word 2010 document to a Word 2003 document and keep all of the document formatting.

 True
True 
 False
False
Getting Acquainted with Microsoft Word |
21 |

Multiple Choice Questions
1. What can you create with the Word program?
a. Letters |
b. Web Pages |
c. Tables |
d. All of the above |
2.Which of the following option provides a document with preformatted layout for content with text and graphics?
6.Which one does not start a new blank document?
a.Ctrl + N keyboard shortcut.
b.Opening a document from a flash drive.
c.Clicking New command on the File tab.
d.Starting the Word program.
a.Dialog Launchers
b.Templates
c.Saving As command
d.Word Help
3.Choose the sentences those are true about the Ribbon. (Choose two answers)
a.The Ribbon is context sensitive.
b.You can not add your favorite commands to the Ribbon.
c.Pressing Alt key shows short-cut keys on the Ribbon.
d.The Ribbon contains major file tasks such as Open and Share.
4.What is the meaning of the text "Compatibility Mode" after a document name in the title bar?
a.The document is compatible with your computer.
b.You need to save the file immediately.
c.The document was created with a previous version of Word.
d.The document contains advanced features of Word.
5.Which of the following can you do on the Microsoft Office Online?
a.Download templates in different categories.
b.Convert a document to an up-to date Word version.
c.Get up-to-date help about a Word topic.
d.Download document views such as the page layout and draft view.
7.What is the correct order to save a new Word document to a flash drive?
I. Choose flash drive from Folders pane. II. Write the file name.
III.Click the Save button on the Quick Access toolbar.
IV. Click Save on the Save dialog box.
a. III., II., I., IV. |
b. |
I., III., II., IV. |
c. III., I., IV., II |
d. |
III., I., II., IV. |
8.A document; you have just opened; appears very small in the Word screen. How can you make it bigger to read or work on it? (Choose two answers)
a.Switch to Full Screen Reading.
b.Use the Zoom dialog box and Zoom Out.
c.Use the Zoom Slider in the Status bar to Zoom In.
d.Close the document and open it again.
9.Which of the following dialog boxes opens when a document is saved for the first time?
a. Save All |
b. Save |
c. Close |
d. Save As |
10.How can you insert a text inside a text line without deleting the existing text?
a.Start typing in the overtype mode.
b.Locate the insertion point after the line.
c.Start typing in the Insert mode.
d.Enable Word Wrapping by pressing Enter key.
22 |
Chapter 1 |

Moving Through a Document
You move through a document to see text and objects that is off the screen, to set the insertion point at a new place, or to select text and objects for changes. There are several ways to move the insertion point in your document: you can use the mouse, the keyboard, or several commands, most notably the Go To command.
Moving Through a Document with the Keyboard
|
Up or Down arrows |
One line up or down |
||
|
Left or Right arrows |
One character left or right |
||
|
Home |
Start of the line |
||
|
End |
End of the line |
||
|
Page Up or Down |
One screen up or down |
||
|
Ctrl+Left or Right |
One word left or right |
||
|
Ctrl+Home |
To the beginning of the document |
||
|
Ctrl+End |
To the end of the document |
||
|
Ctrl+Page Up or Down |
One page up or down |
||
|
|
|
|
|
|
|
|
|
|
|
|
|
Practice |
|
|
|
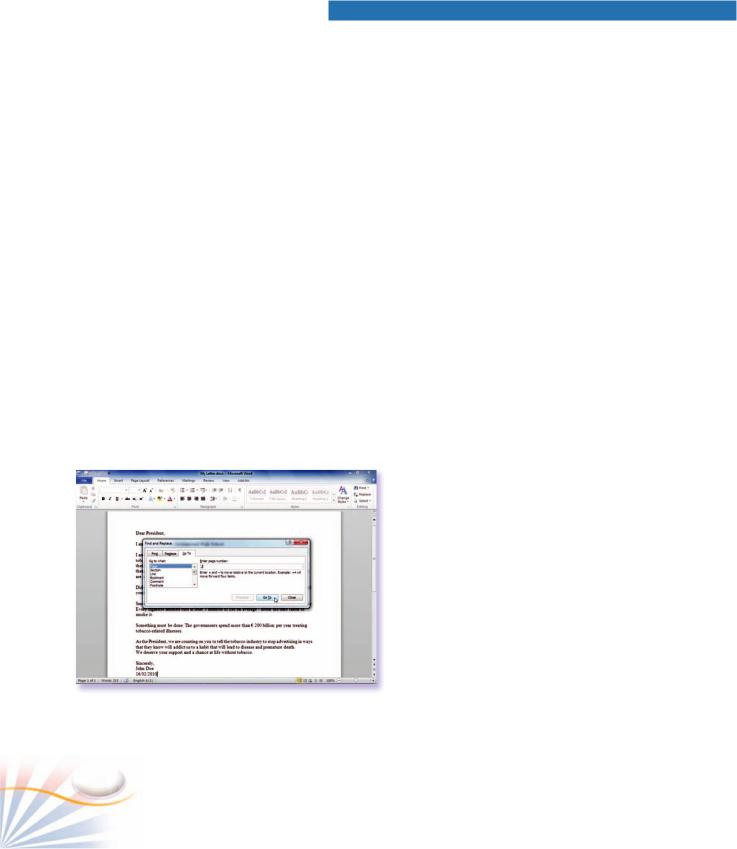
To move the insertion point to a specific place; |
||
|
|
In this exercise, you will move the insertion point to the |
||
|
|
second line. |
|
|
|
|
1. Click Page Number on the Status bar at the bottom of |
||
|
|
|
the Word screen. |
|
|
|
|
Or press Ctrl + G. |
|
|
|
2. Select a type of place to go. In the Go to what list, |
||
|
|
|
select Line. |
|
|
|
3. Type or select a specific item. In Enter line number |
||
|
|
|
type “2”. |
|
Moving the insertion point to the |
|
|
|
|
|
4. Click the Go To button. |
|||
second line |
|
|||
The insertion point moves to the second line.
24 |
Chapter 2 |
Selecting Text
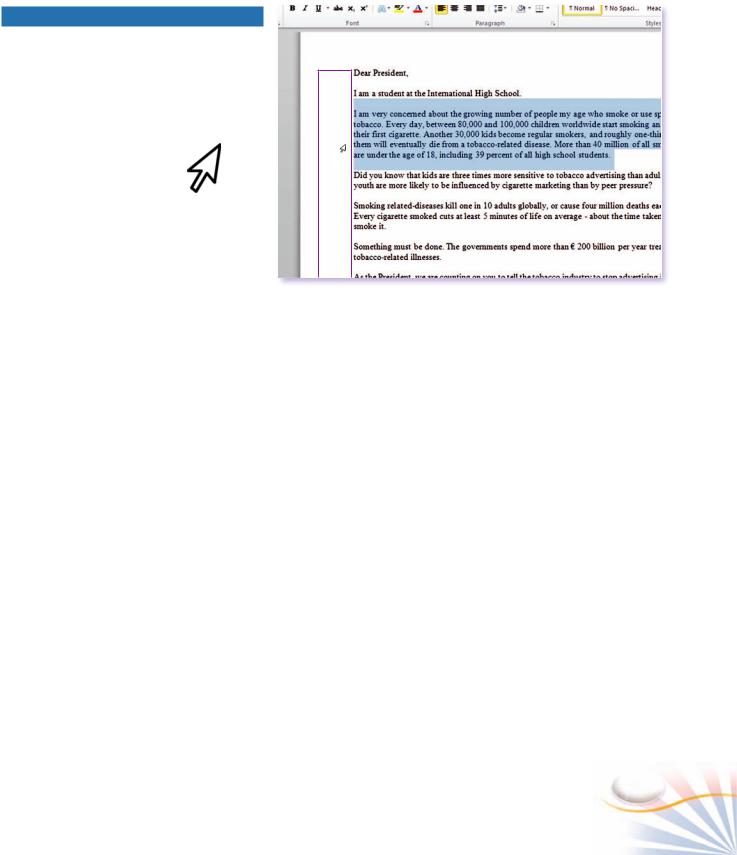
When you want to perform an action with the text; for example edit, format, or copy; you must first select it. Word makes text selection quick and easy.
Selection Bar
Right Pointing Arrow
|
Selecting a paragraph |
|
Selection Techniques |
|
|
|
|
|
TO |
DO |
|
|
|
|
Select a word |
Double-click on the word. |
|
|
Position the mouse pointer in the selection bar before the line |
|
Select a line |
you want to select. When the right-pointing arrow appears, |
|
|
click the mouse. |
|
|
Triple click on any word in the paragraph. |
|
Select a paragraph |
Or Position the pointer in the selection bar to the left side of |
|
the paragraph; when the right-pointing arrow appears, |
|
|
|
|
|
|
double-click the mouse. |
|
|
Position the pointer in the selection bar, when the right- |
|
Select a whole |
pointing arrow appears, triple-click on the document. |
|
Or Press Ctrl + A. |
|
|
document |
|
|
Or In the Editing group, click the Select button and then click |
|
|
|
|
|
|
Select All. |
|
Select any amount of |
Click where you want the selection to begin. Then, while |
|
holding down the shift key, click where you want the selection |
|
|
text |
to end. |
|
|
|
|
Select multiple text |
Hold down the Ctrl key on the keybord and with the mouse |
|
areas |
select different texts. |
|
|
|
|
Working With Text |
25 |
Copy and Move
There are several ways to copy and move text and graphics from one place to another. Dragging text is the most efficient way to move or copy text and graphics, as long as you can see the destination location on your screen.
Practice
Copy and Move with Drag and Drop
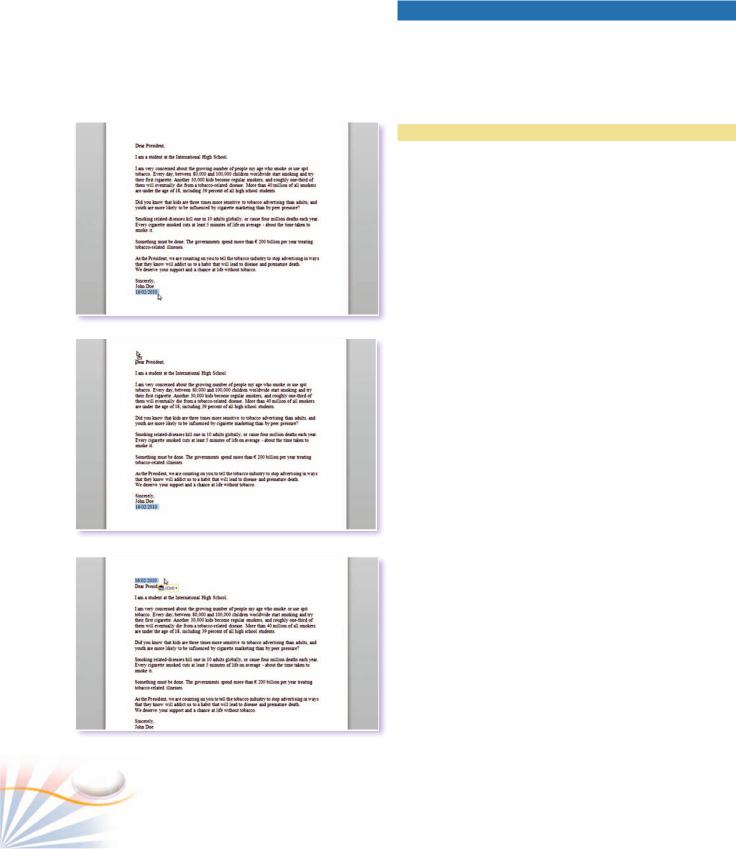
In this exercise, you will move the date text from the last line of the document to the top of the document.
Open the letter (My Letter.docx) that you have created in the previous chapter.
1.Scroll down until you can see the date text at the last line of the document.
2.Position the mouse pointer in the selection area, before the date. The mouse pointer changes to a right-pointing arrow.
3.Click to select the date. The selected text changes to white text on a darker background.
4.Position the mouse pointer over the selected text. The pointer turns into a left-pointing arrow.
5.Click and hold down the mouse button. A small, dotted box and a dotted insertion point appear.
6.Drag up until the dotted insertion point is before the text “Dear President” and then release the mouse button.
7.Click anywhere outside of the selected text to cancel the selection.
Moving a text
26 |
Chapter 2 |
Practice
Copy and Move with Other Techniques
The keyboard shortcuts are the quickest and easiest to use the Cut, Copy, and Paste editing commands.
In this exercise, you will copy the whole letter into a new document.
1.Select the whole letter.
Selecting all the document
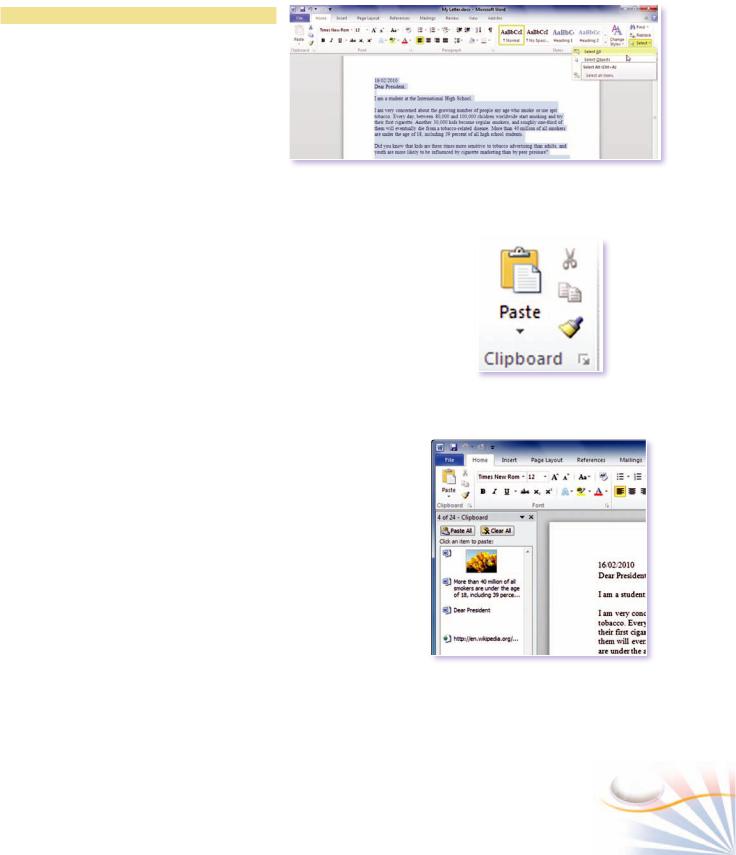
On the Home tab, click the Select button in the Editing group and then choose Select All.
Or press Ctrl + A.
2.Copy the selected text.
Click the Copy button in the Clipboard group.
Or press Ctrl + C.
A copy of the selected text is placed on the Clipboard.
The Clipboard is an area of memory in which you can store text or graphics temporarily. If you cut or copy text, graphics or other items they will be temporarily stored in the Clipboard ready for use elsewhere in the document.
3.Create a New Document.
4.Insert a copy of the letter from the Clipboard. Click the Paste button in the Clipboard group. Or press Ctrl + V.
To move the selected text;
1.Click the Cut button in the Clipboard group. Or press Ctrl + X.
To see the Clipboard contents;
1.Click the Clipboard dialog box launcher in the Clipboard group. Clipboard pane displays left to the document.
The Clipboard group
The Clipboard pane with recently copied text and images
Working With Text |
27 |
The Undo and Redo buttons on the Quick Access toolbar
Undo and Redo
The Undo feature allows you to reverse, or undo a recent action. The Redo command allows you to repeat a recent action.
Undo the last action
You can undo your last action;
1.On the Quick Access toolbar, click the Undo button. Or press Ctrl + Z.
Redo the last action
You can redo your last action;
1.On the Quick Access toolbar, click the Redo button. Or press Ctrl + Y, or press F4.
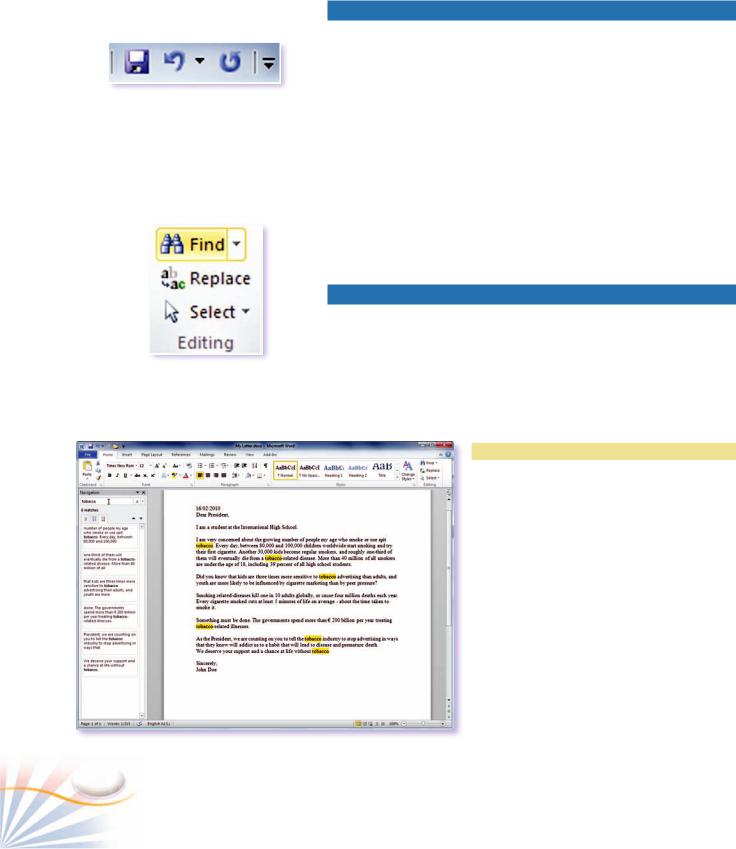
Find and Replace
You can use the Find command to search for specific instances of a text in a document, and the Replace command to search for specific instances of text in a document and replace them with new text. In
The Editing group addition to replacing text, you can use the Replace command to replace formats, such as bold and italic. The Find and Replace commands are located in the Editing group.
Practice
Finding and Highlighting Text
In this exercise, you will find and highlight the word "tobacco" in the document My Letter.
1. On the Home tab, click the Find button in the Editing group.
Or press Ctrl + F.
The Navigation pane opens.
2. In the Search Document box, type “tobacco”.
All the instances of “tobacco” in the My
Letter document are highlighted.
Finding all the instances of a text
28 |
Chapter 2 |
Practice
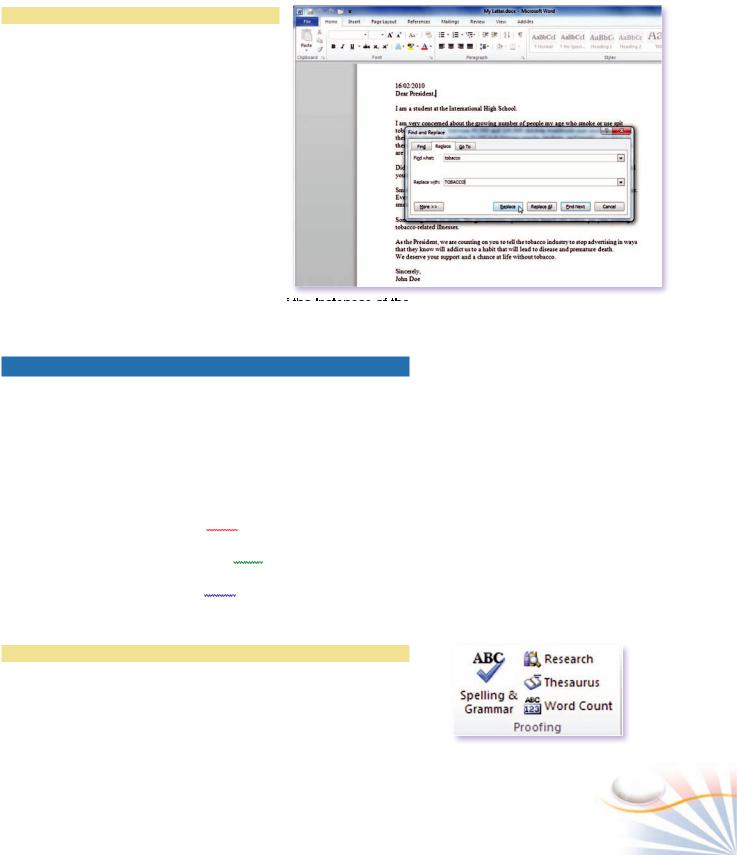
Replacing Text
In this exercise, you will search the word “tobacco” and replace it with the word “TOBACCO”.
1. |
On the Home tab, click the Replace button |
|
|
|
in the Editing group. |
|
|
|
Or press Ctrl + H. |
|
|
|
The Find and Replace dialog box opens. |
|
|
2. |
In the Find what box, type “tobacco”. |
|
|
3. |
In the Replace with box, type “TOBACCO”. |
|
|
|
Click Find Next. When Word finds the text; |
|
|
|
click the Replace button. |
|
|
4. |
Click the Replace All button to replace all of |
the instances of the |
Replacing text |
|
text at once. |
|
|
Spelling and Grammar
Word checks for spelling and grammar errors as you type. Red wavy lines indicate words that aren't recognized or is misspelled. Green wavy lines indicate a possible grammar error. Blue wavy lines indicate correctly spelled words in the incorrect context.
SPELLING AND |
ERROR |
|
GRAMMAR |
||
|
||
Spell checking |
You cann use the Find command to search for specific instances of a text. |
|
Grammar checking |
You can uses the Find command to search for specific instances of a text. |
|
Contextual Spell Checking |
You cane use the Find command to search for specific instances of a text. |
|
|
|
Practice
Use the Spelling and Grammar Checker
In this exercise, you will use the Spelling and Grammar Checker to correct spelling and grammar errors.
1. Type “stard” instead of start and press the spacebar. |
The Proofing group |
|
Working With Text |
29 |

A Red wavy line appears under the word “stard”, because you have typed it incorrectly.
2. In the Review tab; click the Spelling & Grammar button in the Proofing group.
Or press F7.
3. The Spelling and Grammar dialog box checks each underlined word in your document.
In the Suggestions list box, click and select the correct word.
4. Click the Change button to change the word “stard”
Checking spelling and grammar errors |
with “start”. |
||
|
|||
|
|
|
You can also right-click on the word once the red underlining displays. |
|
|
|
|
|
|
|
A pop-up dialog box displays suggesting alternative, correctly spelled |
|
|
|
words. |
|
|
|
Word uses a default dictionary file. If a word isn't in the dictionary; it is |
|
|
|
also underlined with a red wavy line. You can add a word to the default |
|
|
|
dictionary; |
|
|
|
1. Right-click on the misspelled word. |
|
|
|
2. Choose the Add to Dictionary option from the pop-up menu. |
|
|
|
|
|
|
|
Research Task Pane |
|
|
|
The Research task pane provides links to Internet research tools that |
|
|
|
you can use from within Word. |
|
|
|
To open the Research task pane; |
Spell checking on the pop-up menu |
|||
|
|
|
1. Click the Review tab, and click the Research button in the Proofing |
|
|
|
group. |
|
|
|
Or press the Alt key and click anywhere within the document. |
|
|
|
To display the search results, you can either click the Start Searching |
|
|
|
arrow in the green box, or select a type of reference material from the |
|
|
|
list box below. |
|
|
|
2. Use the drop-down menu at the top of the Research task pane to |
|
|
|
choose references such as Thesaurus. |
|
|
|
3. Enter the key words or phrase in the Search for box in the task |
|
|
|
pane, and click the Start searching button. |
30 |
|
|
Chapter 2 |