


186 Chapter 5 WORKING WITH FORMS
VB6 VB.NET
The Form Designer is one of the most improved areas of VB.NET. For the first time, you can design forms that can be easily resized—anyone who has programmed in earlier versions of VB knows what a hassle the resizing of forms could be. The Anchor and Dock properties allow you to anchor controls on the edges of the form and dock them on the form. When the form is resized, the controls on it can be either resized or moved to new locations, so that they remain visible.
If the controls can’t fit the form, scroll bars can appear automatically, so that users can scroll the form in its window and bring another section into view, if the form’s AutoScroll property is True. Scrolling forms are also new to VB.NET.
A new special control was added, whose sole purpose is to act as a pane separator on forms: the Splitter control. This control is a thin horizontal or vertical stripe that allows you to resize two adjacent controls. If two TextBox controls on the same form are separated by a Splitter control, users can shrink one TextBox to make more room for the other. Again, no code required.
Of course, many things have changed too. You can no longer show a form by calling its Show method. You must first create an instance of the form (a variable of the Form type) that you want to show and then call the Show method of this variable. You no longer have arrays of controls. This isn’t much of a problem, though, because with VB.NET you can create instances of new controls from within your code and position them on the form.
The Appearance of Forms
Applications are made up of one or more forms (usually more than one), and the forms are what users see. You should craft your forms carefully, make them functional, and keep them simple and intuitive. You already know how to place controls on the form, but there’s more to designing forms than populating them with controls. The main characteristic of a form is the title bar on which the form’s caption is displayed (see Figure 5.1).
Figure 5.1 |
Title bar |
Minimize |
Maximize |
Close |
The elements of |
button |
button |
button |
|
the form |
|
|
|
|
|
Control |
|
|
|
|
menu |
|
|
|
Copyright ©2002 SYBEX, Inc., Alameda, CA |
www.sybex.com |

THE APPEARANCE OF FORMS 187
Clicking the icon on the left end of the title bar opens the Control menu, which contains the commands shown in Table 5.1. On the right end of the title bar are three buttons: Minimize, Maximize, and Close. Clicking these buttons performs the associated function. When a form is maximized, the Maximize button is replaced by the Restore button. When clicked, this button resets the form to the size and position before it was maximized. The Restore button is then replaced by the Maximize button.
Table 5.1: Commands of the Control Menu
Command |
Effect |
Restore |
Restores a maximized form to the size it was before it was maximized; available only |
|
if the form has been maximized |
Move |
Lets the user move the form around with the mouse |
Size |
Lets the user resize the form with the mouse |
Minimize |
Minimizes the form |
Maximize |
Maximizes the form |
Close |
Closes the current form |
|
|
Properties of the Form Control
You’re familiar with the appearance of the forms, even if you haven’t programmed in the Windows environment in the past; you have seen nearly all types of windows in the applications you’re using every day. The floating toolbars used by many graphics applications, for example, are actually forms with a narrow title bar. The dialog boxes that display critical information or prompt you to select the file to be opened are also forms. You can duplicate the look of any window or dialog box through the following properties of the Form object.
AcceptButton, CancelButton
These two properties let you specify the default Accept and Cancel buttons. The Accept button is the one that’s automatically activated when you press Enter, no matter which control has the focus at the time, and is usually the button with the OK caption. Likewise, the Cancel button is the one that’s automatically activated when you hit the Esc key and is usually the button with the Cancel caption. To specify the Accept and Cancel buttons on a form, locate the AcceptButton and CancelButton properties of the form and select the corresponding controls from a drop-down list, which contains the names of all the buttons on the form. You can also set them to the name of the corresponding button from within your code.
Copyright ©2002 SYBEX, Inc., Alameda, CA |
www.sybex.com |
188 Chapter 5 WORKING WITH FORMS
AutoScale
This property is a True/False value that determines whether the controls you place on the form are automatically scaled to the height of the current font. When you place a TextBox control on the form, for example, and the AutoScale property is True, the control will be tall enough to display a single line of text in the current font. The default value is True, which is why you can’t make the controls smaller than a given size. This is a property of the form, but it affects the controls on the form. If you change the Font property of the form after you have placed a few controls on it, the existing controls won’t be affected. The controls are adjusted to the current font of the form the moment they’re placed on it.
AutoScroll
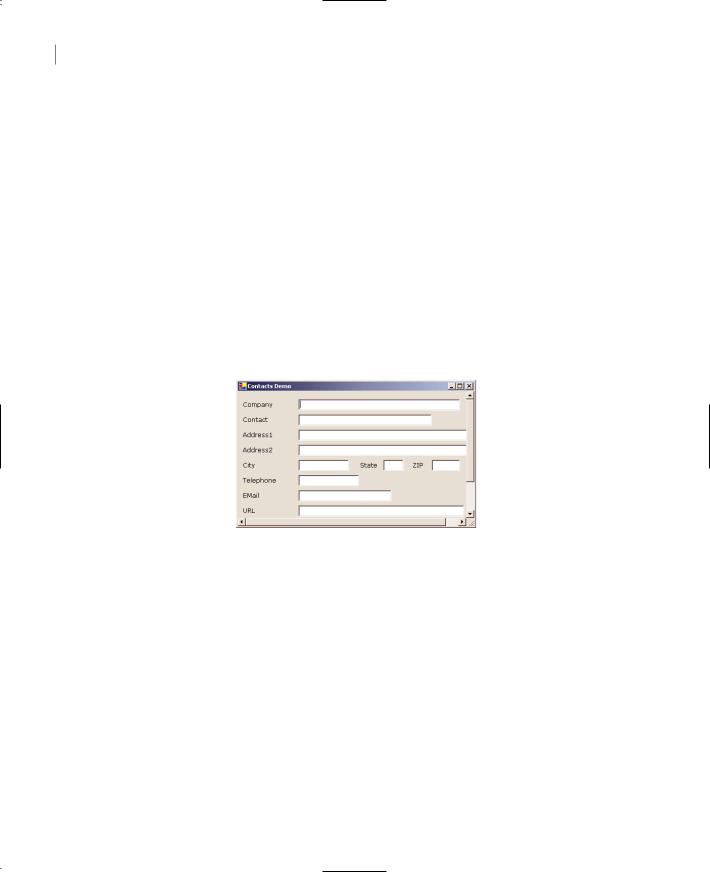
This is one of the most needed of the Form object’s new properties. The AutoScroll property is a True/False value that indicates whether scroll bars will be automatically attached to the form (as seen in Figure 5.2) if it’s resized to a point that not all its controls are visible. This property is new to VB.NET and will help you design large forms without having to worry about the resolution of the monitor on which they’ll be displayed.
Figure 5.2
If the controls don’t fit in the form’s visible area, scroll bars can be attached automatically.
The AutoScroll property is used in conjunction with three other properties, described next: AutoScrollMargin, AutoScrollMinSize, and AutoScrollPosition.
AutoScrollMargin
This is a margin, expressed in pixels, that’s added around all the controls on the form. If the form is smaller than the rectangle that encloses all the controls adjusted by the margin, the appropriate scroll bar(s) will be displayed automatically.
If you expand the AutoScrollMargin property in the Properties window, you will see that it’s an object (a Size object, to be specific). It exposes two members, the Width and Height properties, and you must set both values. The default value is (0,0). To set this property from within your code, use statements like these:
Me.AutoScrollMargin.Width = 40
Me.AutoScrollMargin.Height = 40
Copyright ©2002 SYBEX, Inc., Alameda, CA |
www.sybex.com |
THE APPEARANCE OF FORMS 189
AutoScrollMinSize
This property lets you specify the minimum size of the form, before the scroll bars are attached. If your form contains graphics you want to be visible at all times, set the Width and Height members of the AutoScrollMinSize property accordingly. Notice that this isn’t the form’s minimum size; users can make the form even smaller. To specify a minimum size for the form, use the MinimumSize property, described later in this section.
Let’s say the AutoScrollMargin properties of the form are 180 by 150. If the form is resized to less than 180 pixels horizontally or 150 pixels vertically, the appropriate scroll bars will appear automatically, as long as the AutoScroll property is True. If you want to enable the AutoScroll feature when the form’s width is reduced to anything less than 250 pixels, set the AutoScrollMinSize property to (250, 0). Obviously, if the AutoScrollMinSize value is smaller than the dimensions of the form that will automatically invoke the AutoScroll feature, AutoScrollMinSize has no effect. In this
example, setting AutoScrollMinSize.Width to anything less than 180 or AutoScrollMinSize.Height
to anything less than 150 will have no effect on the appearance of the form and its scroll bars.
AutoScrollPosition
This property lets you read (or set) the location of the auto-scroll position. The AutoScrollPosition is the number of pixels by which the two scroll bars were displaced from their initial locations. You can read this property to find out by how much the scroll bars were moved, or to move the scroll bars from within your code.
Use this property in very specialized applications, because the form’s scroll bars are adjusted automatically to bring the control that has the focus into view. As long as the users of the application press the Tab key to move the focus to the next control, the focused control will be visible.
BorderStyle
The BorderStyle property determines the style of the form’s border and the appearance of the form; it takes one of the values shown in Table 5.2. You can make the form’s title bar disappear altogether by setting the form’s BorderStyle property to FixedToolWindow, the ControlBox property to False, and the Text property to an empty string. However, a form like this can’t be moved around with the mouse and will probably frustrate users.
Table 5.2: The FormBorderStyle Enumeration
Value |
Effect |
None |
Borderless window that can’t be resized; this setting should be avoided. |
Sizable |
(default) Resizable window that’s used for displaying regular forms. |
Fixed3D |
Window with a visible border, “raised” relative to the main area. Can’t be resized. |
FixedDialog |
A fixed window, used to create dialog boxes. |
|
Continued on next page |
Copyright ©2002 SYBEX, Inc., Alameda, CA |
www.sybex.com |

190 Chapter 5 WORKING WITH FORMS
Table 5.2: The FormBorderStyle Enumeration (continued)
Value |
Effect |
FixedSingle |
A fixed window with a single line border. |
FixedToolWindow |
A fixed window with a Close button only. It looks like the toolbar displayed by the |
|
drawing and imaging applications. |
SizableToolWindow |
Same as the FixedToolWindow but resizable. In addition, its caption font is smaller |
|
than the usual. |
|
|
ControlBox
This property is also True by default. Set it to False to hide the icon and disable the Control menu. Although the Control menu is rarely used, Windows applications don’t disable it. When the ControlBox property is False, the three buttons on the title bar are also disabled. If you set the Text property to an empty string, the title bar disappears altogether.
KeyPreview
This property enables the form to capture all keystrokes before they’re passed to the control that has the focus. Normally, when you press a key, the KeyPress event of the control with the focus is triggered (as well as the other keystroke-related events), and you can handle the keystroke from within the control’s appropriate handler. In most cases, we let the control handle the keystroke and don’t write any form code for that.
If you want to use “universal” keystrokes in your application, you must set the KeyPreview property to True. Doing so enables the form to intercept all keystrokes, so that you can process them from within the form’s keystroke events. The same keystrokes are then passed to the control with the focus, unless you “kill” the keystroke by setting its Handled property to True when you process it on the form’s level. For more information on processing keystrokes at the Form level and using special keystrokes throughout your application, see the Contacts project later in this chapter.
MinimizeBox, MaximizeBox
These two properties are True by default. Set them to False to hide the corresponding buttons on the title bar.
MinimumSize, MaximumSize
These two properties read or set the minimum and maximum size of a form. When users resize the form at runtime, the form won’t become any smaller than the dimensions specified with the MinimumSize property and no larger than the dimensions specified by MaximumSize. The MinimumSize property is a Size object, and you can set it with a statement like the following:
Me.MinimumSize = New Size(400, 300)
Copyright ©2002 SYBEX, Inc., Alameda, CA |
www.sybex.com |

THE APPEARANCE OF FORMS 191
Or, you can set the width and height separately:
Me.MinimumSize.Width = 400
Me.MinimumSize.Height = 300
The MinimumSize.Height property includes the height of the Form’s title bar; you should take that into consideration. If the minimum usable size of the Form is 400 by 300, use the following statement to set the MinimumSize property:
me.MinimumSize = New Size(400, 300 + SystemInformation.CaptionHeight)
Tip The height of the caption is not a property of the Form object, even though you will find it useful in determining the useful area of the form (the total height minus the caption bar). Keep in mind that the height of the caption bar is given by the CaptionHeight property of the SystemInformation object.
SizeGripStyle
This property gets or sets the style of sizing handle to display in the bottom-right corner of the form; it can have one of the values shown in Table 5.3. By default, forms are resizable, even if no special mark appears at the bottom-right corner of the form. This little mark indicating that a form can be resized is new to VB.NET and adds a nice touch to the look of the form.
Table 5.3: The SizeGripStyle Enumeration
Value |
Effect |
Auto |
(default) The SizeGrip is displayed as needed. |
Show |
The SizeGrip is displayed at all times. |
Hide |
The SizeGrip is not displayed, but the form can still be resized with the mouse |
|
(Windows 95/98 style). |
|
|
StartPosition
This property determines the initial position of the form when it’s first displayed; it can have one of the values shown in Table 5.4.
Table 5.4: The FormStartPosition Enumeration
Value |
Effect |
CenterParent |
The form is centered in the area of its parent form. |
CenterScreen |
The form is centered on the monitor. |
Manual |
The location and size of the form will determine its starting position. See the |
|
discussion of the Top, Left, Width, and Height properties of the form, later in |
|
this section. |
|
Continued on next page |
Copyright ©2002 SYBEX, Inc., Alameda, CA |
www.sybex.com |