


Chapter 7: Web Caching |
Web Caching Configuration 254 |
|
|
|
|
Web Caching Configuration
This section presents the following topics:
•Web Caching Overview
•Web Caching Configuration Example
Web Caching Overview
The Vyatta system can be configured to act as a web proxy server for web caching and web filtering. A client can request a web page from the Vyatta system, which connects to the web server and requests the page on the client’s behalf. The Vyatta system caches the response; if the page is requested again it can be served directly from the cache, saving the time and bandwidth required for transacting with the web server.
By default, the system acts as a transparent proxy. A transparent proxy automatically redirects HTTP (port 80) traffic to the web proxy server (which, by default, listens on port 3128).
The Vyatta system can also be set as a non-transparent proxy. Non-transparent proxies require client browsers to supply the proxy address and port. The advantage of non-transparent proxying is that the client web browser can detect that a proxy is in use, and can behave accordingly. In addition, web-transmitted malware can sometimes be blocked by a non-transparent web proxy, since the malware is unlikely to be aware of the proxy settings.
To configure the Vyatta system as a non-transparent proxy, use the service webproxy listen-address <ipv4> disable-transparent command.
NOTE Vyatta recommends against enabling web caching on systems with flash memory storage as the cache will repeatedly write to disk and wear out the flash storage medium over time. Web caching should only be used in environments with a hard disk drive.
Web Caching Configuration Example
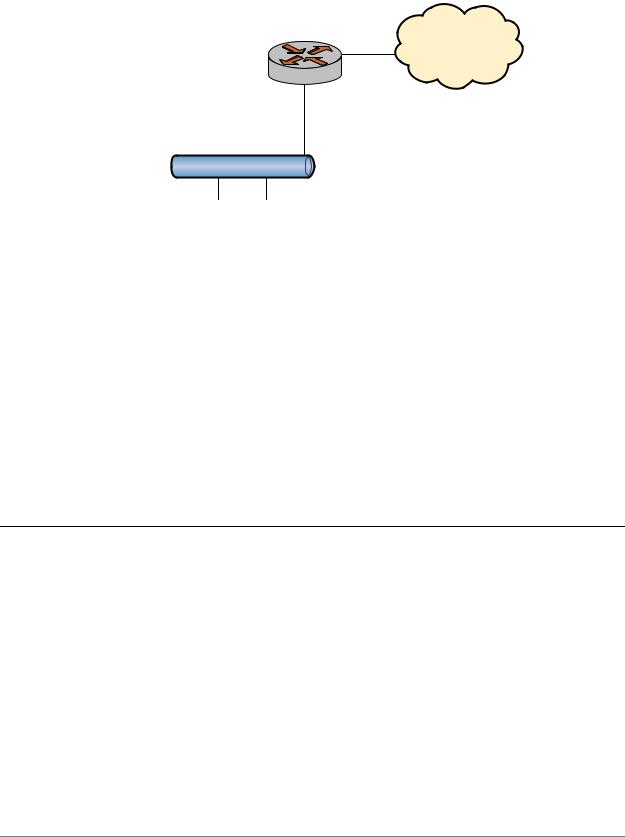
Figure 7-1 shows the web proxy deployment used in the examples in this section. In this scenario:
•Devices on the company’s internal LAN are accessing the Internet through the Vyatta system (R1).
•The web proxy is deployed on R1 to provide web caching functionality to employees accessing the Internet.
Services |
R6.3 v01 |
Vyatta |
Chapter 7: Web Caching |
Web Caching Configuration 255 |
|
|
|
|
Figure 7 1 Web proxy
R1
INTERNET
wan0
eth1
192.168.1.254
Internal LAN
This section presents the following example:
•Example 7-1 Setting up web caching
Configuring Web Caching
Example 7-1 sets up simple, transparent, web caching. In this example:
•The listen address is set to the primary IP address of the internal interface.
•The default cache-size is set to 100MB.
•The default port for the web proxy service is 3128. HTTP traffic (that is, traffic on port 80) will be redirected to this port.
To set up web caching on the Vyatta system perform the following steps:
Example 7 1 Setting up web caching
Step |
Command |
|
|
Set web proxy to listen on |
vyatta@R1# set service webproxy listen address 192.168.1.254 |
address 192.168.1.254 for web |
|
requests. |
|
|
|
Commit the change |
vyatta@R1# commit |
|
|
Show web proxy–related |
vyatta@R1# show service webproxy |
configuration. |
listen address 192.168.1.254 { |
|
} |
|
|
Services |
R6.3 v01 |
Vyatta |