

Visual Web Developer™ 2005 Express Edition For Dummies - Alan Simpson
.pdf30 Part I: Planning a Web Site
Selected object
Figure 2-11:
An object’s properties.
Properties
HTML (Hypertext Markup Language) is a set of tags used to define the general format of items on a Web page. Visual Web Developer is a tool for people who already know that, and know what the HTML tags are. That’s why when you click on a picture and look at its Properties sheet, you see the term <IMG> in the properties sheet rather than the word picture. The assumption is you already know that <IMG> tags show pictures.
Different types of objects have different properties. The list of properties for an object may be long, so you may need to use the scrollbar at the right side of the list to see them all. Most properties can be changed by clicking the column to the right of the property name.
An object’s properties sheet provides a means of tweaking optional settings for the object, but not the only means. In fact, any settings that relate to the look and feel of the object on the page are best dealt with outside the properties sheet through the Style Builder or CSS (Cascading Style Sheets), which are covered in Chapters 5 and 6.
To get to the Style Builder, right-click the item you want to style and choose Style.
Switching views
The Design view shown in the previous figures allows you to edit a Web page in a WYSIWYG (pronounced wizzy-wig — “what you see is what you get”) mode. In other words, what you see in the Design view is very similar to what a person visiting the page with a Web browser would see. That’s the way most people like to work.

Chapter 2: Creating a Web Site 31
As mentioned earlier, there’s also a Source view for editing Web pages. To switch to Source view, click the Source button at the bottom of the Design surface. (To switch back to Design view, click the Design button at the bottom of the Design surface.)
The Source view shows the HTML tags (and other stuff) that VWD is creating behind the scenes as you create the page in the Design view. Whether or not any of that looks familiar depends on your familiarity with HTML.
Those of you who are familiar with HTML will recognize similarities between the tags and the content of the page. For example, if you switch to Source view while viewing the page in Figure 2-11, you might recognize the tags shown here:
<img src=”Images/Logo.gif” />
<h1>Welcome to my site</h1>
Dragging the logo.gif file onto the page created the <IMG> tag. Welcome to my site is typed text. The <H1> and </H1> tags were added by selecting the typed text and choosing Heading 1 <H1> from the Block Format menu on the toolbar.
There’s rarely any need to work directly with HTML tags. So don’t get too uncomfortable looking at all the gibberish in the Source view. But for those of you who are familiar with HTML, I offer the following section.
Editing in Source view
If you’re familiar enough with HTML to work directly in the Source view, you’ll be able to take advantage of VWD’s IntelliSense technology. IntelliSense “looks at” what you’re typing, or have already typed, and provides menus of options representing valid HTML keywords relevant to the context in which you’re typing. I think an example will best illustrate.
Suppose you’re working in the Source view and want to insert an HTML tag. As soon as you type the opening angle bracket, <, a menu appears listing valid words you can type after the opening bracket, as in Figure 2-12.
When the IntelliSense menu appears, you have two choices. You can ignore it and just keep typing. Or you can scroll through the menu and double-click the word you want to insert next into the brackets.
If you enter the first tag of a pair, IntelliSense will usually add the closing tag for you automatically. For example, if you type <p> into the page in Source view, you’ll get <p></p>. The cursor lands between the two tags so you can type within the tags immediately.

32 Part I: Planning a Web Site
Figure 2-12:
IntelliSense
menu in
Source
view.
When you use XHTML for validation, unpaired tags such as <img> and <br> must end with a slash and a closing angle bracket (/>). For example,
<img.../> and <br/>. When you edit in the Design surface, the correct tags are created automatically. If you plan on writing HTML yourself, make sure you’re up on XHTML rules, which you can find online at www.w3.org/MarkUp.
If you’re not familiar with HTML and don’t quite get what value IntelliSense offers, don’t worry about it. For the most part, you can create Web sites in VWD by using simple drag-and-drop techniques and properties without typing any HTML at all.
All Web pages contain some HTML, even though you never see HTML tags in pages. That’s because your browser renders the HTML into what you see in your browser. For example, the HTML <b>Hello</b> renders as the word Hello in boldface, without the tags. If you use Internet Explorer as your Web browser, you can choose View Source from its menu bar to see the unrendered HTML source page.
Saving your work
As soon as you start editing a page, you’ll notice that the tab that shows the page name at the top of the Design surface is boldfaced and shows an asterisk, as in the example shown in Figure 2-13. The asterisk means “you’ve changed this page since you last saved it, and those changes have not yet been saved.” To save the page with your most recent edits, use whichever technique below is most convenient:
Click the Save button in the toolbar (shown near the mouse pointer in Figure 2-13).
Press Ctrl+S.
Choose File Save Pagename from the menu bar (where Pagename is the name of the page you’re editing).

Chapter 2: Creating a Web Site 33
Clicking the Save All button next to the Save button will do the trick too. As its name indicates, the Save All button saves all open pages.
If you attempt to close an edited page without saving it first, you’ll see a prompt asking whether you want to save your changes. You should choose Yes unless you’re sure you want to abandon all changes you’ve made since you last saved the page.
Save button |
Asterisk |
Figure 2-13:
Changed page and Save button.
Dealing with code-behind files
Many .aspx pages have a corresponding code-behind file. These pages contain programming code that defines the behavior of the page, as opposed to any kind of visible content. The code in a code-behind page is written in whatever programming language you choose when first creating the Web site. In this book’s examples, that will always be the C# programming language.
In Solution Explorer, any page that has a code-behind file shows a + sign next to its icon, or a minus sign with an icon for the code-behind file. The name of the code-behind file is the same as the name of the .aspx page with a .cs extension added on, as in Figure 2-14. (The .cs is for C#. If you use a different programming language, the extension will adjust accordingly, for example,
.vb for Visual Basic.)
Figure 2-14:
Icon for codebehind file under
Default.
aspx.

34 Part I: Planning a Web Site
When you open a code-behind file you see code. There is no Design view for code, because a code-behind file can only contain code — computer instructions written in a programming language like C# or Visual Basic. The code may look something like this:
using System; using System.Data;
using System.Configuration; using System.Web;
using System.Web.Security; using System.Web.UI;
using System.Web.UI.WebControls;
using System.Web.UI.WebControls.WebParts; using System.Web.UI.HtmlControls;
public partial class _Default : System.Web.UI.Page
{
protected void Page_Load(object sender, EventArgs e)
{
}
}
The meaning of the code isn’t important at the moment. Suffice it to say that the code file is where the logic of a Web page resides, whereas HTML controls what appears on-screen when someone views the page through a Web browser. You’ll see examples of how that works in Chapter 9. Whether or not you’ll ever have to deal with code-behind pages depends on what you want your Web site to do — so don’t let all that gibberish in the code-behind page worry you.
To close a code-behind page, just click its Close (X) button near the upperright corner of the Design surface.
Titling Pages
Every Web page has a page title that appears in the Web browser’s title bar when someone is viewing the page. That same title also shows up in links to the page from most search engines, like Google. In HTML, the title must be placed between <title>...</title> tags, which in turn must be inside the page’s <head>...</head> tags.
In Visual Web Developer, you can follow these steps to create a title for whatever page you’re currently editing in the Design surface:
Chapter 2: Creating a Web Site 35
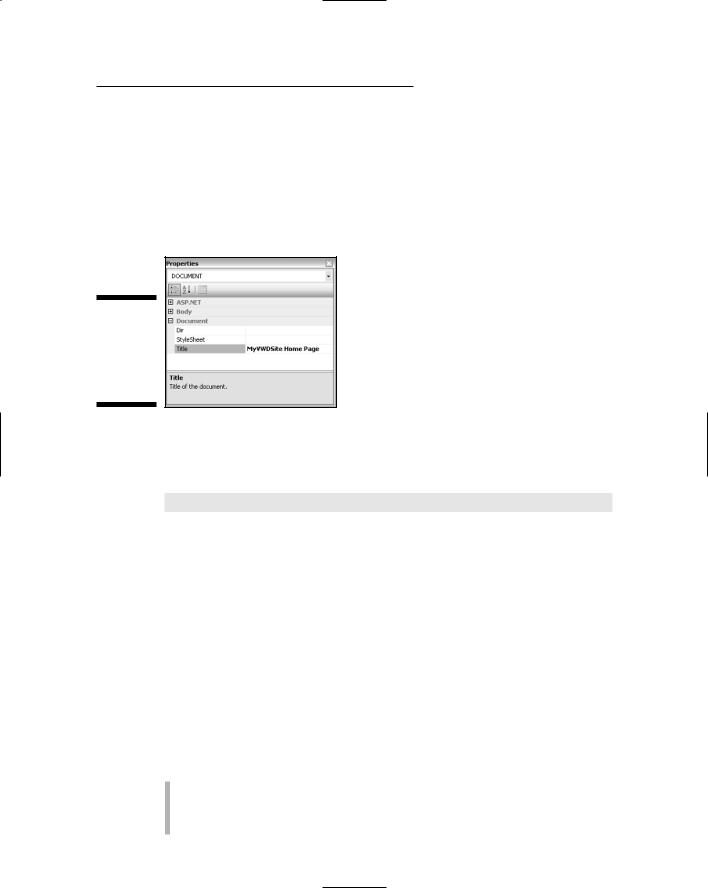
1.From the drop-down list at the top of the Properties sheet, choose
<DOCUMENT>.
2.Scroll to the bottom of the Properties sheet and type your page title as the Title property.
For example, in Figure 2-15, I’ve given the page the general title MyVWDSite
Home Page.
Figure 2-15:
Typing a page title for the browser’s title bar.
You won’t see anything in the Design view of the page, because this title doesn’t show up on the Web page. In Source view, you’ll see the HTML required to show the page title:
<title>MyVWDSite Home Page</title>
The only other time you’ll see that title is when you view the page in a Web browser, where it appears in the title bar at the top of the Web browser’s program window. Which brings us to . . .
Viewing Pages in a Web Browser
The Design view of a page gives you a good sense of how the page will look in a Web browser. But it doesn’t always provide an exact view. To put your page to a real test, view the page in a Web browser. After all, when the site is up and running on a Web server, everyone who visits the site will be doing so through a Web browser.
To view, in a Web browser, the page you’re currently working on in Design or Source view in VWD, use whichever method below is most convenient for you:
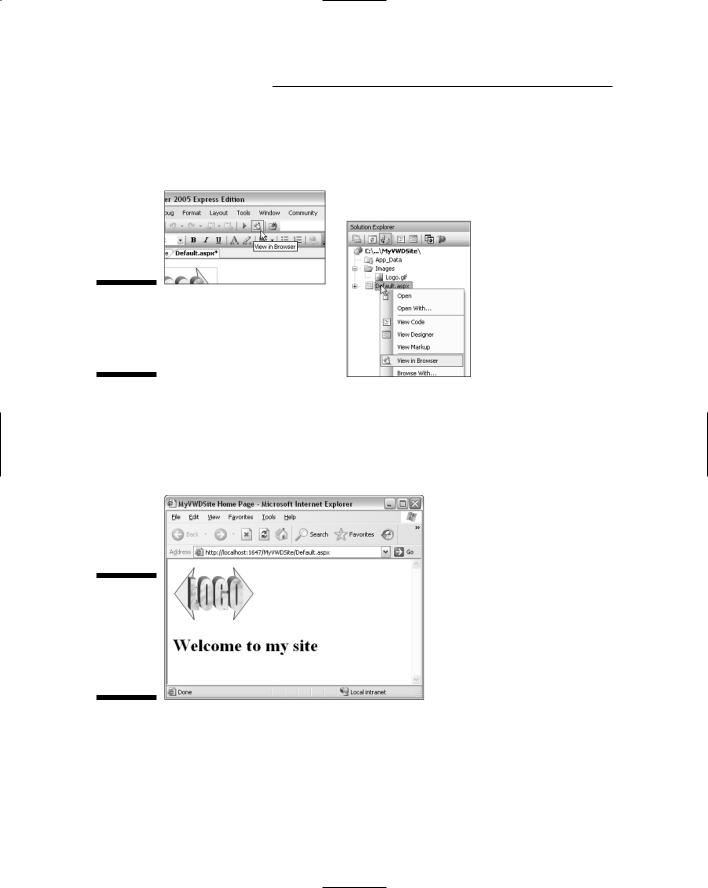
Right-click some empty space on the page and choose View In Browser.
Click the View in Browser button in the toolbar (left side of Figure 2-16).
Press Ctrl+F5.
36 Part I: Planning a Web Site
If you want to view in a Web browser a page that isn’t currently open, rightclick its name in Solution Explorer and choose View in Browser, as shown at the right side of Figure 2-16.
Figure 2-16:
Two ways to view a page in a Web browser.
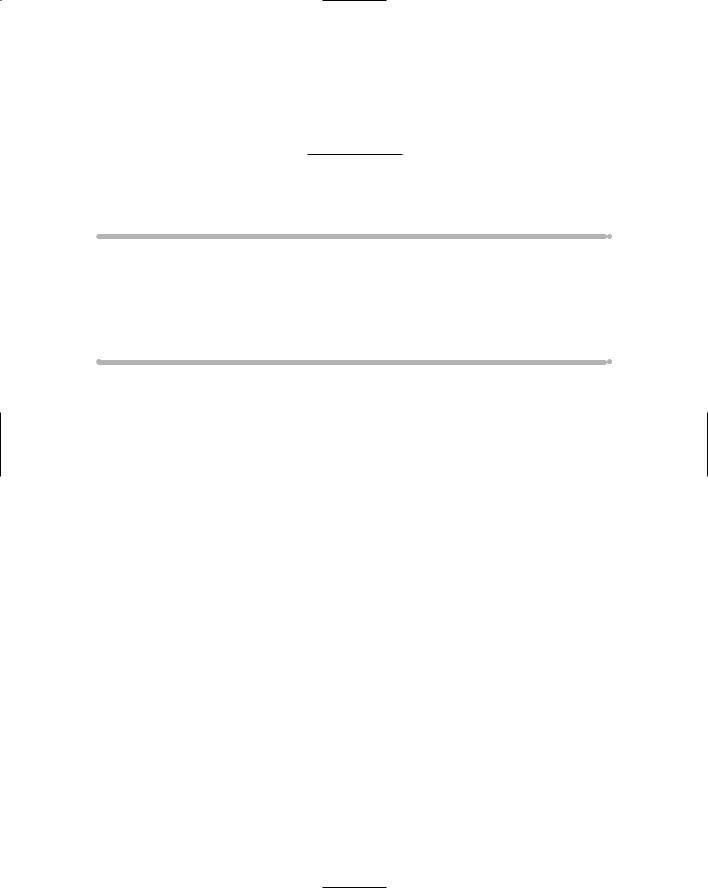
The page opens in a Web browser, mostly likely Microsoft Internet Explorer. Figure 2-17 shows the Default.aspx page open in Internet Explorer. Note the page title, MyVWDSite Home Page, in the upper-left corner of the figure. That’s the only place that page title is actually visible on the screen.
Figure 2-17:
The
Default.
aspx page
in Microsoft
Internet
Explorer.
The browser window will likely cover Visual Web Developer’s program window. To go back to designing your page, just close the Web browser by clicking the Close (X) button in its upper-right corner.

Chapter 2: Creating a Web Site 37
Opening and Closing Web Sites
Creating a Web site is no small feat, and it’s pretty unusual to accomplish much in a single sitting. So before I end this chapter, let’s take a quick look at managing Web sites as a whole.
When you’re in Visual Web Developer and working on a site, you can close the site without closing the program — handy if you’re working on multiple sites. To close the current Web site, choose File Close Project from VWD’s menu bar. (VWD often uses project to mean Web site.)
When you first open VWD, you won’t be taken to your Web site automatically. Even so, you can easily open your site by any of the following methods:
Click your site’s name under Recent Projects on the VWD Start Page.
Choose File Recent Projects from the menu bar. Then click the name of the Web site you want to open.
Choose File Open Web Site from the menu bar. When you choose this option, the Open Web Site dialog box opens. Click File System, then use the directory tree to navigate to the folder in which you placed your project (look for a regular folder icon with whatever name you entered when you created the site).
Whichever method you use to open your Web site, the folders and files appear in Solution Explorer exactly as you left them.

38 Part I: Planning a Web Site
Chapter 3
Configuring a Membership Site
In This Chapter
Configure your Web site for membership
Create folders for members-only content
Prevent anonymous users from accessing members-only content
Create and manage user accounts
One of Visual Web Developer’s best features is its ability to create a membership Web site with minimal fuss and muss. As the owner of a
membership Web site, you can control who has access to what content. For example, you can have general content for anonymous users, people who just happen to wander into the site, and then you can have premium content for members only, where members are people who have set up an account on your site.
The basic idea is pretty simple. You create a folder, perhaps named MemberPages, where you put all members-only content. Then you set up a role, perhaps named SiteMembers. Finally, you create a rule that says “anonymous users cannot access content in the MemberPages folder; only people in the SiteMember role can access pages in the MemberPages folder.” In other words, if someone who just happens to visit your site wants to see your special content, that person must first join your site by setting up a user account.
Creating a Folder for Members-Only Content
The first step to setting up a membership site is to decide how you’re going to organize your content. You’ll likely want some of your site’s content to be available to anonymous users. An anonymous user is anyone who visits the site without creating or logging into an account on your site.
In addition to the general content that’s available to everyone, you may want some privileged members-only content that’s available only to site members — people who have joined your site by setting up a user account.