

Visual Web Developer™ 2005 Express Edition For Dummies - Alan Simpson
.pdf10 Part I: Planning a Web Site
Of course, each said tool or technology is a book-length topic in itself. Total coverage of all that is beyond the scope of a single book written about Visual Web Developer. By way of a quick look, however, I describe what they are, how you use them, and where you find online resources with more information.
Installing Visual Web Developer
One of the biggest challenges beginners face when trying to use a large, complex program like Visual Web Developer is knowing what to do, how to do it, and when to do it. Technical documentation and “theory” don’t help with that. To really get your feet wet and understand the big picture, you need to spend some time using the program in a hands-on way.
Getting that hands-on experience is what this book is about. And to make sure you can get that experience, we’ve included a free copy of Visual Web Developer Express on the CD that comes with this book.
Like any program, you have to install Visual Web Developer Express before you can use it. So before you go any further here, take a moment to complete the installation instructions presented in Appendix B.
Getting Around in VWD
Once installed, starting Visual Web Developer is no different from starting any other program. Assuming VWD is properly installed on your computer, just click the Start button and choose All Programs Visual Web Developer 2005 Express Edition. Figure 1-1 shows (roughly) how the program looks when it first opens. Don’t worry if yours looks different — it’s easy to move and size things to your liking.
The list given here briefly describes the purposes of the main panes pointed out in Figure 1-1. (If some of the terms are new to you, don’t worry about it; save the definitions for later when you start creating your site.)
Toolbox: When you open a page or other item to edit, the Toolbox offers tools that allow you to add controls to the page.
Design Surface: Also called the design grid, this is where you’ll create and edit your Web pages. Initially, you’ll see a Start Page here, which I’ll discuss that in a moment.

Chapter 1: Getting Started |
11 |
Solution Explorer/Database Explorer: Each Web site you create is organized as a group of folders that shows up in the Solution Explorer. Any database you create for the site appears in the Database Explorer. Use the tabs at the bottom of the pane to switch between the two Explorer programs.
Properties: Shows properties associated with the page or object with which you’re currently working.
Using panes
You can move, size, show, and hide panes as needed to take advantage of your available screen space. To widen or narrow a pane, drag its innermost border left or right. If you have two or more panes stacked up along the edge of a screen, you can make the lower pane taller or shorter by dragging its top border up or down. The two-headed mouse pointers in Figure 1-2 show where you’d drag a couple of sample borders. (Ever see a two-headed mouse?)
Solution Explorer/Database Explorer
Figure 1-1:
VWD main program window.
Toolbox |
Design surface |
Properties |

12 Part I: Planning a Web Site
Auto Hide
Window position Close
Figure 1-2: |
Drag to size |
Tools for |
|
moving and |
|
sizing |
|
panes. |
|
As pointed out in Figure 1-2, the title bar of a pane contains three buttons titled Window Position, Auto Hide, and Close. Clicking the Window Position option gives you the following choices on a drop-down menu:
Floating: Converts the pane to a free-floating window that you can move and size independently of the program window.
Dockable: Docks a pane that is currently showing as a tabbed document.
Tabbed Document: Moves the pane into the Editing area, identified by a tab at the top of the area. Click the tab to make the pane visible. Rightclick the tab and choose Dockable to re-dock the pane to the program window.
Auto Hide: Converts open panes to hidden panes along the border of the program window, as in the example shown in Figure 1-3. To bring a pane out of hiding, point to (or click) its name.
Hide: Hides a pane immediately so only its name appears along the border. To bring the pane out of hiding, click (or just point to) its name.
To quickly put all of the visible panes into hiding, choose Window Auto Hide All.
When you bring a hidden pane out of hiding, you’ll notice that the Auto Hide “pushpin” is horizontal. Clicking that pushpin keeps the pane open.
Getting panes back to normal
With so many optional panes, and so many ways to move and size things, it’s easy to make a real mess of your program window. But don’t worry; to whip everything back into shape, all you have to do is choose Window Reset Window Layout from the menu bar.

Chapter 1: Getting Started |
13 |
Figure 1-3:
Hidden panes along the right border.
Don’t forget the View menu
The View option in the menu bar, shown in Figure 1-4, provides access to all optional panes (also called windows because they can be free-floating). If you close a pane by clicking its Close (X) button, you can always bring the pane back into view by choosing its name from the View menu.
Figure 1-4:
The View
menu.

14 Part I: Planning a Web Site
Some options on the View menu, like Object Browser and Error List, won’t play any significant role until you start building your Web site. In most cases, these panes appear automatically when needed. I’ll discuss those other panes as the need arises in this, and later, chapters.
The View menu also offers a Toolbars option you can use to show and hide various toolbars. As with many of the optional panes, toolbars appear — and disappear — as appropriate to whatever task you’re performing at the moment. So don’t fret about which toolbars are (or aren’t) visible right now.
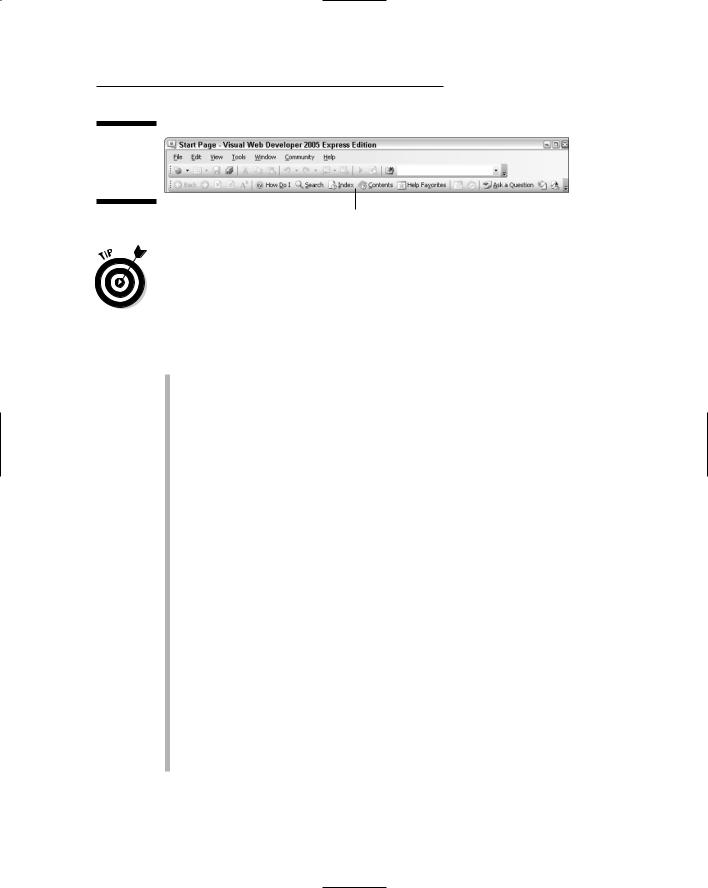
About the Start Page
The Start Page, shown in Figure 1-5, appears each time you open VWD. Under Recent Projects you’ll see a list of Web sites you’ve worked on recently (if any). To open one of those Web sites, just click its name.
Figure 1-5:
The VWD
Start Page.
The Start page doesn’t contain anything that’s required to build a Web site. In fact, after you’ve created or opened a Web site, you can close the Start page by clicking the Close (X) button in its upper-right corner. If you change your mind and want to bring the Start page back to the screen, just choose View Other Windows Start Page from the menu.
Using VWD Help
Quick, easy access to information is key to using VWD well. There’s too much information for anyone to memorize. Visual Web Developer offers many ways of getting the information you need when you need it. The Help command on the menu bar, and the Help toolbar shown at the bottom of Figure 1-6, provide many ways to look up information, as summarized below.
Chapter 1: Getting Started |
15 |
Figure 1-6:
The Help
toolbar
(bottom).
Help toolbar
If the Help toolbar isn’t visible, choose View Toolbars Help from the menu bar. The navigation buttons at the left side of the Help toolbar will be enabled when you have some Help content visible on your screen.
It’s probably no stretch to assume you can find your way around the Help system and figure things out from the options available to you. But just so you know what’s available, I’ll briefly summarize the main Help options:
How Do I: Opens the “How Do I?” page in the Design Surface. The page contains links to topics that describe how to perform various common tasks in VWD.
Search: Provides many options for searching both local and online help for a specific word or phrase.
Index: Provides an index, like the index at the back of a book, where you can look up a term alphabetically.
Contents: Opens the Help Table of Contents in the right pane. Use it as you would the Table of Contents at the start of a book.
Help Favorites: Opens the Help Favorites pane at the right side of the program window. When you’re viewing a Help page, you click the “Add to Help Favorites Button” in the Help toolbar (just to the right of the Help Favorites button) to add the current page to your Help Favorites.
Dynamic Help: (Help menu only) Opens the Dynamic Help pane in the lower-right corner of the screen (Figure 1-7). As you create a page and click different types of controls, links to information about the context in which you’re working automatically appear in this pane.
Help on Help: (Help menu only) Offers detailed information on all the built-in help available to you.
If you’re new to Web development, much of the help may be over your head and not very helpful at all. Try not to let that intimidate you. Everyone has to be a beginner at some point. A major goal of this book is to get you from that absolute-beginner point to a more experienced level where the technical documentation can actually be helpful.

16 Part I: Planning a Web Site
Figure 1-7:
The
Dynamic
Help pane.
Closing Help pages and panes
Most Help pages open up in the Design surface. You can switch among open pages using the tabs at the top of the surface. To close a pane, click its tab and then click the Close (X) button at the top of the Design surface (Figure 1-8). Or right-click the tab and then choose Hide.
Tabs |
Close button |
Figure 1-8:
Tabs and Close button.
Panes, like the Dynamic Help pane shown back in Figure 1-7, can be handled like any other pane, using tools and techniques described near Figure 1-2.
Online resources
No matter what your level of expertise coming into this book, sometimes you need specific information about the technologies that VWD supports. That includes the .NET Framework 2.0, ASP.NET, CSS, HTML, XML, SQL Server 2005, and the C# programming language. You don’t need to master all these topics right off the bat. Heck, the printed documentation for the .NET Framework alone is over 8,000 pages. Not may people will be interested in learning or using everything it has to offer. It’s just too darn much information, most of which has nothing to do with building Web sites.
The trick is being able to find the information you need when you need it. Certainly the Help resources described in the previous sections have much to offer. But it never hurts to have a few extra resources at your fingertips.
A good first resource is the Visual Web Developer section of my own personal Web site at www.coolnerds.com. (You can browse straight to that section using www.coolnerds.com/vwd). For more technical information, consider the following Web sites:

Chapter 1: Getting Started |
17 |
.NET Framework Developer Center: http://msdn.microsoft.com/ netframework/
ASP.NET QuickStart Tutorials: www.asp.net/tutorials/quickstart. aspx
Cascading Style Sheets (CSS) — W3C: www.w3.org/Style/CSS/
SQL Server Developer Center: http://msdn.microsoft.com/SQL/
Visual C# Developer Center: http://msdn.microsoft.com/vcsharp/
XHTML Home Page: www.w3.org/TR/xhtml1/
XML (Extensible Markup Language): www.w3.org/XML/
Being Compatible with Web Browsers
Every Web author has to make a trade-off decision between Web browser compatibility and fancy features. If you want to ensure that virtually everyone can visit your site, then you want to be compatible with very early versions of Web browsers — say, Internet Explorer 3 and Netscape Navigator 3. However, those older browsers don’t support the better, fancier stuff you can use with modern Web browsers.
If you want to use the capabilities of modern browsers, you have to limit your Web site to using only those. This is not as big a sacrifice as it might seem; almost everyone has more recent browsers. Few sites gear their new content to version 4 and earlier browsers anymore, and most browser manufacturers are keeping up with current XHTML specifications. And since XHTML is the future for browsers anyway, most Web authors lean toward those specifications.
Anyway, I’m sure one could debate browser compatibility ad infinitum — but here’s the bottom line: Make that decision early on so you’re better prepared to create consistent pages for the site and match what your visitors are most likely using. You use the Options dialog box in VWD to set browser compatibility; here are the steps:
1.Choose Tools Options from VWD’s menu bar.
The Options dialog box opens.
2.Click the + sign (if any) next to Text Editor HTML.
3.Click Validation.
4.Choose your preferred browser compatibility from the Target dropdown list.
In Figure 1-9, I chose “XHTML 1.0 Transitional (Netscape 7, Opera 7, Internet Explorer 6).”
5.Click OK.

18 Part I: Planning a Web Site
Figure 1-9:
Choosing target browsers.
In case you’re wondering why the option in the Options dialog box is named Validation, it’s because VWD automatically validates your page each time you open it — that is, it makes sure everything in the page works properly when a visitor opens the page from a Web browser. If VWD finds a problem, it alerts you via an error message.
The Options dialog box has a whole slew of other options. You can see ’em if you choose the Show All Settings check box at the bottom of the dialog box. There are a ton of other options to choose from, but the only one worth bothering with at the moment would likely be the General tab under HTML Designer.
As you’ll discover in Chapter 2, you can edit pages either in a WYSIWYG graphical view, or a more textual Source view. You can switch views at any time with a single mouse click, which is no big deal. But if you choose Design View rather than Source View from the HTML Designer General options, as in Figure 1-10, your pages will initially open in Design view.
Figure 1-10:
Choosing to open pages in Design view.

Chapter 1: Getting Started |
19 |
When you’ve finished making your choices in the Options dialog box, just click OK to save your choices and return to VWD.
Publishing Your Web Site
As you may already know, simply creating a Web site on your own PC is only a first step; you can admire it while it sits there, but that doesn’t make your site available to the public at large. That can happen only after you’ve obtained a domain name and published your site to a Web server located at that domain name.
The company that provides the space on which you publish your site is often referred to as a hosting service, a hosting provider, a Web presence provider, or even a WPP for short. The hosting services that specifically support the technologies you use in VWD to develop your Web site are ASP.NET 2.0 Hosters.
Eventually you’ll need a hosting service that supports ASP.NET 2.0 and SQL Server 2005. You can find a list of such hosting services at www.asp.net/ hosters/. There’s no reason to sign up right this minute, especially if your site isn’t built yet. But you can certainly shop around as time permits.