


Using Themes, Skins, and Styles
<siteMapNode url="~/Departments.aspx" title="Departments" description="Dorknozzle Departments" />
<siteMapNode url="~/AdminTools.aspx" title="Admin Tools" description="Admin Tools" />
<siteMapNode url="~/AdminNewsletter.aspx" title="Admin Newsletter" description="Dorknozzle Admin Newsletter" />
</siteMapNode>
</siteMap>
Great! Your sitemap file is ready to be used.
Using Themes, Skins, and Styles
We’ll be using CSS to build the layout of our Dorknozzle interface. CSS provides developers with flexibility and control over the look of their web applications, and makes it very simple to keep the appearance of the web site consistent.
In ASP.NET, style sheets can be managed through a mechanism called themes. Themes can be used to do much more than simply select which style sheets are applied to an application, as we’ll see shortly. But first up, let’s add a style sheet to our Dorknozzle site.
Creating a New Theme Folder
Right-click the root node in Solution Explorer, and select Add ASP.NET Folder > Theme. You’ll then be able to type in a name for the new theme. Type Blue, then hit Return. If everything worked as planned, you should have a brand new folder called App_Themes in the root of your project, with a subfolder called Blue, as Figure 5.35 illustrates.
Figure 5.35. Your new theme in Solution Explorer
189

Chapter 5: Building Web Applications
We’ll keep all the files related to the default appearance of Dorknozzle in this Blue folder.
Creating a New Style Sheet
We’ll start by adding a new CSS file to the Blue theme. CSS files can be created independently of themes, but it’s easier in the long term to save them to themes—this way, your solution becomes more manageable, and you can save different versions of your CSS files under different themes. Any files with the
.css extension in a theme’s folder will be automatically linked to any web form that uses that theme.
Right-click the Blue folder, and select Add New Item…. Select the Style Sheet template to create a new file named Dorknozzle.css, and click Add. By default, Dorknozzle.css will be almost empty:
File: Dorknozzle.css (excerpt)
body {
}
Let’s make this file more useful by adding more styles to it. We’ll use these styles soon, when we build the first page of Dorknozzle.
File: Dorknozzle.css (excerpt)
body
{
font-family: Tahoma, Helvetica, Arial, sans-serif; font-size: 12px;
}
h1
{
font-size: 25px;
}
a:link, a:visited
{
text-decoration: none; color: Blue;
}
a:hover
{
color: Red;
}
.Header
{
190

Using Themes, Skins, and Styles
top: 0px; left: 0px;
position: absolute; width: 800px;
background-image: url(/Dorknozzle/Images/header_bg.gif); background-repeat: repeat-x;
}
.Menu
{
top: 160px; left: 15px; width: 195px;
position: absolute;
}
.Content
{
top: 160px; left: 170px;
position: absolute; width: 600px
}
Remember, we’re not limited to using these styles. If, during the development of our application, we decide to add more styles, we’ll simply need to open the Dorknozzle.css file and add them as necessary.
While you’re editing the CSS, take a quick look at the built-in features that Visual Web Developer offers for building and editing styles. Right-click on any style rule in the CSS code editor, and in the context menu that appears (which is shown in Figure 5.36), you’ll see one very handy item: Build Style….
Figure 5.36. Choosing to edit a style visually
191
Chapter 5: Building Web Applications
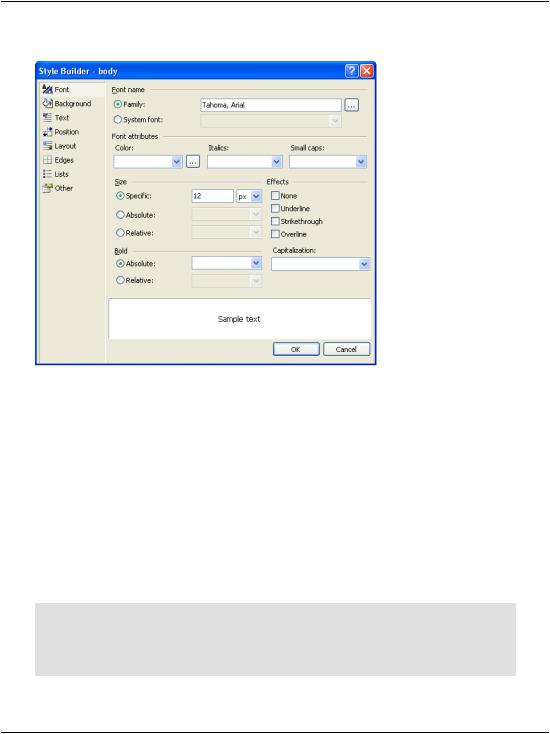
Figure 5.37. Using the Style Builder
If you choose Build Style…, you’ll access the very useful Style Builder tool, shown in Figure 5.37, which lets you set the properties of the selected style.
Styling Web Server Controls
CSS styles can apply only to HTML elements—they can’t really be used to keep the appearance of web server controls consistent. In Chapter 4, you learned about many ASP.NET controls, and you saw that some of them contain properties that affect their output.
Take the Calendar control, for example. Say you use many calendars throughout your web site, and all of them are supposed to have the same properties as this one:
<asp:Calendar id="myCalendar" runat="server" DayNameFormat="Short" FirstDayOfWeek="Sunday" NextPrevFormat="FullMonth" SelectionMode="DayWeekMonth" SelectWeekText="Select Week" SelectMonthText="Select Month" TitleFormat="Month" OnSelectionChanged="SelectionChanged" />
192