


Selecting Certain Fields
Viewing Results in Text Format
By default, the query editor of SQL Server Management Studio displays the results in a grid like the one shown in Figure 8.3. As you work with SQL Server, you may start to find this view a little impractical; in particular, it makes viewing longer strings of text painful because each time you run the query, you need to resize the columns in the grid. Personally, I prefer the plain text view, which is shown in Figure 8.4. You can enable this mode by selecting Query > Results To > Results To Text.
Let’s move on and take a look at some variations of the SELECT query. Then we’ll see how easy it is to insert, modify, and delete items from the database using other keywords.
Selecting Certain Fields
If you didn’t want to select all the fields from the database table, you’d include the names of the specific fields that you wanted in place of the * in your query. For example, if you’re interested only in the department names—not their IDs—you could execute the following:
SELECT Department
FROM Departments
This statement would retrieve data from the Department field only. Rather than specifying the *, which would return all the fields within the database table, we specify only the fields that we need.
Selecting All Columns Using *
To improve performance in real-world development scenarios, it’s better to ask only for the columns that are of interest, rather than using *. Moreover, even when you need all the columns in a table, it’s better to specify them by name, to safeguard against the possibility that future changes, which cause more columns to be added to the table, affecting the queries you’re writing now.
It’s important to note that the order of the fields in a table determines the order in which the data will be retrieved. Take this query, for example:
SELECT DepartmentID, Department
FROM Departments
You could reverse the order in which the columns are returned with this query:
299

Chapter 8: Speaking SQL
SELECT Department, DepartmentID
FROM Departments
Executing this query would produce the result set shown in Figure 8.5.
Figure 8.5. Retrieving department names and their IDs
Try it for yourself!
Selecting Unique Data with DISTINCT
Say you want to find out which cities your employees hail from. Most likely, a query such as the one shown below would generate multiple results:
SELECT City
FROM Employees
If this query were applied to the Dorknozzle application, the same city location would appear six times in the results—once for every employee in our database. Figure 8.6 illustrates this point.
That’s not usually what we want to see in our results. Typically, we prefer to see the unique cities in the list—a task that, fortunately enough, is easy to achieve. Adding the DISTINCT keyword immediately after the SELECT clause extracts only
300

Selecting Unique Data with DISTINCT
Figure 8.6. Reading the employees’ cities
the unique instances of the retrieved data. Take a look at the following SQL statement:
SELECT DISTINCT City
FROM Employees
This query will produce the result shown in Figure 8.7.
Figure 8.7. Selecting distinct cities
In this case, because only the City column was included within the SQL query, unique instances within the City column were returned.
Note that the uniqueness condition applies to the whole of the returned rows. If, for example, we asked for the name of each employee as well, all the rows would be considered unique (because no two employees have the same name)
301
Chapter 8: Speaking SQL
and no row would be eliminated by DISTINCT. To see for yourself, execute this query:
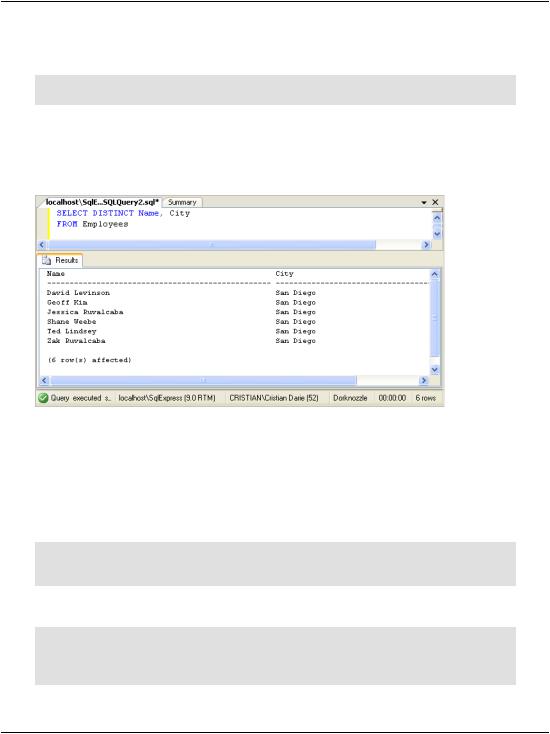
SELECT DISTINCT Name, City
FROM Employees
The results of this code are pictured in Figure 8.8. As we expected, the DISTINCT clause doesn’t have any effect, since each row is unique.
Figure 8.8. Retrieving employees and cities
Row Filtering with WHERE
The WHERE clause is used in conjunction with SQL queries, including the SELECT query, to deliver more refined search results based on individual field criteria. The following example could be used to extract all employees that work in the
Department whose ID is 6:
SELECT Name, DepartmentID |
|
FROM Employees |
|
WHERE DepartmentID = 6 |
|
This query returns the results shown below: |
|
Name |
DepartmentID |
-------------------------------------------------- |
------------ |
Ted Lindsey |
6 |
Shane Weebe |
6 |
302