

Beginning Object-Oriented ASP.NET 2.0 with VB.NET From Novice to Professional
.pdfC H A P T E R 6 ■ N A M E S PA C E S |
89 |
Figure 6-7. Adding a new project called Chapter6
This class library will now become a namespace, which means that it can contain multiple classes that provide common functionality to be used by your company. To create this class library as a namespace, you don’t really need to do anything. By default, you could build this class library project into an assembly (called Chapter6) and Chapter6 would become your namespace. For our example, though, the namespace is going to be changed to MyCompany. You can change the root namespace (the base namespace for all files within the project) by clicking the My Project folder within the Solution Explorer. The Project Properties window will then appear. Find the Root Namespace textbox within the properties window and then enter MyCompany, so that will become the namespace for this assembly.
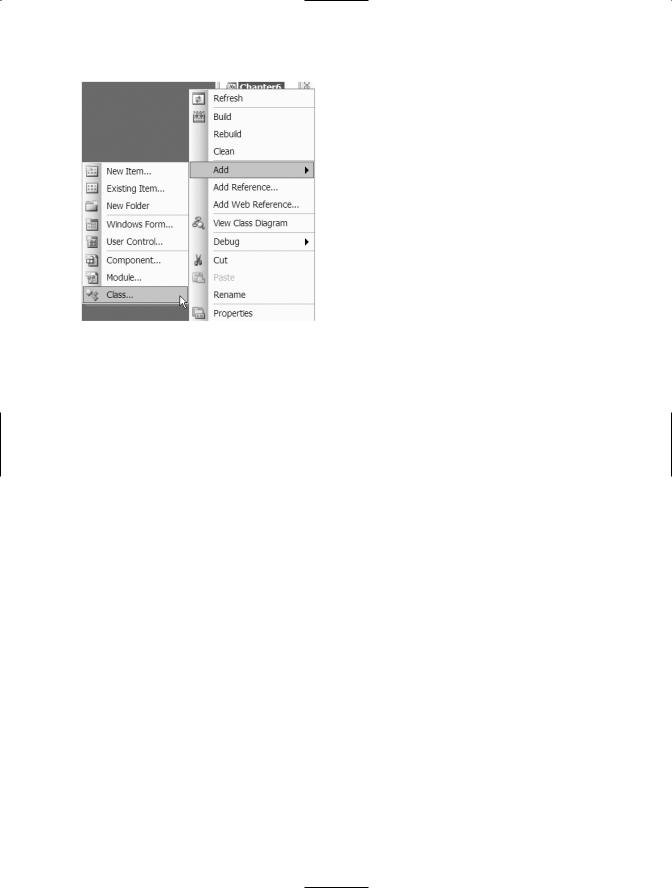
After you’ve changed the Root Namespace, close the Project Properties window. Next, rename the class (.vb) file that was created with the new project to Math.vb. Then add a class called UserAuth by right-clicking the project name (Chapter6) at the top of the Solution Explorer and then choosing Add and then Class, as shown in Figure 6-8.
90 C H A P T E R 6 ■ N A M E S PA C E S
When the Add Item window appears, make sure class is already selected and enter UserAuth.vb as the file name.
Now there are two classes within the namespace. I’m going to revert to some of the prior examples and add a couple of methods and properties to the Math class and then to the User Auth class (UserAuth.vb). Then, I’ll create an ASP.NET application to use these two classes.
To do this, you should first create a public function called AddIntegers that returns an integer with two integer parameters: firstInteger and secondInteger. Within the new function, return the value of the firstInteger parameter added
to the secondInteger parameter. Then, create a public function called MultiplyIntegers that returns an integer with two integer parameters, firstInteger and secondInteger. Within the new function, return the value of the firstInteger parameter multiplied by the secondInteger parameter. Next, add a new function called AddDecimal that returns a decimal with two decimal parameters: firstDecimal and secondDecimal. Within the new function, return the value of the firstDecimal parameter added to the secondDecimal parameter. Finally, create a new function called MultiplyDecimal that returns a decimal with two decimal parameters, firstDecimal and secondDecimal. Within the new function, now return the value of the firstDecimal parameter multiplied by the secondDecimal parameter. Your resulting code should look like this:
Public Function AddIntegers(ByVal firstInteger As Integer,
ByVal secondInteger As Integer) As Integer
Return firstInteger + secondInteger
End Function
Public Function MultiplyIntegers(ByVal firstInteger As Integer,
ByVal secondInteger As Integer) As Integer
Return firstInteger * secondInteger
End Function
Public Function AddDecimal(ByVal firstDecimal As Decimal,
ByVal secondDecimal As Decimal) As Decimal
Return firstDecimal + secondDecimal
End Function

C H A P T E R 6 ■ N A M E S PA C E S |
91 |
Public Function MultiplyDecimal(ByVal firstDecimal As Decimal,
ByVal secondDecimal As Decimal) As Decimal
Return firstDecimal * secondDecimal
End Function
Next open the UserAuth.vb file. Create a new public function called IsUserAdmin, which will return a Boolean and accept a string parameter called UserName. Within this function, add code to determine if the username parameter is equal to “Mickey,” (or some other character that might be your favorite) and if it is, return true; otherwise, return false. The point is that eventually we will pass in your true user name and this function will return false. Create a new public function called IsUserValid that returns a Boolean and accepts a string parameter called UserName. Within this function add code to determine whether the username parameter is equal to “Mickey” or your favorite character (the same as the IsUserAdmin function) and if it is, return true; otherwise, return false. The resulting code should look like:
Public Function IsUserAdmin(ByVal UserName As String) As Boolean
If UserName = "Mickey" Then
Return True
Else
Return False
End If
End Function
Public Function IsUserValid(ByVal UserName As String) As Boolean
If UserName = "Mickey" Then
Return True
Else
Return False
End If
End Function
Now that both classes have methods, build the class library into an assembly by choosing Build Chapter6 from the Build menu. Close the class library project and then create a new web site called Chapter6.
Drag a label control onto Default.aspx, and then set the text property to First and the ID property to lblfirst. Drag a second label onto Default.aspx and set the text property to Second and the ID property to lblsecond. Finally, drag a third label onto Default.aspx and set the text property to Answer and the ID property to lblAnswer.
Drag three text box controls onto Default.aspx. The first text box has an ID property of txtfirst, the second’s ID property is txtSecond, and the third’s ID property is txtAnswer. Add a button control with an ID property of btnAddIntegers, a text property of Add Integers, and then a button control with an ID property of btnMultiplyIntegers with a text property of Multiply Integers. Next, add a button control with an ID property of btnAddDecimals,
92 C H A P T E R 6 ■ N A M E S PA C E S
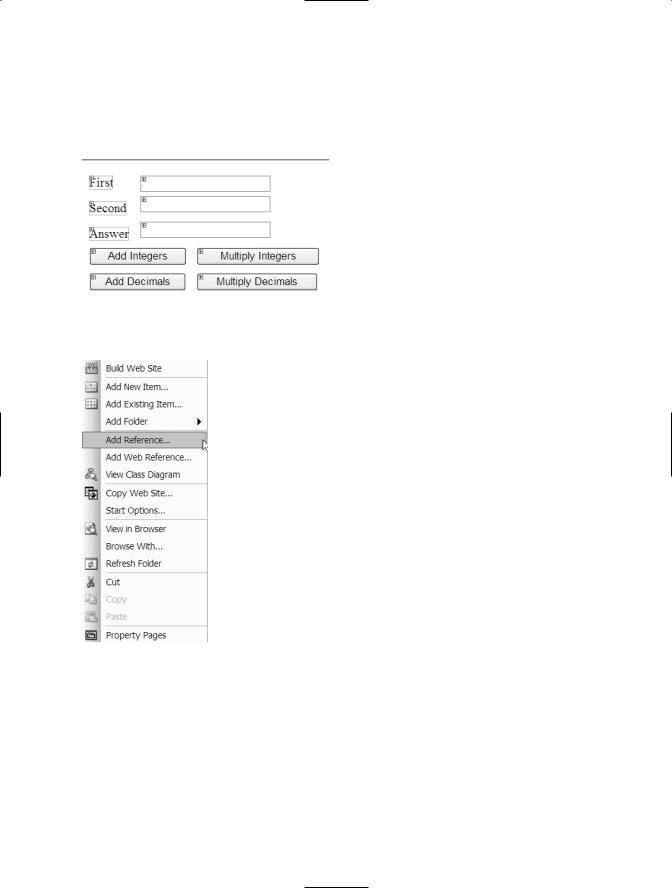
a text property of Add Decimals, and then a button control with an ID property of btnMultiplyDecimals with a text property of Multiply Decimals. The resulting Default.aspx should look like Figure 6-9.
Figure 6-9. Completed Default.aspx form
Figure 6-10. Adding a Reference
To use a namespace or class library, you need to reference it. To reference a namespace, you need to reference the assembly that it belongs to, in this case Chapter6.dll. Right-click the project URL at the top of the Solution Explorer (probably http://localhost/Chapter6/) and choose Add Reference, as shown in Figure 6-10.
The Add Reference window will now appear. Click the Browse tab to find the .dll file that you want to reference. Navigate the Look In drop-down
list to the folder where the Chapter6 class library project was created (probably c:\chapter6). Open the bin folder and then the Debug folder. Chapter6.dll should be in this folder—select it and then click OK. Now there is a relationship established between the Chapter6 ASP.NET application and the chapter6.dll class library.
Right-click the Default.aspx page and choose View Code. This will show you the Default.aspx.vb file.
To show that namespaces are a good way to organize classes and allow you to create two classes with the same name within different namespaces, try declaring a private variable with
Private clsMath as Math
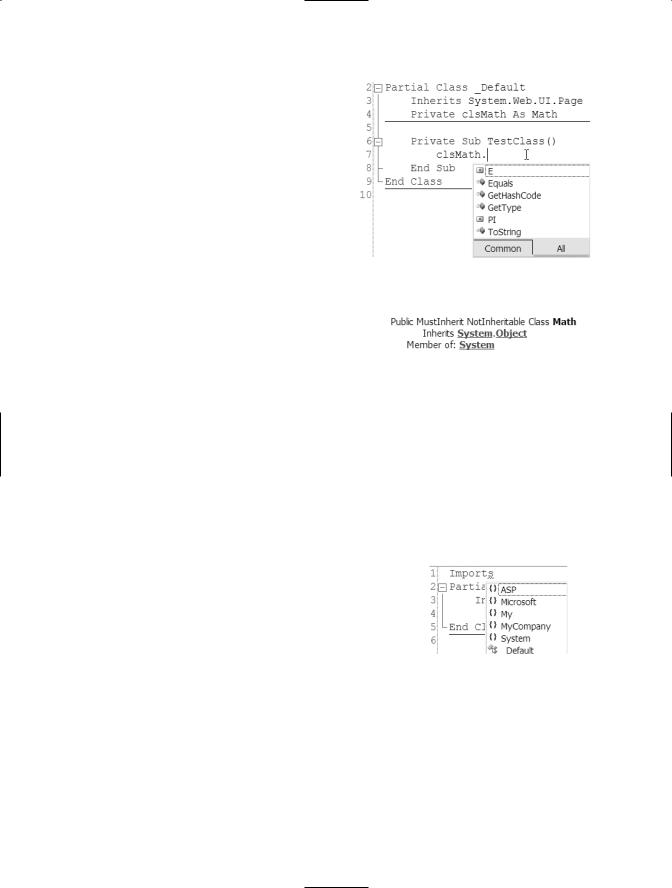
Remember, Math is the name of one of the classes within the MyCompany namespace. Next, create a private sub called TestClass. Within that private sub, type clsMath followed by a period. IntelliSense will now show you the items that make up the Math class, as shown in Figure 6-11.
93
94 C H A P T E R 6 ■ N A M E S PA C E S
Now you’ve seen that the namespace can be used as an organizational tool to allow you to create classes with the same name as classes that already exist within other namespaces. Right-click on the Math part of the variable declaration (Private clsMath as Math) and choose Go To Definition. This brings up the Object Browser again, and shows the information for the Math class as shown in Figure 6-15.
Since you can see that the correct class is referenced from the correct namespace, close the Object Browser if it is still open, and delete the TestClass sub. It is not needed.
Now, it’s time for you to see that the classes within the namespace can be used like any other class. From the left drop-down list, on top of the code window, choose btnAddIntegers. From the right drop-down list on the top of the code window, choose Click. This will create a sub called btnAddIntegers_Click, which will
handle the click event of the button btnAddIntegers. When the add integers button is clicked, the two integers in the text boxes should be passed to the AddIntegers method of the Math class and the result should be placed in the txtAnswer text box. Use the following code to accomplish this:
clsMath = New Math
txtAnswer.Text = clsMath.AddIntegers(txtfirst.Text, txtsecond.Text)
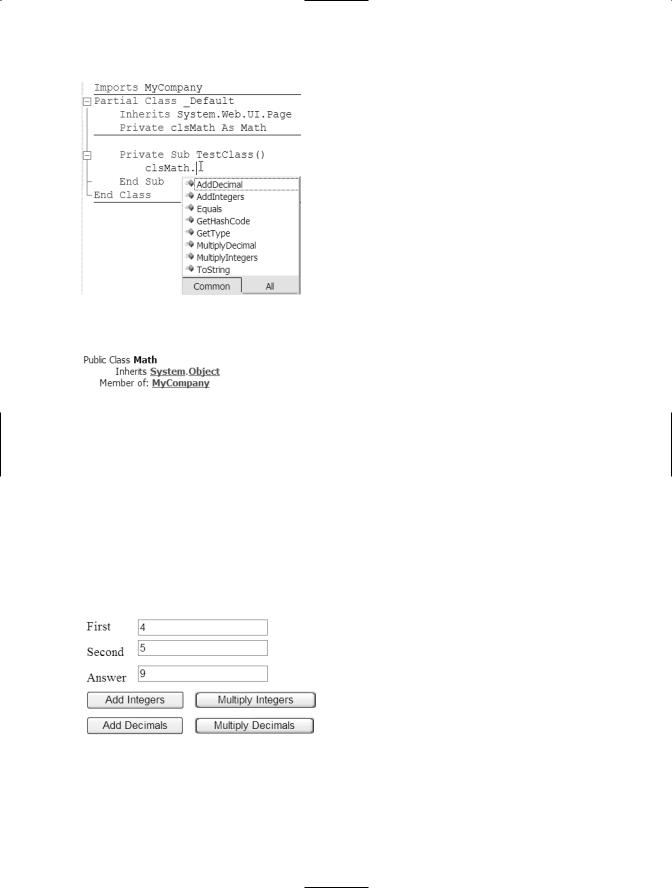
To test this out, start the web application by choosing Start without Debugging from the Debug menu. Type 4 for First, type 5 for Second, and then click the Add Integers button. The answer 9 should appear in the answer text box, as shown in Figure 6-16.
You can add the same code to Figure 6-16. Results the other click events for your other
buttons. The resulting code within Default.aspx.vb would look like this:

C H A P T E R 6 ■ N A M E S PA C E S |
95 |
Protected Sub btnAddIntegers_Click(ByVal sender As Object, ByVal e As System.EventArgs) Handles btnAddIntegers.Click clsMath = New Math
txtAnswer.Text = clsMath.AddIntegers(txtfirst.Text, txtsecond.Text) End Sub
Protected Sub btnAddDecimals_Click(ByVal sender As Object, ByVal e As System.EventArgs) Handles btnAddDecimals.Click clsMath = New Math
txtAnswer.Text = clsMath.AddDecimal(txtfirst.Text, txtsecond.Text) End Sub
Protected Sub btnMultiplyDecimals_Click(ByVal sender As Object, ByVal e As System.EventArgs) Handles btnMultiplyDecimals.Click clsMath = New Math
txtAnswer.Text = clsMath.MultiplyDecimal(txtfirst.Text, txtsecond.Text) End Sub
Protected Sub btnMultiplyIntegers_Click(ByVal sender As Object, ByVal e As System.EventArgs) Handles btnMultiplyIntegers.Click clsMath = New Math
txtAnswer.Text = clsMath.AddIntegers(txtfirst.Text, txtsecond.Text) End Sub
As mentioned before, a particular namespace can have another namespace within it, called a nested namespace. To create a nested namespace, open the Chapter6 class library project again. The class library will use MyCompany as a namespace. Now you are going to add a new namespace. To make this a little more meaningful to you, change the name of the Math.vb class to Integers.vb. You’ll see that this will also change the name of the class. Next, add a new class called Decimals. Move the two functions (AddDecimals and MultiplyDecimals) to the Decimals class. Now you have two classes, one called Integers and one called Decimals. At the top of each of the two classes, type Namespace Math. At the end of each class file, type End Namespace. This will create a namespace called Math with two classes: Integers and Decimals. The Math namespace is already within the MyCompany namespace. The resulting code for the Integers class is
Namespace Math
Public Class Integers
Public Function AddIntegers(ByVal firstInteger As Integer,
ByVal secondInteger As Integer) As Integer
Return firstInteger + secondInteger
End Function

96 C H A P T E R 6 ■ N A M E S PA C E S
Public Function MultiplyIntegers(ByVal firstInteger As Integer,
ByVal secondInteger As Integer) As Integer
Return firstInteger * secondInteger
End Function
End Class
End Namespace
The resulting code for the Decimals class is
Namespace Math
Public Class Decimals
Public Function AddDecimal(ByVal firstDecimal As Decimal,
ByVal secondDecimal As Decimal) As Decimal
Return firstDecimal + secondDecimal
End Function
Public Function MultiplyDecimal(ByVal firstDecimal As Decimal,
ByVal secondDecimal As Decimal) As Decimal
Return firstDecimal * secondDecimal
End Function
End Class
End Namespace
One useful way to view your namespace and the classes within it is to use the Class View. You can access this by choosing Class View from the View menu at the top of VS2005. The Class View will show both the namespace and the classes, as shown in Figure 6-17.
Next, build the Chapter6 class library again. You’ll need to go back to the Chapter6 web site project, delete the references and then add them again. To delete the references, go to the Solution Explorer and expand the bin folder. Delete the three files that are there. Then, add the reference again, as discussed earlier in the chapter. After you’ve added the reference again, you will notice that the code on your Default.aspx.vb page looks different. The Math class declaration will have a blue
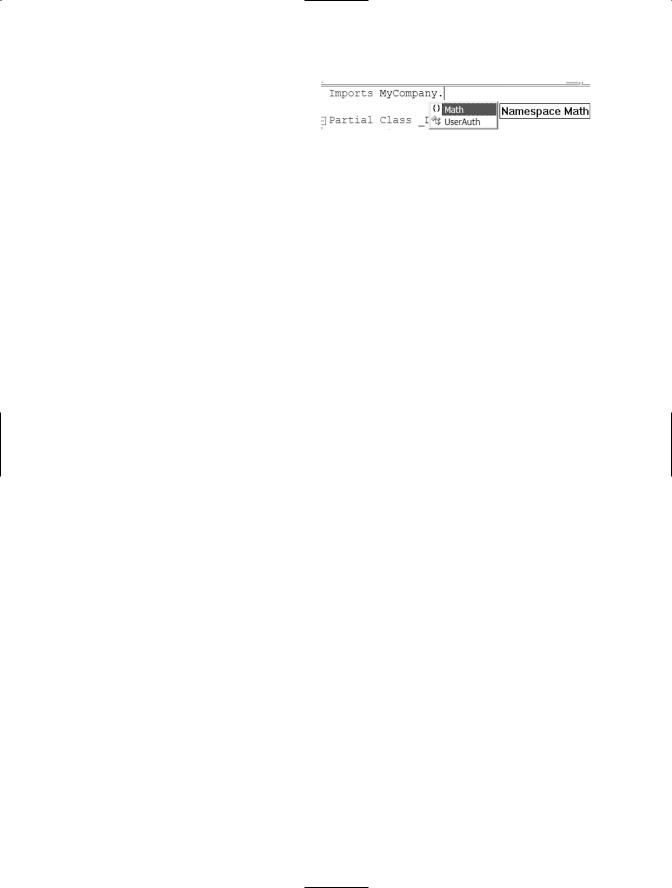
squiggle line under it. If you mouse over that blue line, you will get a pop-up message that says Type Expected. This is because MyCompany.Math is now a namespace instead of a class.
To correct this problem, find the Imports statement at the top of the code page. Type another period after Imports MyCompany. You will now see a Math namespace, as shown in Figure 6-18.
C H A P T E R 6 ■ N A M E S PA C E S |
97 |
To correct the remaining issues with Default.aspx.vb, you will need to remove the clsMath declaration and replace it with two private variable declarations. The first, called clsIntegers, will be of the type Inte-
gers; and the second, called clsDecimals, will be of the type Decimals. Within each sub, make the necessary changes so that the manipulation of integer values is done by the Integers class and the manipulation of the decimal values is done by the Decimals class. The resulting code should look like this:
Private clsIntegers As Integers
Private clsDecimals As Decimals
Protected Sub btnAddIntegers_Click(ByVal sender As Object, ByVal e As System.EventArgs) Handles btnAddIntegers.Click clsIntegers = New Integers
txtAnswer.Text = clsIntegers.AddIntegers(txtfirst.Text, txtsecond.Text) End Sub
Protected Sub btnAddDecimals_Click(ByVal sender As Object, ByVal e As System.EventArgs) Handles btnAddDecimals.Click clsDecimals = New Decimals
txtAnswer.Text = clsDecimals.AddDecimal(txtfirst.Text, txtsecond.Text) End Sub
Protected Sub btnMultiplyDecimals_Click(ByVal sender As Object, ByVal e As System.EventArgs) Handles btnMultiplyDecimals.Click clsDecimals = New Decimals
txtAnswer.Text = clsDecimals.MultiplyDecimal(txtfirst.Text, txtsecond.Text) End Sub
Protected Sub btnMultiplyIntegers_Click(ByVal sender As Object, ByVal e As System.EventArgs) Handles btnMultiplyIntegers.Click clsIntegers = New Integers
txtAnswer.Text = clsIntegers.AddIntegers(txtfirst.Text, txtsecond.Text) End Sub
This example showed how nested namespaces work and how they can be created.
98 C H A P T E R 6 ■ N A M E S PA C E S
The My Namespace
The My namespace is a new namespace for VB 2005. You can use My within code to access several useful classes and features without importing or accessing the specific namespaces. These useful classes are application, computer, resources, user, and web services. The application class allows you to access some information about the application. The computer class lets you access information about the computer the application is being run on. The resources class allows you to set the culture of the application. User class allows you to get the identity of the user, if you are using Windows NT logins for your application. Finally, the web services class allows you to access and use web services. Not all of the classes are available for all of the different types of applications. For example, the application class and forms class are only available for Windows-based applications.
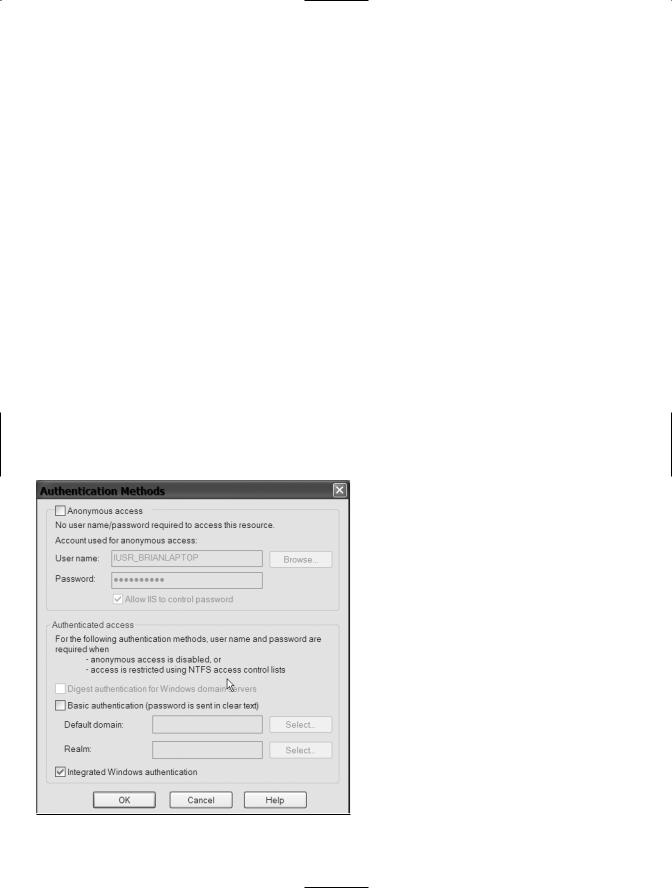
A good use of the My namespace within an ASP.NET application is to use the My namespace to get the login name (including the domain) of the currently logged-in user. This information can be very useful within your application. The first thing you need to do is to set up the virtual directory to use Windows Domain Authentication. If you have IIS installed, you can do this by opening the Internet Information Services administration tool from within the Administration Tools area of the control panel. First, right-click the virtual directory for the web site that you are working on (in this case Chapter6) and choose Properties. When the Properties window appears, click the Directory Security tab. On the Directory Security tab, click the Edit button at the top. If the Anonymous check-
box is checked, uncheck and verify the Integrated Windows authentication checkbox is checked, as shown in Figure 6-19.
If the anonymous access checkbox is checked, the name of the domain user cannot be found even if the Integrated Windows Authentication is checked. If Anonymous access is left checked, all users are granted
access regardless of their Windows credentials. After verifying that Integrated Windows authentication is the only box checked, click the OK button.
Figure 6-19. Authentication methods