

Beginning Object-Oriented ASP.NET 2.0 with VB.NET From Novice to Professional
.pdfC H A P T E R 1 ■ A N I N T R O D U C T I O N TO . N E T A N D V I S U A L S T U D I O 2 0 0 5 |
9 |
Type the name of the web site, as you see in Figure 1-5. This is the name that will be used to access the web site within the web server. In this example, localhost would be the web server name. The reason localhost is the web server name is that it is the web server running on the development computer. If the web site was on another server or was a domain name like Apress.com, the address would be http://www.apress.com/ followed by the web site name. In this example, I am going to use localhost as the address, and
I’ll name the web site MyFirstWebApp, so the final URL will be http://localhost/ MyFirstWebApp.
Figure 1-5. Setting the web site name
After adding the name, click Open. You will be back to the New Web Site screen with the URL of the application in the location box.
Click OK to create the web site. The first default page will be created.
Creating a File System Web Site
To create a file system web site, which can be used either without IIS installed or to hold the web site files in a directory other than the default for IIS, click the Browse button on the New Web Site screen. Then, click the File System button at the top left, as shown in Figure 1-6.
10 C H A P T E R 1 ■ A N I N T R O D U C T I O N TO . N E T A N D V I S U A L S T U D I O 2 0 0 5
Figure 1-6. Choosing File System as the Web Site Location
Choose the folder within the file system that you want to store the files in, and then click Open. Finally, back on the New Web Site screen, click OK. This will create the new project and the default first page.
Project Files
After creating a new project, you will notice there is a file within the Solution Explorer called Default.aspx, with a plus sign (+) beside it. Click the plus sign to expand the
Default.aspx.vb file. You can see an example of this in Figure 1-7.
The App_Data folder shown in Figure 1-7 is automatically created when a new web site project is created. This folder can hold Microsoft Access database files, SQL Server Express data files, or XML files.
The difference between Default.aspx and Default.aspx.vb is that the Default.aspx file is used for the presentation of your web site—this could be called the user interface (UI). The Default.aspx.vb file contains all of

C H A P T E R 1 ■ A N I N T R O D U C T I O N TO . N E T A N D V I S U A L S T U D I O 2 0 0 5 |
11 |
the actual VB source code that you write for the application, and is called the code file. In traditional Active Server Pages, both the presentation code (HTML tags) and the programming logic (usually VBScript) were in the same ASP file, which made for a rather awkward working environment. Attempting to debug an ASP page with both user interface code (HTML) and logic code (VBScript) could become very difficult to follow. Using the new method, two different developers could potentially work on the same page at the same time—one working on the presentation layer and one in the code file writing the logic that makes the page work. Within VS2005, code files are only defined as partial classes.
A partial class is the same structure as a normal class; however, with the keyword partial, VS2005 knows to combine this class with any other partial classes with the same name to create one class when the web site is compiled. This means that multiple developers could be working on the same code file as a partial class. When the whole web site is compiled, the partial classes will all be combined into one.
Working with Virtual Directories
If you have IIS installed you can make a virtual directory from the file system folder that you just created with the IIS Administration Tool. There are two advantages to making a virtual directory instead of just having the folder with files in it. The first is that the virtual directory can be accessed more easily. You can type the web site name that points to the virtual directory (i.e., http://localhost/MyFirstWeApp) instead of having to type the URL for a specific web page. The second advantage is that the virtual directory allows you to have the contents of your web site in a different physical location. A virtual directory creates a web site within the default web site and can be accessed using a URL—however, the files that make up the web site are outside of the default location. By default, when IIS is installed, a folder called inetpub is created on the C drive. Typically web site folders are created as subfolders to the wwwroot folder within the inetpub folder. If you are creating a local IIS web site with VS2005, the actual files will be located within the following directory: c:\inetpub\wwwroot\web_site_name. However, with a virtual directory you could have the folder containing the content on another drive. This helps to move more files off the root drive.
To create a virtual directory, open the control panel, then click Administrative Tools (click Performance and Maintenance first if you are using Windows XP). Once the Administrative Tools are open, select Internet Information Services. If you do not see Internet Information Services within the Administrative Tools, IIS is not installed and you cannot create a virtual directory.
After opening Internet Information Services, find your computer’s name, choose Web Sites, and then expand the Default Web Site.
Create a new Virtual Directory by first right-clicking Default Web Site and then choosing New Virtual Directory, as shown in Figure 1-8.

12 C H A P T E R 1 ■ A N I N T R O D U C T I O N TO . N E T A N D V I S U A L S T U D I O 2 0 0 5
Figure 1-8. Creating a new Virtual Directory
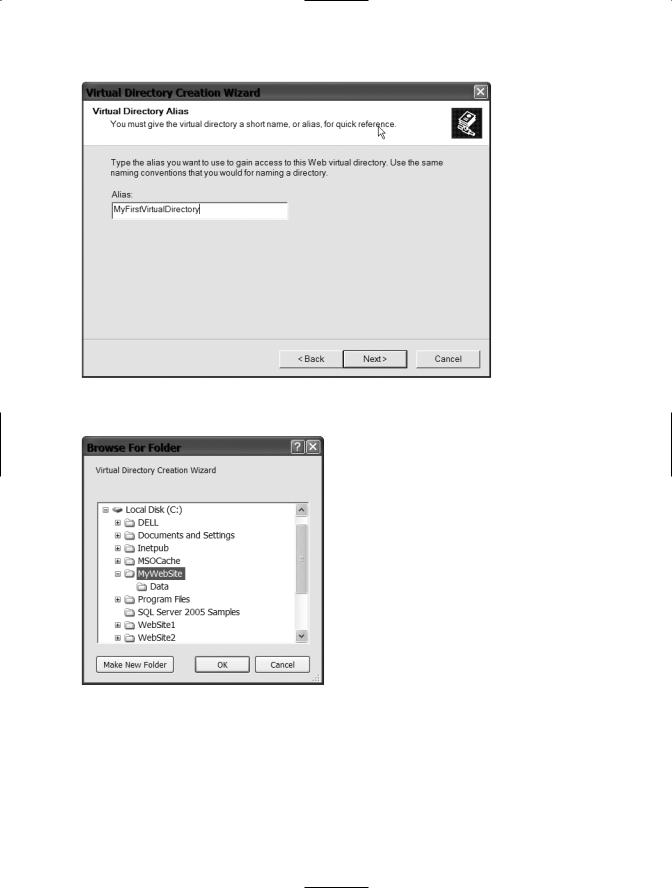
Click Next on the opening splash window, then type the alias that you want to use. The alias is what the web site will be called. In the previous example, when you created a local IIS web site, the web site was called MyFirstWebApp. That would be the alias of the virtual directory. Enter MyFirstVirtualDirectory as the alias, as shown in Figure 1-9, then click Next.
When you’re asked for the directory, click the Browse button and browse to the folder that was created when the File System web site was created earlier, as shown in Figure 1-10.
Click OK on the Browse For Folder pop-up window. Then, click Next on the Directory window. Accept the defaults for the Access Permissions window and then click Next. This will allow read access as well as execution of ASP and ASPX pages. This is enough security for the web site.
C H A P T E R 1 ■ A N I N T R O D U C T I O N TO . N E T A N D V I S U A L S T U D I O 2 0 0 5 |
13 |
Figure 1-9. Entering the Virtual Directory alias
Figure 1-10. Choosing the folder containing the web site pages
14 C H A P T E R 1 ■ A N I N T R O D U C T I O N TO . N E T A N D V I S U A L S T U D I O 2 0 0 5
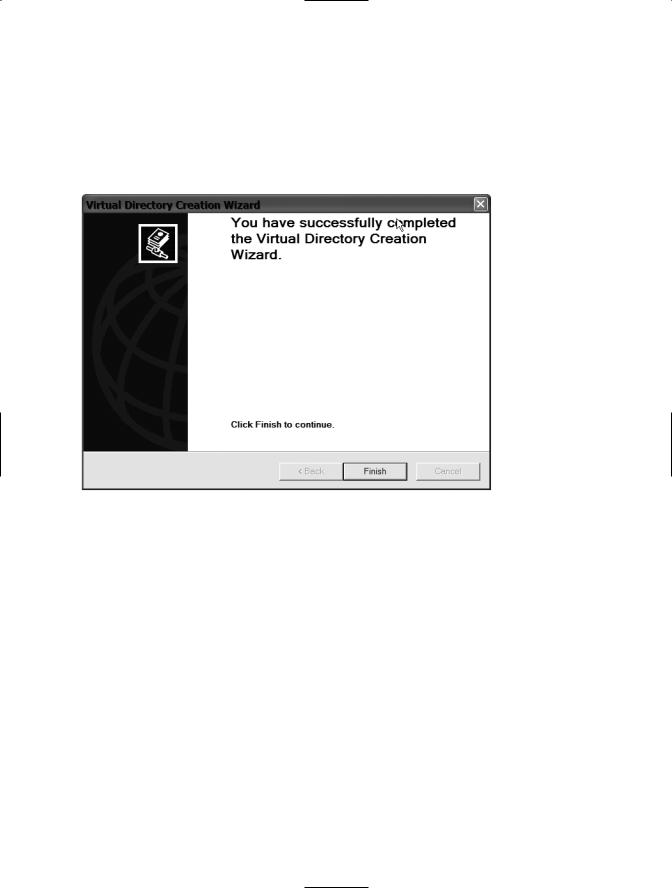
This security setup will allow users to read from the web site and execute the code on an ASP or ASPX page. However, the user will not be able to write to the folder and therefore will not be able to send malicious code via file to the web site. Finally, you should see a window, as shown in Figure 1-11, saying that the Virtual Directory was created successfully. Click Finish when this window appears.
Figure 1-11. The Virtual Directory has been created.
If the web site you are creating is for internal use only and all your users are part of the same domain, you can use Windows Authentication to perform the authentication for the web site. By default, both Windows Authentication (called Integrated Windows Authentication) and Anonymous Access are enabled.
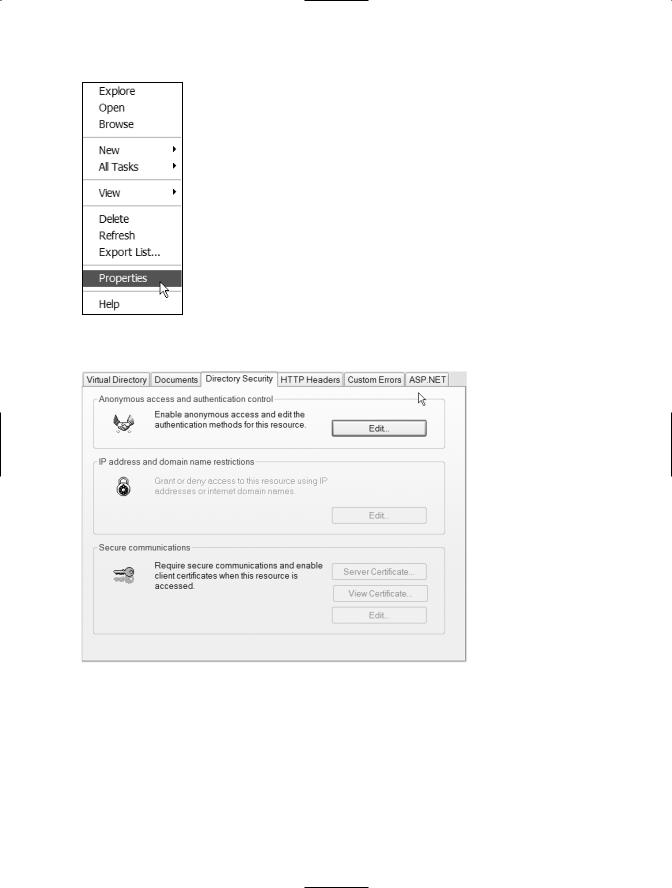
To view the Directory Security for the web site, right-click the Virtual Directory you just created and choose Properties. This is shown in Figure 1-12.
Click the Directory Security tab (shown in Figure 1-13) at the top of the Properties window.
C H A P T E R 1 ■ A N I N T R O D U C T I O N TO . N E T A N D V I S U A L S T U D I O 2 0 0 5 |
15 |
Figure 1-12. Virtual Directory properties
Figure 1-13. Choosing the Directory Security tab

16 C H A P T E R 1 ■ A N I N T R O D U C T I O N TO . N E T A N D V I S U A L S T U D I O 2 0 0 5
Within the Directory Security tab, click the Edit button. The Authentication Methods screen, shown in Figure 1-14, will appear.
Figure 1-14. Authentication methods
Allowing both Integrated Windows Authentication and Anonymous Access permits users to log on to the web site without being part of the domain. If your application is an intranet application, it is suggested that you remove the Anonymous Access. However, if this is an external web site, and username credentials will be handled by the web site, then unselect Integrated Windows Authentication. If the web site is internal and you are attempting to determine the currently logged on user, then you can only select Integrated Windows Authentication. If you attempt to determine the currently logged on user and the web site allows Anonymous Access, your code will not be able to determine the logged on user.
Opening an Existing Web Site
There are two ways to open an existing web site from the File menu. If this is a recent web site (the last four or five projects you worked on), you can click Recent Projects to see a list. The Recent Projects menu option is shown in Figure 1-15.
The other option is to choose Open Web Site from the File menu, as shown in Figure 1-16.

C H A P T E R 1 ■ A N I N T R O D U C T I O N TO . N E T A N D V I S U A L S T U D I O 2 0 0 5 |
17 |
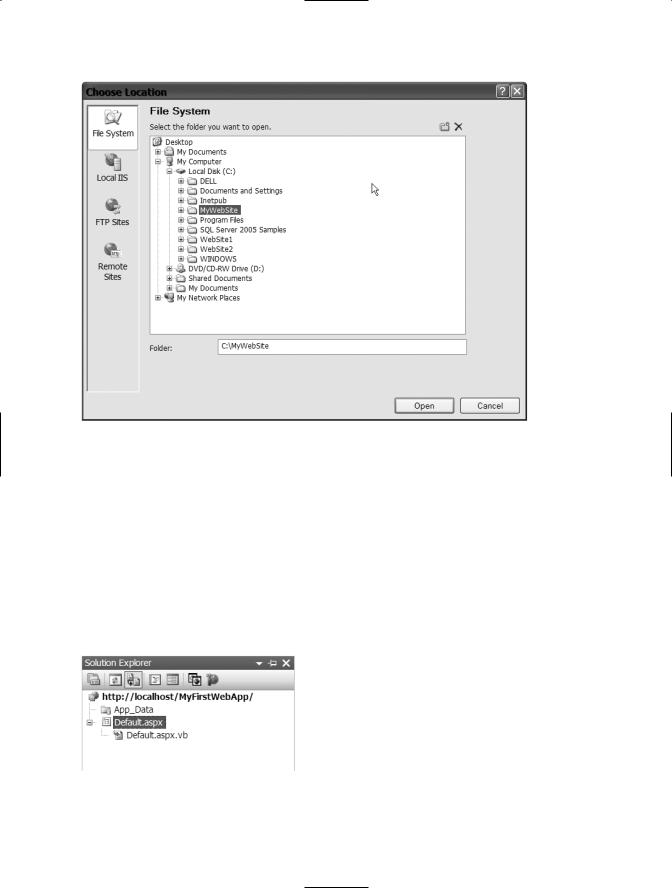
Make a choice from the options on the left, depending on the type of web site that was created (File System, Local IIS). Then choose the folder the project file is in and click Open, as shown in Figure 1-17.
Figure 1-15. Recent Projects |
Figure 1-16. Open Web Site option from the File menu |
from the File menu |
|
Figure 1-17. Choosing the folder with the project to open

18 C H A P T E R 1 ■ A N I N T R O D U C T I O N TO . N E T A N D V I S U A L S T U D I O 2 0 0 5
Building Web Sites
After opening a web site, the source code file will most likely be showing. Enter My First Web App between the HTML tags that say <title>. The source code file with the correct title is shown in Figure 1-18.
Figure 1-18. Visual Web Designer
■Note If you do not see a source code page similar to Figure 1-18, then click the View menu and select Solution Explorer. The Solution Explorer will appear. Double-click the file named Default.aspx, which will open a page in the middle section. Then click the source button at the bottom of the middle section to see the HTML source as in Figure 1-18.
The source code that is showing is HTML. If you click Design at the bottom of the window, this will take you to the Designer tool that you will use later to add elements to the user interface, such as text boxes. From the menu at the top, choose Build Build
Web Site, as shown in Figure 1-19.
Figure 1-19. Build Web Site menu