

Beginning Object-Oriented ASP.NET 2.0 with VB.NET From Novice to Professional
.pdfC H A P T E R 9 ■ A S P. N E T C O N T R O L S |
159 |
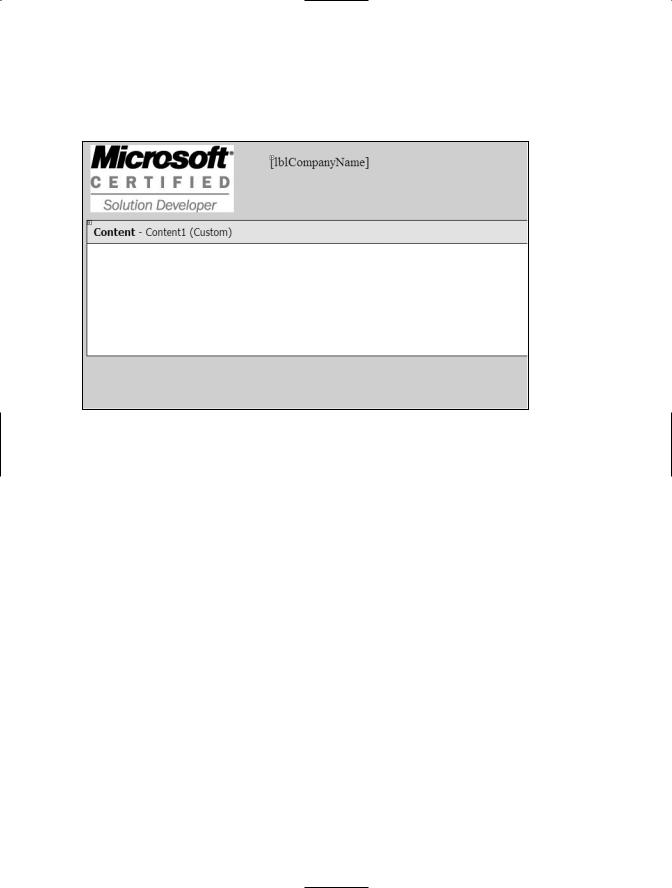
the image is within the project structure, place your cursor at the top of the master page and press enter a couple of times. This will move the contentplaceholder control down the page. The contentplaceholder is a control that will hold the content that you want to create for the child pages. After the contentplaceholder is moved, click and drag the image file from the Solution Explorer to the top left corner of the master page. Add a label with an ID of lblCompanyName and do not add a text property. The results should look like Figure 9-12.
Figure 9-12. Design of master page, HD.master
The master page is now complete. The problem is that you can’t associate a master page with an existing page. So, each of the pages that you’ve already created will need to be re-created to be used with the master page. For now though, you’re only going to create new pages to work alongside your master page.
Next add a new web form called ViewTickets to the web site. When the Add New Item window appears, check the box Select master page, as shown in Figure 9-13.
When you click the Add button, the Select a Master Page window will appear. All master pages within the web site will also appear. Select the master page you want associated with this web form (in this case HD.master), and click OK, as shown in Figure 9-14.

160 C H A P T E R 9 ■ A S P. N E T C O N T R O L S
Figure 9-13. Check Select master page
Figure 9-14. Select the master page to use
C H A P T E R 9 ■ A S P. N E T C O N T R O L S |
161 |
You’ll notice the layout of the master page can be seen when the new page is opened, but that the master page content is grayed out, as shown in Figure 9-15.
Figure 9-15. ViewTicket.aspx with grayed out master page content
Next, drag and drop a label from the toolbox onto the ViewTicket page. Set the ID property to lblTicketID and the text property to Ticket ID. Drag and drop a text box from the toolbox onto the ViewTicket page and then set the ID property to txtTicketID. You’ll use these properties to show how the content page works.
You can also make sure that all the pages that use the master page get the same code, by adding this code to the master page. This is a useful strategy for doing something like populating the company name label on each page at once, rather than adding the code to do this on each individual page.
To do this, open the HD.master.vb file. Choose Page Events from the top left dropdown list and then choose load from the top right drop-down list. This will create the page load sub.
Within the page load sub add
lblCompanyName.Text = Application("CompanyName").ToString
This code will be executed each time a page that is associated with the master page is loaded. To see this in action, click the ViewTicket.aspx page again and choose Start without debugging from the Debug menu. The resulting page will look similar to Figure 9-16.

162 C H A P T E R 9 ■ A S P. N E T C O N T R O L S
Figure 9-16. ViewTicket.aspx file showing content and master file
Notice that both the master page content and the ViewTicket.aspx page content are present and that the name of the company was loaded when the master page was loaded.
Expanding the Help Desk Application
In this section I’ll take the existing Help Desk application and use some of the information I’ve presented in this chapter to add more to the web site. This will include setting the tab order for fields, making the problem description field a multiple line text box, changing fonts, aligning controls, and using drop-down lists.
Your first task is to order the tabs of the controls on the AddTicket.aspx page. The reason you should order the controlsy is so that the user entering information into your form can tab from one control to the next. The flow of your controls should be logical and follow the most common order—for example, your State field should follow your City field, rather than the other way around. Only controls that require user interaction such as buttons or text boxes should have a value in their tab index property.
To do this, open AddTicket.aspx and click the User Login control. Next, view the properties page for the control. Then, find the tab index property and enter 1. You should always start the tab order with 1. Click on the FirstName text box and change the tab index to 2. Repeat this for all of the text boxes and then do the same for the buttons. The Save button should have a tab index before the Cancel button.
■Tip When working with the properties of multiple controls you might find it useful to pin the Properties window open. To do this, click the icon that looks like a pin at the top of the Properties window (it will say Auto Hide when you mouse over it). Clicking the pin should point it downwards instead of sideways. This will keep the Properties window visible, rather than hidden, when you’re not working with it.
When you have added the tab index to each control, it’s time to test your work! Start without debugging. Then, click the mouse into the first text box and hit the Tab key.

C H A P T E R 9 ■ A S P. N E T C O N T R O L S |
163 |
When the Tab key is hit, the cursor should move to the next text box. Continue doing this until you reach the Cancel button. If hitting the tab key did result in the correct text box getting the cursor, verify the tab index property of the controls in question.
Your next task is to make a problem description field with multiple lines. The default behavior of a text box control is to only accept one line of text, which means under normal circumstances you can’t hit the Enter key and that you have limited space for typing.
For example, while you have the AddTicket.aspx file open, type something into the Problem Description text box. Continue typing until you reach the end of the text box. You will notice that what you have already typed will scroll to the left, and that this will continue to happen as you continue to type.
To fix this problem, you can set the text box control’s Textmode property set to Multiline. To do this, close the web site and open the AddTicket.aspx page. First, expand the Problem Description text box so that it’s wider. Next, view the properties for the Problem Description text box and find the Textmode property. Click the drop-down list and choose Multiline. This will allow the text box to accept multiple lines of text and will also allow the user to hit Enter. This will also allow your user to view all of the content at once, until the content is below the bottom of the text box.
When there is more content than can be viewed within the text box, scroll bars will automatically appear. To see this happen, start without debugging and enter a large amount of text into the Problem Description text box, as shown in Figure 9-17.
Figure 9-17. Multiline text box with scroll bars
Notice that not only are the scroll bars present, but also that there are multiple lines of text. You can’t see from Figure 9-17, but there is a carriage return (made using the Enter key) at the end of each line. This can’t be done in a single line text box.
Your next task is to change the font of all of the label controls. First, click each label while holding down the Control key. This will allow you to select all of the labels at one time. Next view the Properties window and find the Font property under the appearance category. Click the + sign next to the font property to expand the set. From there, click the drop-down list next to the Name property. This is the Font Name property. Choose Arial

164 C H A P T E R 9 ■ A S P. N E T C O N T R O L S
from the list. Next, find the Size property within the Font set and use the drop-down menu to choose Small. The resulting properties window is shown in Figure 9-18.
While you have all of the labels selected, you can also choose to align all of the labels. To do this, choose the Format menu and Align, and then Lefts, as shown in Figure 9-19.
Figure 9-18. Font properties |
Figure 9-19. Align Lefts |
This technique can be used to align any set of controls. As you can see from the menu, you can align the lefts, centers, rights, tops, middles, and bottoms of a set of controls. All you need to do is just select the controls you want to align by holding down the Control button and clicking on the controls that you want to include in the grouping.
Your final task is to change the Location text box to a drop-down list. A drop-down list can be loaded dynamically from a database, manually added within the Properties window, or item by item via added code. Again, since ADO.NET is outside the scope of this book, you will only be adding items from the Properties window and then with code.
The first step is to remove the Location text box and then drag and drop a drop-down list control from the toolbox. When you drag the drop-down list control onto the form, you’ll see a small box with two tasks listed, as shown in Figure 9-20.
You can click on the first task, if you are using ADO.NET, to determine where the data for the list should come from. You can choose the second task to add items to the list manually through the Property window. The check box at the end of the list determines whether you want the drop-down list to force the page to refresh (postback) when you select an item from the drop-down list. For the Help Desk
C H A P T E R 9 ■ A S P. N E T C O N T R O L S |
165 |
application this isn’t necessary. However, you could use this to post back the results of the drop-down list if that specific information is needed for another control on the form. For example, if one drop-down list depended on another, you could enable the Autopostback control for the first drop-down list and then populate the second drop-down list on page load, if there was a postback.
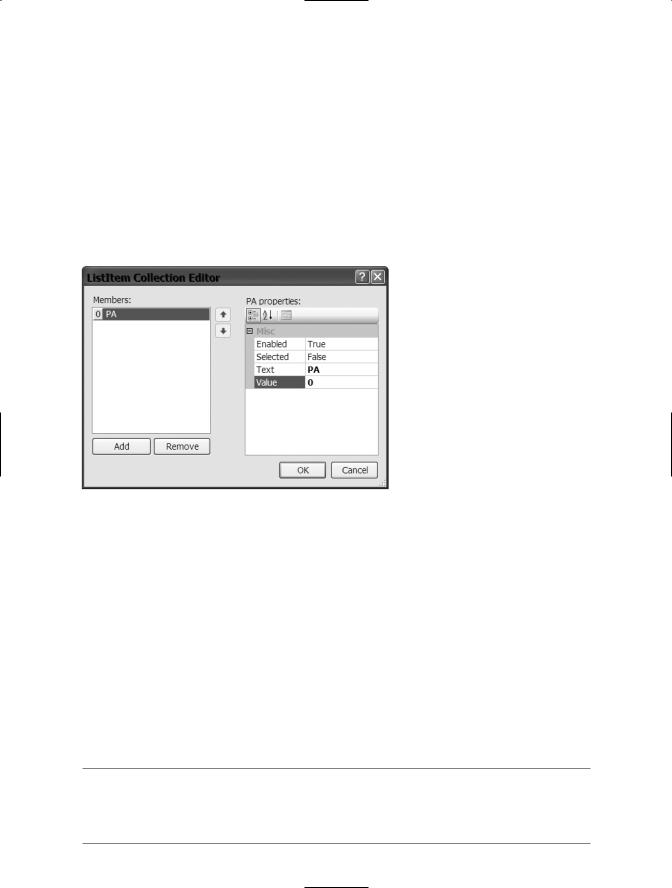
Click the Edit Items task to manually add the items to the drop-down list. When the ListItem Collection Editor window appears click the Add button. This will add an item to the list and allow you to manipulate some of the properties of the list item as shown in Figure 9-21.
Figure 9-21. ListItem Collection Editor after Add
The first property on the list determines whether the list item is enabled or not (grayed out). The second property determines whether the item is selected when the list is first shown. Only one item can have the Selected property set to True.
The third and fourth properties are the most important. The third property is the text to be displayed, while the fourth property is the value that will be provided when the item is selected. Enter PA as the text and 0 (zero) as the value. Next, add another list item with a text of NY and a value of 1. Finally, add a third list item with a text of NJ and a value of 2.
You’ll also notice a Remove button. You can use this button to remove an existing list item. Just click on the list item you want to remove, and then click the Remove button. When you have added all three items, click OK and then move the drop-down list next to the Location label.
■Note The Text and Value properties of a list item are represented as strings. Either one can contain alphanumeric values. If you wanted to, you could use PA as both the text and the value. In this case, the class Ticket is expected an integer value, so 0 (zero) was assigned to the value.
166 C H A P T E R 9 ■ A S P. N E T C O N T R O L S
To test this out, first delete the Rangevalidator control that is associated with the Location text box. Since the text box is no longer on the page, the validation control will cause an error when building the web site. Also, the drop-down list guarantees that the values for the location are valid. Since the text box doesn’t exist anymore, the value from the text box control can’t be determined. This means you also need to change the code that assigns the value from the Location text box control to the Location Public property within the Ticket class. To do this, double-click the Save button, which will bring you to the Button save click event. You will now see a line of code with a squiggly line under it, which will be the line that assigns the text property of the Location text box to the Location Public property of the Ticket class:
clsTicket.LocationID = txtLocation.Text.Trim()
For now, place a single quote before this line, which will comment the line out. (All of the characters will be green in a commented-out line.) A commented line of code will not be executed when the other code is executed. You will also find a reference to txtlocation in the ClearValues sub. Place a single quote before that line to comment it out also.
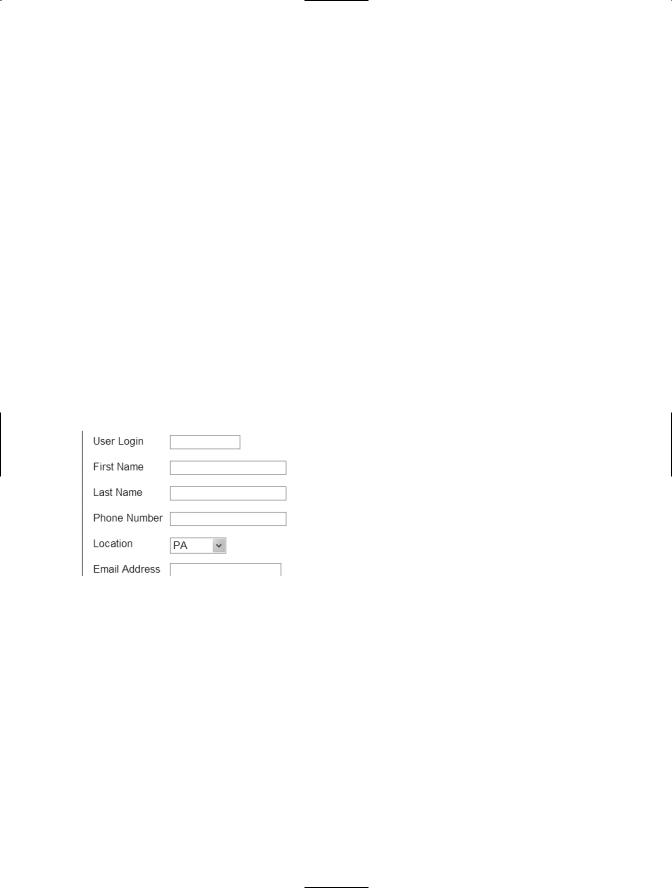
Next, choose Start without debugging from the Debug menu. The AddTicket page will appear and you will see the drop-down list, as shown in Figure 9-22.
Notice that PA is the selected item. PA is the first item in the list so it’s automatically selected.
The next step is to assign the value from the drop-down list to the location property of the Ticket class. To do this, close the web site and view AddTicket. aspx in Design Mode again. Click on the drop-down list and view its properties. Change the ID property to DDLocation. Double-click the Save button to go to the Button save click event. Remove the single quote that was used to comment out
the line of code assigning the public property of the Ticket class. Remove the assignment part of the statement:
trim(txtlocation.text)
Next, type DDLocation followed by a period. This will show you all of the various drop-down list properties and methods that are available to you. Find the property called SelectedValue and then select it. The SelectedValue property of a drop-down control holds the value property of the selected item. Your code will look like
clsTicket.LocationID = cint(ddlocation.SelectedValue)

C H A P T E R 9 ■ A S P. N E T C O N T R O L S |
167 |
The cint built-in function will convert the string value from the SelectedValue property to an integer required for the public property LocationID of the Ticket class.
To test this out, place a breakpoint on the line of code that was just changed (the location assignment line). Then, choose Start debugging from the Debug menu. You will receive the error message that is shown in Figure 9-23. Never fear—this message just enables debugging. Click OK to continue.
Figure 9-23. Debugging not enabled message
Enter a value for each of the fields, and be sure to put in a valid e-mail address. Choose NY from the drop-down list and then click Save. When the breakpoint is hit, place your mouse over the cint(DDLocation.SelectedValue) statement. You will see that the value is 1. Remember that the list item with a text of NY had a value of 1 so you know that this is correct. You can now stop the execution of the web site.
The final step in this task is to add an item programmatically. I like to add an item to the beginning of the list that lets the user know what to select. For example, in this case I would add “Select a Location” to the list. To do this, create a new private sub called AddItem within the AddTicket.aspx.vb file. First, you need to declare a variable of type New ListItem called NItem. The ListItem object represents one item in a list. Next, set the Text property of the NItem object to “Select a location”, set the value property of the NItem object to “999”, and set the Selected property of the NItem object to True. Finally, you must add the NItem object to the drop-down list’s items collection. To do that use DDLocation.Items.Add(NItem). This line of code calls the Add method of the Items collection for the drop-down list. The finished sub will look like this:
Private Sub AddItem()
Dim NItem As New ListItem
NItem.Text = "Select a Location"
NItem.Value = "999"
NItem.Selected = True
DDLocation.Items.Add(NItem)
End Sub

168 C H A P T E R 9 ■ A S P. N E T C O N T R O L S