

Chapter 1
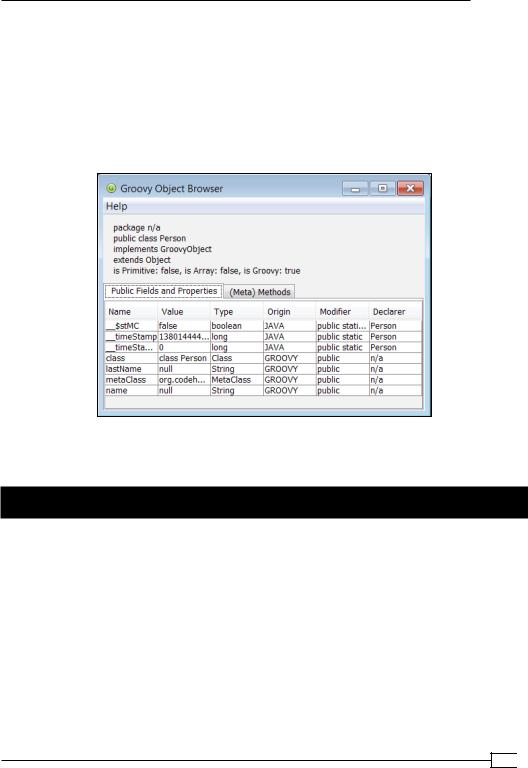
Press Ctrl + I (CMD + I on a Mac) to launch the browser and display the last evaluated expression. The following simple class would appear like in the following screenshot:
class Person { String name String lastName
}
p = new Person()
By pressing Ctrl + J (CMD + J on a Mac), we can display another view of the Object Browser, this time focused on the variables visible from within the script.
Configuring Groovy in Eclipse
Eclipse is a popular IDE that is taking up a big share of the IDE market for JVM-based technologies, as well as other languages and platforms. In fact, Eclipse is a huge ecosystem devoted to building tooling for different areas such as dynamic languages, reporting, testing, modeling, analysis, and so on.
Eclipse is distributed in various combinations featuring different areas. A special distribution exists that comes prepackaged with an Eclipse plugin for Groovy (code named GRECLIPSE), as well as various other useful plugins. It can be downloaded from http://grails.org/
products/ggts.
However, in this recipe we will describe the installation instructions for the Eclipse plugin for Groovy assuming that it is not part of the distribution that you already have.
35 
www.it-ebooks.info
Getting Started with Groovy
Getting ready
The steps in the following section have been tested against Eclipse Indigo 3.7, but are very similar when using previous or later versions of Eclipse. For information on different Eclipse versions, you can always check http://groovy.codehaus.org/Eclipse+Plugin.
How to do it...
The plugin installation in Eclipse usually starts with opening the Install New Software... menu item under the Help menu. Perform the following steps to configure Groovy support in Eclipse:
1.In the Work with: textbox, you need to type a plugin update site URL, which is http://dist.springsource.org/release/GRECLIPSE/e3.7/ for the given version of Eclipse.
2.After you press Enter, Eclipse will load the updated site contents into the tree view.
3.You need to select the Groovy-Eclipse component and click on the Next button.
4.Then you will have to follow the standard Eclipse installation procedure by accepting the software license and restarting Eclipse workspace after the download and installation process is complete.
5.When your Eclipse instance starts again, it should be possible to create Groovy projects, as well as edit, compile, and execute Groovy source files.
6.To get started, let's create a new project first. Go to the New menu and select the
Other... menu item.
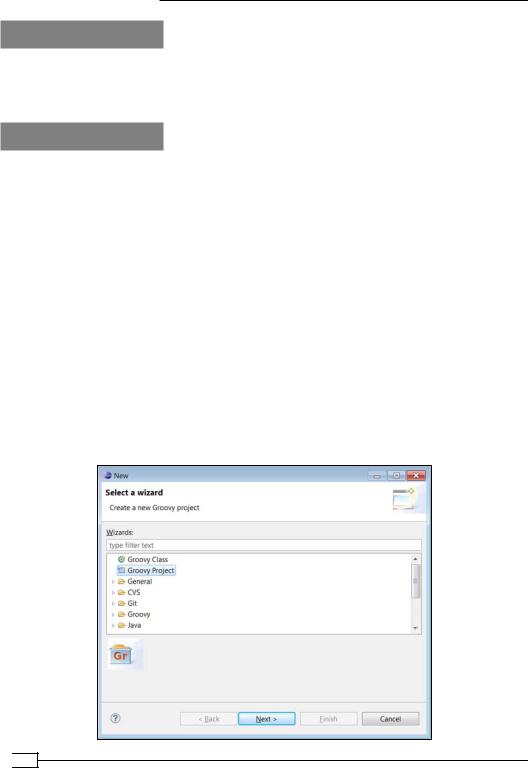
7.In the New wizard window, you should select the Groovy Project item and then click on the Next button, as shown in the following screenshot:
 36
36
www.it-ebooks.info
Chapter 1
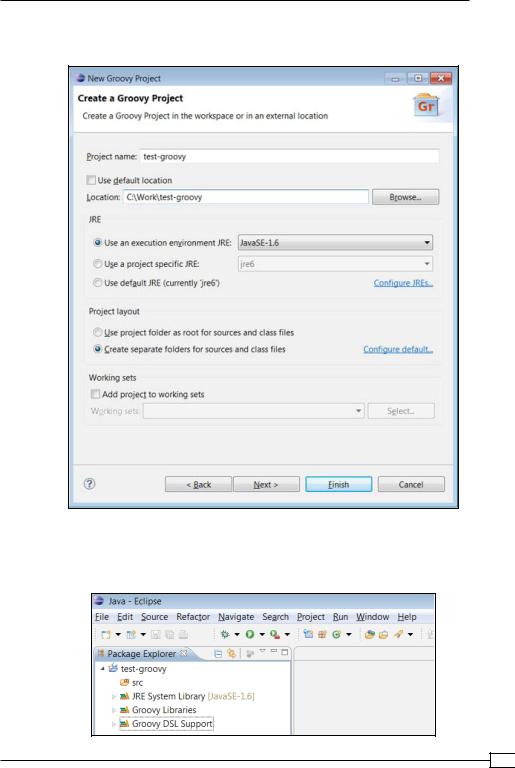
8.The following dialog shows the new project's options, which are very similar to the one for Java projects:
9.You need to choose a project name (for example, test-groovy), a project location (for example, C:\Work\test-groovy), a target JRE, and click on the Finish button for the project to be created in the current workspace, as shown in the following screenshot:
37 
www.it-ebooks.info
Getting Started with Groovy
10.Now it's time to add some code. You can do it through the same New menu, and add a new Groovy Class to the recently created project.
11.The class creation dialog has many similarities to the one for Java classes:
12.Groovy shares almost 100 percent of Java syntax; therefore, you can start creating Groovy classes in the same way you would do it in Java. You will also get all the syntax highlighting and other IDE goodies when editing Groovy source files, as shown in the following screenshot:
 38
38
www.it-ebooks.info
Chapter 1
How it works...
The code shown in the previous section is actually Groovy code (even though it looks very much like Java) since we omitted semicolons and used the println method. The reasons for that method to be available were described in the Executing Groovy code from the command line recipe.
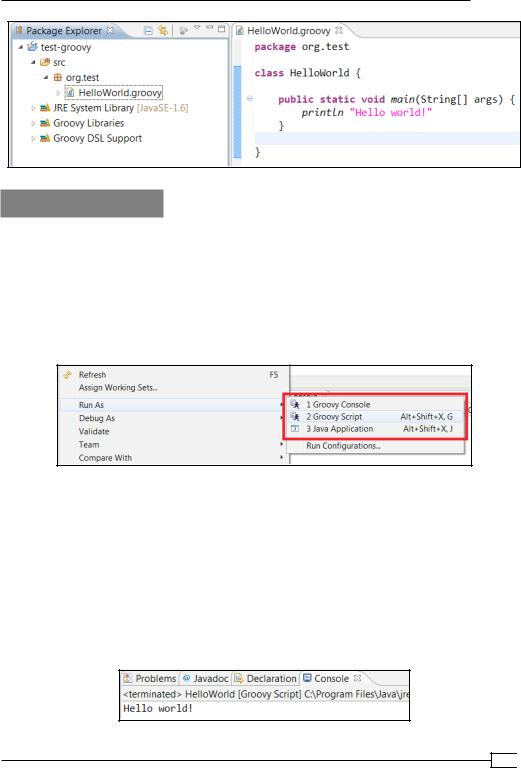
With the Eclipse plugin for Groovy, you also get the possibility to execute Groovy code right from your IDE. For that, you need to use the Run as... menu item from the Context Menu, as shown in the following screenshot:
ff The Groovy Console executor will send your code to the groovyConsole instance, which is described to a greater extent in the Starting groovyConsole to execute Groovy snippets recipe.
ff The Groovy Script executor will run your code in the same way as groovy HelloWorld.groovy command would do it.
ff The Java Application executor (similarly to how it works for Java classes) will try to invoke the main method of your class.
By running the example code with either the Groovy Script executor or Java Application executor, you should get the following output in Eclipse's Console view:
39 
www.it-ebooks.info
Getting Started with Groovy
There's more...
Groovy can be used to write standard classes. But as we have seen in the previous recipes, Groovy is also a scripting language, and the Eclipse IDE plugin supports this feature as well.
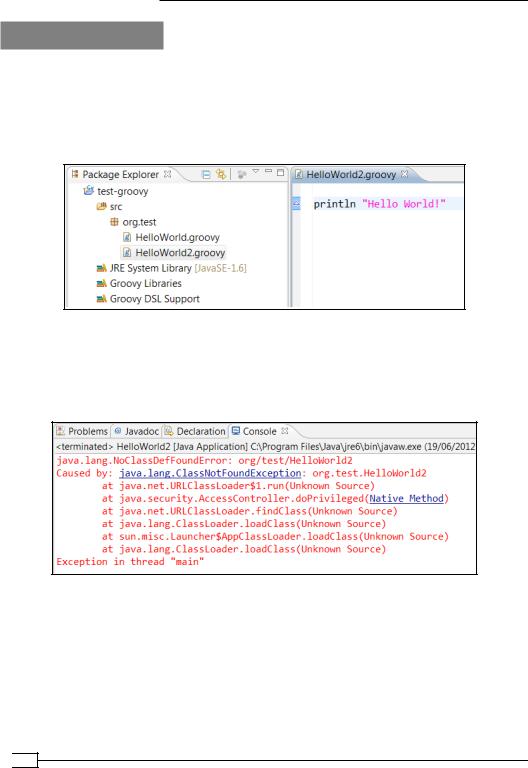
To define a Groovy script in your project, simply create a plain empty text file with the *.groovy extension anywhere in your project. The new file is a Groovy script, so you can start by typing the line of code, as shown in the following screenshot:
When you run your script (HelloWorld2.groovy) with the Groovy Script executor, you will get the same output as the previously mentioned Groovy source file (HelloWorld.groovy).
Conversely, if you run your Groovy script (HelloWorld2.groovy) using the Java Application executor, it will complain about a missing class, as shown in the following screenshot:
The reason for the exception lies in how Groovy distinguishes between script files and classes.
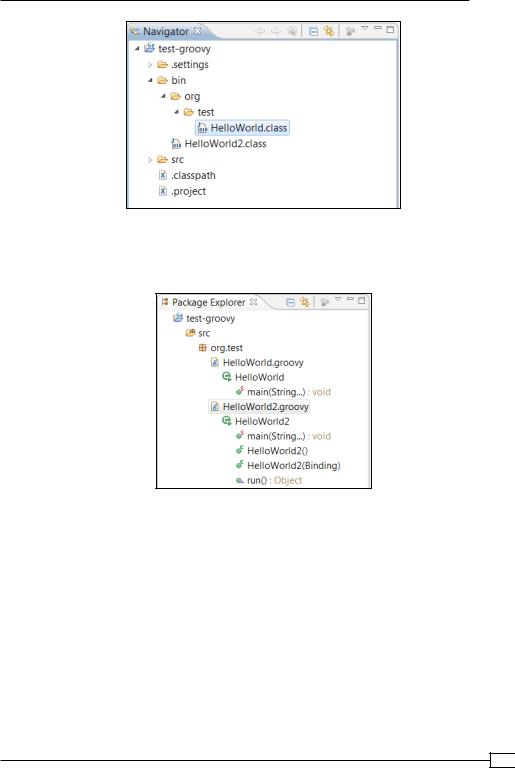
If you look at the way Groovy script and Groovy classes are compiled in the Eclipse Navigator view, you can also see that even though the script source file resides in the package folder org.test under the src directory, that information is erased when the actual script is compiled into a class file:
 40
40
www.it-ebooks.info
Chapter 1
You can also spot the difference between scripts and classes by looking at the list of the class generated methods by activating Package Explorer view, as shown in the following screenshot:
As you can see, the Groovy script class has additional constructors as well as the main and run methods. The Groovy class has only the methods that were defined by the class definition.
This distinction makes Groovy a very powerful addition to a Java tool set. Groovy allows you to use an alternative and more concise syntax to extend your existing Java applications, as well as writing short and concise scripts that leverage the richness of the Java platform.
41 
www.it-ebooks.info