

System Settings (Menu)
System Settings (Menu)
This menu summarizes all the balance settings relevant to the device. Basic settings can be made here that immediately affect the device. Changed settings do not affect previously defined tasks and user profiles.
hAllusers.system settings are user-independent, i.e., they are valid for all
hAs long as a task is active and/or a user has been selected, several basic settings cannot be changed. In order to change all settings, “Weighing” has to be selected in the operating mode and no user may be selected.
Not all functions/settings can be selected on balances used in legal metrology!
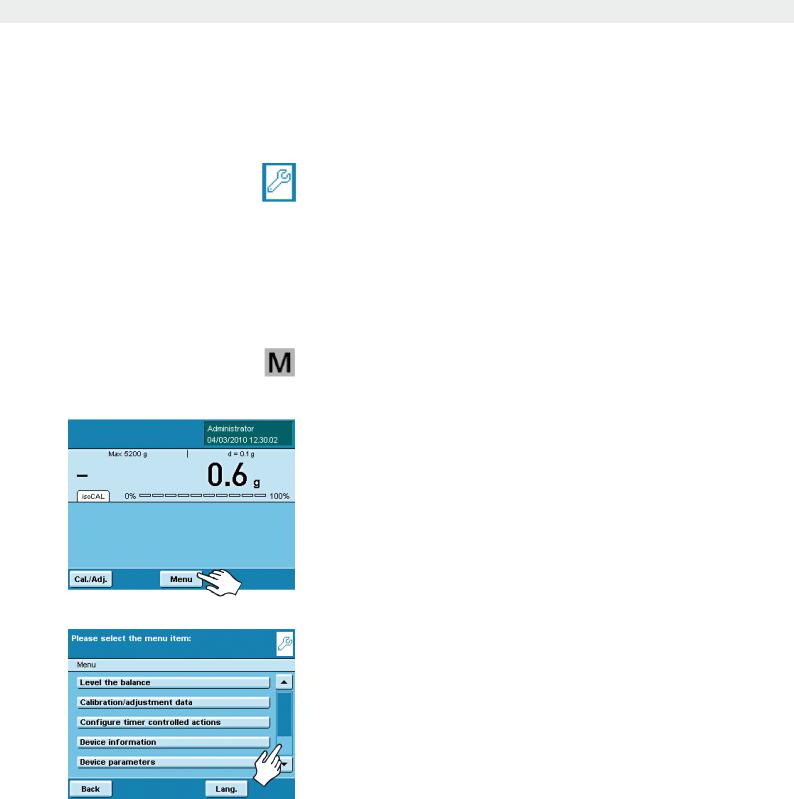
tTo open System settings, touch Menu when the balance is in the operating mode.
y The list of available system settings is displayed.
tTo view all menu items, use the right scroll bar.
tTouch the menu item whose settings you want to change.
System settings are divided into the following menus:
–Level the balance
–Configure calibration/adjustment
–Configure timer-controlled actions
–Display device information
–Configure device
–Import/export data
–Activate service mode
You have already learned how to use the menus (see chapter “Using the Touch Screen”). Only the configuration options and their meanings are described below.
Cubis MSA User Manual |
37 |
|
|
System Settings (Menu)
Leveling the Balance (Q-Level)
It is essential for exact weighing results that the balance is absolutely level. The front leveling feet can be used to level out small tilts of the floor.
Leveling must always be carried out when the balance is moved to another setup location or shifted in its place.
Depending on the model, the balance is equipped either with leveling feet that can be operated manually or motorized leveling feet.
An integrated sensor detects the alignment of the balance and triggers a warning message when leveling is required. You can configure the leveling notice and the automatic leveling function (see System Settings/Device Parameters).
When the isoCAL function is activated, the isoCal function is triggered after manual leveling. Balances with motorized leveling feet are leveled automatically prior to each new calibration/adjustment.
hNote: The balance needs to be re-leveled and then adjusted each time its setup location is changed.
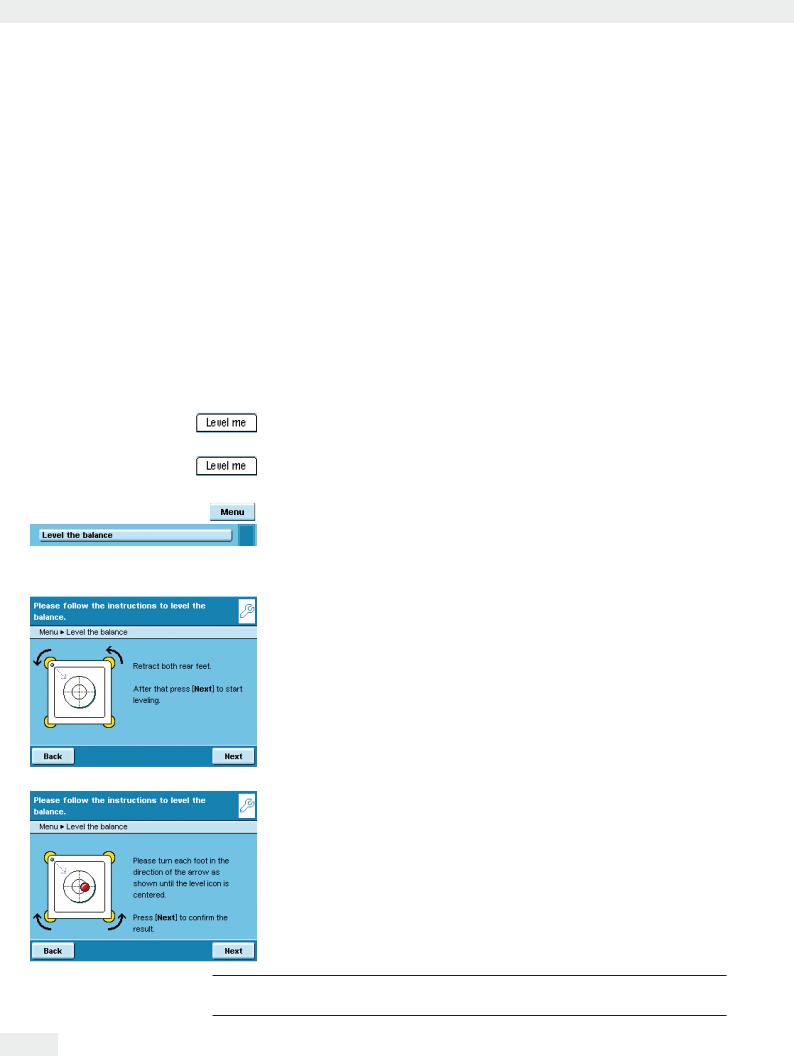
When “Level me” appears on the display, you must level the balance.
The process is quick and easy.
t Touch the tab Level me
or
t Select the option Level the balance from the menu. t Make sure that the weighing pan is empty.
Balance with motorized leveling feet
(available for all models with weighing ranges of > 6.1 g and ) 6.200 g):
tTo start the leveling function, touch Start.
tFollow the instructions on the display.
Balance with electronic level indicator and manual leveling feet t Follow the instructions on the display.
3After each leveling routine, the balance must be calibrated/adjusted
(see chapter Calibration and Adjustment).
38 Cubis MSA User Manual
System Settings (Menu)
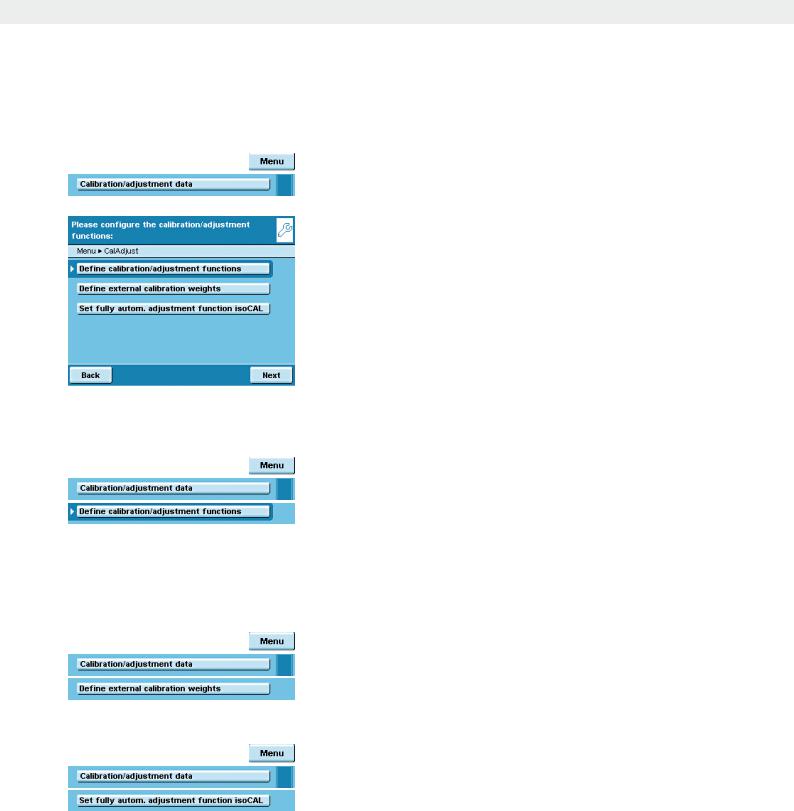
Configuring Calibration/Adjustment
Setting options are divided into the following sections:
–Defining calibration/adjustment functions
–Defining external calibration weights
–Setting fully automatic adjustment function isoCAL
tEnter the desired settings in all submenus.
tTo save settings, touch Save.
hFactory settings are marked with an *.
Defining Calibration/Adjustment Functions
cal./adj. key: Function of the key: Block key/*Configure key selection menu/ Select fixed 1-key function.
cal./adj. selection menu: Which calibration/adjustment functions should be offered when touching the cal./adj. key?
Cal./adj. sequence: Options: *Calibration, thenperform auto. adjustment/ calibration and then manual adjustment.
Cal./adj. unit: Options: *gram/kilogram/defined by data record.
Defining External Calibration Weights
Number of ext.calibration weights: Enter the number.
External calibration weight n: Enter the data for each calibration weight: Weight value
(in grams)/ID/Certificate/Validation
Configuring Fully Automatic Adjustment Function isoCAL
isoCAL: Define the function: Off/Only warning level, manual trigger/*On, automatic implementation
isoCAL warning level: *Only isoCAL status field/Warning message, repeat/ Alarm message, adjustment mandatory.
isoCAL temperature: Enter temperature differential (in Kelvin). isoCAL interval: Enter interval in hours.
Cubis MSA User Manual |
39 |
|
|
System Settings (Menu)
Timer-controlled Actions
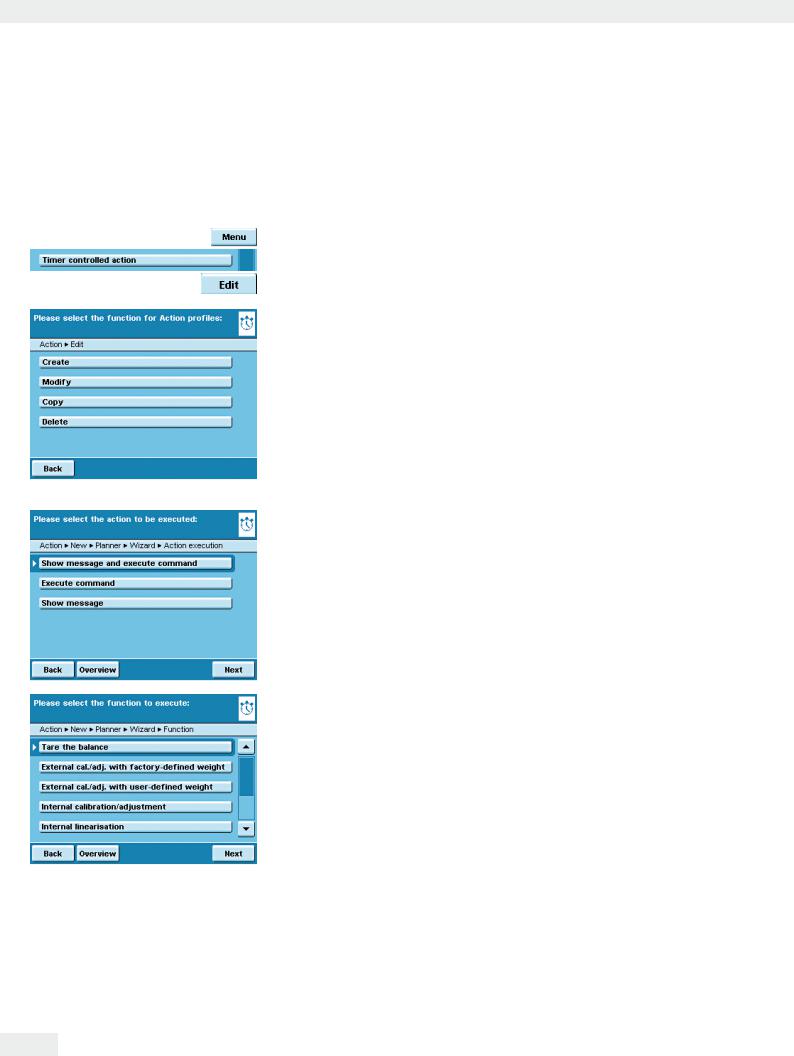
You can program the following actions so that they are run automatically at pre-specified times:
–Display a message and execute a command (see example below)
–Execute a command
–Show a message (e.g., a prompt as a reminder)
yThe available actions are displayed. When you open this menu for the first time, the list will be empty.
tTouch Edit.
tTo define a new timer-controlled action, touch Create. Here you can later also modify, copy or delete each action.
Example: You want to have the “Internal calibration/adjustment” function performed each morning at 7:00 a.m. In addition, you want a message to be displayed.
tSelect the action you want to install (e.g., Show message and execute command).
tSelect the command you want to have executed (e.g., Internal calibration/ adjustment).
40 Cubis MSA User Manual
System Settings (Menu)
tEnter the text you want to be displayed during the action (e.g., Timer-controlled adjustment).
t Enter the time when the action should be performed for the first time.
tDefine the time interval at which you want the action to be performed repeatedly (e.g., 1 day for daily repetition).
t To start the action at the time set, select Enable action.
Here you can disable the programmed action at any time and re-enable it later with a new starting time.
y The overview of all settings for the action is displayed.
tCheck and correct all settings as required.
tTouch Next.
tEnter a name and a description for the action.
tTo save the action, touch Save.
Cubis MSA User Manual |
41 |
|
|