

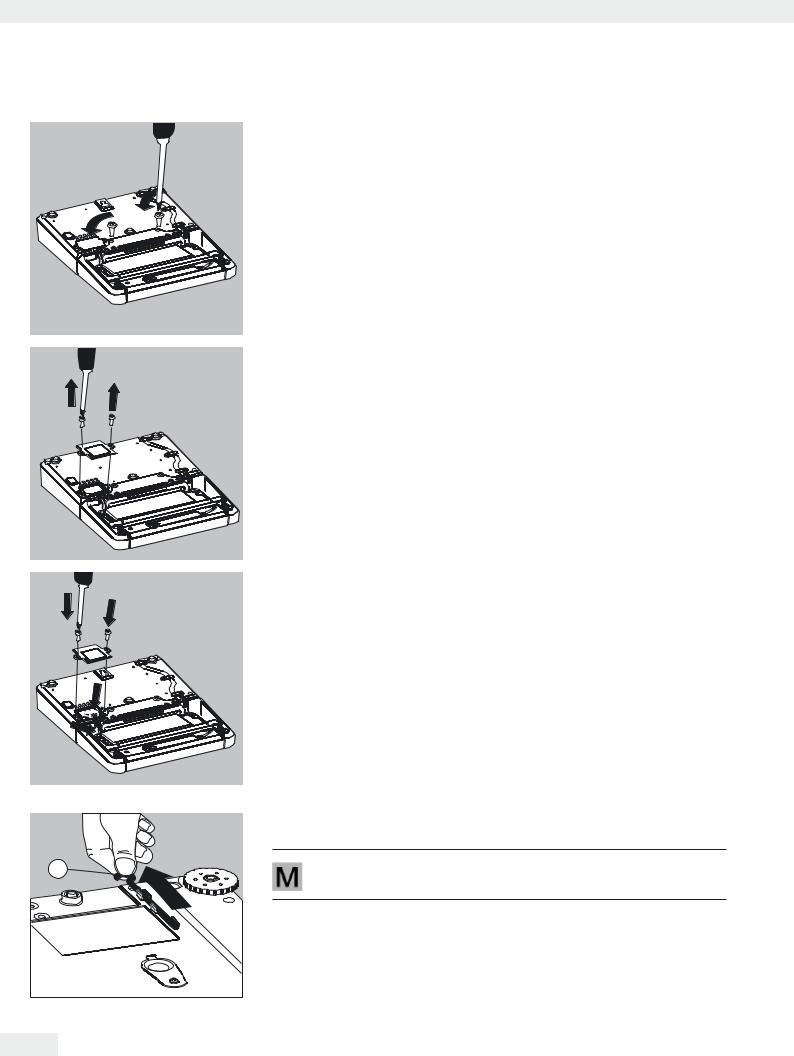
Getting Started
t Attach the display and control unit to the electronics module: Reattach the two retaining screws.
Open the slot for the connection cable on the electronics module:
t Remove the screws from beneath the electronics module and detach the plate.
Connect the display and control unit to the electronics module: t Plug in the connection cable.
t Then reattach the plate to the slot.
t Slide plate cable that sticks out into the cable channel.
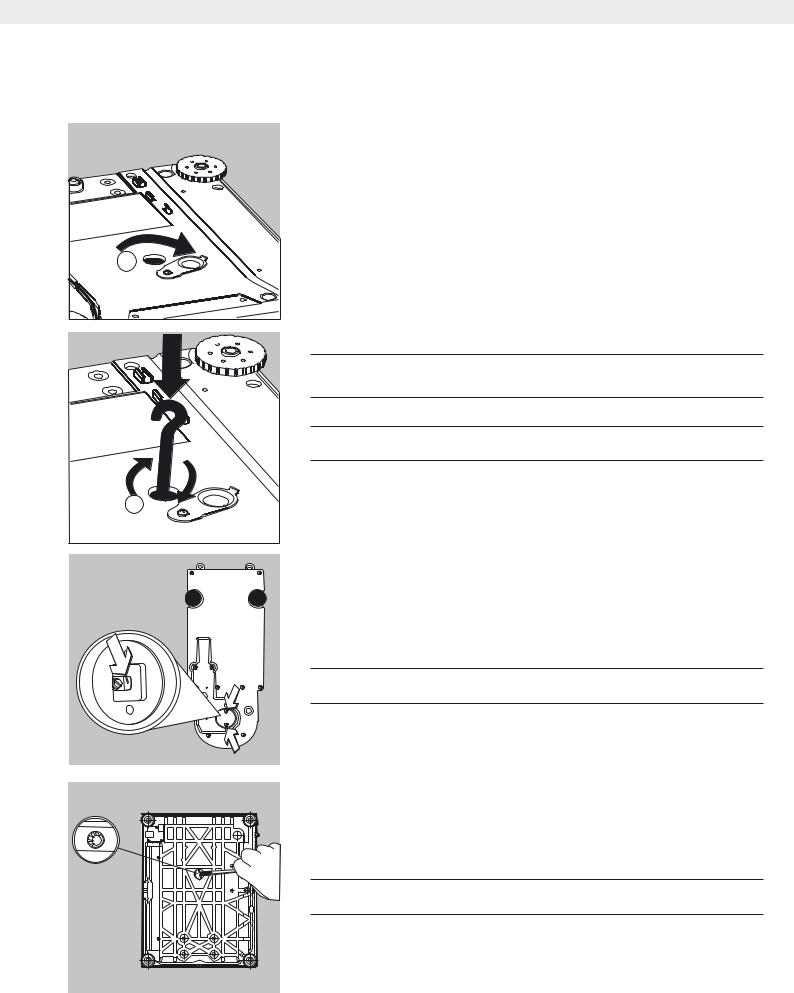
Preparing Below-Balance Weighing
A port for a below-balance weighing hook is located on the bottom of the balance.
The below-balance weighing port must not be opened or used on
1
balances used for legal metrology.
Analytical and Precision Balances with a Weighing Range of up to 15 kg:
1. Remove the hook for below-balance weighing from the clip on the bottom of the balance.
26 Cubis MSA User Manual
Getting Started
2. Push the cover of the below-balance weighing port to one side.
2
3. Carefully screw on the below-balance weighing hook.
3 Dobalance.not screw it in too tightly,as this could damage the thread or the
h Install a draft protection shield.
t Attach the sample (e.g., using a suspension wire) to the hook.
3
4When weighing has been completed, unscrew the hook and return it to the clip.
t Close the cover of the below-balance weighing port.
Balances with a Readability of ) 1 μg:
t Remove both screws from beneath the weigh cell and detach the cover plate. t Attach a wire, for example, to the sample and hang it on the notched hook.
h Install a draft protection shield.
Balances with a Weighing Range of 20 kg or more:
t Use a suitable screwdriver to unscrew the cover plate from the bottom of the balance.
t Request the hook directly from Sartorius.
h Install a draft protection shield.
Cubis MSA User Manual |
27 |
|
|

Getting Started
Using the Cable Opening of the Draft Shield
Models with an analytical draft shield have an opening for passing a cable
(for example, for a temperature sensor) through to the interior of the weighing chamber.
1.Lift the locking tab on the rear panel of the analytical draft shield.
2.Lift the panel out of the draft shield.
t Turn the panel clockwise 180° so that the opening is at the bottom.
tInstall the desired sensor.
tInsert the panel in the guide rail.
tLift the locking tab and gently press the panel into position.
tPress the locking tab down and close it.
tYou can now begin weighing.
28 Cubis MSA User Manual

Getting Started
Moving the Balance
Transporting the Device over Short Distances
3Exercise caution to avoid glass breakage.
Never lift and carry the balance by its draft shield.
t Carry as shown in the first illustration.
or
t Carry as shown in the second illustration.
Storage and Shipping Conditions
–Permitted storage and shipping temperature: -10 to +60 °C
–Unpacked devices can lose their precision if subject to extreme vibrations.
–Excessive vibrations may compromise the safety of the equipment.
Save the packaging for any future storage or shipment of the balance.
Only the original packaging provides optimum protection for the equipment.
–Follow all warnings and safety precautions.
–Follow the instructions in the chapter: “Transporting the Balance.”
Cubis MSA User Manual |
29 |
|
|