

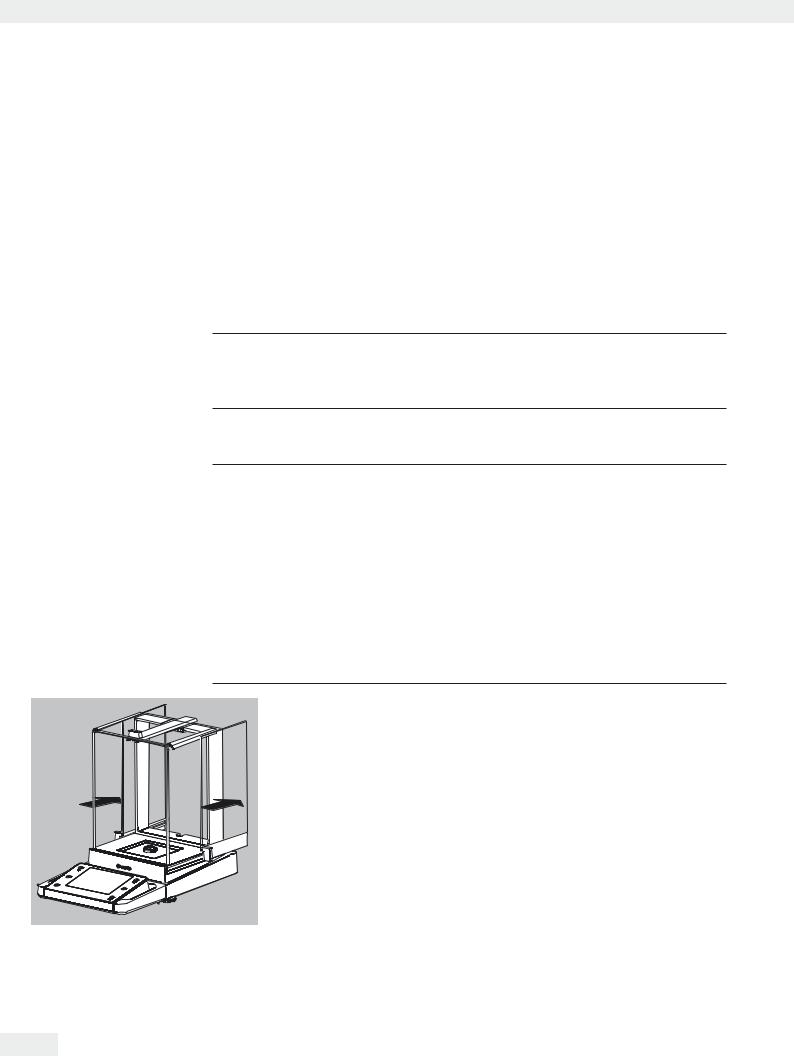
Care and Maintenance
Care and Maintenance
Service
Regular servicing by a Sartorius technician will extend the service life of your balance and ensure its continued weighing accuracy. Sartorius offers its customers service contracts with regular maintenance intervals ranging from 1 month to 2 years.
The frequency of the maintenance intervals depends on the operating conditions and user’s tolerance requirements.
Repairs
Repair work must only be performed by trained service technicians. Repairs performed by untrained persons may result in considerable hazards for the user.
3The device should be unplugged during repair work. Unplug the power cord from the outlet.
Repair work must only be performed by Sartorius-trained service technicians. As needed: Please contact your Sartorius dealer!
Cleaning the Balance
3Ensure that no dust or liquid enters the balance weighing system. Do not use aggressive cleaning agents (solvents or similar agents).
Disconnect from the voltage supply: Unplug the power cord from the wall outlet and unplug any data cables connected to the balance.
Models with a Readability of >10 mg:
–These models meet the requirements of protection class IP54. The IP protection only applies to the balance housing and not to the AC adapter.
–The IP protection is only guaranteed when the weighing pan is mounted.
–Retain the cover cap for the data output. When the data output is not in use, reapply the cover cap to protect it against vapors, moisture, and dust or dirt.
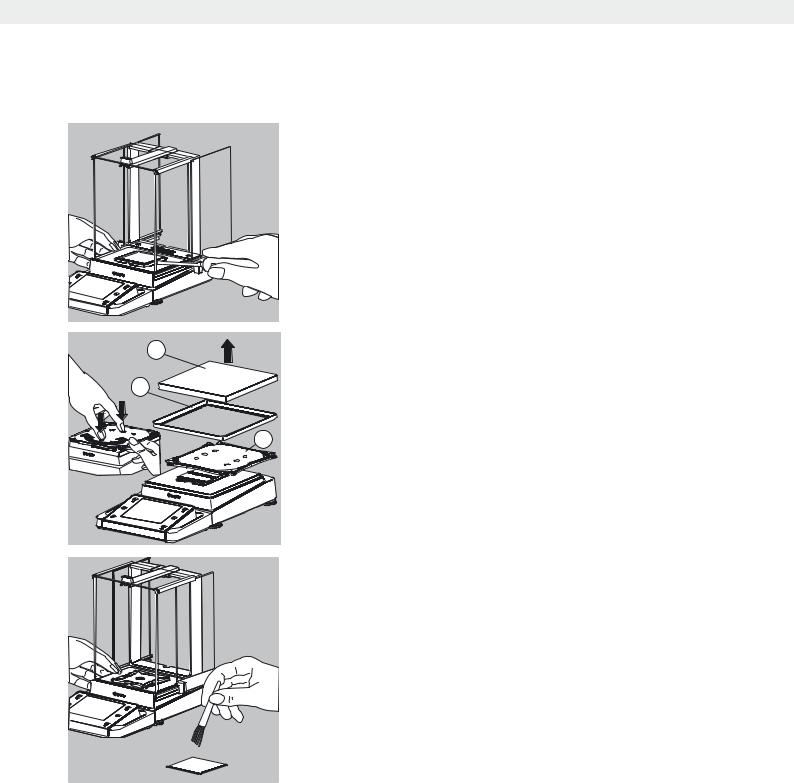
t Open the panels of the analytical draft shield completely.
t Clean the housing and interior of the balance with a cloth lightly moistened with a soap solution.
t Dry all parts with a soft, dry cloth or use blotting paper to absorb dampness. Then replace all dried parts.
t Remove panels from the analytical draft shield and clean them with commercially available glass cleaner. Dry the panels and then reinstall them in the balance.
164 Cubis MSA User Manual
Care and Maintenance
1 |
2 |
3 |
tCarefully remove any sample residue/spilled powder using a brush or hand-held vacuum.
t If necessary, remove the weighing pan, shield plate and pan support.
1)Weighing pan
2)Shield plate/draft shield
3)Pan support
tClean parts with a cloth or brush. Then replace the parts.
Cleaning Stainless Steel Surfaces
All stainless steel parts should be cleaned at regular intervals.
Use a damp cloth or sponge to clean stainless steel parts on the balance.
Only use conventional household cleaning agents which are suitable for stainless steel (e.g., Stahlfix). After this, let the device dry.
For additional protection, protective oil may be applied.
Remove the stainless steel weighing pan and thoroughly clean it separately. Only use solvents for cleaning stainless steel parts.
The stainless steel weighing pan should be cleaned simply by rubbing. After this, rinse the equipment thoroughly until all residue is removed.
No protective oil should be applied to the stainless steel weighing pan!
Cubis MSA User Manual |
165 |
|
|

Care and Maintenance
Safety Inspection
If there is any indication that safe operation of the balance is no longer warranted:
tDisconnect from the supply voltage: Unplug the power cord from the outlet.
tSecure the AC adapter and cord so that they cannot be used.
Safe operation of the mass comparator with the AC adapter is no longer ensured when:
–The AC adapter or the mains connecting lead shows visible damage.
–The AC adapter no longer functions properly.
–Following extended storage in adverse conditions. In this case, notify the Sartorius Service Center.
Maintenance and repair work may be performed only by authorized service technicians who have access to the required maintenance manuals and instructions and who have received the necessary training.
We recommend that the AC adapter be inspected by a qualified service technician with regard to the following:
–Leakage current: <0.25 mA measured with a properly calibrated multimeter.
–Insulation resistance >ΣOhm as measured with a constant voltage of at least 500 volts at a 500 kOhm load.
The duration and number of checks should be determined by a qualified Sartorius service technician on site based on specific ambient and operating conditions (once a year as a minimum).
166 Cubis MSA User Manual
Packing the Balance for Shipping
Packing the Balance for Shipping
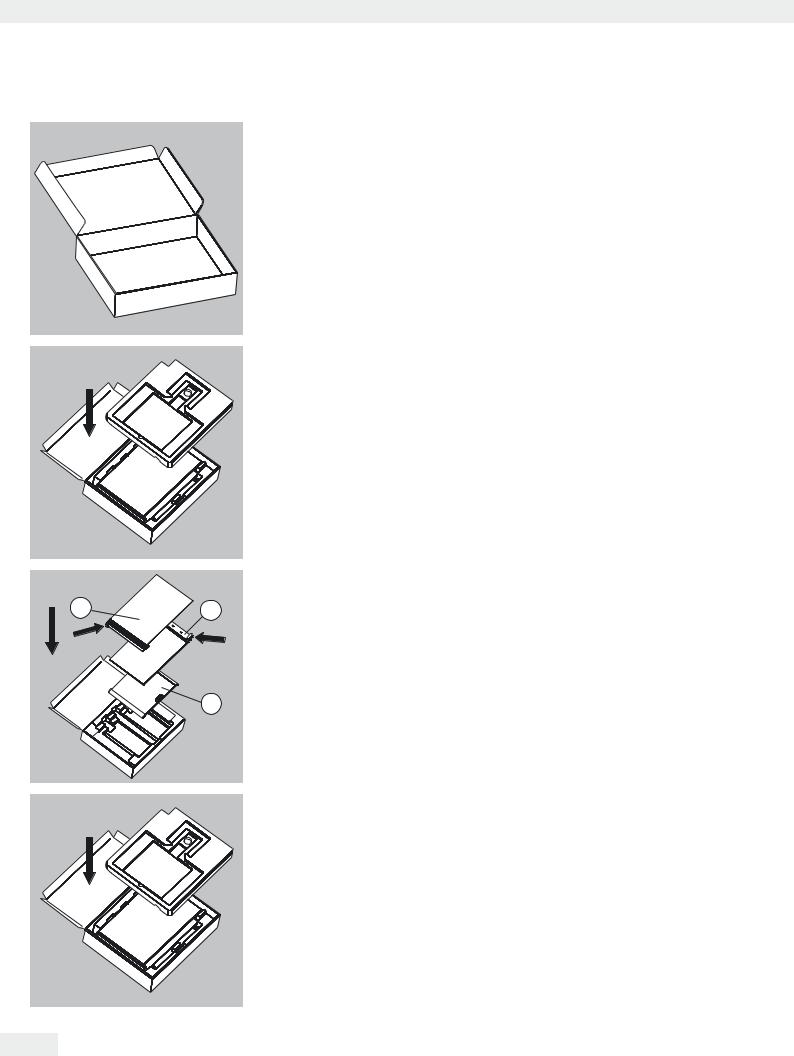
If repairs are required, use the original packaging to transport the balance.
To ensure adequate protection for safe shipment, Sartorius products have been packaged to the extent necessary using environmentally friendly materials. Only the original packaging provides optimum protection for the equipment.
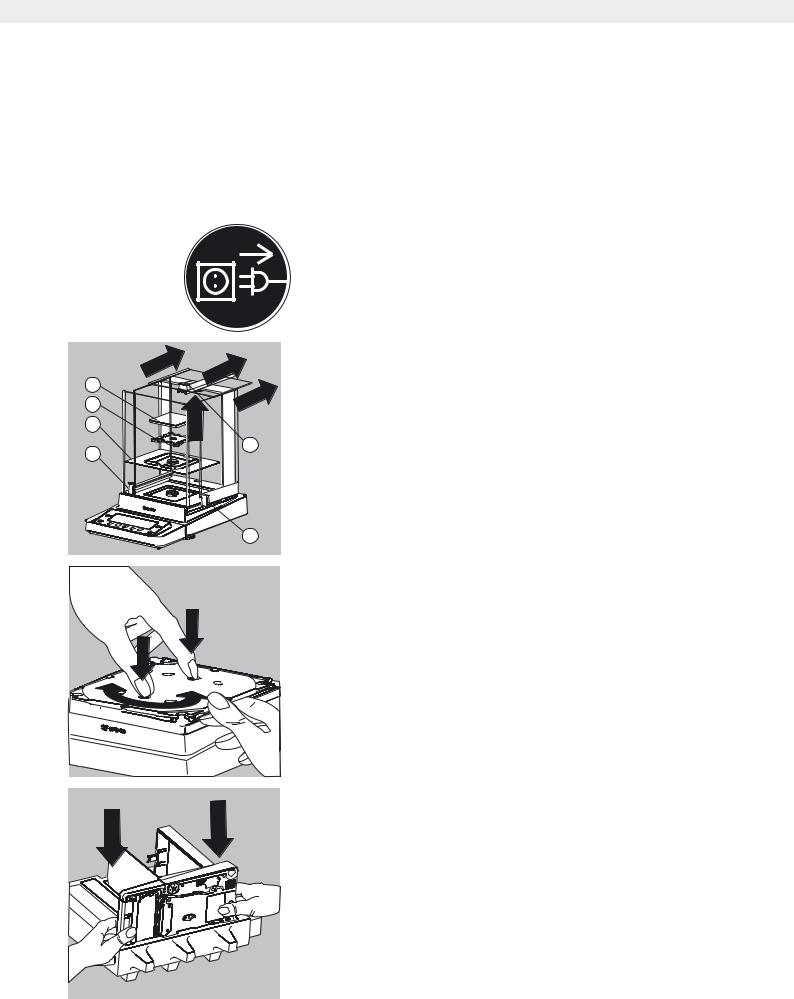
t Disconnect the device from the power supply.
t Disconnect any data cables from the device.
|
|
t Remove all items (such as weights, sensors, etc.) from the weighing chamber. |
|
|
|
1) |
Remove the left side panel |
4 |
|
2) |
Remove the right side panel |
|
3) |
Remove the upper draft shield panel |
|
5 |
|
||
|
4) |
Remove the weighing pan |
|
6 |
|
||
|
5) |
Remove the pan support |
|
1 |
3 |
6) |
Remove the shield plate/draft shield |
|
|
|
|
2
tOn models without a draft shield: press down on the two pan support fasteners.
tRotate and remove the pan support.
t Place the balance in the lower part of the packaging.
Cubis MSA User Manual |
167 |
|
|
Packing the Balance for Shipping
Transporting the Parts (Large Analytical Draft Shield)
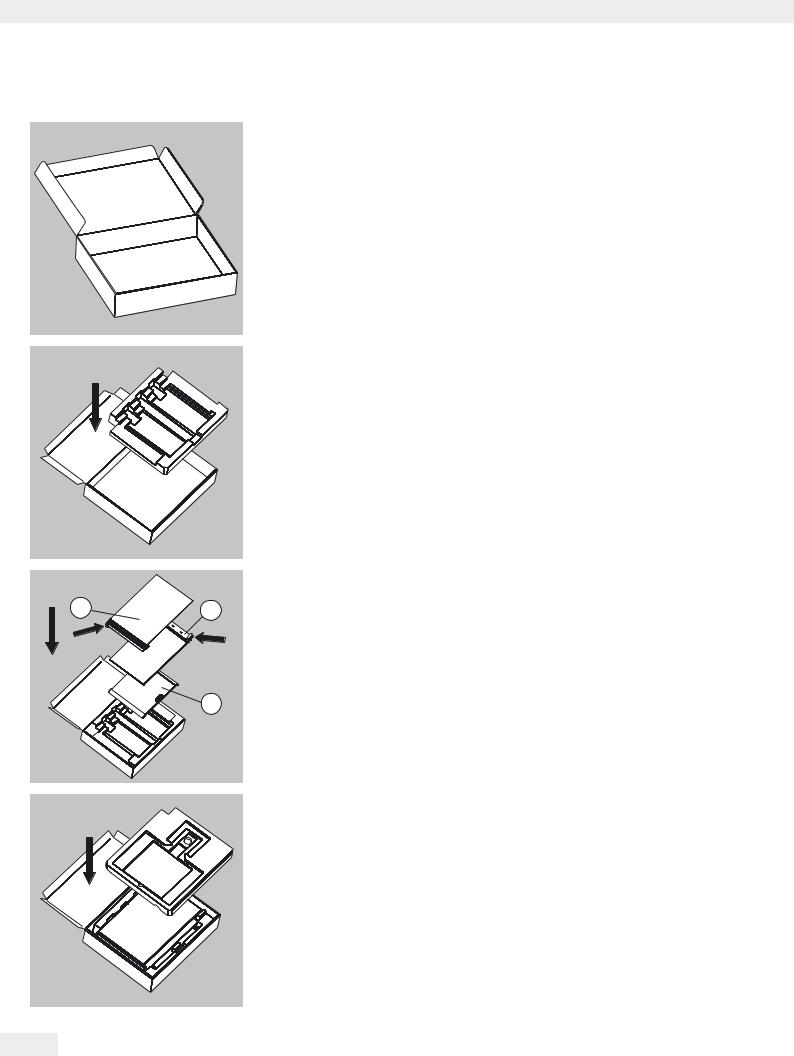
t Get the box for the individual parts of the balance ready.
|
|
t |
|
|
t |
3 |
2 |
1) |
2) |
||
|
|
3) |
|
1 |
|
|
|
t |
Place the bottom foam piece in the box.
Place the panels in the packaging:
Place the upper draft shield panel into the packaging (handle upwards). Place the side draft shield panel into the packaging (handle upwards). Place the other side panel into the packaging (handle downwards).
Then place the top foam piece in the box.
168 Cubis MSA User Manual
Packing the Balance for Shipping
t Place the shield plate into the box.
tPlace the pan support and weighing pan into the opening.
tClose the box.
Cubis MSA User Manual |
169 |
|
|
Packing the Balance for Shipping
Transporting the Parts (Small Analytical Draft Shield)
t Get the box ready for the individual parts of the balance.
|
|
t |
|
|
t |
3 |
2 |
1) |
2) |
||
|
|
3) |
|
1 |
|
|
|
t |
Place the bottom foam piece in the box.
Place the panels in the packaging:
Place the upper draft shield panel into the packaging (handle upwards). Place the side draft shield panel into the packaging (handle upwards). Place the other side panel into the packaging (handle downwards).
Then place the top foam piece in the box.
170 Cubis MSA User Manual
Packing the Balance for Shipping
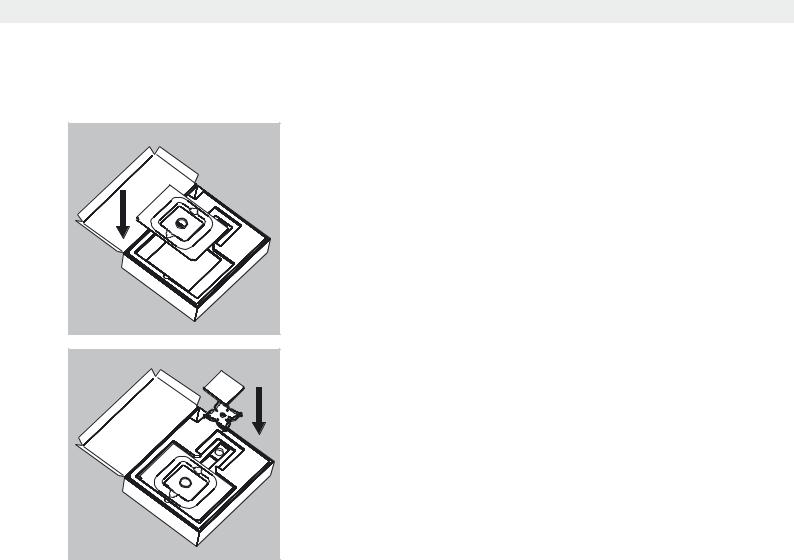
t Place the following parts into the foam piece in the order given:
1)Pan support
2)Shield plate
3)Weighing pan t Close the box.
t Place the box into the packaging.
t Place the top part on to the packaging.
t Insert the balance into the box with cushioning.
t Send the packaged balance.
Cubis MSA User Manual |
171 |
|
|