


Task Management
|
Configuring a Printout |
|
|
|
You can configure the printout at two places; for example you can have the |
||
|
printout for basic weighing differ from all the other applications. |
||
In System Settings (Menu) |
In this menu, you define the basic settings. Previously created tasks will not be |
||
|
affected by modifications to the basic settings. |
|
|
Creating Tasks |
This is where you can specifically modify the user-defined settings for any task. |
||
|
You will be routinely prompted for the printer settings with every new task you |
||
|
create and can be modify them. |
|
|
Printout (example): |
Print events: |
Printout content (record) |
Print elements |
|
Start task |
|
GLP header |
|
------------------ |
||
|
|
21.02.2011 09:17 |
|
|
|
SARTORIUS |
|
|
|
Mod. MSA 224S |
|
|
|
Ser.-Nr. 12-34-56 |
|
|
|
------------------ |
|
|
Start task |
Laboratory |
Operator name |
|
In this example: |
technician |
|
|
Start task |
Product........... |
ID1, identification: fixed/variable |
|
P key |
123.5678g |
Measured value |
|
|
------------------ |
|
|
Exit task |
21.02.2010 09:20 |
GLP footer |
|
|
Name: |
|
|
|
------------------ |
|
|
|
|
|
Setting Options for Printouts
hThe options for printouts depend on the how the interfaces and their operating modes are configured. So if not all options are available, check the interface configuration.
|
The configuration of standard printout parameters defines the following: |
Interfaces for Printer Output |
Peripheral port (Com A), USB/PC (Com B), optional interface (Com C), Ethernet |
|
(Com D) |
Protocol (Operating Mode) |
Depends on the interface: Print, SBI, xBPI, SICS |
Output |
Depends on the operating mode: Single printout or automatic (not with printer), |
|
with/without stability |
Printout Criterion |
Manual without stability, manual with stability |
Format Autoprint |
22 characters for applications, 16 characters for raw data |
Standard Data Output |
Standard 1 (measured value only), Standard 2 (measured value and date/time), |
|
Standard 3 (date/time, weight block (N,T,G) and dotted line |
GLP-compliant Printout |
Turned off/on for Cal./adjust./Always On |
Print Event |
Defines which event should trigger a print job. |
|
The selectable print events depend on the selected application. |
|
For basic weighing: P key, start or end task, calibration/adjustment result |
|
For calculating applications: Additionally, initialization and result |
|
For logging applications: Additionally, component and evaluation |
Print Elements |
The elements to be printed also depend on the selected application. You define the |
|
print elements for each each event, e.g., date and time, dotted line, measured value |
|
and the sequence they should be printed in, etc. |
Tare after Printing: |
Turn off, on (auto. tare after printing) |
62 Cubis MSA User Manual
Task Management
Configuring Printouts in the System Settings (Menu)
hThe settings can only be modified as long as no task has been activated (ready to start) in the operating mode. Make sure that basic weighing is active in the operating mode.
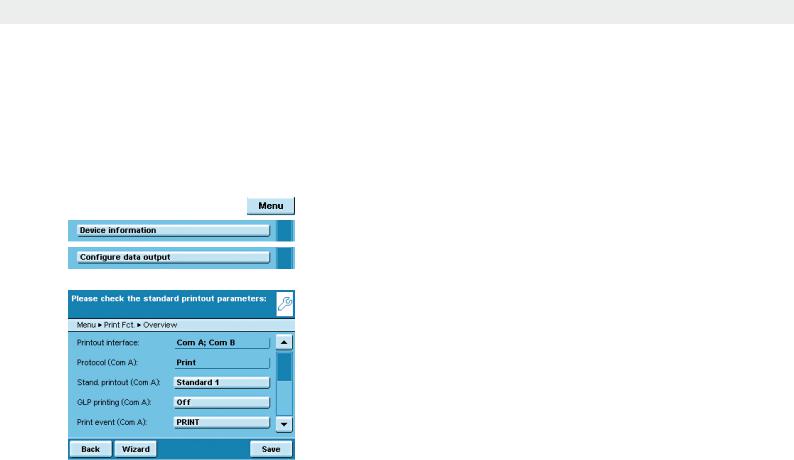
t Toggle to the System Settings menu.
t Open the Configure data output submenu.
If the submenu is not selectable, check the operating mode and select basic
weighing.
yThe setting menu will open. Several options are not modifiable because they are preset by the interface configuration.
The initial default setting and several exemplary settings are described in the following.
Cubis MSA User Manual |
63 |
|
|
Task Management
Standard Printout Parameters when the Balance Is first Delivered
When the balance is first delivered, two interfaces are configured: The peripheral port (Com A) is configured for one printout, the USB interface (Com B) is configured for data with a PC per SBI protocol.
Interfaces: Com A (peripheral port) and Com B (USB/PC)
Protocol for Com A: Print (preset by the interface configuration)
Standard for output to Com A: Standard 1 (measured value only)
GLP-compliant printout to Com A: Off
Print event for output to Com A: Press the PRINT P key
Element to be output via Com A: Measured value
Protocol to Com B: SBI (preset by the interface configuration)
SBI output to Com B: Single printout to the PC
Criterion for output to Com B: After stability of balance
Format for output to Com B: 22 characters
Tare after printing: Off
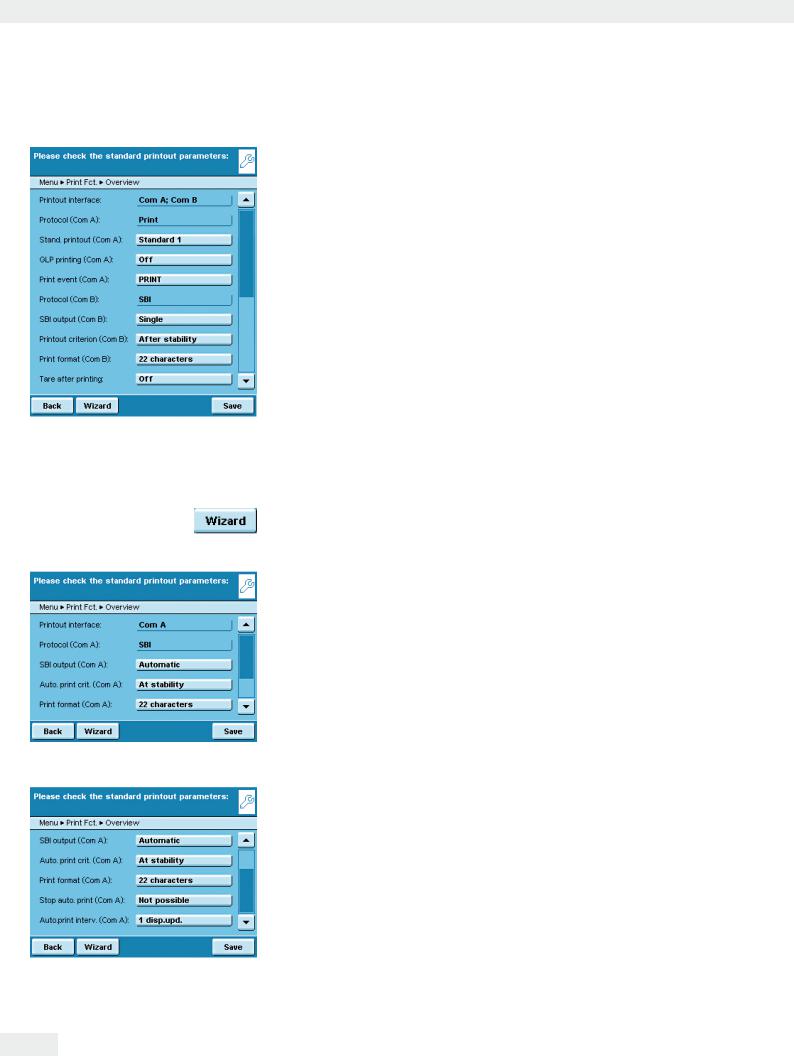
tYou can select the variable parameters individually by clicking on the respective input field.
or
t To be guided step-by-step through the settings, use the wizard.
Example: Manual Printout to Peripheral Port, SBI Operating Mode
yAfter manual operation, you want an individual printout to be printed to the ported peripheral device.
Interface: Com A (peripheral port)
Protocol: SBI (toggling to the interface configuration possible)
SBI output: Individual printout
Criterion: Manual without stability
Format: 22 characters (for applications)
Tare after printing: Turned on or off
Example: Automatic Printout to Peripheral Port, SBI Operating Mode
yAt a preset interval, automatic printouts should be sent to the ported peripheral device.
Interface: Com A (peripheral port)
Protocol: SBI (toggling to the interface configuration possible) SBI output: Automatic printout
Criterion: Without stability, at stability or after load change Format: 22 characters (for applications)
Stop automatic printing: Not possible or by using the Print P key.
Interval for automatic printing: Number of cycles (1, 2, 5, 10 to100) and 0.1, 0.2, 0.5 to 10 seconds.
64 Cubis MSA User Manual
Task Management
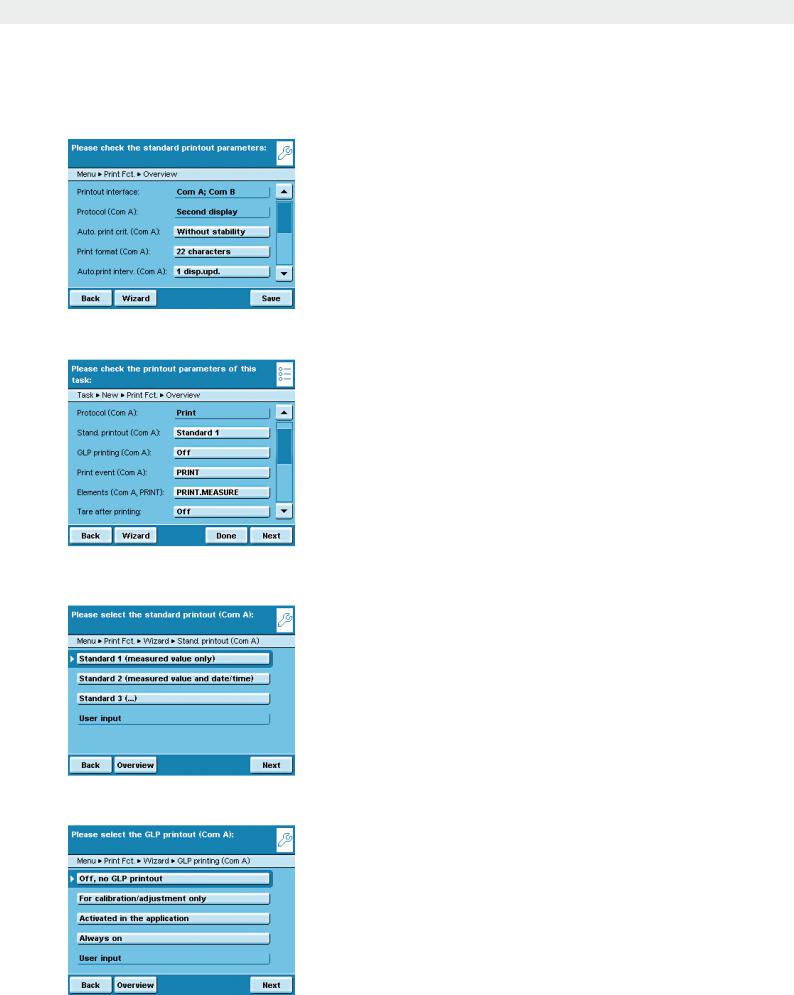
Example: Automatic Printout to Peripheral Port, Remote Display Operating Mode
yAt a preset interval, automatic printouts should be sent to the ported peripheral device as remote display.
Interface: Com A (peripheral port)
Protocol: Remote display (toggling to the interface configuration possible) SBI output: Automatic printout
Criterion: Without stability, at stability or after load change Format: 22 characters (for applications)
Interval for automatic printing: Display updates (1, 2, 5, 10 to100) or every 0.1, 0.2, 0.5 to 10 seconds.
Example: Printout to Peripheral Port only using the PRINT P Key, Printer Operating
Mode
yAfter pressing the Print key, the measured value should be printed to the ported peripheral device.
Interface: Com A (peripheral port)
Protocol: Print (toggling to the interface configuration possible)
Standard data output: Standard 1 (measured value only), Standard 2 (measured value and date/time), Standard 3 (measured value with date/time and weight block) GLP-compliant printout: Turned on or off
Print event: Press the PRINT key
Elements for the print event PRINT: Measured value PRINT.MEASURE Tare after printing: Turned on or off
Setting Options of Printout Parameters
Standard Data Output
You can select which data should be printed out as default. Standard 1 (measured value only)
Standard 2 (measured value with date/time)
Standard 3 (measured value with date/time and weight block)
User input is only selectable if the standard settings have been modified by the user.
GLP-compliant Printout
You can select if and when the printout should be GLP-compliant.
Off, no GLP printout
For calibration/adjustment only Activated in the application Always on
User input is only selectable as long as none of the three options apply: i.e., if only a GLP header but not a GLP footer has been configured.
Cubis MSA User Manual |
65 |
|
|
Task Management
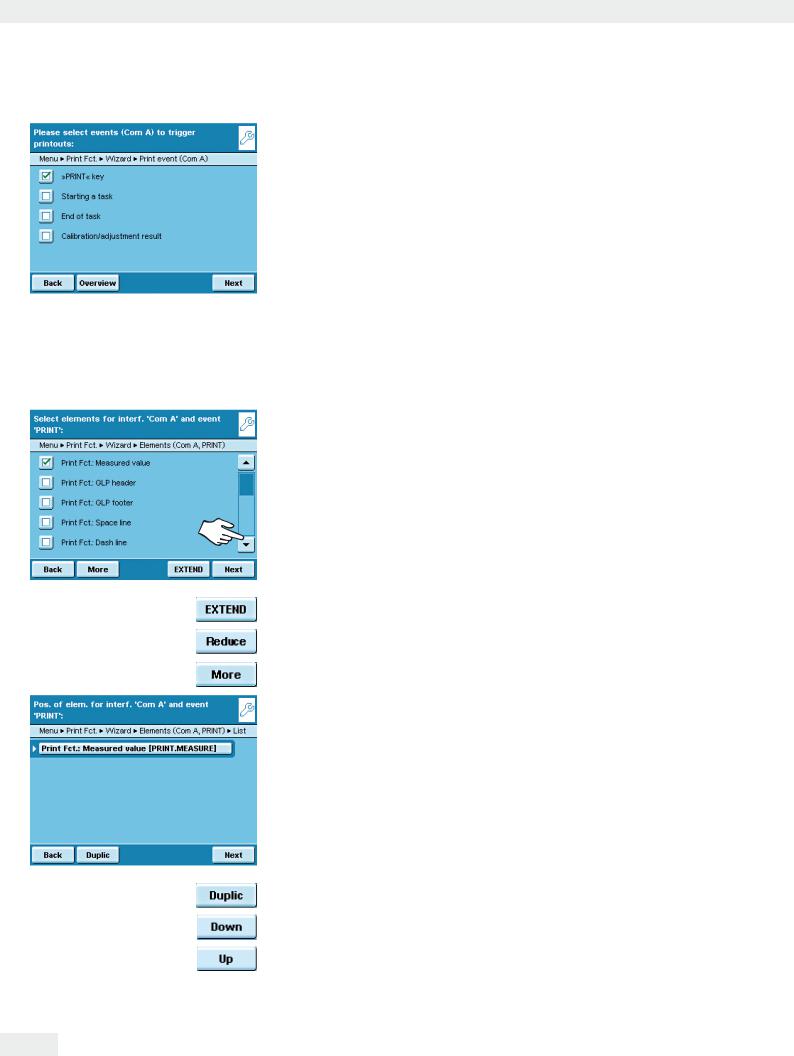
Print Events
You can define one or several events that trigger a printout. The number of selectable print events depends on the selected application.
Basic Weighing:
Press the PRINT key Starting a task
End of task
Calibration/adjustment result, after calibration/adjustment
For calculating applications the following is additionally possible:
Initialization Result
For logging applications the following is additionally possible:
Component
Evaluation
The application-specific print events cannot be configured in the Basic menu but only when you create a new task.
Print Elements
Which information should be printed?
Measured value GLP header GLP footer Space line Dash line
Form feed Date and time etc.
tTo scroll through the extensive list, slide the right scroll bar downwards.
tTo view the complete list, touch EXTEND.
tTo minimize the list, touch Reduce.
tTo reset to default, touch Standard.
Sequence of Print Elements
In which order should the print elements be printed?
y The list of selected print elements is displayed.
You can change the order and can duplicate individual elements, for multiple printouts (e.g., at the beginning and end of the list).
tMark the element that you wish to move or duplicate.
tTo duplicate the element, touch Duplic.
tTo move the element downwards in the list, touch Down.
tTo move the element upwards in the list, touch Up.
66 Cubis MSA User Manual
Task Management
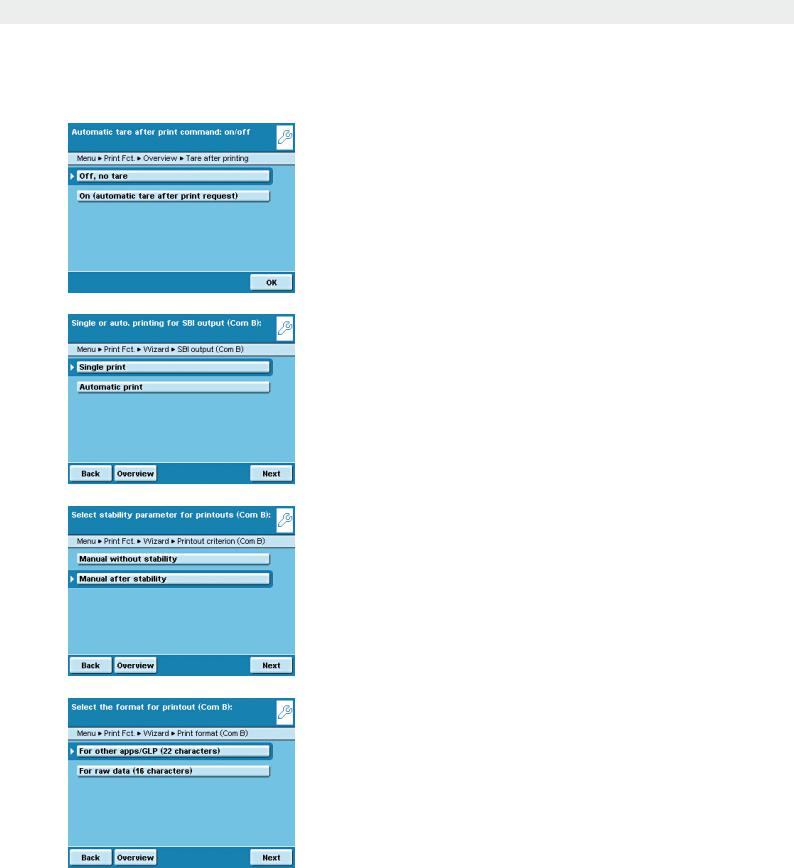
Automatic Tare after Printing
Should the balance be tared automatically after each printout?
Off, no tare
On (automatic tare after print request )
Setting Options for SBI Output SBI Output Mode
How should SBI printout be output?
Single print: Printout generated by pressing the PRINT P key or by ESC command via the interface
Automatic print: The printout is generated automatically in the weighing cycle
Stability Parameter for Printout
Should the printout be dependent on balance stability?
Manual without stability: Immediate printout without waiting.
Manual after stability: Printout generated immediately at stability, otherwise not until after next stability.
Format for Printout
How should the printout be formatted?
For other applications (22 characters): Printout with header; 20 characters plus line break (CR) and dotted line (LF)
For raw data (16 characters): Printout without header; 14 characters plus line break (CR) and dotted line (LF)
Cubis MSA User Manual |
67 |
|
|