


Interfaces
|
Network Interface (Ethernet) |
|
Purpose |
This interface lets you integrate your balance into a TCP/IP-based network. |
|
Requirements |
The person configuring the Ethernet interface should have basic knowledge |
|
|
of TCP/IP-base networks and network technologies in general. |
|
|
The Ethernet interface is connected to the local network via the RJ45 slot. |
|
Features |
|
|
|
Transfer rate: |
10 Mbs/sec (10BASE-T, Ethernet) and 100 Mbs/sec |
|
|
(100BASE-TX, Fast Ethernet), auto-recognition (10/100, |
|
|
HalfDX/FullDX) |
|
Connection type: |
Network protocol: ModBus/TCP |
|
Transport: |
TCP/IP or UDP/IP |
|
HMS certificates: |
Compatible with ModBus TCP standard of the ModBus |
|
|
Organisation, industry-compatible CE, UL, cUL |
|
Cable: |
Twisted pair, shielded, CAT-5 or higher, 1:1, UTP / STP, |
|
|
male connector RJ45; e.g., patch cable CAT5 depending |
|
|
on application (straight/crossover) |
|
Cable impedance: |
150 Ohm |
|
Cable length to HUB: |
Max. 30 m |
|
Connecting Network Cables |
|
|
The slot for the network port is located at the back of the control unit. |
|
1 |
t Tilt the control unit (1) until it is nearly vertical. |
|
|
||
On the bottom panel of the display unit:
t Turn the locking lever (2) 90°.
2
146 Cubis MSA User Manual

Interfaces
3
4
tRemove the cover plate (3).
tInsert the Ethernet cable plug (4) so that it clicks audibly into place.
tReattach the cover plate (5).
tTurn the locking lever back to its locked position.
5
3 Exercise caution to avoid glass breakage for models with a draft shield.
t Turn over the balance and place it on a soft surface.
t Lay the Ethernet cable (6) through the cable channel of the weighing module.
Cubis MSA User Manual |
147 |
|
|

Interfaces
|
Configuring Network Operation (Ethernet) |
|
Preparation: |
Before you can start with the configuration, you will require some information |
|
|
about your network. Please contact your network administrator. The important |
|
|
question is whether your network supports DHCP or not. |
|
DHCP |
With DHCP, you can automatically link a (new) balance to an existing network |
|
|
without having to configure it manually. Normally, the balance (client) only |
|
|
requires the automatic acquisition setting for IP address (factory setting). |
|
DHCP is supported |
In this case, no additional information is required. |
|
DHCP is not supported |
In this case, you need the following information from the network administrator: |
|
|
– |
IP address |
|
– |
Subnet mask |
|
– |
Default gateway address |
|
|
Device name (host name): This name can be changed if required. |
|
|
This name is used to select the balance in the network. |
Select Network Settings (Fixed Setting)
tIf appropriate, toggle to the System Settings menu.
tSelect the Device information submenu and slide the right scroll bar down.
tSelect Configure ports.
t Open the Network parameter (Ethernet) submenu.
tTo change the IP settings, touch the input field behind
Network configuration input field.
t Select Use fixed IP address and confirm with OK.
tIn the overview, check all settings and change as required.
Host name (device name): You can select this name freely. This name is used to select the balance in the network.
tIf you then want to produce an Ethernet connection, write down the IP address now.
tTo save the network configuration, touch Save.
y The Configure ports submenu is displayed.
148 Cubis MSA User Manual
Interfaces
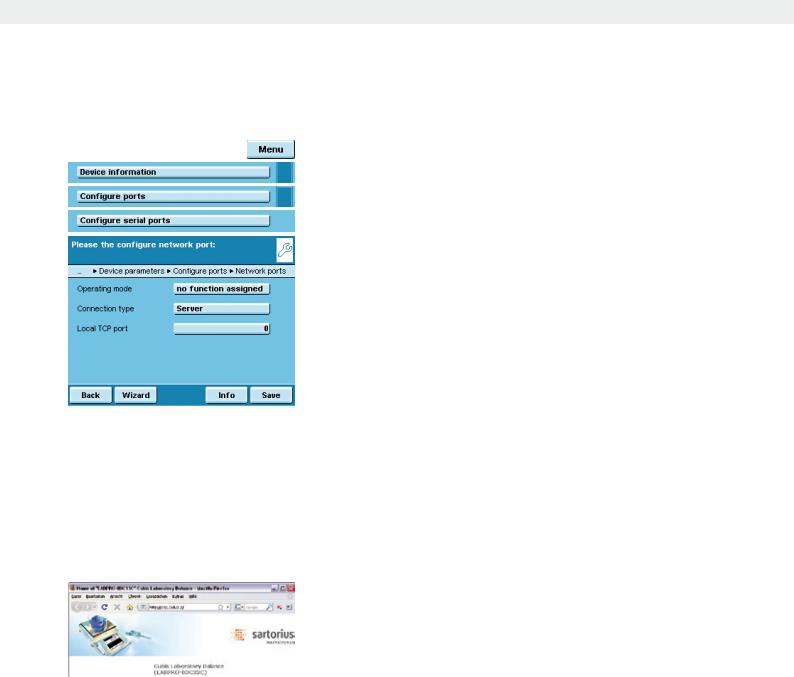
Configuring Network Interface (Com D)
tIf appropriate, toggle to the System Settings menu.
tSelect the Device information submenu and slide the right scroll bar down.
tSelect Configure ports.
tOpen the Network ports submenu.
tDefine the operating mode and, depending on the connection type, either Server port and address or the local TCP port.
Operating mode: No function/XBPI/SBI/Printer output/SICS protocol
Connection type (of the balance): Server/Client t To save settings, touch Save.
Examples:
For the connection type Balance = Server you only need to enter the local TCP port (e.g., for working with the Sartorius SartoCollect software for data communication).
For the connection type Balance = Client, you have to enter the server TCP port and the server IP address (e.g., for working with “Virtual serial port emulator”
as the server for all previous serial PC applications with the balance or for printing on a network printer server).
Remote Control of the Balance from a PC via Ethernet
System Requirements
–PC with internet browser
–Operating system Windows, Mac OS, Linux, Unix or Solaris.
Installation
tConnect the balance to your network via the Ethernet interface.
tEnter the IP address of the balance in the address field of your Windows browser. The IP address of your balance is listed under Menu/Device Information/Basic data.
Port Release
–If you are having problems with the connection, you must configure your firewall to release the right TCP/IP UDP port.
–If you are using a router and want to access your computer on the internet via your IP address, the port must also be set in the router’s virtual server settings. This means that you must forward the port to the IP address of the server.
–If you still have problems, you may have to deactivate your firewall temporarily while using a browser connection.
Cubis MSA User Manual |
149 |
|
|
Interfaces
Selecting Functions
tClick on the desired function in the browser.
tTo exit a function, click on >>Back or on the back key of your browser.
Remote configuration (VNC): Use this function for remote control of the balance. The display screen on the balance is reproduced in the browser, you can operate the balance now by using the mouse and keyboard of your PC. Software version: You can view the version of the balance, control unit and application software.
Screenshot: You can print the current screen or save it as GIF file. Browse alibi memory: You can view the alibi memory.
Show settings: You can view the following settings:
–Task profiles
–User profiles
–System settings (menu)
–Service information (service)
–Interface information (ports)
–Timer-controlled actions
Show log files: You can view respective log files.
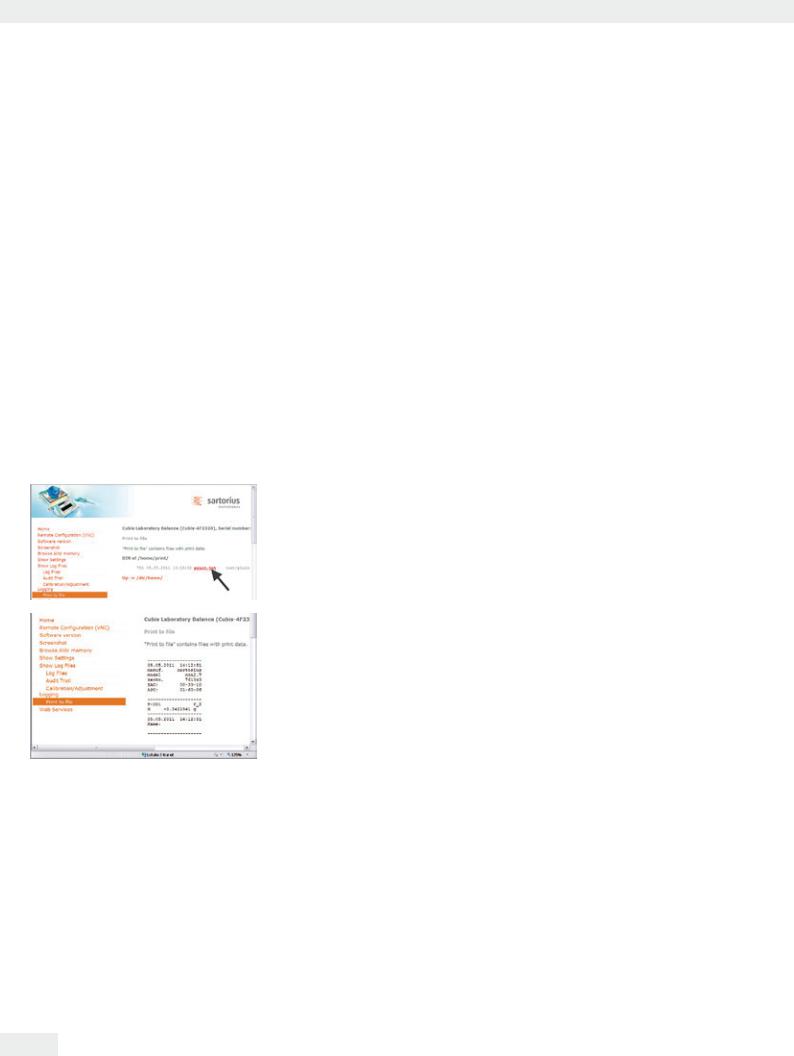
Viewing a Print File Directly in an Internet Browser:
Prerequisites:
The configuration settings can be found in the chapter System Settings (Menu): “Print to File.” Select the following file format for viewing directly in an Internet browser: Print to TXT file.
tIn the browser, click on “Show Log Files” and then “Print to File.”
tTo view the printout directly in the internet browser, click on “print.txt.”
y The printout is displayed in the Internet browser.
150 Cubis MSA User Manual