

Изделия из кожи
.pdfTo the layman the secret plait is an impossibility. There seems to be no logical method by which a belt can be plaited in the centre without either end being cut. I have heard customers in our saddlery shop become quite heated on the subject, and insist that such belts must have been cunningly glued together after the plaiting has been completed.
Leatherworkers know differently, yet many otherwise skilled craftspeople still approach the task in a rather hit and miss manner, simply pushing strands about until they hit the correct combination.
In this chapter I have laid out the method for producing three, five, seven, nine, eleven and thirteen plaits. I worked this method out some years ago, and since then have looked in every available book on leatherwork , but have yet to find any other writer describe it, and yet I find it to be the easiest method of all.
ALLOWING FOR SHRINKAGE
When a belt is plaited a certain amount of length is lost, but not nearly as much as many writers claim. As an experiment I prepared a belt exactly one metre long x 25mm wide and worked it into a three plait. The loss was only 40mm, or 4%. The leather was 2.5mm thick.
As a check on this I then chose a 3mm leather and plaited a five strand, beginning one metre long and 30mm wide. Again the loss was only 40mm.
As a matter of interest a 25 plait shortened by 9%.
THREE PLAIT
The following three pages show the full sequence for working the three plait. This is the simplest of all secret plaits and so is the one most often used.
It is best to practise this one before attempting the five or seven plait.
49
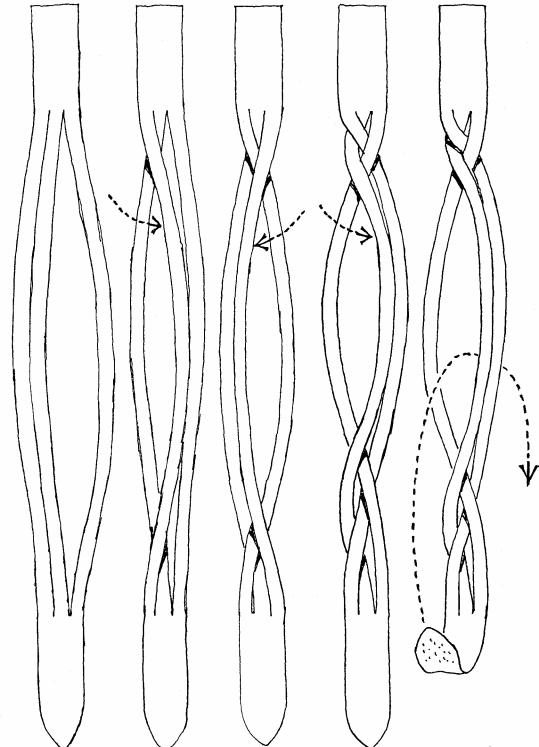
In order to avoid trouble it is important to count out each sequence as you go. The sequence for the three plait is one,
50
two, three, through the top, through the bottom, four, five, six. The
sequence is now complete.
51
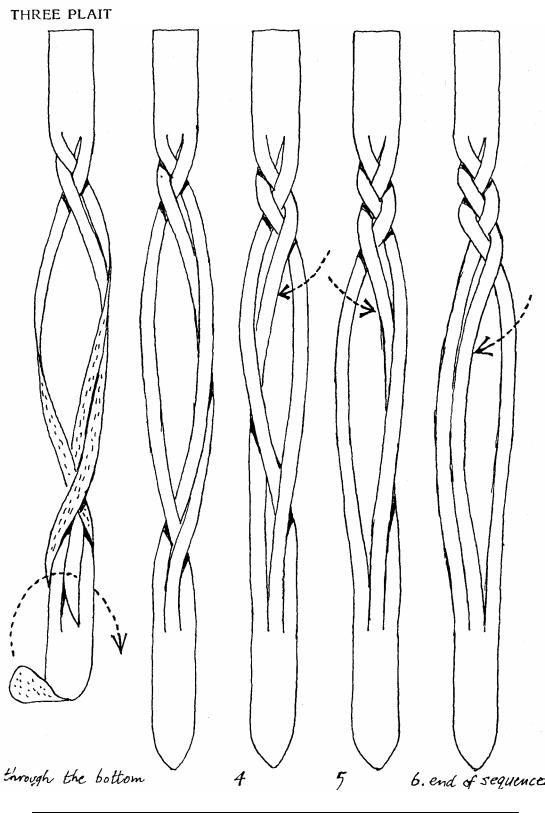
On a very short length of leather, such as that shown on page 48(top), the plait is now completed, but in most cases you will be working a belt length and so the sequence is repeated until there is no more room to do another sequence.
When this happens the job will look like the left hand sketch. The work is then evened out until it looks like the right hand sketch. The plait is now complete.
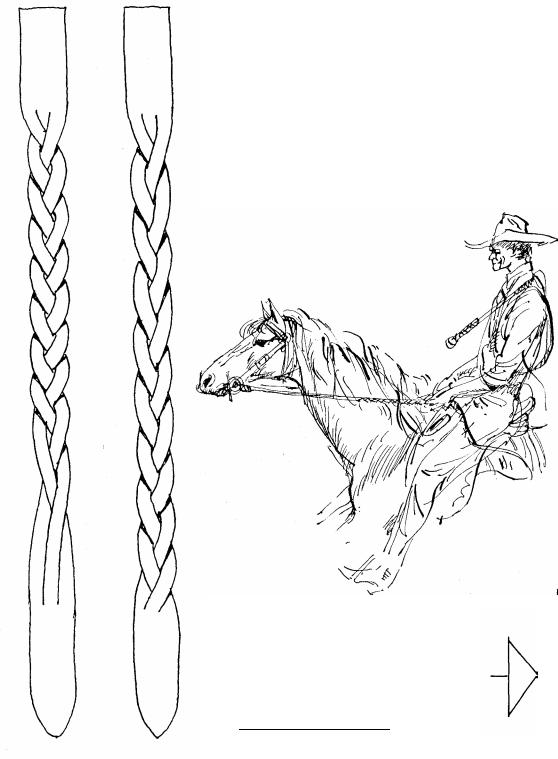
The secret plait is often used on reins to provide a better grip.
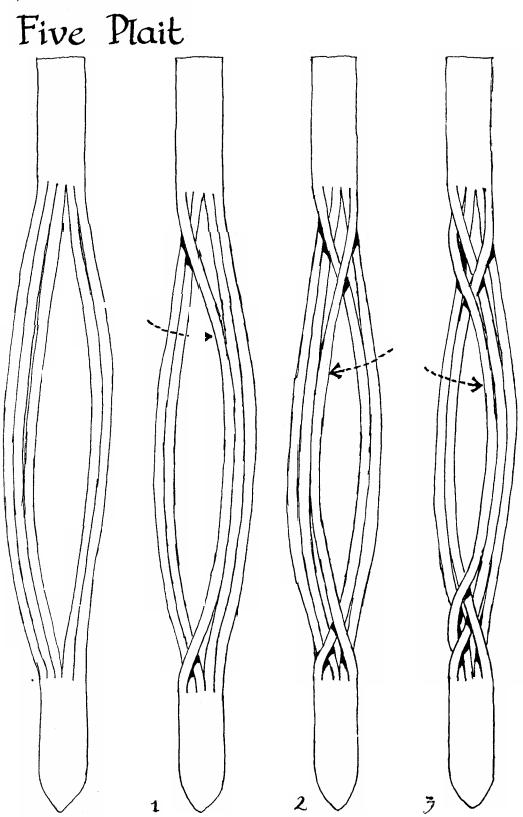
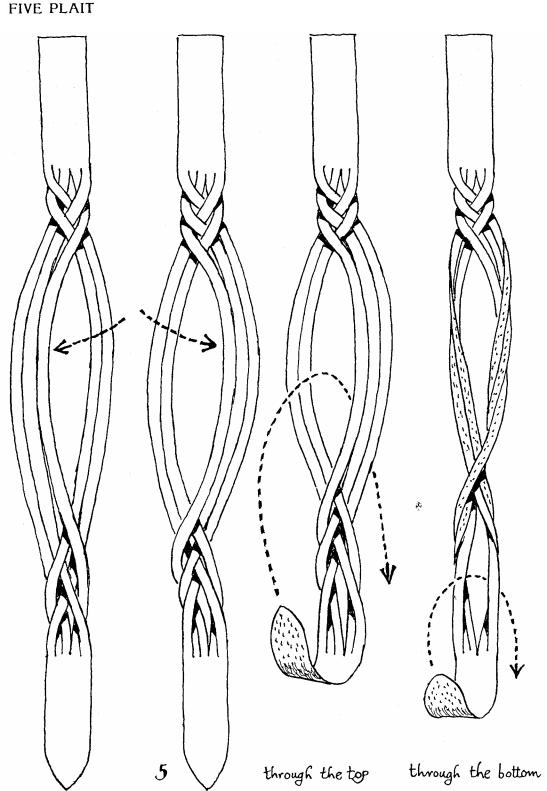
FIVE PLAIT
The five plait is the most attractive of all, and is just as easy to work as the three plait. In this case you count out the sequence as 1, 2, 3 , 4 , 5 , t h r o u g h t h e t o p , through the bottom, 6, 7, 8, 9, 10. This is
the complete sequence.
THREE PLAIT
52
53
4
54
5
5
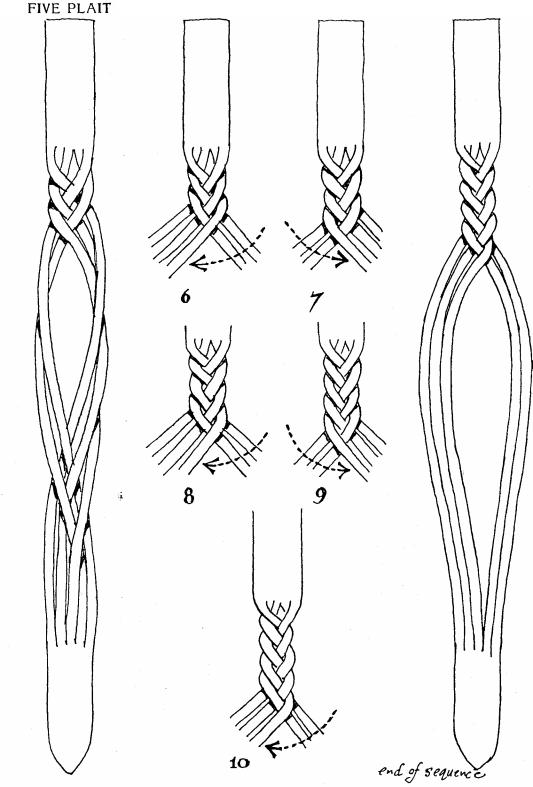
FIVE PLAIT
Repeat the
s e q u e n c e u n t i l t h e r e i s n o more room to do another one. The belt will then look like the left sketch.
Now work the plait down until it looks like the right hand sketch.
Everyone works o u t t h e i r o w n m e t h o d o f working the plaiting down, some simply tug at the strands t o s p r e a d t h e p l a i t w h i l e o t h e r s t u r n t h e j o b u p s i d e down and work the strands out to an even spacing .
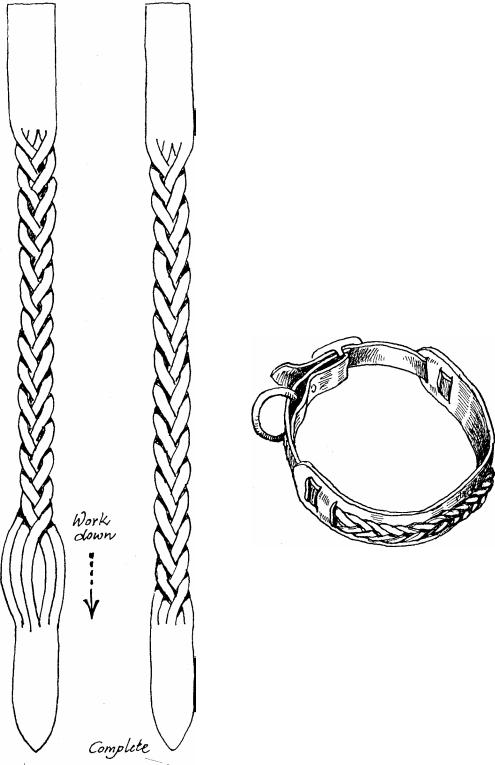
A dog collar using the 5 plait
A DOG COLLAR
This attractive collar is easy to make using the secret plait. In leatherwork there are many techniques that look simple but are really difficult, this is just the opposite, the collar looks far more difficult than it really is.
It is best suited to large dogs. Plaited collars can also be a problem with long haired dogs because their hair gets caught in the plaited work. This collar
56
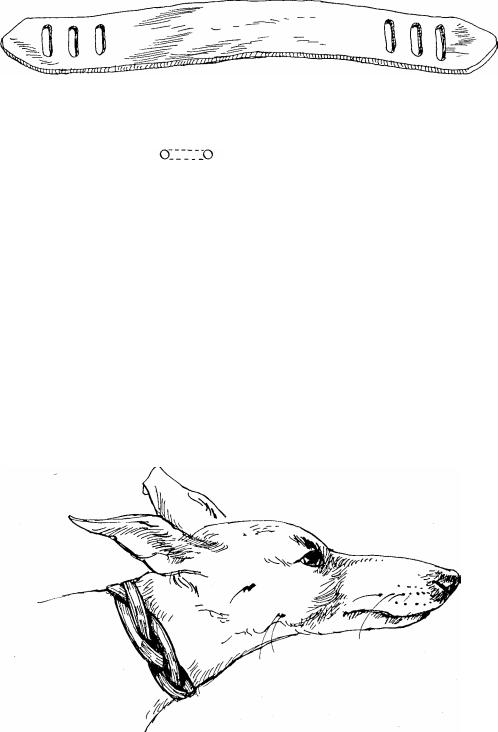
avoids the problem as there is only smooth leather against the dog. I used such a collar on my wolfhound for a few years and had
no problems at all with his hair getting caught.
The collar is made in two parts. The first part is an ordinary collar, this is cut in the middle into 3 or 5 strands and a secret plait is worked into it.
A wider piece of leather is then cut, and three slots put in at either end. If you do not have a slot punch the technique is to punch a hole on either side of the strap and then join them
with two knife cuts.
The plaited strap is put through these holes and the collar is complete, I have found that the two pieces do not have to be fastened together in any way, the plaiting seems to keep the wider strap from moving.
A COLLAR FOR A SMALL DOG
The secret plait can be used to make an attractive collar for small smooth-haired dogs. The five plait looks very fine, but the three plait is the easiest to do.
The making of a 3 plait collar is shown on the next page. Before beginning to plait cut the strands, round off the edges and then give the strands a good rub with oil or leather dressing. This will help stop the leather drying out and greatly increase the life of the collar.
It is best to oil and also polish the strands before the plaiting is done, as it is difficult to get a good penetration if it is left to the last.
The sketch shows the collar on my whippet.
57

I know of at least three different ways to do the three plait, but I would recommend the beginner to stick with the one given at the start of this chapter. The reason for this is that it uses a system which can also be used for all the other secret plaits, from 3 to 21.
58