

Изделия из кожи
.pdf
BUSH LEATHERWORK RON EDWARDS
By the same author-
AUSTRALIAN TRADITIONAL BUSH CRAFTS
SKILLS OF THE AUSTRALIAN BUSHMAN
MAKING A STOCK SADDLE
THE AUSTRALIAN YARN
OVERLANDER SONGBOOK
MUD BRICK AND EARTH BUILDING THE CHINESE WAY
YARNS AND BALLADS OF THE AUSTRALIAN BUSH

THE RAMS SKULL PRESS
In 1982 I began writing a series of small books dealing with various aspects of leatherwork concentrating on the special s k i l l s a n d t e c h n i q u e s t h a t h a v e b e e n d e v e l o p e d i n t h e Australian bush over the past century.
Fortunately these skills have not vanished, and in fact interest in them seems to be growing. There are a number of plaiters working today whose skills equal that of any of the great names from the past, and many bush people are once again making their own leather gear. We know this from the increase in orders from outback areas of north Queensland that come into our saddlery business in Cairns.
At present I have written and published eleven small books on leather, and they are all in this one volume, plus a section on making thread, taken from my book 'Making a Stock Saddle.
Ron Edwards.
November 1984
This eBook version was scanned and proofed by Ten80. These books are becoming hard to get even in Australia. So I hope the by converting them to electronic format that I can introduce new readers to the joys of Ron Edwards' unique style. After all, the more of us wanting his titles, the more likely there are to be reprints.
If you enjoy this book, please strongly consider sending Ron a donation at the address below, and ask for copies of his other books - they are well worth the reading too.
I hope you find this, my first scanning attempt, of use. Thanks,
Ten80.
Copyright Ron Edwards 1984
THE RAMS SKULL PRESS
Box 274 Kuranda
Qld 4872
Australia
Ph (070) 937474
Also obtainable from CRAFT SHOP SADDLERY 61 Grafton St Cairns 4870
ISBN 0 909901 47 3

1. STOCKMEN'S PLAITED BELTS |
|
4. |
BUSHMEN'S BELT POUCHES |
|
|
Another use for belts |
9 |
Pouches sewn on the belt |
69 |
||
Selecting the lace |
I1 |
A 3 -pouch belt |
69 |
||
Cutting lace by hand |
11 |
Pouch with a stud |
72 |
||
The stabbed block guide |
13 |
Pouch worn on the front |
73 |
||
The split twig guide |
14 |
Plaited knife pouch fixed to belt |
74 |
||
Fingers only method |
14 |
materials needed |
74 |
||
Standard flat plaiting technique |
15 |
Plaited knife pouch, loose |
78 |
||
Eight plait |
15 |
Standard knife pouch |
81 |
||
Ten plait |
15 |
Simple pouch |
83 |
||
Twelve plait |
15 |
Double pouch |
83 |
||
Sixteen plait |
15 |
Rabbiter's pouch |
84 |
||
Losing the sequence |
16 |
Sailor's knife |
84 |
||
Calculating the amount of lace |
16 |
Plaited pouch |
85 |
||
Twin ring belt |
17 |
Watch pouch |
91 |
||
Fourteen plait |
19 |
Drop -down pouch |
92 |
||
Eighteen plait |
19 |
5. |
LEATHER LACING |
|
|
Getting tension on plaited belts |
20 |
|
|||
Reversing the face |
20 |
|
|
|
|
Finishing off |
22 |
Whip stitch |
94 |
||
The keeper |
23 |
Wide whip |
95 |
||
Loose keeper |
24 |
Mummy wrapping |
97 |
||
Smoothing and stretching |
25 |
Back whip |
98 |
||
Buckle belt |
25 |
Cross stitch |
99 |
||
Fixed keeper |
26 |
Round braid |
100 |
||
Plaiting patterns |
27 |
Single cordover |
102 |
||
Patterns in general |
28 |
Double cordover |
103 |
||
Crocodile ridge plait |
29 |
Triple cordover |
105 |
||
Raised edge plait |
33 |
Lazy S |
106 |
||
Triple ridge plait |
33 |
Dot stitch |
108 |
||
Some variations |
34 |
Baggin's stitch |
108 |
||
Hat bands |
36 |
6. PLAITS ROUND & FLAT |
|
||
Watch bands |
36 |
|
|||
2. |
BRAIDED BELTS |
|
Three plait |
111 |
|
Round edge braiding |
39 |
Four plait(round |
111 |
||
Crown knot |
112 |
||||
Single strand centre braid |
40 |
Double four plait |
113 |
||
Vine & flowers pattern |
41 |
Five plait(round) |
114 |
||
Twelve point braid |
42 |
Six plait(round) |
115 |
||
Wide braiding |
43 |
Seven plait(round) |
115 |
||
Covered buckles |
45 |
Eight plait(round) |
116 |
||
A braided snake |
46 |
Eight plait(another method) |
117 |
||
3. |
THE SECRET PLAIT |
|
Twelve plait(round) |
117 |
|
|
Coachwhipping |
117 |
|||
Three plait |
48 |
Short whipping |
118 |
||
A dog lead |
119 |
||||
Eleven plait |
48 |
Long whipping |
121 |
||
Twenty-one plait |
48 General rule for flat plaits |
122 |
|||
Allowing for shrinkage |
49 |
Three plait(flat) |
122 |
||
Three plait |
49 |
Four plait(flat) |
122 |
||
Five plait |
52 |
Five plait(flat) |
123 |
||
A dog collar |
56 |
Six plait (flat) |
123 |
||
A collar for a small dog |
57 |
Seven plait(flat) |
124 |
||
Another way to do three plait |
58 |
Eight plait(flat) |
124 |
||
Seven plait |
60 |
Ten plait(flat) |
124 |
||
Nine, eleven & thirteen plait |
63 |
Twelve plait(flat) |
125 |
||
Homemade gang cutter |
64 |
Fourteen plait(flat) |
125 |
||
Gulf knot |
65 |
Sixteen plait(flat) |
125 |
||
Trinity knot |
66 |
A useful plaiting tip |
125 |
||
|
|
|
|
|
5 |
7. WHIPMAK1NG PART 1 |
9. HOMEMADE TOOLS |
Basic stockwhips
Dimensions '
Cutting the strands
Skiving
Rolling the belly
Avoiding tangles
Plaiting the whip
Plaiting soap
Attaching the fall
Rolling the whip
Making the cracker
Speeding up the job
Finishing off the cracker
Fastening the cracker
Making the handle
Attaching the keeper
Attaching whip & handle
Covering the handle
Forming the knob
Six plait whip
Working the six plait
Changing from 6 to 4
8 . W H I P- M A K I N G P A R T 2
K a n g a r o o h i d e s t o c k w h i p s M a t e r i a l s n e e d e d
T h e c o r e
T h e f i l l e r a n d b e l l y p l a i t T h e b o l s t e r
T h e t o p p l a i t
T h e t o p p l a i t , g r e a s i n g s t r a n d s A v o i d i n g t a n g l e s
B r o k e n s t r a n d s
J o i n i n g w i t h o u t g l u e A f a s t e r j o i n
C h a n g i n g f r o m 1 2 t o 1 0 p l a i t C h a n g i n g f r o m 1 0 t o 8 p l a i t C h a n g i n g f r o m 8 t o 6 p l a i t T h e f a l l
T h e h a n d l e
A h a l f - p l a i t e d h a n d l e F r e n c h w h i p p i n g Appendix 1
A p p e n d i x 2 - A l l k a n g a r o o h i d e w h i p A p p e n d i x 3 - C o w h i d e b e l l y
A p p e n d i x 4 - W h i p f r o m p r e - c u t l a c e M a k i n g a b u l l w h i p
Snakewhip
C o v e r i n g t h e k n o b
6
126 |
H o l e p u n c h |
189 |
||
129 |
Mallet |
190 |
||
130 S t a m p s |
191 |
|||
130 |
E m b o s s i n g t o o l s |
192 |
||
131 |
C u t t i n g s t r a p s |
193 |
||
132 |
Plough gauge |
194 |
||
132 |
Edg e shave |
197 |
||
133 |
E d g e c r e a s e |
198 |
||
134 |
W o o d e n e d g e c r e a s e |
200 |
||
135 |
L e a t h e r c r e a s e |
200 |
||
135 |
R a c e |
201 |
||
136 |
Markin g wheel |
203 |
||
137 |
R o u n d k n i f e |
203 |
||
137 |
L a c i n g f i d |
204 |
||
138 |
Awl |
|
205 |
|
138 |
S t i t c h i n g a w l |
206 |
||
139 |
B o n e s m o o t h e r |
207 |
||
140 |
Multiple slit punch |
208 |
||
141 |
Edge polishing iron |
208 |
||
Lace needles |
209 |
|||
143 |
||||
143 |
10. |
ROLLING A THREAD |
|
|
144 |
|
|||
|
|
|
||
|
Sewing |
213 |
||
|
S e w i n g t h i c k l e a t h e r |
216 |
||
|
A n o t h e r w a y o f b e g i n n i n g |
217 |
||
145 |
B a c k- s t i t c h i n g w i t h o n e n e e d l e |
218 |
||
11. |
SADDLE REPAIRS |
|
||
146 |
|
|||
146 |
Simple saddle repairs |
220 |
||
149 |
||||
150 |
Sewing the panel back |
225 |
||
150 |
Repairing the tree |
228 |
||
155 |
Replacing dees |
230 |
||
156 |
Repairing a torn flap |
231 |
||
158 |
Replacing girth straps |
232 |
||
158 |
Seat breaking loose |
234 |
||
158 |
Putting on a new seat |
235 |
||
159 |
12. |
COUNTER-LINING STOCK SADDLES |
||
160 |
||||
160 |
Materials needed |
241 |
||
160 |
||||
163 |
Beginning the patching |
242 |
||
168 |
Preparing to patch panel |
242 |
||
168 |
Sewing back patch to back facing |
243 |
||
172 |
Patch on panel edge |
244 |
||
1 7 2 |
Sewing in channel material |
245 |
||
173 |
Pinning patches in place |
246 |
||
1 7 4 |
Stitching patches |
247 |
||
175 |
M aterials for counter -lining |
248 |
||
180 |
Begin counter-lining |
248 |
||
186 |
Concealed stitch |
253 |
||
|
Serge sewn & filling begun |
254 |
||
|
Filling top & bottom |
255 |
||
|
Start of quilting |
256 |
||
|
Using double ended needle |
257 |
||
|
Using seat awl |
258 |
||
1
7

STOCKMAN'S PLAITED |
STOCKMAN'S PLAITED BELTS |
BELTS |
|
STOCKMAN'S PLAITED |
STOCKMAN'S PLAITED |
BELTS |
BELTS |
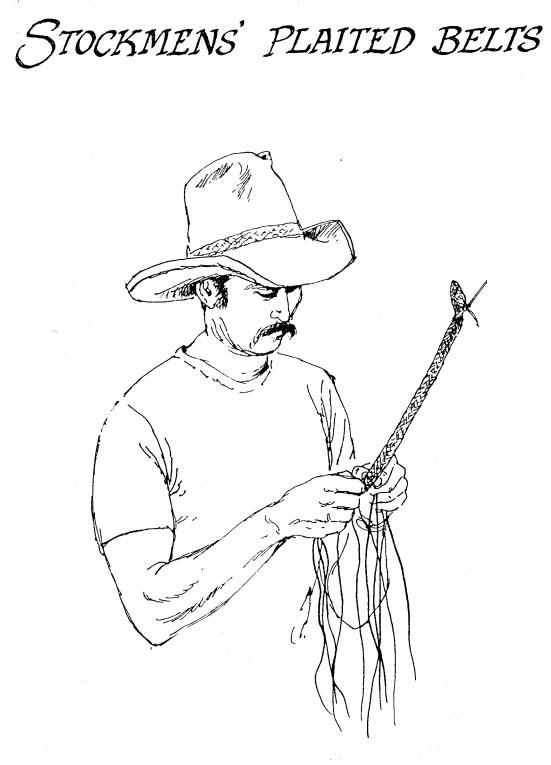
When I first printed the booklet on plaited belts I used a sketch of a stockman friend, Rob Cheerio, on the cover.
When it came time to print a
second edition I added a few years onto him, much to his disgust.
In later printings he has got older and older, until now he looks just about ready to retire.
8
FOREWORD
Over the years bushmen have developed various crafts that are typically Australian, and one of these is the plaiting of kangaroo hide belts. Braided belts of various types are found in other countries, but the Australian variety is quite distinctive.
These belts are extremely comfortable, very flexible and immensely strong. Kangaroo hide is said to be the strongest leather in the world for its thickness, and yet is very easy to work with.
The stockman's belt evolved generations ago, probably in some isolated outback cattle camp during the wet season. At this time of the year when outs ide work becomes impossible the men repair harness and make up gear for the coming season. There is plenty of spare time to fill in, and so plaited work can be undertaken, such as the making of stockwhips, the best of which are also worked with kangaroo hide.
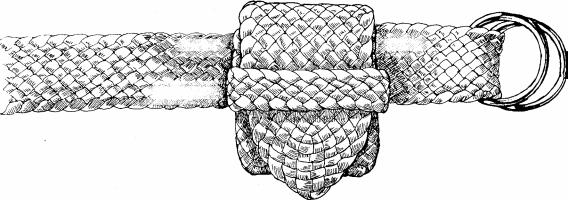
Belts are made in two forms, with a conventional buckle or with a pair of rings. The twin ring buckle is the most characteristic form, the rings usually being brass and from an old bridle. This style doubtless originated from necessity as there are usually a few bridle rings to be found around any station even when buckles are scarce.
Besides the use of kangaroo hide the stockman's belt also differs from other forms in the way that it is begun. In other parts of the world the usual custom is to begin a plaited belt from the buckle end, but stockmen begin from the point.
This may seem to be a little complicated the first time it is attempted, but after only a few belts it will be found to be relatively easy. Once the point has been formed the rest of the plaiting is quite simple.
ANOTHER USE FOR BELTS
One day when I was doing some plaiting a bushman came along and told me an odd tale about plaited belts. He said that in the early days in western New South Wales and Queensland it was against the law for a swagman to carry a bridle amongst his gear. This was to discourage horse stealing.
To get around this problem the travellers would use two or three plaited belts to tie up their swag, and another around their waist, and with these they could soon put together a simple bridle using a scrap of fencing wire as a bit.
9