

Professional Visual Studio 2005 (2006) [eng]
.pdfIntroduction
How This Book Is Structured
This book’s first section is dedicated to familiarizing you with the core aspects of Visual Studio 2005. From the IDE structure and layout to the various options and settings you can change to make the user interface synchronize with your own way of doing things, everything you need is contained in the first six chapters.
From there, the many functions of Visual Studio 2005 are broken down into nine broad categories:
Project and Solution Design: In this part, you learn how to take control of your projects, how to organize them in ways that work with your own style, and how to edit application configuration and XML resource files.
Documentation and Research: The old adage of “read the manual” applies no less strongly with this latest version of Visual Studio. Microsoft has kept the documentation library completely up-to-date, with the MSDN library available both online and offline. In addition, Microsoft has also strived to help you control your own documentation efforts, and this section walks you through the process of automated XML documentation as well as using the Outline modes to review your code.
Security and Modeling: Two extremely important features that are often overlooked or left until the last minute are implementing good security and modeling your solution before commencing development. Rather than follow the trend and leave these two topics to the end of the book, they are placed in a more appropriate order.
Coding: While the many graphical components of Visual Studio that make a programmer’s job easier have been discussed in many places, you often need help when you’re in the process of actually writing code. This section deals with features such as IntelliSense, regionalizing your code, and tagging sections of your program for processing later.
Automation: If the functionality found in the previous part isn’t enough to help you in your coding efforts, Microsoft has provided many other features related to the concept of automating your programming work. This part starts by looking at code-generation techniques and macros, but also discusses add-ins, extensions, and automation of assembly signing.
Other Time-Savers: Think of this part as an informational “Swiss Army knife,” with just the right tool for the job always at hand. Controlling your workspace, maximizing your performance in searching, and using both regular expressions and Windows registry hacks are all included in this part, along with coverage about how to harness performance counters, database creation, and diagramming.
Build and Deployment: In addition to discussing how to build your solutions effectively and getting applications into the hands of your end users, this part also deals with the upgrade process for Visual Basic 6 projects into the new Visual Basic 2005 format.
Debugging and Testing: No matter how good a developer you are, you’re bound to need to test your solutions before making them available to users, and this part walks you through the powerful tools at your fingertips for debugging code and even databases.
Extensions for Visual Studio 2005: Many third-party add-ins and extensions to Visual Studio 2005 are available, but there are three valuable extensions to the core IDE that Microsoft itself has developed. The last part of this book deals with these—the Team System additions to Visual Studio, the InfoPath 2003 Toolkit for Visual Studio 2005, and Visual Studio Tools for Office for developers who need to work with Microsoft Office.
xxxviii

Introduction
While this breakdown of the Visual Studio feature set provides the most logical and easily understood set of topics, you may need to look for specific functions that will aid you in a particular activity. To address this need, references to appropriate chapters are provided whenever a feature is covered in more detail elsewhere in the book.
What You Need to Use This Book
To use this book effectively, you’ll need only one additional item—Microsoft Visual Studio 2005 Professional Edition. With this software installed and the information found in this book, you’ll be able to get a handle on how to use Visual Studio 2005 effectively in a very short period of time.
To get the absolute most out of the book, you can also install the following products, all of which are available from Microsoft:
Microsoft Visual Studio 2005 Team System: A more powerful version of Visual Studio, Team System introduces tools for other parts of the development process such as testing and design. Team System is discussed in Chapter 56.
SQL Server 2005: The installation of Visual Studio 2005 includes an install of SQL Server 2005 Express, enabling you to build applications that use database files. However, for more comprehensive enterprise solutions, you can use SQL Server 2005 instead. Database connectivity is covered in Chapter 38.
Visual Studio Tools for Office 2005: VSTO2005 for short, this add-in integrates new project templates into Visual Studio 2005, enabling you to create managed solutions for Microsoft Word, Excel, and Outlook. Take a look through Chapter 55 for more information.
InfoPath 2003 Toolkit for Visual Studio 2005: Another addition to the core Visual Studio 2005 environment, this toolkit integrates managed code solutions with InfoPath forms, doing away with the requirement to use JavaScript for the code behind InfoPath and replacing it with the language of your choice. Discussion on the toolkit can be found in Chapter 54.
Code Snippet Editor: This is a third-party tool developed for creating code snippets in Visual Basic. This tool and how to obtain it is covered in Chapter 19.
Other third-party tools: Chapter 33 is all about additional third party add-ins and utilities that maximize your effectiveness using Visual Studio 2005. Please review that chapter for more information on each tool and how to obtain it.
Conventions
To help you get the most from the text and keep track of what’s happening, we’ve used a number of conventions throughout the book.
Boxes like this one hold important, not-to-be forgotten information that is directly relevant to the surrounding text.
xxxix

Introduction
Tips, hints, tricks, and asides to the current discussion are offset and placed in italics like this.
As for styles in the text:
We highlight new terms and important words when we introduce them.
We show keyboard strokes like this: Ctrl+A.
Filenames, URLs, and code appear within the text like so: persistence.properties.
We present code in two different ways:
In code examples we highlight new and important code with a gray background.
The gray highlighting is not used for code that’s less important in the present context, or has been shown before.
Source Code
As you work through the examples in this book, you may choose either to type in all the code manually or to use the source code files that accompany the book. All of the source code used in this book is available for download at www.wrox.com. Once at the site, simply locate the book’s title (either by using the Search box or by using one of the title lists) and click the Download Code link on the book’s detail page to obtain all the source code for the book.
Because many books have similar titles, you may find it easiest to search by ISBN; this book’s ISBN is 0-7645-9846-5 (changing to 978-0-7645-9846-3 as the new industry-wide 13-digit ISBN numbering system is phased in by January 2007).
Once you download the code, just decompress it with your favorite compression tool. Alternately, you can go to the main Wrox code download page at www.wrox.com/dynamic/books/download.aspx to see the code available for this book and all other Wrox books.
Errata
We make every effort to ensure that there are no errors in the text or in the code. However, no one is perfect, and mistakes do occur. If you find an error in one of our books, such as a spelling mistake or faulty piece of code, we would be very grateful for your feedback. By sending in errata you may save another reader hours of frustration, and at the same time you will be helping us provide even higher quality information.
To find the errata page for this book, go to www.wrox.com and locate the title using the Search box or one of the title lists. Then, on the book details page, click the Book Errata link. On this page you can view all errata that has been submitted for this book and posted by Wrox editors. A complete book list, including links to each book’s errata, is also available at www.wrox.com/misc-pages/booklist.shtml.
xl

Introduction
If you don’t spot “your” error on the Book Errata page, go to www.wrox.com/contact/ techsupport.shtml and complete the form there to send us the error you have found. We’ll check the information and, if appropriate, post a message to the book’s errata page and fix the problem in subsequent editions of the book.
p2p.wrox.com
For author and peer discussion, join the P2P forums at http://p2p.wrox.com. The forums are a webbased system for you to post messages relating to Wrox books and related technologies, and to interact with other readers and technology users. The forums offer a subscription feature to e-mail you topics of interest of your choosing when new posts are made to the forums. Wrox authors, editors, other industry experts, and your fellow readers are present on these forums.
At http://p2p.wrox.com you will find a number of different forums that will help you not only as you read this book, but also as you develop your own applications. To join the forums, just follow these steps:
1.Go to http://p2p.wrox.com and click the Register link.
2.Read the terms of use and click Agree.
3.Complete the required information to join as well as any optional information you wish to provide and click Submit.
4.You will receive an e-mail with information describing how to verify your account and complete the joining process.
You can read messages in the forums without joining P2P but in order to post your own messages, you must join.
Once you join, you can post new messages and respond to messages other users post. You can read messages at any time on the Web. If you would like new messages from a particular forum e-mailed to you, click the Subscribe to this Forum icon by the forum name in the forum listing.
For more information about how to use the Wrox P2P, be sure to read the P2P FAQs for answers to questions about how the forum software works as well as many common questions specific to P2P and Wrox books. To read the FAQs, click the FAQ link on any P2P page.
xli


Part I
The Integrated
Development
Environment
Chapter 1: A Quick Tour of the IDE
Chapter 2: Options
Chapter 3: Toolbox
Chapter 4: The Solution Explorer
Chapter 5: Customizing the IDE
Chapter 6: Form Design


A Quick Tour of the IDE
If you haven’t used Visual Studio before, you may feel a little overwhelmed at first. There are many different components in the very first encounter with the user interface, from familiar menus and toolbars to a myriad of windows around the sides of the main development interface space, some looking like tabs and others like small forms in their own right.
The next set of pages introduces you to the basic principles of the Visual Studio 2005 Integrated Development Environment (IDE) and shows you how the various menus, toolbars, and windows can be used. This chapter serves as a quick tour of the IDE — it won’t show you how to customize its appearance in any great detail, or itemize the various settings you can change. Those topics are covered in the following chapters.
Where to First?
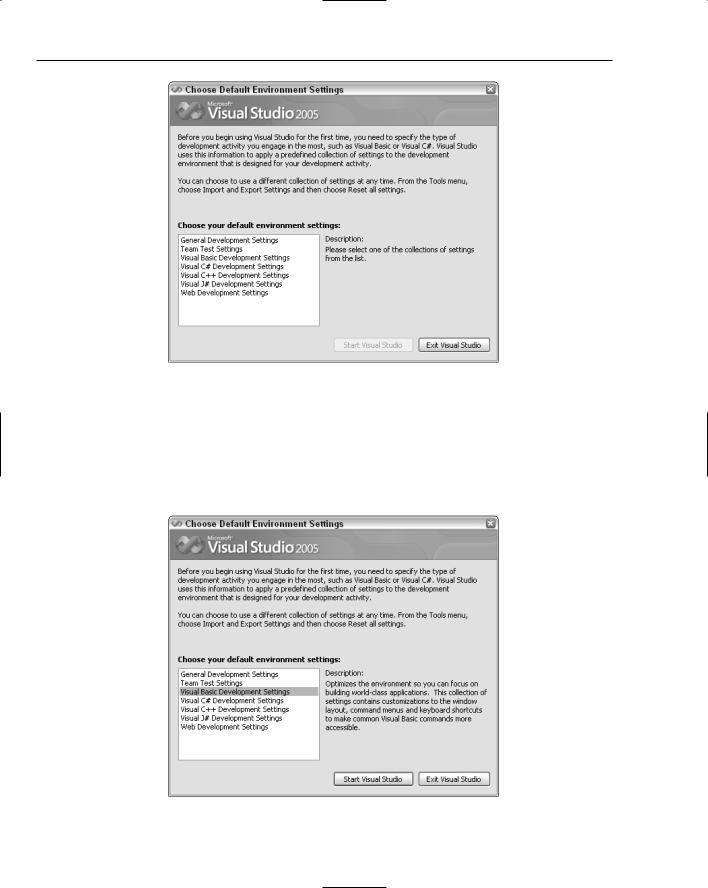
Visual Studio 2005 commences customizing itself to fit into your own work style before you even get to see the development environment. When you first start Visual Studio 2005 it asks you what kind of developer you are (see Figure 1-1). This enables it to customize the appearance of the IDE to most closely suit your way of doing things. Microsoft has researched the way different programmers work; and while you may think Visual Basic programmers work in the same way as C# developers or C++ coders, there are subtle (and sometimes not so subtle) differences.
If you take a moment to review the various options in this list, you’ll find that the environment settings that will be affected include the position and visibility of various windows, menus, and toolbars and even keyboard shortcuts. For example, Figure 1-2 describes the changes that will be applied if you select the Visual Basic Development Settings option as your default preference.
Don’t worry, though — you can individualize your interface experience to match your own way of doing things exactly, so if the default setup doesn’t suit you, you’ll be able to change it.
Chapter 1
Figure 1-1
After selecting your preferred development settings, click the Start Visual Studio button to have Visual Studio customize the IDE so that windows, toolbars, lists, menus, and a myriad of other options are all appropriate to the generalized developer for that particular language or technology.
Once it has completed this process, Visual Studio will then display the IDE, ready for you to start work. It will remember this setting so you won’t have to select from the list again.
Figure 1-2
4
A Quick Tour of the IDE
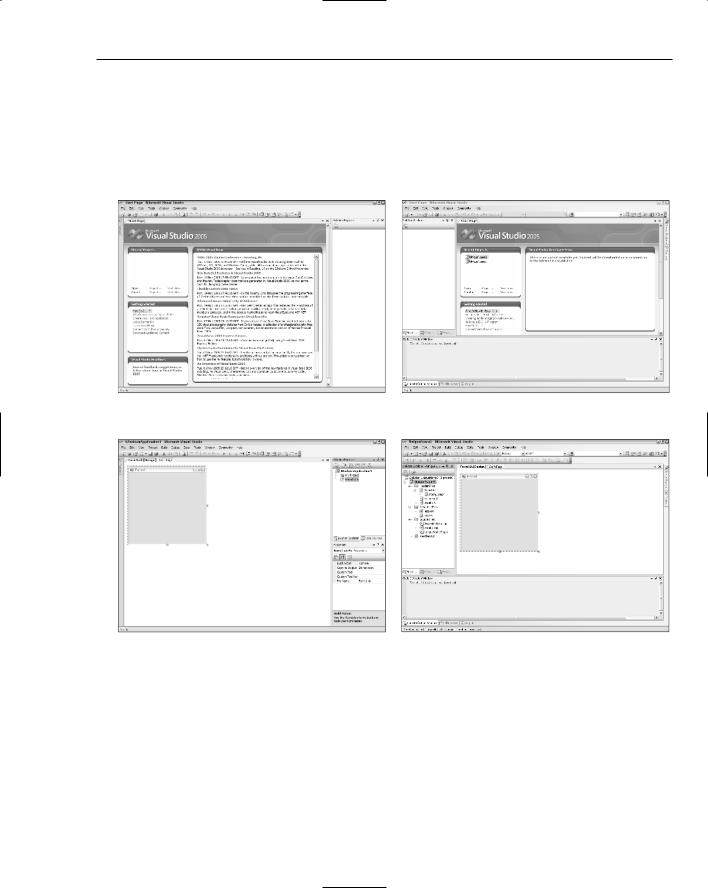
The screenshots in Figures 1-3 and 1-4 illustrate how the general interface can appear visually different depending on the settings you choose. The two images/ in Figure 1-3 show the main interface as it appears for the first time to a Visual Basic developer and to a C++ developer, while Figure 1-4 shows how a default Windows Application project is generated for these two different types of programmer. Note how not only do the menus and number and type of windows change, but also the default position of certain essential windows — for example, the Solution Explorer changes depending on what kind of programmer is using Visual Studio.
Figure 1-3
Figure 1-4
IDE Structure
The next step is to understand how the various components fit together to form the comprehensive tool that is the Visual Studio 2005 Integrated Development Environment. The best way to achieve this is by starting Visual Studio 2005 itself, picking a specific development environment, and then examining the individual elements, so in the next few pages you’ll do just that. Note that the task list that follows assumes you have already installed Visual Studio 2005 but have not yet started it for the first time.
5