

ASP.NET 2.0 Everyday Apps For Dummies (2006)
.pdfChapter 4: Building a User Authentication Application |
87 |
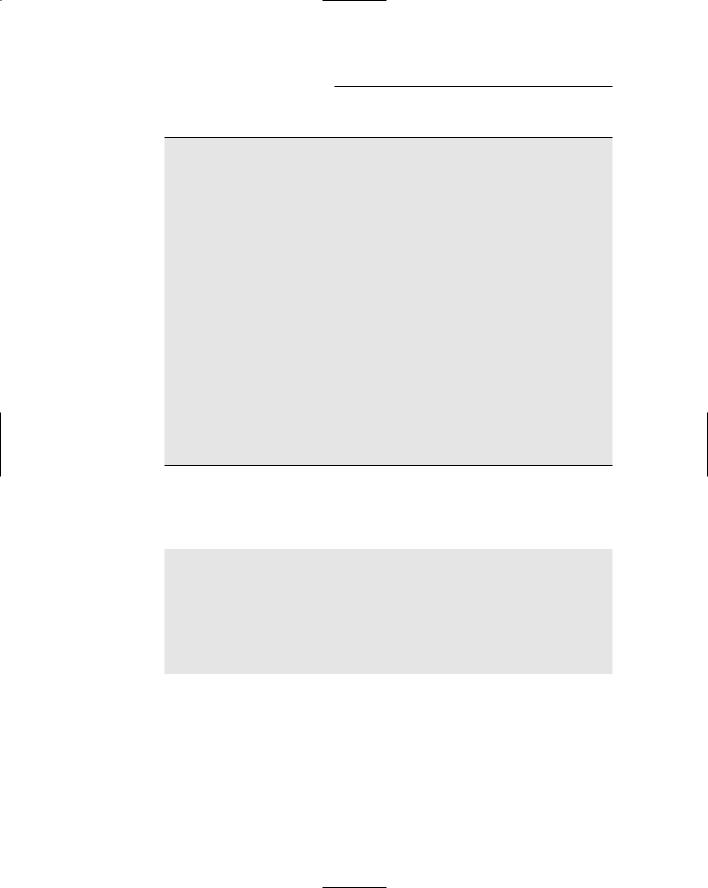
Figure 4-10:
The Change
Password
page.
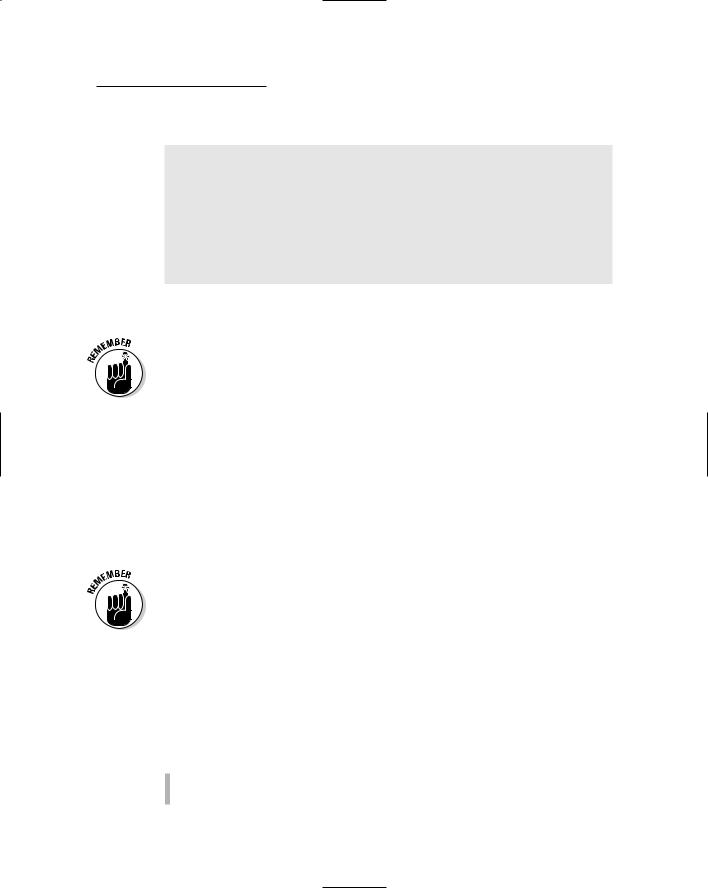
Figure 4-11:
The User
List page.

88 |
Part II: Building Secure Applications |
Designing the User Authorization
Application
To keep the User Authorization application simple to use, it takes advantage of built-in ASP.NET authorization features — as many as possible, especially these:
It uses the supplied SQL membership provider to manage the user database. If you want to extend the application so that it tracks additional data besides the user name, password, and the secret question and answer, or if you want to use your own database to store the member information, you can code your own provider. For most applications, however, the supplied provider should be adequate.
It relies on the new login controls as much as possible and uses as little C# or Visual Basic code as possible. In fact, the only page that requires a code-behind file is the User List page. The other pages rely entirely on the declarative features of the new login controls.
The application uses a Master Page (MasterPage.master) to provide a consistent layout for each page of the application. Even so, I refrained from using fancy formatting features; the resulting pages may be plainlooking, but they’re easier to modify and adapt to your application’s unique needs. You can easily add formatting to the pages by applying AutoFormats or themes.
The Application’s Folders
As with most ASP.NET applications, the User Authorization application includes several folders. These folders are used to determine which pages can be viewed by users who haven’t yet logged in, which ones are visible to normal users who have logged in, and which ones can only be seen by administrators who have logged in. The application uses the following folders:
Root: The application’s root folder (though the Solution Explorer doesn’t call it that) contains the pages that can be viewed by a user once he
or she has logged in. These include the application’s main content page (Default.aspx), the user list page (UserList.aspx), the Change Password page (ChangePW.aspx), and the Master Page (MasterPage.master). In addition, this folder contains the Login page itself (Login.aspx).
App_Data: This folder contains the membership database (ASPNETDB. MDF). The membership database is generated automatically, so you don’t have to create it yourself.

Chapter 4: Building a User Authentication Application |
89 |
Images: This folder contains the banner graphic that’s displayed by the Master Page. This folder also contains a web.config file that allows anonymous users to access its files. That’s required so the banner can be displayed by the Login.aspx, Register.aspx, and Recover.aspx pages that appear on-screen before a user has logged in.
Login: This folder contains the files necessary to display the Register and Recover Password pages. In addition, this folder contains a web.config file that allows anonymous users to access the files it contains. That
way, users who haven’t logged in can display the Register and Recover Password pages.
Admin: This folder contains the Administration page (Admin.aspx) and a web.config file that restricts access to administrative users (that is, users who are assigned to the Admin role).
The root and App_Data folders are created automatically when you create a new Web site in Visual Studio. You’ll have to create the Images, Login, and Admin folders manually, using the Solution Explorer. (To create a folder in the Solution Explorer, right-click the root folder and choose the New Folder command.)
The web.config Files
The User Authentication application relies on web.config files to configure its authentication features. Listing 4-1 shows the web.config file that appears in the application’s root folder. The following paragraphs point out the highlights of this web.config file:
1 The <authorization> section contains a <deny> element that denies access to anonymous users, as indicated by the question mark in the users attribute.
2 The <roleManager> element is required to enable roles. The roles themselves are defined in the membership database.
3 The <authentication> element specifies that the application will use forms-based authentication. As a result, the application will automatically redirect to the Login.aspx page whenever necessary.
4 The <mailSettings> section provides the information necessary to access a mail server to send e-mail when the user registers or requests a password recovery. The host attribute specifies the name of the mail host, and the from attribute specifies the address listed in the from field for any e-mail messages sent. Depending on how your mail server is configured, you may also need to supply a user name and password via the user and password attributes.
90 |
Part II: Building Secure Applications |
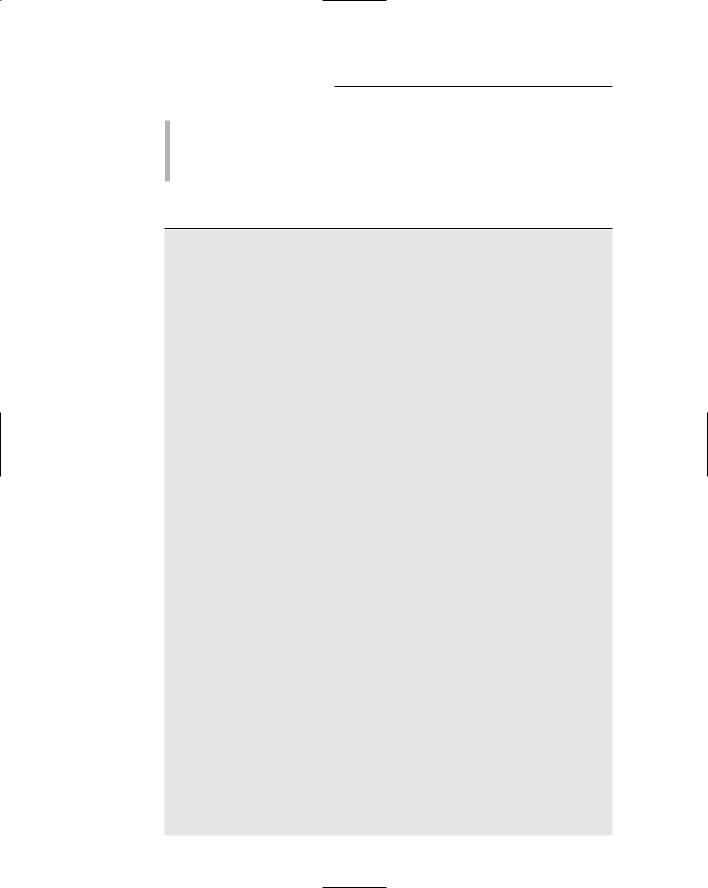
Listing 4-1: The main web.config file
<?xml version=”1.0”?> <configuration xmlns=
“http://schemas.microsoft.com/.NetConfiguration/v2.0”> <appSettings />
<connectionStrings/>
<system.web> |
|
<compilation debug=”true”/> |
|
<authorization> |
1 |
<deny users=”?” /> |
|
</authorization> |
|
<roleManager enabled=”true” /> |
2 |
<authentication mode=”Forms” /> |
3 |
</system.web> |
|
<system.net> |
|
<mailSettings> |
4 |
<smtp> |
|
<network host=”my.mail.server” /> |
|
</smtp>
</mailSettings>
</system.net>
</configuration>
In addition to the main web.config file, the User Authentication application has three other web.config files that specify access to the Login, Admin, and Images folders. The web.config files for the Login and Images folders are the same:
<?xml version=”1.0” encoding=”utf-8”?> <configuration xmlns=
“http://schemas.microsoft.com/.NetConfiguration/v2.0”>
<system.web>
<authorization>
<allow users=”?” /> </authorization>
</system.web>
</configuration>
As you can see, this web.config file specifically allows access for anonymous users (the ? wildcard refers to anonymous users).
Chapter 4: Building a User Authentication Application |
91 |
The web.config file for the Admin folder is a little different:
<?xml version=”1.0” encoding=”utf-8”?> <configuration xmlns=
“http://schemas.microsoft.com/.NetConfiguration/v2.0”>
<system.web>
<authorization>
<allow roles=”Admin” /> <deny users=”*” />
</authorization>
</system.web>
</configuration>
Here, the <allow> element allows users who are assigned to the Admin role to access files in the folder. Then the <deny> element denies access to all other users.
The order is important here. If you listed the <deny> element before the <allow> element, no one would be able to access pages in the Admin folder.
Building Pages for the User
Authentication Application
The following sections present the .aspx file for each of the User Authentication application’s pages and, where appropriate, both C# and Visual Basic versions of the code-behind files. Note that .aspx files assume that C# is for the code-behind files.
To make these pages work with the Visual Basic code-behind files, you must change the Language attribute in the Page directive from C# to VB, and the CodeFile attribute will need to specify the Visual Basic version of the codebehind file, using .vb as the extension instead of .cs.
Building the Master Page
Before we look at the individual Content pages that make up the User Authentication application, Listing 4-2 presents the Master Page that’s used by the Content pages. This Master Page displays four elements on every page of the application:
A banner.
A link that lets the user log in or out.
92 |
Part II: Building Secure Applications |
If the user is logged in, a greeting such as Hello, Hawkeye.
If the user is a member of the Admin role, a link to the Admin.aspx page. (To assign a member to the Admin role, use the Web-based administration tool.)
Listing 4-2: The Master Page (MasterPage.master)
<%@ Master Language=”C#” AutoEventWireup=”true” |
1 |
CodeFile=”MasterPage.master.cs” |
|
Inherits=”MasterPage” %> |
|
<!DOCTYPE html PUBLIC “-//W3C//DTD XHTML 1.1//EN” “http://www.w3.org/TR/xhtml11/DTD/xhtml11.dtd”>
<html xmlns=”http://www.w3.org/1999/xhtml” > |
|
<head runat=”server”> |
|
<title>User Authentication Application</title> |
|
</head> |
|
<body> |
|
<form id=”form1” runat=”server”> |
|
<div> |
|
<asp:Image ID=”Image1” runat=”server” |
2 |
ImageUrl=”~/Images/Banner.jpg”/> |
|
<br /> |
|
<asp:LoginStatus ID=”LoginStatus1” |
3 |
runat=”server” /> |
|
<asp:LoginView ID=”LoginView1” runat=”server”> |
4 |
<RoleGroups> |
|
<asp:RoleGroup Roles=”Admin”> |
|
<ContentTemplate> |
|
<a href=”Admin/Admin.aspx”>Admin Page</a> |
|
</ContentTemplate> |
|
</asp:RoleGroup> |
|
</RoleGroups> |
|
</asp:LoginView><br /> |
|
<asp:LoginName ID=”LoginName1” runat=”server” |
5 |
FormatString=”Hello, {0}” /><br /> |
|
<asp:contentplaceholder runat=”server” |
6 |
id=”ContentPlaceHolder1” > |
|
</asp:contentplaceholder> |
|
</div> |
|
</form> |
|
</body> |
|
</html> |
|

Chapter 4: Building a User Authentication Application |
93 |
The following paragraphs describe the key lines of the Master Page:
1 The Master directive identifies the file as a Master Page.
2 The Image control displays a banner image at the top of each page. The Banner.jpg file is stored in the Images folder.
Notice the tilde used in the ImageUrl attribute (“~/Images/ Banner.jpg”). The tilde signifies the application’s root folder and can be used in URLs in any ASP.NET control.
3 The LoginStatus control is a new ASP.NET 2.0 control that displays one of two links, depending on whether the user is logged in or not. If the user is not logged in, a Login link is displayed to allow the user to log in. If the user is logged in, a Logout link is displayed to allow the user to log out. The Login or Logout link appears immediately beneath the banner image.
4 The LoginView control is another new ASP.NET 2.0 control. It displays the contents of a template depending on the user’s login status. As this LoginView control shows, you can use the <RoleGroups> element to create content that’s rendered if the user is logged in and is assigned to the specified role. In this case, the LoginView control renders a link to the Admin.aspx page if the user is logged in and belongs to the Admin role.
Although this example doesn’t show it, you can also use an
<AnonymousTemplate> or a <LoggedInTemplate> element to create content that’s rendered if the user is anonymous or logged in.
5 The LoginName control displays the user’s name if the user is logged in. If the user isn’t logged in, the LoginName control doesn’t display anything. Notice that the LoginName control in this listing uses a format string to format the name by adding “Hello, “ before the name. You might be tempted to just specify “Hello, “ as a text literal immediately before the LoginName control. But if you do that, the text will be displayed even if the user isn’t logged in. By using a format string, the text won’t be displayed if the user isn’t logged in.
6 The ContentPlaceHolder control provides an area in which the content from the individual pages can be displayed. Each content
page includes a Content control that refers to the ID of this
ContentPlaceHolder control.
Building the Content page
The content page (Default.aspx) is pretty simple, as it merely displays a label indicating that the user has reached the page along with a link to the UserList page. The code is shown in Listing 4-3. (Refer back to Figure 4-3 to catch a glimpse of this page displayed in a browser window.)
94 |
Part II: Building Secure Applications |
|
|
|||
|
|
|||||
|
|
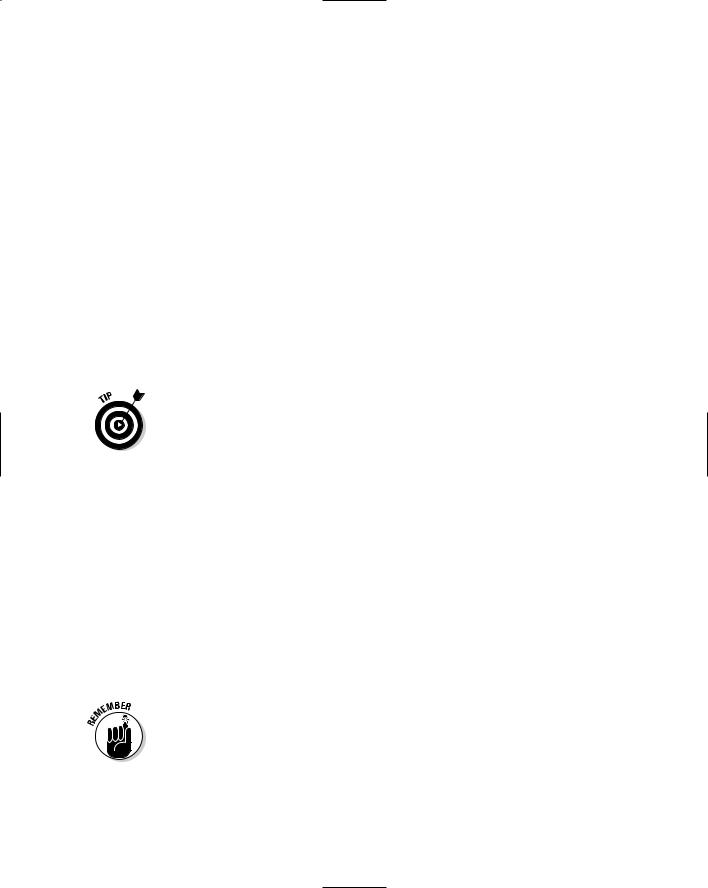
Listing 4-3: The Content Page (Default.aspx) |
|
|||
|
|
|
<%@ Page Language=”C#” AutoEventWireup=”true” |
1 |
||
|
|
|
MasterPageFile=”~/MasterPage.master” |
|
||
|
|
|
CodeFile=”Default.aspx.cs” |
|
||
|
|
|
Inherits=”_Default” %> |
|
||
|
|
|
<asp:Content ID=”Content1” Runat=”Server” |
2 |
||
|
|
|
ContentPlaceHolderID=”ContentPlaceHolder1” > |
|
||
|
|
|
<br /><br /> |
|
||
|
|
|
Congratulations! You have reached the content page. |
|
||
|
|
|
<br /><br /> |
|
||
|
|
|
<a href=”UserList.aspx”>List online users</a> |
|
||
|
|
|
</asp:Content> |
|
||
|
|
The following paragraphs describe the high points of this listing: |
|
|||
|
|
|
1 |
The Page directive for a content page uses the MasterPageFile |
||
|
|
|
||||
|
|
|
|
attribute to specify the name of the Master Page, ~/MasterPage. |
||
|
|
|
|
master. |
|
|
|
|
|
|
If you haven’t worked with Master Pages before, you might be |
|
|
|
|
|
|
wondering where the HTML <Head>, <Body>, and <Form> ele- |
||
|
|
|
|
ments are. Those elements aren’t required here because this is a |
||
|
|
|
|
content page that references a Master Page. As a result, those ele- |
||
|
|
|
|
ments appear in the Master Page. |
|
|
|
|
|
2 |
The <Content> element holds the content that’s displayed when |
||
|
|
|
|
the page is rendered. The ContentPlaceHolderID attribute pro- |
||
|
|
|
|
vides the name of the content placeholder defined in the Master |
||
|
|
|
|
Page. In this case, the content is displayed in the placeholder |
|
|
|
|
|
|
named ContentPlaceHolder1. |
|
|
|
|
|
|
|
||
Building the Admin page
Like the Content page, the Admin page (Admin.aspx) is simpler. It displays a label indicating that the user has reached the page and a button that returns the user to the main content page. In an actual application, this page would contain links to administrative functions such as database maintenance pages. The code for the Admin page is shown in Listing 4-4. You can refer back to Figure 4-4 to see this page displayed in a browser window.
This page is stored in the Admin folder, which contains a web.config file that restricts access to users who are logged in and are assigned to the Admin role. As a result, the page can be viewed only by administrative users.
Chapter 4: Building a User Authentication Application |
95 |
Listing 4-4: The Admin Page (Admin.aspx)
<%@ Page Language=”C#” AutoEventWireup=”true” MasterPageFile=”~/MasterPage.master” CodeFile=”Admin.aspx.cs” Inherits=”Admin_Admin” Title=”Administration Page” %>
<asp:Content ID=”Content1” Runat=”Server” ContentPlaceHolderID=”ContentPlaceHolder1” > <br /><br />
Congratulations, you have reached the Administration Page.
<br /><br />
<asp:Button ID=”Button1” runat=”server” PostBackUrl=”~/Default.aspx” Text=”Return to Main Page” />
</asp:Content>
The following paragraphs describe the key lines in this listing:
1
2
3
1 The Page directive uses the MasterPageFile attribute to specify the name of the Master Page, ~/MasterPage.master.
2 The <Content> element displays a message that lets the user know the Admin page has been reached.
3 The Button control that defines the “Return to Main Page” button includes a new ASP.NET 2.0 feature: the PostBackUrl attribute. PostBackUrl specifies the URL of the page that is posted when the user clicks the button. This effectively allows the button to act
as a link to another page. With previous versions of ASP.NET, you’d have to write an event handler for the button and use
Server.Transfer or Response.Redirect to return to the Admin page — or use a hyperlink rather than a button.
Building the Login page
ASP.NET displays the Login page (Login.aspx) automatically whenever an anonymous user tries to access a protected page. Other than designating which pages are denied access via the web.config file, you don’t have to do anything special to make the Login page appear. All you have to do is create a page named Login.aspx in the application’s root folder and provide a login control on the page. ASP.NET will then take care of the details for you.

96 |
Part II: Building Secure Applications |
Listing 4-5 shows the Login page for the User Authentication application. To see how this page looks in a browser window, you can refer back to Figure 4-2.
Listing 4-5: The Login Page (Login.aspx)
<%@ Page Language=”C#” AutoEventWireup=”true” |
1 |
MasterPageFile=”~/MasterPage.master” |
|
CodeFile=”Login.aspx.cs” |
|
Inherits=”Login_Login” |
|
Title=”Untitled Page” %> |
|
<asp:Content ID=”Content1” Runat=”Server” |
2 |
ContentPlaceHolderID=”ContentPlaceHolder1” > |
|
<asp:Login ID=”Login1” runat=”Server” |
3 |
DestinationPageUrl=”~/Default.aspx” |
4 |
TitleText= |
|
“Please enter your account information:<br /><br />” |
|
CreateUserText=”New user?” |
5 |
CreateUserUrl=”~/Login/Register.aspx” |
|
PasswordRecoveryText=”Forgot password?” |
6 |
PasswordRecoveryUrl=”~/Login/Recover.aspx” /> |
|
</asp:Content> |
|
The following paragraphs describe the high points of this listing:
1 The Page directive specifies that ~/MasterPage.master is the Master Page for this content page.
2 The <Content> element provides the content that’s displayed for the Login page.
3 The Login control allows the user to log in. It displays text boxes that let the user enter his or her user name and password and a Log In button the user can click to log in.
4 The DestinationPageUrl attribute specifies the page that should be displayed when the user successfully logs in. In this case, the Default.aspx page is displayed.
5 The CreateUserText attribute specifies the text that’s displayed in a link the user can click to create a new user account. Then the CreateUserUrl attribute provides the URL of the page that handles the user registration. In this case, the text is New user? and the registration page is ~/Login/Register.aspx.
6 The PasswordRecoveryText attribute specifies the text that’s displayed in a link the user can click if he or she forgets his or her
password. Then the PasswordRecoveryUrl attribute supplies the URL of the page that handles password recovery. In this case, the text is Forgot password? and the password-recovery page is ~/Login/Recover.aspx.