

ASP.NET 2.0 Everyday Apps For Dummies (2006)
.pdfChapter 5: Building a Product Catalog Application 117
USE Products
GO
CREATE TABLE Categories ( catid VARCHAR(10) NOT NULL, name VARCHAR(50) NOT NULL,
[desc] VARCHAR(MAX) NOT NULL, PRIMARY KEY(catid) )
GO
4
5
6
CREATE TABLE Products ( |
|
7 |
|
productid VARCHAR(10) |
NOT NULL, |
|
|
catid |
VARCHAR(10) |
NOT NULL, |
|
name |
VARCHAR(50) |
NOT NULL, |
|
shorttext |
VARCHAR(MAX) NOT NULL, |
|
|
longtext |
VARCHAR(MAX) NOT NULL, |
|
|
price |
MONEY |
NOT NULL, |
|
thumbnail |
VARCHAR(40) |
NOT NULL, |
|
image |
VARCHAR(40) |
NOT NULL, |
|
PRIMARY KEY(productid), |
|
|
|
FOREIGN KEY(catid) REFERENCES Categories(catid) ) |
|
||
GO |
|
|
|
CREATE TABLE FeaturedProducts ( |
7 |
||
productid |
VARCHAR(10) |
NOT NULL, |
|
featuretext VARCHAR(MAX) NOT NULL, |
|
||
saleprice |
MONEY |
NOT NULL, |
|
PRIMARY KEY(productid),
FOREIGN KEY(productid) REFERENCES Products(productid) )
GO
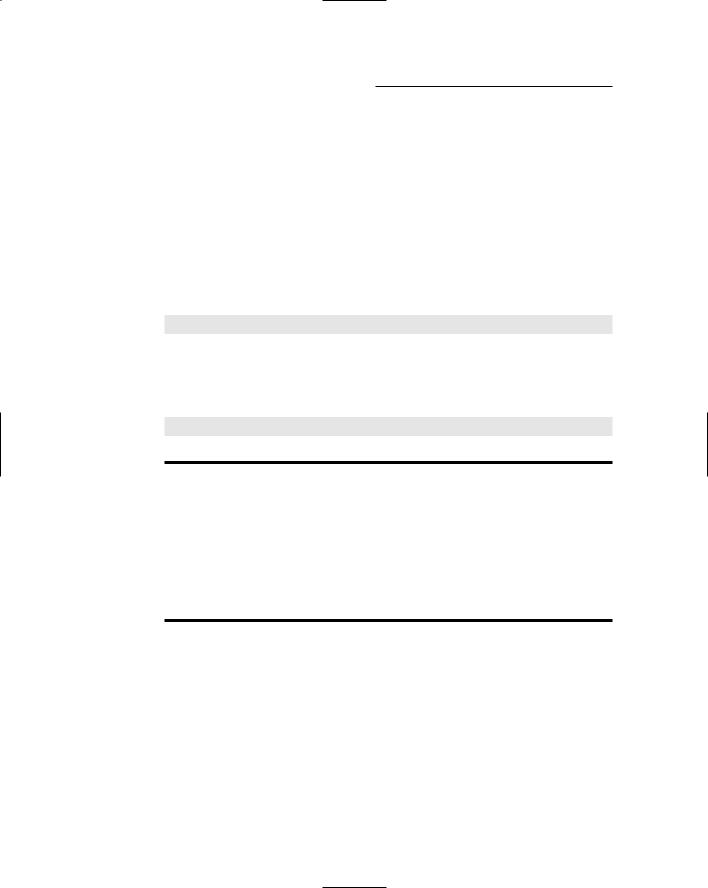
The following paragraphs describe the highlights of this script:
1 Sets the database context to master. This is usually the default context, but it’s a good idea to set it just in case.
2 Deletes the existing Products database if it exists.
3 Creates a database named Products. The database file will be created in the C:\Apps directory. You should change this location if you want to place the database file in a different folder.
4 Creates the Categories table.
5 Note that the column name desc is a SQL keyword, so it must be enclosed in brackets.
6 Creates the Products table.
7 Creates the FeaturedProducts table.
118 Part III: Building E-Commerce Applications
Adding some test data
When you run the CreateProduct script, the database will be created, but it will be empty. Your online store will look pretty bare! To add some test data, run the InsertProducts.sql script that’s included on this book’s CD along with the CreateProduct.sql script. It creates the sample data shown in Tables 5-4, 5-5, and 5-6. (Note that to keep Table 5-5 presentable, I omitted the shorttext and longtext columns. Don’t worry — the script does create data for these columns.)
To run the script, open a command window, change to the directory that contains the script, and then run this command:
sqlcmd -S localhost\SQLExpress -i InsertProducts.sql
Once again, you’ll need to change the server name if you’re not running SQL
Server Express on your own computer.
You’ll know the script works if you see a series of messages like this one:
(1 rows affected)
Table 5-4 |
Test data for the Categories Table |
|
catid |
name |
desc |
booty |
Booty |
Treasure for the Scallywags. |
|
|
|
equip |
Equipment |
Equipment and gear for yer ship. |
|
|
|
weap |
Weapons |
Proper weapons for a scurvy pirate. |
|
|
|
Table 5-5 |
|
Test data for the Products |
|
||
Productid |
catid |
name |
price |
thumbnail |
image |
chain01 |
equip |
Anchor Chain |
6.95 |
chainT.jpg |
chain.jpg |
|
|
|
|
|
|
crown1 |
booty |
Royal Crown |
14.95 |
crown1T.jpg |
crown1.jpg |
|
|
|
|
|
|
flag01 |
equip |
Pirate Flag |
15.95 |
flag01T.jpg |
flag01.jpg |
|
|
|
|
|
|
flag02 |
equip |
Pirate Flag |
12.95 |
flag02T.jpg |
flag02.jpg |
|
|
|
|
|
|
gold01 |
booty |
Gold Coins |
8.95 |
gold01T.jpg |
gold01.jpg |
|
|
|
|
|
|

Chapter 5: Building a Product Catalog Application 119
Productid |
catid |
name |
price |
thumbnail |
image |
polly |
equip |
Polly the Parrot |
15.95 |
pollyT.jpg |
polly.jpg |
|
|
|
|
|
|
rat01 |
equip |
Bilge Rat |
9.95 |
rat01T.jpg |
rat01.jpg |
|
|
|
|
|
|
scope1 |
equip |
Pirate Telescope |
15.95 |
scope1T.jpg |
scope1.jpg |
|
|
|
|
|
|
sign01 |
equip |
Pirate Sign |
25.95 |
sign01T.jpg |
sign01.jpg |
|
|
|
|
|
|
sword01 |
weap |
Pirate Sword |
29.95 |
sword01T.jpg |
sword01.jpg |
|
|
|
|
|
|
sword02 |
weap |
Broad Sword |
9.95 |
sword02T.jpg |
sword02.jpg |
|
|
|
|
|
|
Table 5-6 |
Test data for the Table |
|
productid |
featuretext |
saleprice |
flag01 |
While supplies last! |
9.95 |
|
|
|
sword01 |
Two days only! |
14.95 |
|
|
|
Querying the database
The Product Catalog application uses several queries to retrieve data from the Products database. In particular, the application must perform the following queries:
Retrieve all rows from the Categories table to fill the drop-down list on the Default.aspx page so the user can select a product.
Retrieve all rows from the FeaturedProducts table to display at the top of the Default.aspx page. Note that some data is also required from the Products table, so this query requires a join.
Retrieve all products for a given category, including the sale price indicated in the FeaturedProducts table.
Retrieve all data for a specified product to display on the Product.aspx page. Note that this query must also retrieve the sale price from the
FeaturedProducts table.
These queries will appear in the SqlDataSource controls defined in the application’s .aspx files.

120 Part III: Building E-Commerce Applications
The query to retrieve all rows from the Categories table uses this SQL statement:
SELECT catid, name, [desc]
FROM Categories ORDER BY name
Note that because desc is a SQL keyword, it must be enclosed in brackets. (Some SQL programmers like to enclose all column names in brackets just to be safe.)
The query to retrieve the featured product rows requires a join to retrieve data from the FeaturedProducts table as well as the Products table:
SELECT FeaturedProducts.productid,
FeaturedProducts.featuretext,
FeaturedProducts.saleprice,
Products.name,
Products.price
FROM FeaturedProducts
INNER JOIN Products
ON FeaturedProducts.productid = Products.productid
This query retrieves all rows from the FeaturedProducts table, and joins the corresponding rows from the Products table to get the name and price columns.
The query to retrieve the products for a given category also requires a join:
SELECT Products.productid,
Products.catid,
Products.name,
Products.shorttext,
Products.longtext,
Products.price,
Products.image,
Products.thumbnail,
FeaturedProducts.saleprice
FROM Products
LEFT OUTER JOIN FeaturedProducts
ON Products.productid = FeaturedProducts.productid
WHERE (Products.catid = @catid)

Chapter 5: Building a Product Catalog Application 121
Here, the outer join retrieves data from the FeaturedProducts table and provides nulls for the saleprice column of any product that doesn’t have a row in the FeaturedProducts table. Notice also that the WHERE clause specifies a parameter. As you’ll see later in this chapter, the @catid parameter will be set to the category ID value selected by the user via the drop-down list.
The last query used by the program retrieves the data for a specific product:
SELECT Products.productid, Products.catid, Products.name, Products.shorttext, Products.longtext, Products.price, Products.image, FeaturedProducts.saleprice, FeaturedProducts.featuretext
FROM Products
LEFT OUTER JOIN FeaturedProducts
ON Products.productid = FeaturedProducts.productid WHERE (Products.productid = @productid)”
Here, a parameter named @productid indicates which product to retrieve. This parameter’s value will be obtained from the prod query string field that’s passed to the Product.aspx page.
Notice also that an outer join is used to retrieve the saleprice and featuretext columns from the FeaturedProducts table. If there is no corresponding product in the FeaturedProducts table, these columns will be set to null.
Connecting to the database
The connection string used to access the Products database is stored in the application’s web.config file, like this:
<connectionStrings>
<add name=”ConnectionString” connectionString=”Data
Source=localhost\SQLExpress;
Initial Catalog=Products;Integrated Security=True”/> </connectionStrings>

122 Part III: Building E-Commerce Applications
These lines should go right after the opening <system.web> tag in the web. config file. Note that the connection string is the only place in the application that references the database name and the server information. As a result, you can move the database to a different server or use a different database simply by changing the connection string specified in the web.config file.
The Application’s Folders
Like most ASP.NET applications, the Product Catalog application includes several folders. The following folders are particularly important:
(Root): The application’s root folder contains the application’s three pages (Default.aspx, Product.aspx, and Cart.aspx) as well as the Master Page (Default.master).
App_Data: This folder is created by default by Visual Studio when the application is created. However, because the database may be used by other applications, it’s stored in a folder that isn’t part of the application’s folder hierarchy.
Images: This folder contains the banner graphic that’s displayed by the Master Page as well as image files that picture the various products. For each product, the Images folder contains two image files: one is a larger image that’s approximately 200 pixels square; the other is a thumbnail image that’s about 30 pixels square. Note that not all the images are perfectly square. For the rectangular images, the height is held at 200 pixels (or less) for the large image and 30 pixels for the thumbnail images.
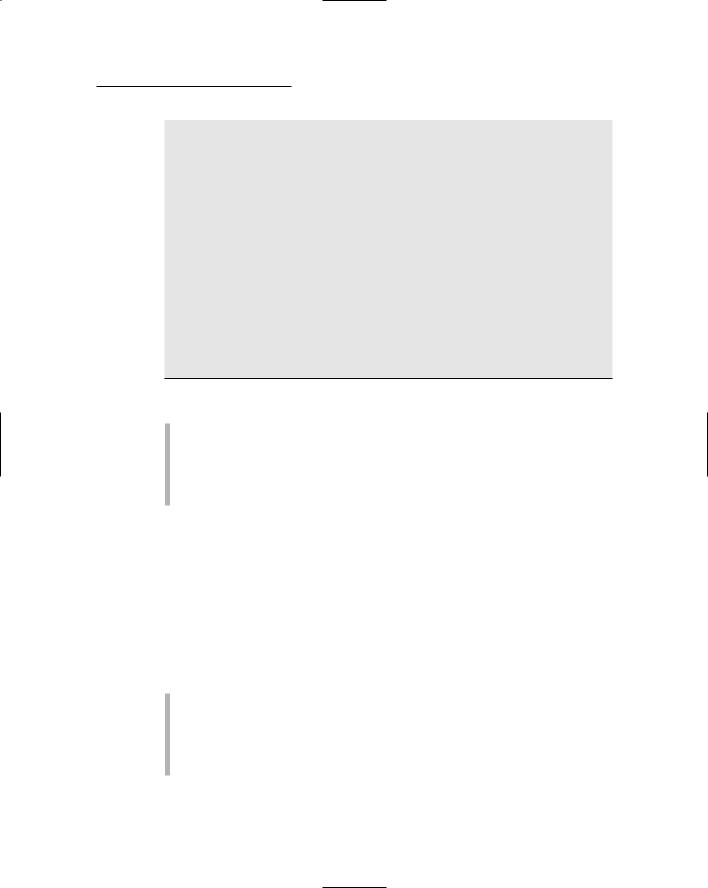
Building the Master Page
Listing 5-2 shows the code for the master page (MasterPage.master), which is used by both the Default.aspx and the Product.aspx pages. It simply displays a banner at the top of each page. In an actual application, you’d probably want to provide a more developed Master Page. But for this application, the simple Master Page shown here will do.
Listing 5-2: The Master Page (MasterPage.master)
<%@ Master Language=”C#”
AutoEventWireup=”true” 1
CodeFile=”MasterPage.master.cs”
Inherits=”MasterPage” %>
Chapter 5: Building a Product Catalog Application 123
<!DOCTYPE html PUBLIC “-//W3C//DTD XHTML 1.1//EN” “http://www.w3.org/TR/xhtml11/DTD/xhtml11.dtd”>
<html xmlns=”http://www.w3.org/1999/xhtml” > <head runat=”server”>
<title>Acme Pirate Supply</title> </head>
<body>
<form id=”form1” runat=”server”> <div>
<img src=”Images/Banner.jpg” /> 2 <br /><br />
<asp:contentplaceholder 3 id=”ContentPlaceHolder1” runat=”server”>
</asp:contentplaceholder>
</div>
</form>
</body>
</html>
The following paragraphs describe the key lines of the Master Page:
1 The Master directive identifies the file as a Master Page.
2 The Image control displays a banner image at the top of each page. The Banner.jpg file is stored in the Images folder.
3 The ContentPlaceHolder control provides the area where the content for the application’s content pages will be displayed.
Building the Product List Page
The Product List page (Default.aspx) is the default page for the Product Catalog application. It displays a drop-down list that lets the user select a product category as well as a list of all products for the category selected by the user. In addition, this page displays a list of all featured products.
The Product List page includes the following controls:
DataList1: A DataList control that lists the products in the FeaturedProducts table. The DataList control is a templated control that renders an instance of its ItemTempate for each row in the data source. The controls in the ItemTemplate can use special binding expressions to bind to data in the data source. The ItemTemplate for this DataList control contains the following bound controls:
124 Part III: Building E-Commerce Applications
•NameLabel: Displays the name column from the data source.
•FeatureTextLabel: Displays the featuretext column from the data source.
•PriceLabel: Displays the price column from the data source.
•SalePriceLabel: Displays the saleprice column from the data source.
•btnFeature: Displays a link button that lets the user display more information about one of the featured products.
SqlDataSource1: A SqlDataSource control that’s used as the data source used by the DataList1 control. This data source queries the FeaturedProducts and Products tables to return the name,
featuretext, price, and saleprice for each featured product. Note that SqlDataSource controls aren’t visible to the user when the page is rendered.
ddlCategory: A drop-down list that displays each row of the Categories table. This drop-down list is bound to the SqlDataSource control named SqlDataSource2.
SqlDataSource2: A SqlDataSource control that’s used as the data source for the ddlCategories drop-down list. This data source simply retrieves all the rows from the Categories table.
GridView1: A GridView control that lists all the products for the category selected by the ddlCategory drop-down list. The GridView control is a new control for ASP.NET 2.0. It serves the same purpose as the old DataGrid control, but provides many more options. This GridView control is bound to a data source named SqlDataSource3 and defines following columns to display the thumbnail image, name, short text, price, and sale price fields from the data source. In addition, a command field column displays a Select button.
SqlDataSource3: A SqlDataSource control that’s used as the data source for the GridView control. This data source retrieves rows from the Products and FeaturedProducts tables. A parameter limits the rows to those whose catid column matches the catid of the category selected in the drop-down list.
The Default.aspx file
Listing 5-3 shows the Default.aspx file, which defines the Product List page. You can refer back to Figure 5-2 to see how this page appears in a browser window.
Chapter 5: Building a Product Catalog Application 125
The SqlDataSource Control
The SqlDataSource control is one of the new data controls provided with ASP.NET 2.0. It lets controls such as DataList, GridView, and DetailsView bind to SQL data retrieved from SQL databases such as Microsoft’s own SQL Server and Access. The SqlDataSource control doesn’t render on the page, so it’s not visible to the user.
The following list describes the most important attributes used with the SqlDataSource control:
ID: Provides a name used to identify the
SqlDataSource control.
Runat: As with all ASP.NET controls, you must specify runat=server.
ConnectionString: Provides the connection string used to connect to the database. You can store the connection string in the web.config file, then use an expression such as <%$ Connection Strings:ConnectionString %> to retrieve the connection string from the web.config file.
SelectStatement: Provides the
SELECT statement used to retrieve the data.
DataSourceMode: DataReader or
DataSet to specify whether the data should be retrieved via a data reader or a dataset. If you specify DataSourceMode= DataSet, you can also specify Enable
Caching=True to place the dataset in cache memory.
InsertCommand: An INSERT command that inserts rows into the database.
UpdateCommand: An UPDATE command that updates rows in the database.
DeleteCommand: A DELETE command that deletes rows.
If the SQL commands used by the data source require parameters, you must use a <Select Parameters>, <InsertParameters>, <UpdateParameters>, or <Delete Parameters> element to define the parameters. You can define the parameters using any of the following elements:
<ControlParameter>: A parameter whose value is taken from another ASP.NET control.
<CookieParameter>: A parameter whose value is taken from a cookie.
<FormParameter>: A parameter whose value is taken from a form field.
<QueryStringParameter>: A parameter whose value is taken from a query string.
<SessionParameter>: A parameter whose value is taken from a session variable.
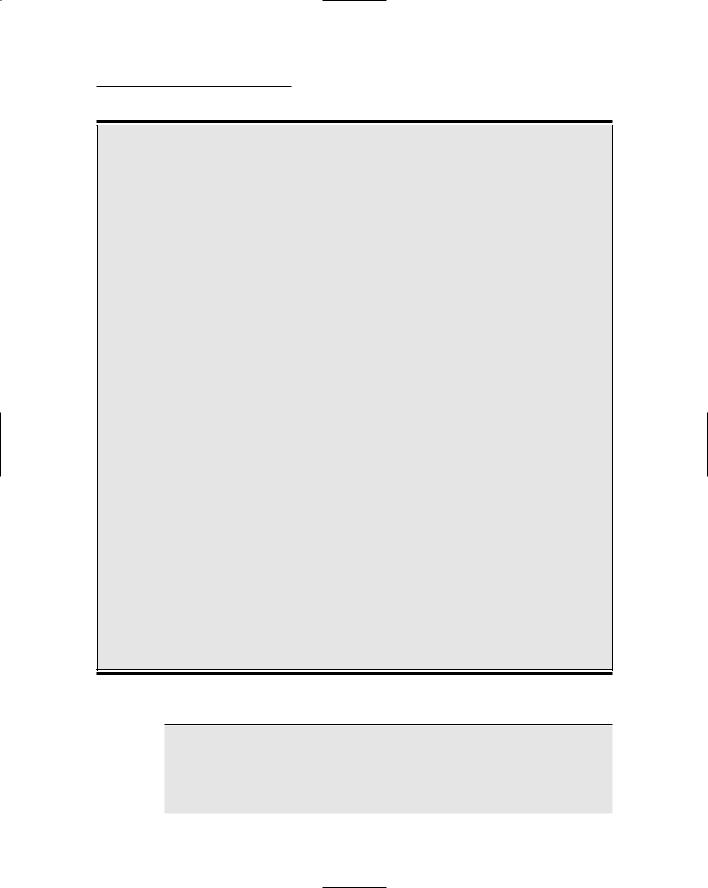
Listing 5-3: The Product List Page (Default.aspx)
<%@ Page Language=”C#” MasterPageFile=”~/MasterPage.master” 1 AutoEventWireup=”true”
CodeFile=”Default.aspx.cs”
Inherits=”_Default”
Title=”Acme Pirate Supply” %>
(continued)

126 Part III: Building E-Commerce Applications
Listing 5-3 (continued)
<asp:Content ID=”Content1” Runat=”Server” |
2 |
ContentPlaceHolderID=”ContentPlaceHolder1” > |
|
Todays specials:<br /> |
|
<asp:DataList ID=”DataList1” runat=”server” |
3 |
DataKeyField=”ProductID” |
|
DataSourceID=”SqlDataSource1” |
|
OnSelectedIndexChanged= |
|
“DataList1_SelectedIndexChanged”> |
|
<ItemTemplate> |
4 |
<b> |
|
<asp:Label ID=”NameLabel” runat=”server” |
5 |
Text=’<%# Eval(“name”) %>’> |
|
</asp:Label> |
|
</b> |
|
<asp:Label ID=”FeatureTextLabel” |
6 |
runat=”server” |
|
Text=’<%# Eval(“FeatureText”) %>’> |
|
</asp:Label> |
|
<asp:Label ID=”PriceLabel” runat=”server” |
7 |
Text= |
|
‘<%# Eval(“price”, “ Regularly {0:c}. “) %>’> |
|
</asp:Label> |
|
<b> |
|
<asp:Label ID=”SalePriceLabel” runat=”server” |
8 |
Text= |
|
‘<%# Eval(“SalePrice”, “Now only {0:c}! “) %>’> |
|
</asp:Label> |
|
</b> |
|
<asp:LinkButton ID=”btnFeature” runat=”server” |
9 |
CommandName=”Select” Text=”Details” > |
|
</asp:LinkButton> |
|
<br /> |
|
</ItemTemplate> |
|
</asp:DataList> |
|
<asp:SqlDataSource ID=”SqlDataSource1” |
10 |
runat=”server” |
|
ConnectionString= |
|
“<%$ ConnectionStrings:ConnectionString %>” |
|
SelectCommand=”SELECT FeaturedProducts.productid, |
|
FeaturedProducts.featuretext, |
|
FeaturedProducts.saleprice, |
|
Products.name, |
|
Products.price |
|
FROM FeaturedProducts |
|
INNER JOIN Products |
|
ON FeaturedProducts.productid = |
|
Products.productid”> |
|
|
|