

HANDS-ON (Finishing Your Report)
How to use page headers and footers
You can use page headers and footers by placing the information in the
Page Header or Page Footer sections of the Design Tab.
●Information to appear only on the first page of the report goes in the Report Header (RH).
●Information to appear only on the last page of the report goes in the Report Footer (RF).
●Information to appear at the top of every page goes in the Page Header (PH).
●Information to appear at the bottom of every page goes in the Page Footer (PF).
Text, fields, or formulas can be used in these sections just as in the Details section.
Related Topics
How to create a footer that appears on all pages but the first, Page 221
How to add a title page to the report
Seagate Crystal Reports provides a quick, easy way to add a title page to a report by selecting Report Title on the Others Tab of the Insert Fields dialog box. In order to use this field, you must have a title entered in the Summary Tab of the Document Properties dialog box. See How to add summary information to the report, Page 119.
Introduction to Reporting |
117 |
1Choose the INSERT SPECIAL FIELD command from the Insert Menu. The Insert Fields dialog box appears with the Others Tab active.
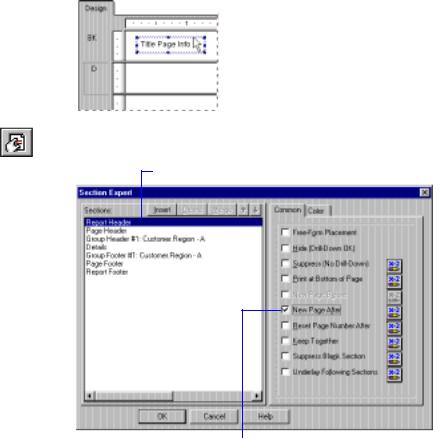
2Select Report Title, and click Insert. An object frame appears when the cursor is moved over the report.
3 Move the object frame to the Report Header section and click once to place the frame.
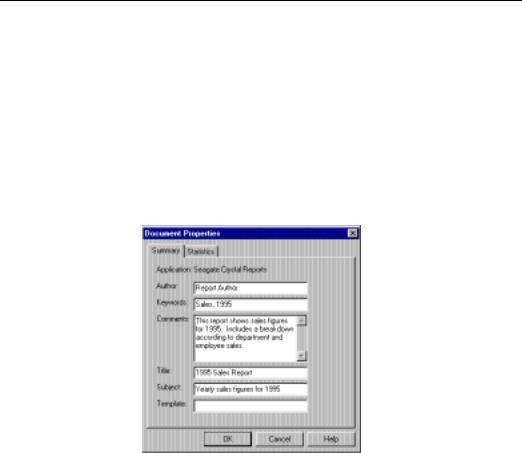
4With the report title highlighted, click the SECTION EXPERT button on the Standard toolbar. The Section Expert appears.
5 With the Report Header section highlighted...
...toggle the New Page After option on.
Now the title will appear on the first page and the report will begin on the second page.
118 |
Seagate Crystal Reports User’s Guide |
How to add summary information to the report
There may be times when you want to include non-printing comments with a report (a personal note to the report recipient, a note to explain more thoroughly the data on which the report is based, a report title, a comment about some particular data on the report, etc.).
The SUMMARY INFO command on the File Menu provides a facility for including anything from a short note to hundreds of lines of text with your report. The comments do not print with the report; they remain in the Summary Tab of the Document Properties dialog box where they can be reviewed on demand. Search for Document Properties dialog box in Seagate Crystal Reports online Help.
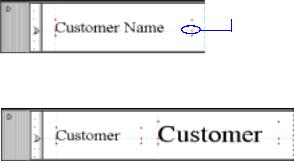
When you choose the SUMMARY INFO command, the Document Properties dialog box appears with the Summary Tab active.
Enter the desired information and click OK when finished to return to your report.
Related Topics
How to add a title page to the report, Page 117.
Search for Report Title command in Seagate Crystal Reports online Help.
Search for Report Comments command in Seagate Crystal Reports online Help.
Search for Special field commands in Seagate Crystal Reports online Help.
Introduction to Reporting |
119 |
120 |
Seagate Crystal Reports User’s Guide |

6 |
Printing, Viewing, and Exporting |
What you will find in this chapter...
Printing considerations, Page 122
Design solutions for printing/distributing, Page 123 Report creation checklist for distributed reports, Page 131 Updating printer drivers, Page 131
Report distribution, Page 132
Compiled reports, Page 132
HANDS-ON (Exporting a Report), Page 133
HANDS-ON (Viewing reports with a web browser), Page 141
Printing, Viewing, and Exporting |
121 |

Printing considerations
When printing, inconsistencies may occur if different printer drivers are used to create and print your reports. These inconsistencies are a result of the varied methods that individual printer drivers use to measure text metrics, such as font size. When printed, text-based objects may be misaligned, cut-off, or overprint each other. Examples of text-based objects include string or character fields, text objects, memo fields, numeric fields, and formula fields.
Problems such as these may arise when you have:
●Two identical printers, but each one is using a different printer driver,
●Two different printers using the same printer driver,
●Two different printers using different printer drivers,
●One printer driver that uses the TrueType font and a second printer driver that maps TrueType fonts to PostScript fonts,
●Two identical printers using the same printer driver, but each one is printing from a different version of Microsoft Windows,
●Two identical printers using the same printer driver, but the printer drivers are different versions, or
●Two identical printers, two identical printer drivers, and two identical operating systems, but the resolution of the video drivers are different.
Therefore, while a document using one printer driver may require six full lines to display a block of text:
●using a second printer driver that measures fonts narrower could result in the same block of text requiring less than six full lines, or
●using a third printer driver that measures fonts wider could require more than six full lines.
For the most part, this situation can’t be avoided. The goal of the report distributor is to design reports that accommodate printer driver dependency and still print consistently using different printer drivers. To do this, Seagate Crystal Reports provides several design solutions. If taken into account when creating your report, these solutions can ensure proper printing and distribution for your report in almost any environment.
122 |
Seagate Crystal Reports User’s Guide |

Design solutions for printing/distributing
Spacing within text-based objects
NOTE: Before using the techniques outlined in this section to reformat a report, please read Updating printer drivers, Page 131.
There are several things to keep in mind when designing reports that will be distributed in different environments. For the best results, consider the following:
●Spacing within text-based objects, Page 123
●Placing text-based objects, Page 124
●Placing multi-line, text-based objects, Page 126
●Section characteristics, Page 127
●TrueType fonts, Page 127
●Video resolution, Page 128
●Specific margins, Page 128
●Default printer, Page 128
●Free form placement, Page 129
While it is recommended that you have the Free Form Placement option toggled on (see Free form placement, Page 129), spacing text-based objects evenly in the free form environment can be somewhat tricky.
To align text objects, there are two features to assist you:
1.the grid, and
2.the guidelines.
USING THE GRID
Each section of a report contains a design grid. It can be toggled on/off and set to different sizes as needed (see How to turn the grid on/off, Page 76). Once set, the grid remains the same size for all sections. It is measured from the upper left hand corner of each section and continues down and to the right until the end of the section. A new grid of the same size then begins from the upper left hand corner of the next section, and so on, through the end of the report.
Seagate Crystal Reports gives you the option of snapping objects to the grid. When you toggle the Snap to Grid option on using the Layout Tab of the Options dialog box:
●The upper left corner of all newly placed text-based and OLE objects will snap to a grid point.
Printing, Viewing, and Exporting |
123 |
Placing textbased objects
●Objects placed before enabling Snap to Grid will not snap to the nearest grid point. They will remain where they are.
●If you resize an object, the side (or sides) that you are resizing snap to the closest grid point.
USING GUIDELINES
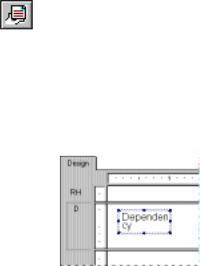
Guidelines are used to line up objects. They too have a snap property that automatically snaps objects to them (see How to move and position objects using guidelines, Page 73). However, the snap property of guidelines works differently for text-based objects than other objects (OLE objects, for example). When a text-based object snaps to a guideline, it is the baseline of the text and not the object frame that snaps to the guideline. You can find the baseline of a text-based object by locating the special indicators positioned on either side of the object directly at the baseline.
Baseline indicator.
To place several text objects of different font sizes on one line and have their baselines line up, snap them to a guideline at the baseline indicator.
Becoming familiar with the properties and functionality of the grid and guidelines will require some experimentation.
NOTE: If Free Form Placement is toggled off and you enable Snap To Grid:
●all objects will snap to the guidelines for vertical placement, and
●the left boundary will snap to both vertical guidelines and grid points.
When a text-based object is placed on a report, the object is represented by an object frame. The height of the object frame is based on the height of the font. The width however, is determined differently depending on the text-based object you are working with.
●For database fields that are not memo fields, the width is initially determined by the width of the field as defined in the database, and by the average character width as provided by the selected font and font size.
124 |
Seagate Crystal Reports User’s Guide |
For example, you have a database field called {customer.LAST NAME} and your database defines this field as a text field with a length of 35 characters. When you place this field on your report, the width of the boundary will be 35 times the average character width of the font and font size that the text-based database field is formatted to. Remember that this is the initial default boundary width. The width can always be resized to increase or decrease as you see fit.
●For text objects, the default width is approximately 17 average character widths wide. Text objects are different from database fields in that their width will automatically expand as you enter in text and/or database fields into the text object. Again, as with all other text-based objects, the width can be resized by the user.
●For different number fields (double, single, integer, long integer, and byte) the default widths are all different. Once again, as with all other text-based objects, the width can be resized by the user.
Whether the default widths are accepted or the text-based objects are resized, a problem could arise if the text inside the object prints right to the edge of the object frame. While the report may look fine on the machine it was designed on, when the report is printed using another printer driver that measures the font wider, the length of the text grows but the object frame remains fixed. This results in the text being truncated or cut off.
There are several ways to prevent text from being truncated:
1.Select the object and click the OBJECT PROPERTIES button on the Supplementary toolbar. Use the Common Tab of the Format Editor to toggle the Can Grow option on. The object is then formatted to print on multiple lines, so if the text prints wider than the object, the text will wrap onto additional lines.
NOTE: This is not an effective solution for strings of text that do not contain spaces (such as single words) because, though the line will wrap, the text string will break at the edge of the object frame and then wrap (as in the screenshot below).
Printing, Viewing, and Exporting |
125 |

Placing multiline, text-based objects
2.Expand the object frame so that it is a little wider than the widest block of text that the object will contain. There are many times when the actual text in a database field is far less than the maximum amount the field can contain.
For example, a {table.LAST NAME} field is designed with a field size of 80 and the longest name in the database is 28 characters. In this case, when you first place the field in your report, the field will be 80 times the average character width. Reduce the width of the field, but not so much that it is just long enough to accommodate the longest string of text. Instead, make it a little wider in order to allow for growth.
While each of these options offers an effective solution when dealing with a single text-based object in a section, there are still design considerations to take into account when placing more than one text-based object in a section. When sizing one object, you must consider its placement with regard to other objects in the section.
Avoid designing reports where the space between each object is very tight. Leave room for growth by expanding the width of the object by approximately 5%. Alternatively, you may consider reducing the size of the font.
While text-based objects that are formatted to print on multiple lines follow the same design rules as other objects, they have one additional characteristic that must be considered. If the printer driver expands or contracts the spacing of the text, word wrapping may differ, thus changing the number of lines necessary to print the object, in order to accommodate growth or shrinkage.
When placing multi-line, text-based objects, you could encounter problems if other objects in the same section are placed directly below them.
Unlike single-line, text-based objects, expanding the object frame of a multi-line, text-based object to accommodate possible growth is not a viable option. When you do this, the line width simply increases according to the expanded boundaries.
126 |
Seagate Crystal Reports User’s Guide |
Section characteristics
TrueType fonts
So, when possible, place multi-line, text-based objects at the bottom of a section. If they require more lines to print, the section will expand downward to accommodate the growth and they will not endanger other objects.
A report consists of several sections, including the Report Header, Page Header, Group Header, Details, Group Footer, Page Footer, and Report Footer (see Design Tab Areas, Page 57).
Each report section is made up of a series of lines. When a text-based object is placed in a section, it is placed on a line in such a way that the text is aligned to the baseline. The line’s height is then adjusted by the printer driver so that it is high enough to accommodate the object.
●If another text-based object is placed on the same line and its font size is larger than that of the first object, the line’s height is extended to accommodate the second object.
●If another text-based object is placed on the same line and its font size is even larger, the line’s height is extended once again to accommodate the third object.
A line’s height will be determined by the text-based object with the largest font on the line.
As text-based objects are added to a report, either in the same section or other sections, line height is adjusted to accommodate the various fonts. Because this vertical (inter-line) spacing is determined by the printer driver, it becomes difficult to create reports designed for pre-printed forms when they may be printed in various environments.
It is recommended that you follow these guidelines when designing reports:
●always print a test page,
●keep all font sizes the same, and
●be sure to print pre-printed forms on the same machine.
Designing your report using printer-specific fonts may lead to problems when using different printers. The fonts may not be supported by the other printers or, while they are supported, they may not be installed on the printers.
When printing, if printer-specific fonts are encountered that the printer driver does not recognize, Seagate Crystal Reports substitutes the fonts, creating inconsistent results. In order to avoid this situation, it is recommended that only common TrueType fonts be used when designing reports.
Printing, Viewing, and Exporting |
127 |
Video resolution
Specific margins
Default printer
If you have two identical printers, two identical printer drivers, and two identical operating systems, but the resolution of the video driver varies between machines, then the pagination of documents will be different.
Unfortunately, there is no way to create Windows documents that are immune to changing video driver resolutions. However, it is best to set your video resolution to 640 x 480 pixels when designing reports. A report designed using a coarse resolution (640 x 480 pixels) and printed on a finer resolution will not encounter as many formatting changes as a report designed using a finer resolution (800 x 600 pixels) that is printed on a coarser resolution (640 x 480 pixels).
Developing reports with your video resolution set at the most common and coarsest resolution will ensure that your reports will be the least sensitive to video driver settings.
Seagate Crystal Reports has the option of setting specific margins or using the printer’s default margins (see How to change margins, Page 217).
Problems may arise if you choose to design your reporting using the default margins.
●When a report is printed in another environment where the printer’s default margins are greater than its setting, the report objects on the right side of the report will print off the page.
●When a report is printed in another environment where the printer’s default margins are smaller (allowing a larger printing area), the entire report will be moved to the left of the page.
It is recommended that you always set your own margins. Even if the margins you want to use are the same as the default margins, be sure that the Use Default Margins option in the Page Setup dialog box is toggled off, and you set your margins manually using the PRINTER SETUP COMMAND.
In general, it is a good idea not to choose a specific printer. Even though the printer may be identical to the default printer, how the printer is recognized can still vary for different operating systems.
Consider the following example:
An HP Laser III printer is being installed on three different operating systems.
●With Windows 95 and Windows 98, the printer name can be changed so that HP Laser III is Front Reception Printer, but the printer driver will be listed as HPPCL5MS.DRV.
●With Windows NT, the printer name is also referenced and can be changed by the user, but the printer driver is always WINSPOOL.
128 |
Seagate Crystal Reports User’s Guide |
Free form placement
●With Windows 3.x, the printer is recognized by the printer name, in this case HP Laser III, and the printer driver is HPPCL5MS.DRV.
If you select a specific printer, Seagate Crystal Reports will look for that printer by name. If the printer you selected can’t be found, the default printer will be chosen, resulting in the possibility of printing inconsistencies.
When selecting a specific printer, such as a label printer or a printer dedicated to printing invoices, the printer name must be the same as the name of the printer the report was designed on. Be aware that anyone printing the report must use that same printer or they could encounter problems.
NOTE: If your report is part of an application that you are distributing, you can provide a Select Printer dialog box. Using this dialog box, users of your report can choose the correct printer or rename the printer accordingly.
FREE FORM PLACEMENT ON
In order to create dynamic reports and reduce printer driver dependency as much as possible, it is recommended that all sections of the reports be formatted with the Free Form Placement option toggled on. This is especially true if your report includes OLE objects such as charts, boxes, lines, and bitmapped images (such as company logos).
When a section is formatted with Free Form Placement, all objects can be placed anywhere in that section. Seagate Crystal Reports places objects within a section based on their absolute coordinates. These absolute coordinates determine the vertical placement of objects in your report. This means that you control the vertical placement of single-line objects rather than the printer driver. In so doing, you can better protect your reports from printing inconsistencies caused by using different printer drivers.
However, while the printer driver no longer controls the vertical spacing of text-based objects within the sections, it still determines horizontal spacing of text within the text-based objects, as well as the inter-line spacing of multi-line text objects. So, while Free Form Placement allows you better control, you must still take into account these considerations when designing your reports (see Placing multi-line, text-based objects, Page 126).
FREE FORM PLACEMENT OFF
If a section has the Free Form Placement option toggled off, the program no longer references the object’s absolute coordinates to determine where it prints, except:
Printing, Viewing, and Exporting |
129 |
●The absolute x coordinate is still referenced to determine where each object begins printing horizontally (left/right placement).
●The y coordinate is still referenced for vertical placement of the object but the coordinates may be adjusted by Seagate Crystal Reports when the printer driver changes.
So, if the report is printed using a printer driver that measures inter-line spacing greater than the original printer driver, the y coordinate will be increased and the text-based object will be printed farther down the page. With Free Form Placement toggled off, the user no longer controls the vertical placement of text-based objects; the printer driver determines that instead.
However, the placement of OLE objects (such as graphics, boxes, and lines) is not controlled by the printer driver. Thus, Seagate Crystal Reports always references these objects’ absolute coordinates when placing and printing. Due to these varied methods of placement, problems can arise when both text-based objects and OLE objects are placed in a report.
Consider the following example:
A box (OLE object) is placed around a database string field (text-based object). Everything looks great and everything is aligned as it should be. However, if the report is printed using a printer with an especially high measurement for inter-line spacing, then:
●the placement of the box will not change relative to the section in which it is placed (the x and y coordinates will not change), but
●the vertical placement of the text-based object will change because the y coordinate will be adjusted upward.
NOTE: The value is a measurement from the section’s upper left corner; so, the greater the value, the farther down the page the object will print.
If you are distributing reports that have sections formatted with Free Form Placement toggled off, and you want the objects in those sections to be surrounded by a border or formatted with lines, it is better to modify the objects’ border properties than to insert lines and boxes. This way, the borders will always stay with the objects. Simply right-click the object and select the CHANGE BORDER command from the shortcut menu (see
How to add color, shading, and borders, Page 215).
Remember, any section can be formatted with Free Form Placement toggled on or off. While it is better to toggle the option on in some cases and not in others, it is highly recommended that every section in your report be formatted in the same manner.
130 |
Seagate Crystal Reports User’s Guide |

Report creation checklist for distributed reports
●To accommodate possible growth caused by varying font measurements of different printer drivers:
¾do not place objects extremely close to each other, and
¾either increase the width of text-based objects by approximately 5% or reduce the size of the fonts.
●Because the number of lines necessary to print a text-based object vary, consider where and how you place multi-line, text-based objects when using different printer drivers.
●Use Windows TrueType fonts where possible. Being the most common fonts they are readily available on all versions of Microsoft Windows and can be recognized by most printers.
●It is recommended to use the most common and coarsest video driver settings and set your video driver resolution to 640 x 480 pixels.
●Set specific page margins.
●Use the default printer unless your application or compiled report requires a specific printer.
●After the report is completed and you are happy with the results, remove all guidelines and format every section to have Free Form Placement toggled on.
By adhering to this checklist, your report will be the least sensitive to changing printer drivers.
Updating printer drivers
In order to maintain performance, Seagate Crystal Reports queries the printer driver for each of the font elements (font metrics), such as average character height, character width, height of the ascenders and descenders, internal leading, etc. A problem may develop if using an older printer driver that does not return the font metrics accurately. If you are experiencing problems when printing (missing fields, incorrect formatting, etc.), it is recommended that you obtain and install the most recently updated drivers for your printer. In many cases, these newer printer drivers will provide the accurate font metrics and printing issues will be remedied.
Printing, Viewing, and Exporting |
131 |

Report distribution
There are many ways to distribute reports.
●You can print the report and send it out by hand.
●You can choose to export reports in Seagate Crystal Reports format (.RPT). You can export to a disk file or to an application (such as MS Excel or Word). See How to export reports, Page 133.
●If you want to e-mail a report to someone who does not have Seagate Crystal Reports, you can export it in MS Word or Excel format directly to an Exchange folder (search for Exchange Data Access in Seagate Crystal Reports online Help), as well as to many other e-mail systems.
●You can even publish the report on the Internet by exporting it to HTML. See How to export reports, Page 133.
Compiled reports
There may be times when you need to compile reports and distribute them to users who do not have Seagate Crystal Reports. Fortunately, Seagate Crystal Reports makes compiling and distributing an easy process.
After compiling reports into executable (.exe) files, use the Report
Distribution Expert to distribute them. The Report Distribution Expert:
●allows users to view, print, and export reports, and
●compresses and distributes the selected compiled reports, dependent files, a Setup.exe file that installs the distributed reports, and any databases and DLLs specified.
For more information, see How to compile a report, Page 138 and How to distribute a compiled report, Page 139.
When distributing a report, specify the DLLs and databases you want distributed with the report. The Report Distribution Expert will automatically list the databases and DLLs used by the report. Next, add or remove these files to better suit the end users’ needs. For example, users in Marketing and users in Human Resources might need access to very different reporting operations. Search for Report Distribution Expert in the Seagate Crystal Reports online help.
For more information, see How to distribute a compiled report, Page 139 and
How to use a compiled report, Page 140.
132 |
Seagate Crystal Reports User’s Guide |