


How to fax a report
Many fax applications, such as Microsoft Fax and Delrina WinFax, allow you to set up a printer driver that will fax documents over a modem. When using one of these applications, you can fax a report from Seagate Crystal Reports.
1Choose the PRINTER SETUP command from the File Menu. The Print Setup dialog box appears.
2Select a fax driver from the Name drop-down list.
3Click OK when finished.
4Choose the PRINTER command from the File|Print Menu. The Print dialog box appears.
5Click OK to fax the report. Your fax application will appear, allowing you to select a cover page and to fill in the appropriate fax information.
HANDS-ON (Compiled Reports)
How to compile a report
Note: You must save the report before compiling.
1With the report active, choose COMPILE REPORT from the Report Menu or click the COMPILE button on the Supplementary toolbar. The Compile Report dialog box appears.
2Enter a file path for the compiled report in the Compiled File Name text box, or click Browse to search for a file name. The default is the report file name with an .exe extension.
3Specify whether you want to create a program item for this executable file. The program will display this item in a window after the report has been compiled. If you click Yes, enter the name of the program group in the Program Group text box.
4Specify whether you want to distribute the report after compiling. See How to distribute a compiled report, Page 139.
●If you chose to distribute the report after compiling, the Report Distribution Expert appears, and the window for the specified program group appears, with shortcuts to the compiled report
138 |
Seagate Crystal Reports User’s Guide |

files present in that program group. For more information, see
How to distribute a compiled report, Page 139.
●If you chose not to distribute the report immediately, the window for the specified program group appears, with shortcuts to the compiled report files present in that program group.
5 Click OK.
How to distribute a compiled report
Compiled reports, along with related databases and DLLs, can be distributed to users who do not have Seagate Crystal Reports. More than one report can be distributed at once, and can be distributed to:
●an installation disk, or
●a directory of files.
There are two distinct processes involved in distributing; this section looks at both. The first is the actual distribution; the second is the installation of the distributed executable files (this is the task of the end user).
DISTRIBUTING
1Choose REPORT DISTRIBUTION EXPERT from the Report Menu, or click the DISTRIBUTION EXPERT button on the Supplementary toolbar. The Report Distribution Expert appears.
2Complete the REPORT DISTRIBUTION EXPERT. Click Build to distribute the specified reports. Search for Report Distribution Expert in the Seagate Crystal Reports online Help.
RECEIVING AND INSTALLING
The Report Distribution Expert Setup makes it easy for end users to quickly install and view, print, and export distributed reports.
1Run Setup.exe.
2Report Distribution Expert Setup opens, and the Introduction dialog box appears. Click Continue to decompress the distribution files to a temporary location. The program decompresses the files, and the Options dialog box appears.
Printing, Viewing, and Exporting |
139 |

3Enter a directory path for the report in the Directory text box or click Set location to search for a path.
4Click Continue. The program will now proceed to Set up the distribution files in the specified directory.
5If you already have an existing Seagate Crystal Reports program group, a message box will appear asking whether you would like to add the new report items to that group. Click Yes or No, as desired. Setup closes.
How to use a compiled report
1Open the compiled report by double-clicking the program item. A Print Options dialog box appears with the report file name displayed on the title bar.
2In the Print Options dialog box, use the Report drop-down list to specify the print destination (Print the report to a window, Export the report, or Print the report to a printer) and the time of printing.
3Set the time (hour and minutes) and the date (month, date, and year) in the Time and Date text boxes, and click either AM or PM.
4The center section of the dialog box is dynamic, and the message and the button appearing there are determined by the selection from the Report (print destination) drop-down list:
●If you are printing the report to a window, click Window Styles to determine the appearance of the window. The Window Style Options dialog box appears. Use this dialog box to specify the style options (you can specify drill-down ability, the appearance of Close and Refresh buttons, etc.) If you toggle the Has Zoom Box with Default Level check box on, select the default zoom level from the adjacent drop-down list. Then click OK to return to the previous dialog box.
●If you are exporting the report, click Export Options. The Export dialog box appears. Select the export format from the Format dropdown list, and select the export destination from the Destination drop-down list. Click OK. (With certain export formats, the Character-Separated Values dialog box will then appear. Enter the separator and the delimiter in the appropriate text boxes, and then click OK. With some export formats, the Number and Date Format dialog box will then appear. Toggle the Same number format as in report and the Same date format as in report check boxes on/off as desired, and then click OK.) The Choose Export File dialog box appears. Select an export file and then click Save.
140 |
Seagate Crystal Reports User’s Guide |

●If you are printing the report to a printer, click Printer Options. The Print dialog box appears. Specify the printing options, and then click OK.
5Click either Use Saved Data or Refresh Data. If you click Refresh Data, the two check boxes in the lower section of the dialog box will become active. Toggle the [Modify selection formula] and the [Modify stored procedure parameters] check boxes on/off as desired.
6Click Print.
Repeat Steps 2-6 for each additional printing or exporting task. Click Done when finished.
HANDS-ON (Viewing reports with a web browser)
How to view reports in a web browser
Your Systems Administrator or IS Manager will have set up an intranet/ extranet where you can view your reports in a browser. Contact your web administrator to ask for the URL. The administrator can also tell you which viewer your company uses. There are four Crystal Smart Viewers:
1.The Crystal Smart Viewer for Java
2.The Crystal Smart Viewer for ActiveX
3.The Crystal Smart Viewer for HTML (Plain)
4.The Crystal Smart Viewer for HTML (Frames)
Using the appropriate viewer, you can easily view, print, and export your reports from a web browser.
USING THE CRYSTAL SMART VIEWER FOR JAVA
1Open your report in the Crystal Smart Viewer for Java. The first page of the requested report will appear inside the viewer. A Smart Navigation Group Tree is generated based on the groups in the report.
NOTE: You may not have access to Smart Navigation with the Group Tree. Smart Navigation may be disabled for the report or for the Crystal Smart Viewer itself. If Smart Navigation is available, you can use the Smart Navigation button in the Crystal Smart Viewer to turn on and off the Group Tree. This button will be disabled if Smart Navigation is unavailable.
Printing, Viewing, and Exporting |
141 |
2Use the page controls to scroll through the report page by page.
3Use the Smart Navigation features of the Group Tree, if it is available, to navigate through the report by group.
4Click the Refresh button to refresh the report data.
The first time a report is requested, the Crystal Web Report Server generates the report and saves it in a directory cache. If someone else requests the same report, the Crystal Web Report Server can send them the existing report rather than regenerate the data, a time consuming process.
If the data that the report is dependent on changes, though, due to updates in the database, the cached report will no longer reflect accurate data. Use the Refresh button to force the Crystal Web Report Server to connect to the database and update the report.
5To search for a specific value within the report, type the value into the Text to search for text box and click the Find Next button.
The Crystal Smart Viewer will locate the first matching value in the report, if it exists, and highlight that value for you. If you need to find the next instance of that value in the report, simply click the Find Next button again.
6Click the Print Report button to print the report to a printer available from your machine.
7Click the Export Report button to export the report. The Export dialog box appears.
8Select the export format from the Export Format drop-down list. You can export in any of the following formats: Crystal Reports, MS Word, MS Excel, or HTML.
9Enter the export destination in the Save To text box, or click Browse to search for an already existing destination file name.
10Click OK when finished.
NOTE: You may experience minor problems scrolling through reports in the Crystal Smart Viewer for Java. Such problems are a result of the Java virtual machine implemented in certain web browsers and can not be accounted for by the Crystal Smart Viewer for Java. If you experience problems, click repeatedly on the scroll buttons to scroll. Do not hold the scroll buttons down.
USING THE CRYSTAL SMART VIEWER FOR ACTIVEX
1Open your report in the Crystal Smart Viewer for ActiveX. The first page of the requested report will appear inside the viewer. A Smart Navigation Group Tree is generated based on the groups in the report.
142 |
Seagate Crystal Reports User’s Guide |
NOTE: You may not have access to Smart Navigation with the Group Tree. Smart Navigation may be disabled for the report or for the Crystal Smart Viewer itself. If Smart Navigation is available, you can use the Smart Navigation button in the Crystal Smart Viewer to turn on and off the Group Tree. This button will be disabled if Smart Navigation is unavailable.
2Use the page controls to scroll through the report page by page.
3Use the Zoom drop-down list to specify a zoom level for the report.
4Use the Smart Navigation features of the Group Tree, if it is available, to navigate through the report by groups.
5Click the Refresh button to refresh the report data.
To improve performance, reports are often cached by the web server. This means that the first time a report is requested, the Crystal Web Report Server generates the report and saves it. If someone else requests the same report, the Crystal Web Report Server will simply send them the saved report rather than regenerate the data.
However, the data that the report is dependent on may change while the report file is stored in the cache. If so, use the Refresh button to force the Crystal Web Report Server to update the report.
6To search for a specific value within the report, type the value into the Text to search for text box and click the Find Next button.
The Crystal Smart Viewer will locate the first matching value in the report, if it exists, and highlight that value for you. If you need to find the next instance of that value in the report, simply click the Find Next button again.
7Click the Print Report button to print the report to a printer available from your machine.
8Click the Export Report button to export the report. The Export Report dialog box appears. The Export Report dialog box works like the Save As dialog box in Seagate Crystal Reports.
9Select a directory from the Save in drop-down list and list box. The report will be saved in that directory.
10Enter a file name in the File name text box. The report will be saved with this file name.
11Select an export format from the Save as type drop-down list. The report can be saved as a Crystal Report, an HTML document, a Word document, or as an Excel document.
12Click Save when finished.
Printing, Viewing, and Exporting |
143 |
NOTE: If the report has been created using different printer settings than those available from your system, you may experience formatting problems when attempting to print a report displayed by the Crystal Smart Viewer for ActiveX. The Crystal Smart Viewer Print button uses printer settings saved with the report file. If you experience problems printing a report, contact your web server administrator.
USING THE CRYSTAL SMART VIEWER FOR HTML (PLAIN)
1Open your report in the Crystal Smart Viewer for HTML (Plain). The first page of the requested report will appear as a standard HTML page inside the viewer.
2To page through the report, use the page controls at the top or bottom of the report page.
3Click the Refresh button to refresh the report data.
The Crystal Web Report Server can store HTML pages for the requested report in a cache directory to improve response time for future requests. If someone else requests the same report, the Crystal Web Report Server will simply send them the saved HTML pages rather than regenerating the pages from the original report.
If database data changes, report data reflected in the HTML pages will no longer be accurate. Use the Refresh button to force the Crystal Web Report Server to update the report data and generate new HTML pages.
4To search for a specific value in the report, type the value into the Search text box, and click the Search button.
The Crystal Smart Viewer will locate the first matching value in the report, if it exists, and highlight it for you. Continue to click the Search button to find successive matching values in the report.
USING THE CRYSTAL SMART VIEWER FOR HTML (FRAMES)
1Open your report in the Crystal Smart Viewer for Plain HTML. The first page of the requested report will appear inside the viewer. A Smart Navigation Group Tree is generated based on the groups in the report.
NOTE: You may not have access to Smart Navigation with the Group Tree. Smart Navigation may be disabled for the report or for the Crystal Smart Viewer itself. If Smart Navigation is available, you can use the Smart Navigation button in the Crystal Smart Viewer to turn the Group Tree on or off. This button will be disabled if Smart Navigation is unavailable.
2Use the page controls at the top of the Preview Tab to page through the report.
144 |
Seagate Crystal Reports User’s Guide |
3Use the Smart Navigation features of the Group Tree, if it is available, to navigate through the report by groups.
4Click the Refresh button to refresh the report data.
The Crystal Web Report Server can store requested reports in a cache directory to improve response time for future requests. If someone else requests the same report, the Crystal Web Report Server will simply send them the saved report rather than regenerate the data for the report.
When report data becomes old, no longer reflecting accurate data from the database, the cached report must be updated. Use the Refresh button to force the Crystal Web Report Server to update the report.
5To search for a specific value within the report, type the value into the Text to search for text box and click the Find Next button.
The Crystal Smart Viewer will locate the first matching value in the report, if it exists, and highlight that value for you. If you need to find the next instance of that value in the report, simply click the Find next button again.
Related Topics
How to drill-down on summarized data, Page 78
Sorting, Grouping, and Totaling, Page 245
Printing, Viewing, and Exporting |
145 |
146 |
Seagate Crystal Reports User’s Guide |
7 |
Tutorial - Customer List |
What you will find in this chapter...
Overview, Page 148
Getting started, Page 149
Record Selection, Page 162
Grouping and sorting, Page 165 Completing the report, Page 169
Tutorial - Customer List |
147 |

Overview
The following tutorial has been designed to give you confidence when creating your first report.
You begin by learning the basic concepts: calling up a database, placing some fields on the report, and then selecting specific records to be included. You will then learn how to:
●insert and move database fields,
●add and format a title,
●display a report in the Preview Tab so you can fine-tune your work,
●use the Select Expert to ensure the report includes only the data you need,
●move objects,
●group and sort data,
●insert pictures, and
●print a report.
Before you begin This tutorial assumes you are familiar with Microsoft Windows and uses conventional terms and procedures common to the Windows environment. If you are not familiar with Windows, you may have trouble understanding basic procedures such as scrolling and clicking. Please refer to the documentation that came with Microsoft Windows for further explanation of these procedures. Also, see Command, button, key, and control conventions, Page 3, for a description of the conventions used in this manual.
The default font for all report sections in the program is set to Times New Roman, 10 point. If you have changed the default font, or if your printer does not support this font, the field size, field spacing, and screen shots will look different than those included in this tutorial.
This tutorial has been designed using Microsoft Windows 95, Windows 98 and Win NT 4.0. Screen shots may vary slightly if you are using Windows 3.1, or NT 3.51.
If you are not familiar with Seagate Crystal Reports environment, please review the following sections before beginning this tutorial:
●Getting to Know Seagate Crystal Reports, Page 41, which explains the main application window, the Design and Preview Tabs, the Menu bar, Standard and Supplementary toolbars, Formatting toolbar, and Status bar, as well as many other features of the program.
148 |
Seagate Crystal Reports User’s Guide |

●How to add, delete, and move guidelines, Page 72, and How to move and position objects using guidelines, Page 73.
●Other fundamentals, Page 66, which describes working with the grid, free form placement of objects using guidelines, and also how to work with sections and objects.
Getting started
In this tutorial, you will get an introduction to the program as you create a Customer List report. The Customer List is one of the most basic business reports and typically has information such as Customer Name, City, Region, and Contact Name.
Creating the report 
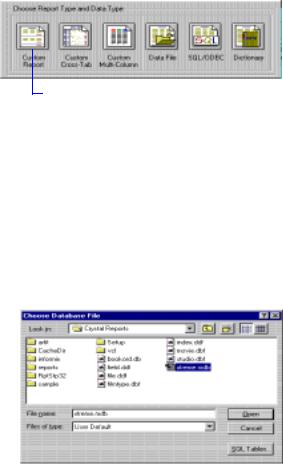
1Click the NEW button on the Standard toolbar. The Report Gallery appears.
The Report Gallery contains a number of buttons. These buttons open the Experts that guide you through the creation of specific types of reports. Since you will be learning reporting concepts here, you can skip the Experts and build your report from scratch. After you have completed this tutorial, you may want to build some reports using the Experts to decide which method of report construction you are most comfortable with.
2 Click Custom. 
The Report Gallery expands to reveal several custom report options.
Tutorial - Customer List |
149 |
Selecting a database to use
3 Click Custom Report. |
|
4 Click Data File. |
|
The Choose Database File dialog box appears.
NOTE: You can also create reports based on SQL/ODBC data sources, dictionary files, or query files. See The Crystal SQL Designer, Page 465, and
Dictionaries, Page 487, for more information.
The next step in creating a report is to select a database. Select the xtreme.mdb sample database for this tutorial.
1In the Choose Database File dialog box, select the xtreme.mdb file from the File Name list box. This file was installed in the \CRW16 directory (16-bit), or \Program Files\Seagate Software\Crystal Reports (32-bit), or the directory in which the program resides.
2 Click Open. The Select Tables dialog box appears.
150 |
Seagate Crystal Reports User’s Guide |

Report sections
3Because you are only dealing with customers in this tutorial, you will only need to select the Customer table. Highlight Customer and click
OK.
The Insert Fields dialog box appears with the Database Tab active.
NOTE: If more than one table is selected in the Select Tables dialog box, the Visual Linking Expert appears. For more information on linking, see
How to add and link multiple tables, Page 104, and search for Visual Linking Topics Index in Seagate Crystal Reports online Help.
The Design Tab is divided into five sections: Report Header (RH), Page Header (PH), Details (D), Report Footer (RF), and Page Footer (PF). If at any time you are unsure of the report section in which you are working, simply look at the shaded area to the left of the report which always displays either the section names or the initials that designate the names. See Design Tab, Page 57.
Tutorial - Customer List |
151 |
●If the Short Section Names in Design check box in the Options dialog box is toggled on, then the Report Header, Page Header, Details, Report Footer and Page Footer section names will appear as RH, PH, D, RF and PF respectively.If this check box is not toggled on, follow these steps:
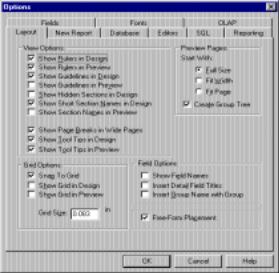
1Choose the OPTIONS command on the File Menu. The Options dialog box appears with the Layout Tab active.
Inserting a field
2Toggle the Show Short Section Names in Design check box on.
3Click OK to return to the report.
The Insert Fields dialog box appears automatically with the Database Tab active, since it is almost certain you will want to insert database fields when you create a new report.
152 |
Seagate Crystal Reports User’s Guide |
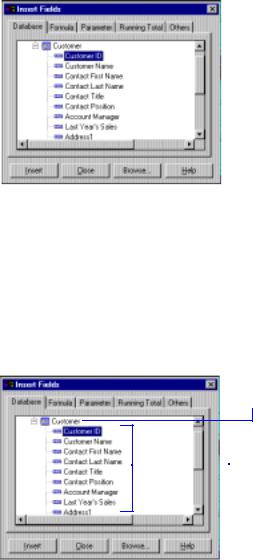
This dialog box is set to remain on-screen until you click the Close button. All the tables available for use are listed in this box.
You can move the dialog box to another location on the screen by clicking on its title bar and dragging it to a new location. You can also resize the dialog box by dragging any of its edges with the Resizing cursor. See
Cursors, Page 54.
You will now start placing objects on the report by inserting the Customer Name field.
First, familiarize yourself with the Database Tab of the Insert Fields dialog box.
The Customer table.
 The fields in the
Customer table.
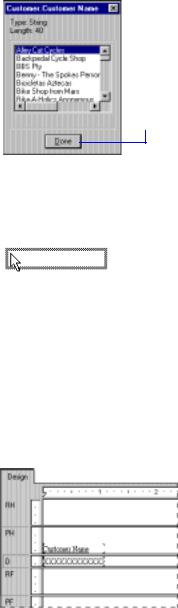
1Highlight a field name in the dialog box by clicking the name once. When you highlight a field name, you can review the values for that field as well as the field type and size, by clicking the Browse button. The Browse dialog box appears listing the field name, type, length, and a subset of field values.
Tutorial - Customer List |
153 |
Understanding fields
2 When finished reviewing the data, click this button to return to the Insert Fields dialog box.
3Click the Customer Name field and drag it into the Details section of the report.
An object frame appears with the Arrow cursor as you drag the field onto the report.
●The object frame represents the object you have just selected for placement.
●The size of the object frame approximates the size of the data in the field selected.
4Move the object frame as far to the left as you can in the Details section. If you move the field too far to the left, the Arrow cursor turns into a Stop cursor, indicating that you can not drag the field that far. See Cursors, Page 54. Keep in mind that you can not place any objects outside the page margin.
The Design Tab should look similar to this:
Before going any further, take a look at the field you just placed in the Details section.
154 |
Seagate Crystal Reports User’s Guide |
Selecting fields
Resizing fields
●First of all, the object frame indicates that when the report is printed, a field value will appear where the box is positioned.
●The X's in the object frame indicate that the database field contains a text string. Other data types have different character representations. For example, a currency data type is represented by $55,555.56.
●The number of X’s in the object frame is the data width, the maximum number of characters in the field as defined by the database. The width of the object frame is the field width (the amount of space allocated to the field for printing). Initially it is set to the width needed to display the maximum number of characters in the field (using the fond selected for the field). You can change this width by resizing the field.
●The size of the X’s indicates the point size selected for the characters in the field.
●The font and style (Bold, Underline, etc.) used in displaying the X’s indicate the font and style selected for the characters in the field. Later in this tutorial you will learn how to make changes to these properties.
●The line spacing is adjusted to the point size selected for the characters in the field.
When a field is selected, the object frame appears with a handle (box) on its right, left, top, and bottom edge. These handles indicate that the field is selected, and therefore active. To do anything with a field (change the font, move it, etc.), you first have to select it.
●Position the cursor inside the object frame and click once. The handles appear, indicating the object is selected.
●Move the cursor away from the object frame and click in an empty part of the window. The handles disappear.
That’s all it takes to select and deselect objects.
To resize the field, follow these steps:
1Click the Customer Name field to select it.
2Press the Ctrl key and click the field heading to select both objects.
3Move the cursor over the resizing handle on the right edge of the fields until the cursor turns into a Resizing cursor. See Cursors, Page 54.
4Resize the fields to the left until they are approximately two inches in length.
Tutorial - Customer List |
155 |
Adding additional fields
Reviewing your work
Next, you will insert two additional fields in the report. This time, however, you will use the Ctrl-click combination to add them at the same time.
1Highlight the City field in the Insert Fields dialog box, press the Ctrl key on your keyboard, and then highlight the Country field. Release the Ctrl key. If you scroll through the field list, you will notice that both fields remain selected.
NOTE: Using the Ctrl-click combination allows you to select a noncontinuous range of fields. The Shift-click combination can be used to select several fields from the list that are continuous.
2Click the Insert button to place the fields.
3As the cursor is moved over the report, an object frame appears along with the Arrow cursor.
4Place the fields to the right of the Customer Name field. Click once to insert the fields. Both fields appear in the Details section of the report in the same order in which they are listed in the Insert Fields dialog box.
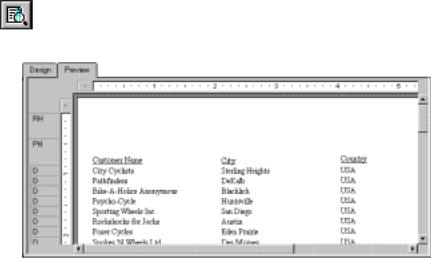
Now let’s see how the report looks with three fields placed and positioned.
1Click the PRINT PREVIEW button on the Standard toolbar to activate the Preview Tab.
The screen should look similar to this:
NOTE: The first time you preview a report, you must click the PREVIEW button on the Standard toolbar to activate the Preview Tab. The Preview Tab appears to the right of the Design Tab. You can then switch between designing and previewing the report by clicking the corresponding tab.
156 |
Seagate Crystal Reports User’s Guide |
Displaying field names
You have the beginnings of a customer list report, but you still have several fields to add.
2When you are finished reviewing the report, return to the Design Tab by clicking it.
Field pictures (object frames containing character representations) have been discussed, but there may be times when you want to see the field names in the Design Tab.
1Choose the OPTIONS command from the File Menu. The Options dialog box appears with the Layout Tab active.
2 Toggle this check box on and click OK.
Combining database fields in a text object
Now in the Design Tab you will see the actual field names instead of character representations (X, $, #, etc.).
Instead of adding the Contact First Name and Contact Last Name fields as separate objects, you can insert both fields in a text object. This allows you to control the formatting of both fields by making changes to only one object. When you insert fields in a text object, the fields are automatically trimmed (they do not have any extra white space on either side). This is important because a field is a fixed size but the data in the fields can vary in size, leaving various amount of unwanted white space.
1Click the INSERT TEXT OBJECT button on the Standard toolbar. As you move the cursor over the report, an object frame appears next to it.
Tutorial - Customer List |
157 |
2Insert the field to the right of the fields in the Details section. As you drag the field, the Design Tab automatically scrolls to the right, if necessary. When you click to place the object, a text object appears and the horizontal ruler of the Design Tab changes to a ruler/tab selector that is used for editing the text object. If you click an empty area of the report or a field object, the standard Design Tab ruler appears.
3Click once on the border of the text object to select it for resizing. Handles appear on all sides of the object.
4Move the cursor over the right sizing handle of the text object and increase the width by about 1 inch. You may need to scroll to the right and continue resizing.
5Double-click inside the text object to select it for editing. Notice the insertion point is now flashing within the text object.
6Highlight the Contact Last Name field in the Insert Fields dialog box. Remember, you can move the Insert Fields dialog box by dragging and dropping it by its title bar.
7Click Insert.
8Move the cursor over the text object until the cursor becomes a Drag and Drop cursor. See Cursors, Page 54.
9Click once to place the field in the text object. The cursor now appears after the Contact Last Name field, within the text object.
10Type a comma and a space after the Contact Last Name.
11In the Insert Fields dialog box, highlight the Contact First Name field.
12Click Insert.
13Move the cursor over the text object until the cursor becomes a Drag and Drop cursor. Move the cursor to the right of the comma and space you just typed, and click once. The field will be inserted to the right of the comma and space.
14You are finished inserting fields, so click Close in the Insert Fields dialog box.
15Click the Preview Tab to look at the fields you just placed.
158 |
Seagate Crystal Reports User’s Guide |
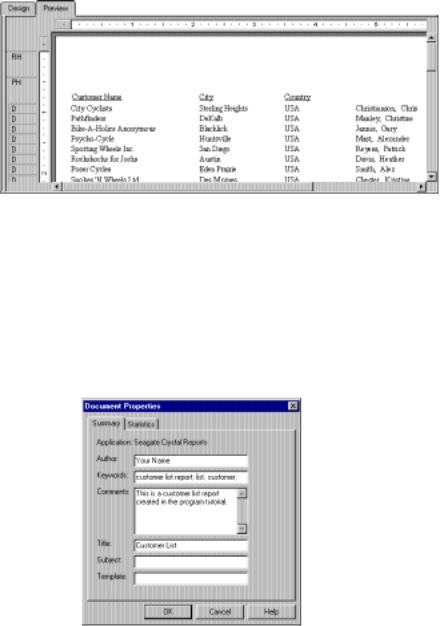
The report should now look similar to this:
Adding summary information
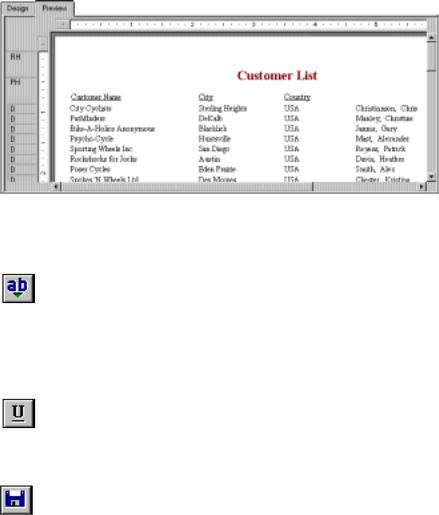
The next step is to add summary information to your report. Adding summary information allows you to specify the author, title, and subject of the report, as well as any keywords or comments related to the report. If a template is used when creating the report, you can specify that as well. When you add summary information, users can find information related to the report quickly. Summary information will also appear in the Reports at a Glance application. Choose Reports at a Glance from Seagate Crystal Reports program menu.
1Choose the SUMMARY INFO command on the File Menu. The Document Properties dialog box appears with the Summary Tab active.
Tutorial - Customer List |
159 |

Adding a title
Formatting objects
2Enter information about your report in the text boxes provided. Be sure to enter the title “Customer List” in the Title text box. This information will be used in the next section of the tutorial.
3Click OK when finished.
As you can see, the report looks incomplete without a title. Although you can add a title using a text object, you can also tell the program to take the title information directly from the Title text box in the Document Properties dialog box.
1Click the Design Tab to activate it.
2Choose the REPORT TITLE command from the Insert|Special Field Menu.
3Move the cursor over the report. An object frame appears.
4Position the object frame in the upper left-hand corner of the Page Header (PH) section of the report and click once to place the object.
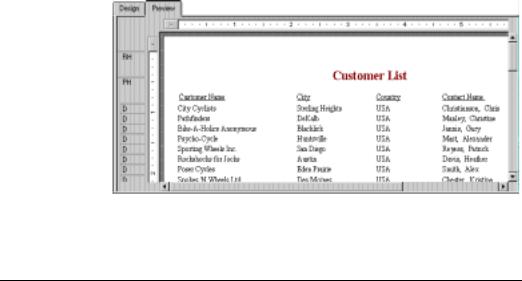
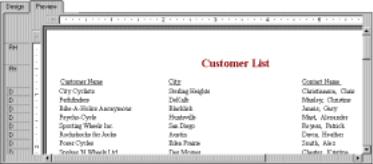
5Click the Preview Tab to review your changes.
The report title object now displays the title that you entered in the Title text box of the Document Properties dialog box.
Now you can format the report title. This time, however, you will remain in the Preview Tab to do the work. This will make it easier to see your work while you are formatting the title.
1To center the title, you will first need to expand the title field box so that it's about the same width as the data in your report. To do this, select the object.
2Position the cursor on the right edge of the object until the cursor turns into a Resizing cursor. Drag the right edge of the field box until it is even with the right edge of the data in the Contact Name field object.
You have created a large field that extends from the left edge to the right edge of the report.
3With the report title object still selected, click the CENTER ALIGNMENT button on the Formatting toolbar. The title is centered within the object.
4Right-click the object and choose CHANGE FONT from the shortcut menu. The Format Editor appears with the Font Tab active. Search for Format Editor in Seagate Crystal Reports online Help.
5Set the report title to a larger, bolder version of the active font by choosing Bold from the Style drop-down list and 16 (or a point size suitable to the font you are using) from the Size drop-down list.
160 |
Seagate Crystal Reports User’s Guide |
Adding a field heading
Saving the report
6Change the color of the text by choosing Maroon from the Color drop-down list. Notice that the Sample box shows an example of how the text will look.
7Click OK when finished.
8Resize the report title object vertically to accommodate the increased size of the title.
The title is now formatted to stand out on the report.
As you can see, the Contact Name field is the only field without a heading. In this section you will create a heading using a text field.
1Return to the Design Tab.
2Click the INSERT TEXT OBJECT button on the Standard toolbar. As you move the cursor over the report, an object frame appears next to it.
3Place the object in the Page Header (PH) section, above the contact name object.
4Type “Contact Name” (without the quotation marks) in the text object edit box.
5While the text object is still in edit mode, highlight the field heading.
6Click the UNDERLINE button on the Formatting toolbar.
The Contact Name field now has a heading that looks just like the other field titles.
1Click the SAVE button on the Standard toolbar to save your work. Since this is the first time you are saving the report, the File Save As dialog box appears displaying the default directory where the database resides.
Tutorial - Customer List |
161 |
2Type CUSTLIST.RPT in the Filename edit box and click Save. Your report is saved to the default directory in which the program resides.
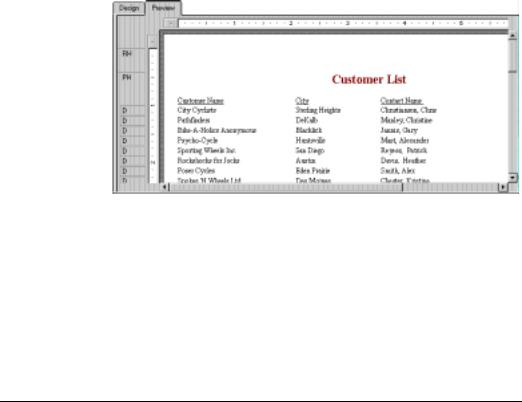
3Click the Preview Tab to view the report.
The report should now look similar to the following:
Congratulations! You have just created a basic listing report. You will continue to refine this report throughout the rest of this tutorial.
Record Selection
Entering the selection criteria
Seagate Crystal Reports allows you to limit or restrict the records that are to be included in a report. In this section you will learn how to:
●select the records you want included in the report, and
●save a report, including the selection criteria.
For example, it may be useful to have a customer list that only lists customers from the USA. The sample data contains records from the United States and International customers. It is easy to restrict lists like this using the Select Expert. See Record and Group Selection, Page 227.
When you scroll through the report, you will see that it contains information for customers from many different countries. In this step, you will limit the number of countries displayed to the USA.
1 To begin, click the Design Tab to return to design mode.
2Click an empty area of the report to make sure all fields are deselected.
162 |
Seagate Crystal Reports User’s Guide |
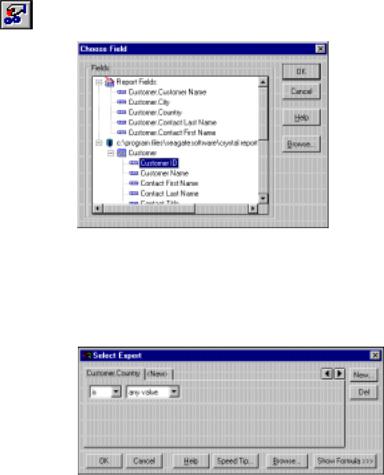
3Click the SELECT EXPERT button on the Standard toolbar. The Choose Field dialog box appears.
This dialog box lists all the fields currently in the report in the Report Fields section and then lists all fields that are available from each table in the Database Fields section.
4Since you are going to base record selection on the country field, choose {customer.COUNTRY} from the Fields list box and click OK. The Select Expert appears.
Your job in this dialog box is to imagine that you are completing the following sentence:
Select all records where a customer’s COUNTRY is
You complete the sentence with the condition you want the program to use when selecting records for your report. Right now the condition is any value, clearly not a restrictive condition.
5Click the arrow on the right drop-down list to see what other options you have. Since you want only those records where the Country is USA, select the equal to condition. A new list box appears on the right. The dialog box sentence now reads:
Tutorial - Customer List |
163 |
Deleting a field
Select all records where a customer’s Country is equal to
All that you need to complete the sentence is the value USA.
6Click the arrow on the drop-down list. A list of all the country values appears. Select USA from the list.
The sentence now reads:
Select all records where a customer’s Country is equal to USA
7Click OK to return to the Design Tab.
8Click the Preview Tab to review the results of your work.
9Save this version of the report without overwriting the original report by choosing the SAVE AS command from the File Menu and giving the new report the name USA.RPT.
Congratulations! You have started formatting your report and have added selection criteria to it. More than that, you have learned how to manipulate your data. By now, you have a good idea of the powerful kinds of reports you can prepare. As you can see, it is an easy program to use.
Now that the report only contains records from the USA, displaying the Country field in the body of the report is not necessary. You will quickly delete this before continuing.
1Select the Country field and the Country column heading using the Ctrl-click combination.
2Press the DELETE button on your keyboard. That is all it takes to delete fields from the report.
The report should now look similar to this:
164 |
Seagate Crystal Reports User’s Guide |
Balancing field spacing
Now that the Country field has been deleted, there is a large amount of white space between the City and Contact Name fields. You might be satisfied with the spacing as it stands, but it might be more readable if the columns were better balanced across the page.
1Return to the Design Tab. Select the Contact Name field and its field heading by using the Ctrl-click combination.
2Place the cursor over one of the two highlighted text objects and drag them to the left, closer to the City field.
3Click the Preview Tab and review your work again. The report should look similar to this:
The spacing between the fields is much better, but it looks as if the report title is off-center.
4Click the report title object to select it.
5Position the cursor on the right handle of the object until the cursor turns into a resizing cursor. Drag the right edge of the object frame until it is even with the right edge of the data in the Contact Name field object.
The report title automatically recenters itself based on the size of the object.
Grouping and sorting
Reports can be grouped and sorted in a variety of ways. Sorting and grouping tools provide a great deal of flexibility for customizing reports.
Tutorial - Customer List |
165 |

Grouping the report
In many reports you need to break the data into groups in order to make it easier to read and to understand. Seagate Crystal Reports lets you do this easily. For this customer list, you will group the customers by region and then sort the customers alphabetically within each group.
1In the Design Tab, click the INSERT GROUP button on the Supplementary toolbar. The Insert Group dialog box appears.
2Select the Region field from the Customer table in the first dropdown list. The program will now take all records with the same value in the region field and place them together in a group on the report.
3Select in ascending order from the second drop-down list. The region grouping will be displayed on the report in alphabetic ascending order.
4Click OK.
Notice that two new sections now appear in the Design Tab: GH1 (Group Header) and GF1 (Group Footer). This is how the program shows that the report has been grouped.
166 |
Seagate Crystal Reports User’s Guide |
5 Click the Preview Tab to see what the report looks like.
Understanding “live” group headers
Sorting records
6If the group tree is not visible, click the TOGGLE GROUP TREE button on the Formatting toolbar to see the groups included in the report.
You can view the group of interest by simply clicking on the group name in the Group Tree. For example, to see the Texas customer group, simply click TX in the Group Tree. The program jumps to the Texas group, displaying that group in the Preview Tab. The Group Tree allows you to quickly jump to a specific group of interest instead of scrolling through the report looking for the group. For more information on the group tree, see Group Tree view, Page 63.
NOTE: For many reports, you will want to insert summaries, subtotals and grand totals. For example, when creating a sales report rather than a customer list, you would want to calculate the total sales amount for each region. See Sorting, Grouping, and Totaling, Page 245.
When a group is inserted, a group name field is automatically inserted in the Group Header section of the report. The group name field displays the current group’s name. For example, if you group by region, when you preview the report, the group header for the CA (California) group will show “CA”.
The group field name is automatically formatted to stand out from the records in the group.
In a typical customer list report, customer names are listed alphabetically. In this example, you will sort the customer names alphabetically within each region.
1In the Preview Tab, click the SORT ORDER button on the Standard toolbar. The Record Sort Order dialog box appears.
Tutorial - Customer List |
167 |
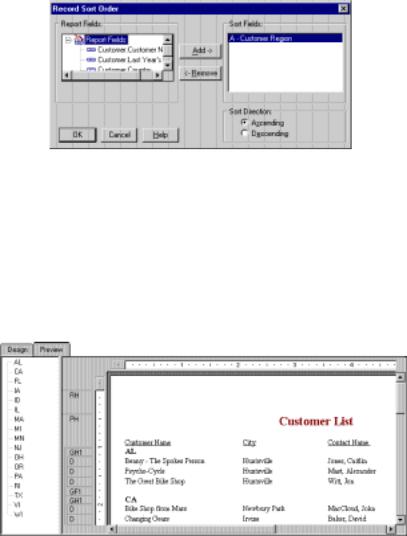
●The Report Fields list box displays all fields currently on your report. You can choose to sort based on any of these fields.
●The Sort Fields list box displays the fields that are already sorted in the report. Since the region field has already been sorted, the sorting you are about to do will be within each region, and not for the entire report.
2Highlight the Customer Name field and click the Add button. Notice that the Customer Name field now appears in the Sort Fields list box.
3Click the Ascending option button for the Sort Direction and click OK. The report should now look similar to the following:
Notice that the records within each group are in alphabetic order.
168 |
Seagate Crystal Reports User’s Guide |
Completing the report
Inserting a company logo
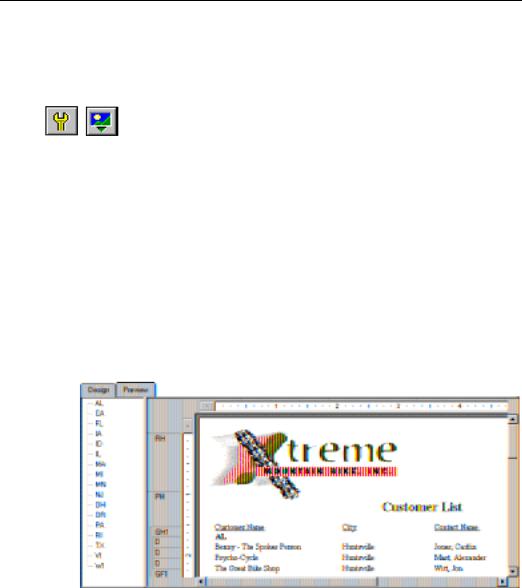
You have just one step left to complete the report. A company logo needs to be added to the first page of the report.
In this section, you will place a company logo at the top of the first page of the report.
1In the Design Tab, click the INSERT PICTURE button on the Supplementary toolbar. The Open dialog box appears.
2Choose the xtreme.bmp and click Open. An object frame appears as you move the cursor over the report. The object frame represents the logo you will place.
3Position the object frame in the upper left-hand corner of the Report Header (RH) section of the report and click once to place it.
Placing the logo in the Report Header (RH) section ensures that the logo is printed only on the first page of the report. See Area printing characteristics, Page 59.
NOTE: Although there does not appear to be enough room in the Report Header (RH) section when you place the graphic, the section will automatically expand to accommodate the picture.
4Click the Preview Tab to view the report. The final report should look like this:
5 Save the report by clicking the SAVE button on the Standard toolbar.
Tutorial - Customer List |
169 |
You have just completed your first report. It is an impressive report, and Seagate Crystal Reports made it easy to do.
Related Topics
For information about distributing reports (printing, exporting, etc.) see
Printing, Viewing, and Exporting, Page 121.
170 |
Seagate Crystal Reports User’s Guide |

8 |
Reporting on OLAP data |
What you will find in this chapter...
Introduction, Page 172
Working with OLAP data, Page 172
OLAP Reporting with Seagate Crystal Reports, Page 172
OLAP grid objects, Page 173
Updating an OLAP database location, Page 174
OLAP Language, Page 175
Working with Hyperion Essbase data (Report Script Method), Page 175
Working with Informix MetaCube (MetaCube SQL Method), Page 183
HANDS-ON (Reporting on OLAP data), Page 183
Reporting on OLAP data |
171 |