


Chapter 14
Rails in Depth
Having survived our Depot project, now seems like a good time to dig deeper into Rails. For the rest of the book, we’ll go through Rails topic by topic (which pretty much means module by module).
This chapter sets the scene. It talks about all the high-level stuff you need to know to understand the rest: directory structures, configuration, environments, support classes, and debugging hints. But first, we have to ask an important question....
14.1So, Where’s Rails?
One of the interesting aspects of Rails is how componentized it is. From a developer’s perspective, you spend all your time dealing with high-level modules such as Active Record and Action View. There is a component called Rails, but it sits below the other components, silently orchestrating what they do and making them all work together seamlessly. Without the Rails component, not much would happen. But at the same time, only a small part of this underlying infrastructure is relevant to developers in their day-to-day work. We’ll cover the parts that are relevant in the rest of this chapter.
14.2Directory Structure
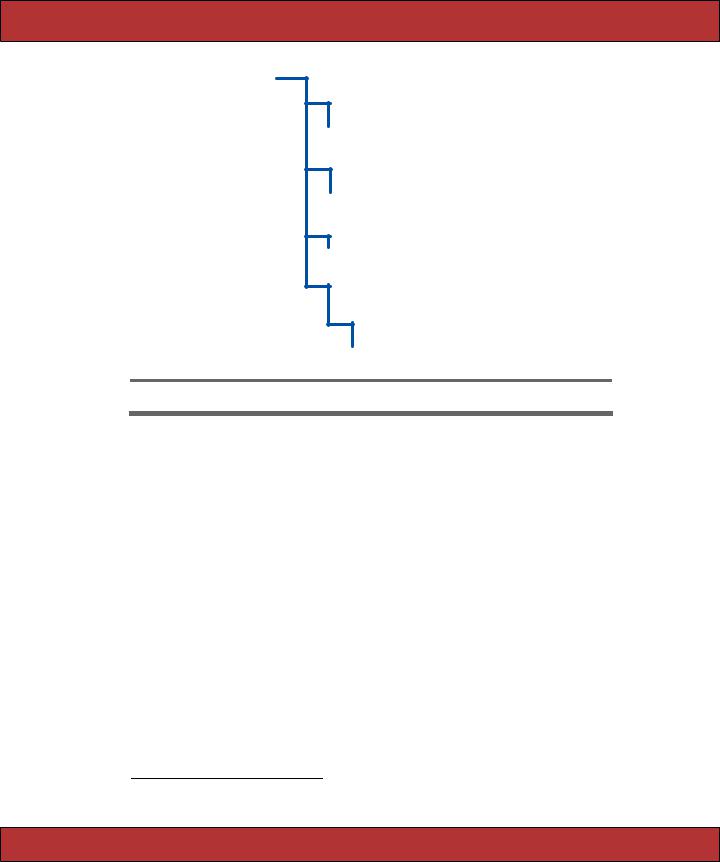
Rails assumes a certain runtime directory layout. Figure 14.1, on the following page, shows the top-level directories created if you run the command rails my_app. Let’s look at what goes into each directory (although not necessarily in order). The directories config and db require a little more discussion, so each gets its own section.
The top-level directory also contains a Rakefile. You can use it to run tests, create documentation, extract the current structure of your schema, and more. Type rake - -tasks at a prompt for the full list.

|
|
DIRECTORY STRUCTURE |
229 |
my_app/ |
|
|
|
|
README |
Installation and usage information. |
|
|
|
||
|
Rakefile |
Build script. |
|
|
app/ |
Model, view, and controller files go here. |
|
|
components/ |
Reusable components. |
|
|
config/ |
Configuration and database connection parameters. |
|
|
db/ |
Schema and migration information. |
|
|
doc/ |
Autogenerated documentation. |
|
|
lib/ |
Shared code. |
|
|
log/ |
Log files produced by your application. |
|
|
public/ |
Web-accessible directory. Your application runs from here. |
|
|
script/ |
Utility scripts. |
|
|
test/ |
Unit, functional, and integration tests, fixtures, and mocks. |
|
|
tmp/ |
Runtime temporary files. |
|
|
vendor/ |
Imported code. |
|
|
|
||
Figure 14.1: Result of rails my_app Command
app/ and test/
Most of our work takes place in the app and test directories. The main code for the application lives below the app directory, as shown in Figure 14.2, on the next page. We’ll talk more about the structure of the app directory as we look at Active Record, Action Controller, and Action View in more detail later in the book, and we already looked at test back in Chapter 13, Task T: Testing, on page 184.
components/
In the glorious old days of Rails, the components directory was supposed to contain reusable chunks of view code and controller code. They were a bit like Java’s portlets. However, the Rails core team now thinks this style of development has some major design holes and is gently deprecating components. We won’t talk about them more here.
Report erratum
DIRECTORY STRUCTURE  230
230
app/
controllers/
application.rb store_controller.rb
helpers/ application_helper.rb store_helper.rb
models/
product.rb
views/
layouts/
store/ add_to_cart.rjs index.rhtml
Figure 14.2: The app Directory
doc/
The doc directory is used for application documentation. It is produced using RDoc. If you run rake doc:app, you’ll end up with HTML documentation in the directory doc/app. You can create a special first page for this documentation by editing the file doc/README_FOR_APP. Figure 12.3, on page 182, shows the top-level documentation for our store application.
lib/
The lib directory holds application code that doesn’t fit neatly into a model, view, or controller. For example, you may have written a library that creates PDF receipts that your store’s customers can download.1 These receipts are sent directly from the controller to the browser (using the send_data method). The code that creates these PDF receipts will sit naturally in the lib directory.
The lib directory is also a good place to put code that’s shared among models, views, or controllers. Maybe you need a library that validates a credit card number’s checksum, that performs some financial calculation, or that works out the date of Easter. Anything that isn’t directly a model, view, or controller should be slotted into lib.
1. Which we did in the new Pragmatic Programmer store
Report erratum
DIRECTORY STRUCTURE  231
231
Don’t feel that you have to stick a bunch of files directly into the lib directory itself. Most experienced Rails developers will create subdirectories to group related functionality under lib. For example, in the Pragmatic Programmer store, the code that generates receipts, customs documentation for shipping, and other PDF-formatted documentation is all in the directory lib/pdf_stuff.
Once you have files in the lib directory, you use them in the rest of your application. If the files contain classes or modules and the files are named using the lowercase form of the class or module name, then Rails will load the file automatically. For example, we might have a PDF receipt writer in the file receipt.rb in the directory lib/pdf_stuff. As long as our class is named PdfStuff::Receipt, Rails will be able to find and load it automatically.
For those times where a library cannot meet these automatic loading conditions, you can use Ruby’s require mechanism. If the file is in the lib directory
itself, you require it directly by name. For example, if our Easter calculation ֒→ page 643 library is in the file lib/easter.rb, we can include it in any model, view, or con-
troller using
require "easter"
If the library is in a subdirectory of lib, remember to include that directory’s name in the require statement. For example, to include a shipping calculation for airmail, we might add the line
require "shipping/airmail"
Rake Tasks
You’ll also find an empty tasks directory under lib. This is where you can write your own Rake tasks, allowing you to add automation to your project. This isn’t a book about Rake, so we won’t go into it deeply here, but here’s a simple example. We’ll write a Rake task that prints out the current version of our development schema. These tasks are Ruby code, but they need to be placed into files with the extension .rake. We’ll call ours db_schema_version.rake.
Download depot_r/lib/tasks/db_schema_version.rake
namespace :db do
desc "Prints the migration version" task :schema_version => :environment do
puts ActiveRecord::Base.connection.select_value('select version from schema_info') end
end
We can run this from the command line just like any other Rake task.
depot> rake db:schema_version
(in /Users/dave/Work/...) 7
Report erratum

DIRECTORY STRUCTURE  232
232
Consult the Rake documentation at http://docs.rubyrake.org/ for more information on writing Rake tasks.
log/
As Rails runs, it produces a bunch of useful logging information. This is stored (by default) in the log directory. Here you’ll find three main log files, called development.log, test.log, and production.log. The logs contain more than just simple trace lines; they also contain timing statistics, cache information, and expansions of the database statements executed.
Which file is used depends on the environment in which your application is running (and we’ll have more to say about environments when we talk about the config directory).
public/
The public directory is the external face of your application. The web server takes this directory as the base of the application. Much of the deployment configuration takes place here, so we’ll defer talking about it until Chapter 27,
Deployment and Production, on page 613.
script/
The script directory holds programs that are useful for developers. Run most of these scripts with no arguments to get usage information.
about
Displays the version numbers of Ruby and the Rails components being used by your application, along with other configuration information.
breakpointer
A client that lets you interact with running Rails applications. We talk about this starting on page 245.
console
Allows you to use irb to interact with your Rails application methods.
destroy
Removes autogenerated files created by generate.
generate
irb
֒→ page 641
A code generator. Out of the box, it will create controllers, mailers, models, scaffolds, and web services. You can also download additional generator modules from the Rails web site.2
2. http://wiki.rubyonrails.com/rails/show/AvailableGenerators
Report erratum

DIRECTORY STRUCTURE  233
233
plugin
The plugin script helps you install and administer plugins—pieces of functionality that extend the capabilities of Rails.
runner
Executes a method in your application outside the context of the Web. You could use this to invoke cache expiry methods from a cron job or handle incoming e-mail.
server
The server script runs your Rails application in a self-contained web server, using mongrel, LightTPD (if either is available on your box), or WEBrick. We’ve been using this in our Depot application during development.
The script directory contains two subdirectories, each holding more specialized scripts. The directory script/process contains two scripts that help control a deployed Rails application: we’ll discuss these in the chapter on deployment. The directory script/performance contains two scripts that help you understand the performance characteristics of your application.
benchmarker
Generates performance numbers on one or more methods in your application.
profiler
Creates a runtime-profile summary of a chunk of code from your application.
tmp/
It probably isn’t a surprise that Rails keeps its temporary files tucked up in the tmp directory. You’ll find subdirectories for cache contents, sessions, and sockets in here.
vendor/
The vendor directory is where third-party code lives. Nowadays, this code will typically come from two sources.
First, Rails installs plugins into the directories below vendor/plugins. Plugins are ways of extending Rails functionality, both during development and at runtime.
Second, you can ask Rails to install itself into the vendor directory. But why would you want to do that?
Typically, you’ll develop your application using a system-wide copy of the Rails code. The various libraries that make up Rails will be installed as gems some-
Report erratum

DIRECTORY STRUCTURE  234
234
Binding Your Application to a Gem Version
You can tell Rails to use a particular version of itself by adding a line like
RAILS_GEM_VERSION = "1.2"
at the very top of environment.rb in the config directory. When your application starts, Rails will query the installed gems on your system and arrange to load the correct one (1.2 in this case).
Although attractively simple, this approach has a major drawback: if you deploy to a box that doesn’t include the specified version of Rails, your application won’t run. For more robust deployments, you’re better off freezing Rails into your vendor directory.
where within your Ruby installation, and all your Rails applications will share them.
However, as you near deployment, you may want to consider the impact of changes in Rails on your application. Although your code works fine right now, what happens if, six months from now, the core team makes a change to Rails that is incompatible with your application? If you innocently upgrade Rails on your production server, your application will suddenly stop working. Or, maybe you have a number of applications on your development machine, developed one after the other over a span of many months or years. Early ones may only be compatible only with earlier versions of Rails, and later ones may need features found only in later Rails releases.
The solution to these issues is to bind your application to a specific version of Rails. One way of doing this, described in the sidebar on this page, assumes that all the versions of Rails you need are installed globally as gems—it simply tells your applications to load the correct version of Rails. However, many developers think it is safer to take the second route and freeze the Rails code directly into their application’s directory tree. By doing this, the Rails libraries are saved into the version control system alongside the corresponding application code, guaranteeing that the right version of Rails will always be available.
It’s painless to do this. If you want to lock your application into the version of Rails currently installed as a gem, simply enter the command
depot> rake rails:freeze:gems
Behind the scenes, this command copies off the most recent Rails libraries into a directory tree beneath the directory vendor/rails. When Rails starts running an application, it always looks in that directory for its own libraries before
Report erratum

DIRECTORY STRUCTURE  235
235
looking for system-wide versions, so, after freezing, your application becomes bound to that version of Rails. Be aware that freezing the gems copies only the Rails framework into your application: other Ruby libraries are still accessed globally.
If you want to go back to using the system-wide version of Rails, you can either delete the vendor/rails directory or run the command
depot> rake rails:unfreeze
Using Edge Rails
As well as freezing the current gem version of Rails into your application, you can also link your application to a version of Rails from Rails’ own Subversion repository (the one the Rails core developers check their code into). This is called Edge Rails. You have a couple of options here. Both require that you have a Subversion client installed on your local machine. The first additionally requires that your own project is stored in a Subversion repository.
Linking Your Project to the Rails Repository
One way to link your code to the Rails development code is to use Subversion externals. We’ll link the rails subdirectory under vendor directly to the head of the Rails development code in their repository. In the project’s top-level directory, enter the command (all on one line, without the backslash)
depot> svn propset svn:externals \
"rails http://dev.rubyonrails.org/svn/rails/trunk" vendor
This tells Subversion that the directory vendor/rails is stored in a remote repository.3 Then type
depot> svn up vendor
and you’ll see Rails being installed into your application. From now on, every time you run svn up you’ll update your application’s code, and you’ll also pick up any changes to Rails. This is life on the Edge.
You can also live a little less dangerously by linking to the latest stable version of Rails. In this case, set your svn:externals property to
http://dev.rubyonrails.org/svn/rails/branches/stable/
Freezing an Edge Version of Rails
The previous technique makes a live connection between your application and the bleeding edge of the Rails libraries. An alternative is to take a version of Rails from the development repository and freeze it into your application’s tree,
3. If you see an error saying that “vendor is not a working copy,” it means that you don’t have your application code stored under Subversion. You might want to use the second approach, freezing an edge version of Rails, instead.
Report erratum

DIRECTORY STRUCTURE  236
236


 David Says. . .
When Is Running on the Edge a Good Idea?
Running on the Edge means getting all the latest improvements and techniques as soon as they emerge from extraction. This often includes major shifts in the state of the art. RJS was available on the Rails edge for many months before premiering in Rails 1.1. The latest drive for RESTful interfaces has been similarly available for months ahead of the 1.2 release.
So, there are very real benefits to running on the Edge. There are also downsides. When major tectonic shifts in the Rails foundation occur, it often takes a little while before all the aftershocks have disappeared. Thus, you might see bugs or decreased performance while running on the Edge. And that’s the trade-off you’ll have to deal with when deciding whether to use the Edge.
I recommend that you start out not using the Edge while learning Rails. Get a few applications under your belt first. Learn to cope with the panic attacks of unexplained errors. Then, once you’re ready to take it to the next level, make the jump and start your next major development project on the Edge. Keep up with the Trac Timeline, subscribe to the rails-core mailing list,† and get involved.
Trade some safety for innovation. Even if a given revision is bad, you can always freeze just one revision behind it. Or you can go for the big community pay-off and help fix the issues as they emerge, thereby taking the step from being a user to being a contributor.
. http://dev.rubyonrails.org/timeline
†. http://groups.google.com/group/rubyonrails-core
just as we can freeze a version of Rails from gems. To do this, we use one of the following three variants of a Rake task.
depot> rake rails:freeze:edge
depot> rake rails:freeze:edge TAG=rel_1-1-0
depot> rake rails:freeze:edge REVISION=<some number>
These Rake tasks take a version of Rails (the current one, a particular tag, or a particular Subversion revision number) and freeze it into your vendor directory. This is less risky than having your project dynamically update as the core team make changes each day, but in exchange you’ll need to unfreeze and refreeze if you need to pick up some last-minute feature.
Report erratum

RAILS CONFIGURATION  237
237
14.3Rails Configuration
Rails runtime configuration is controlled by files in the config directory. These files work in tandem with the concept of runtime environments.
Runtime Environments
The needs of the developer are very different when writing code, testing code, and running that code in production. When writing code, you want lots of logging, convenient reloading of changed source files, in-your-face notification of errors, and so on. In testing, you want a system that exists in isolation so you can have repeatable results. In production, your system should be tuned for performance, and users should be kept away from errors.
To support this, Rails has the concept of runtime environments. Each environment comes with its own set of configuration parameters; run the same application in different environments, and that application changes personality.
The switch that dictates the runtime environment is external to your application. This means that no application code needs to be changed as you move from development through testing to production. The way you specify the runtime environment depends on how you run the application. If you’re using WEBrick with script/server, you use the -e option.
depot> ruby script/server |
-e development |
# the default if -e omitted |
|||
depot> |
ruby |
script/server |
-e |
test |
|
depot> |
ruby |
script/server |
-e |
production |
|
If you’re using script/server and running LightTPD, you can edit the default environment in the file lighttpd.conf in the config directory (but you have to run script/server at least once beforehand in order to have that configuration file created for you).
# . . . |
|
fastcgi.server |
= ( ".fcgi" => ( "localhost" => ( |
"min-procs" |
=> 1, |
"max-procs" |
=> 1, |
"socket" |
=> CWD + "/tmp/sockets/fcgi.socket" , |
"bin-path" |
=> CWD + "/public/dispatch.fcgi", |
"bin-environment" => ( "RAILS_ENV" => "development" )
) ) )
$ . . .
If you’re using Apache with Mongrel, use the -e production parameter when you configure your Mongrel cluster. This is described on page 622.
If you have special requirements, you can create your own environments. You’ll need to add a new section to the database configuration file and a new file to the config/environments directory. These are described next.
Report erratum

RAILS CONFIGURATION  238
238
Configuring Database Connections
The file config/database.yml configures your database connections. You’ll find it contains three sections, one for each of the runtime environments. Here’s what one section looks like.
development: adapter: mysql
database: depot_development username: root
password:
host: localhost
Each section must start with the environment name, followed by a colon. The lines for that section should follow. Each will be indented and contain a key, followed by a colon and the corresponding value. At a minimum, each section has to identify the database adapter (MySQL, Postgres, and so on) and the database to be used. Adapters have their own specific requirements for additional parameters. A full list of these parameters is given in Section 17.4,
Connecting to the Database, on page 290.
If you need to run your application on different database servers, you have a couple of configuration options. If the database connection is the only difference, you can create multiple sections in database.yml, each named for the environment and the database. You can then use YAML’s aliasing feature to select a particular database.
# Change the following line to point to the right database development: development_sqlite
development_mysql: adapter: mysql
database: depot_development host: localhost username: root
password:
development_sqlite: adapter: sqlite dbfile: my_db
If changing to a different database also changes other parameters in your application’s configuration, you can create multiple environments (named, for example, development-mysql, development-postgres, and so on) and create appropriate sections in the database.yml file. You’ll also need to add corresponding files under the environments directory.
As we’ll see on page 290, you can also reference sections in database.yml when making connections manually.
Report erratum

RAILS CONFIGURATION  239
239
Environments
The runtime configuration of your application is performed by two files. One, config/environment.rb, is environment independent—it is used regardless of the setting of RAILS_ENV. The second file does depend on the environment: Rails looks for a file named for the current environment in the config/environments directory and loads it during the processing of environment.rb. The standard three environments (development.rb, production.rb, and test.rb) are included by default. You can add your own file if you’ve defined new environment types.
Environment files typically do three things.
•They set up the Ruby load path. This is how your application can find components such as models and views when it’s running.
•They create resources used by your application (such as the logger).
•They set various configuration options, both for Rails and for your application.
The first two of these are normally application-wide and so are done in environment.rb. The configuration options often vary depending on the environment and so are likely to be set in the environment-specific files in the environments directory.
The Load Path
The standard environment automatically includes the following directories (relative to your application’s base directory) into your application’s load path.
•test/mocks/environment. Because these are first in the load path, classes defined here override the real versions, enabling you to replace live functionality with stub code during testing. This is described starting on page 224.
•The app/controllers directory and its subdirectories.
•All directories whose names start with an underscore or a lowercase letter under app/models and components.
•The directories app, app/models, app/controllers, app/helpers, app/services, app/apis, components, config, lib, and vendor.
Each of these directories is added to the load path only if it exists.
In addition, Rails checks for the directory vendor/rails in your application. If present, it arranges to load itself from there, rather from the shared library code.
Report erratum