

Beginning SharePoint With Excel - From Novice To Professional (2006)
.pdf16 C H A P T E R 1 ■ S H A R E P O I N T A N D E X C E L : T H E P E R F E C T PA RT N E R S H I P
to keep the workbooks organized. Finding a workbook for a specific order can be frustrating. Mary Jones was the sales person at the beginning of the order but John Smith took over—is the workbook filed under Mary or John? Was it last quarter or this quarter? This type of discernment takes times and wastes energy.
SharePoint eliminates this headache. By uploading all the workbooks to a single document library, and tracking important data such as sales person, customer name, and order date in metadata fields, you can slice and dice the workbooks any way you want. Look back at Figure 1-8. It shows metadata fields on the Upload Document page of a WSS document library. If you want, you can require any or all of the fields. You can also create drop-down lists or, for easy list management, tie a drop-down list to another list on the WSS site.
If you still can’t find what you’re looking for in a document library, you can use SharePoint’s Search feature to search document properties, including metadata fields, and all the content of the workbook. For example, say you need to find all the order workbooks that include a specific product. You can enter all or part of the product name in the Search field, and SharePoint returns a list of all workbooks where that product was sold. Although theoretically you could use Windows Search to do the same thing, you’ll find SharePoint’s Search not only easier to use, but a whole lot faster.
Publishing an Excel List
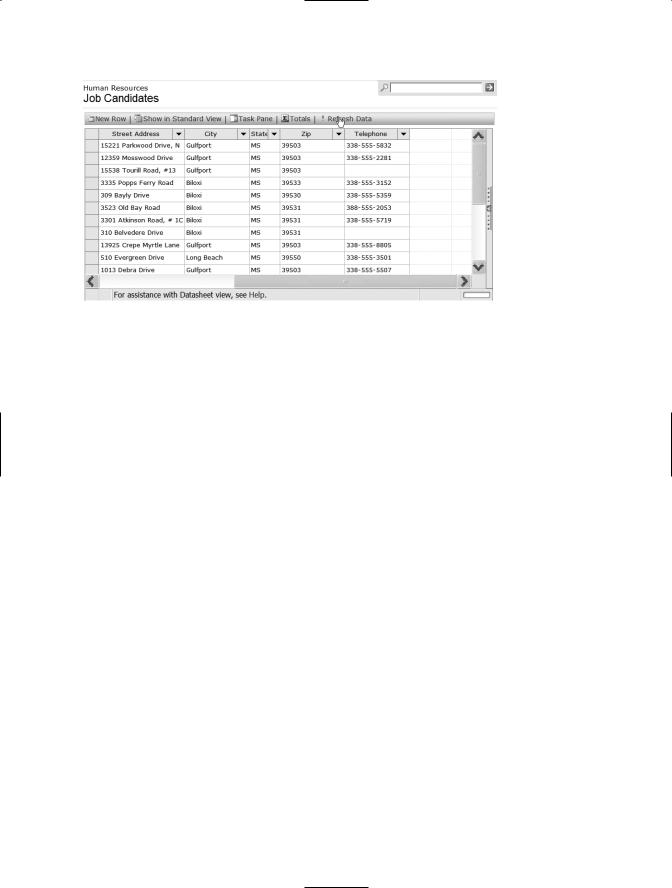
The second option for sharing Excel workbook data in SharePoint is by publishing an Excel list. In Chapter 2, we explore publishing an Excel list to SharePoint in great detail, so here we’ll just present a brief overview. In the previous section, we talked about uploading an Excel workbook to a document library. Although that has significant advantages over using shared network folders, it still has its limitations. For one thing, except through the use of metadata and searching, you cannot access data within the workbook without opening it up in Excel. However, by publishing an Excel list to SharePoint, you can display the contents of a worksheet directly on the site. In this way, you can control access to the workbook and limit users to seeing just the content you want them to see. Excel lists can be published as static data, or can be published to synchronize with the SharePoint server so changes made in either the Excel list or in the SharePoint list are reflected in the other. Figure 1-9 shows an Excel list published as a SharePoint list.
C H A P T E R 1 ■ S H A R E P O I N T A N D E X C E L : T H E P E R F E C T PA RT N E R S H I P |
17 |
Figure 1-9. Excel lists can be synchronized with SharePoint so that users are always viewing the most current data.
From SharePoint to Excel and Back Again
In addition to uploading Excel workbooks and publishing Excel lists to SharePoint, you can also go in the reverse direction. You can publish SharePoint lists to Excel to make use of Excel’s analysis, charting, and other advanced features (see Chapter 3). You can also publish Excel charts and tables as web pages to display in SharePoint so you can easily share them with others (see Chapter 6). If you need in-depth query capability, you can use Microsoft Query through Excel to query data in a SharePoint list (see Chapter 8).
As you can see, it doesn’t matter where your data starts—with the integration of SharePoint and Excel, you can take it in whatever direction you need to go.
Summary
In this chapter, we reviewed features of Microsoft Excel that make Excel an excellent partner for a collaboration tool such as SharePoint. We took a high-level look at Microsoft SharePoint Technologies, including Microsoft SharePoint Portal Server and Windows SharePoint Services. We then ended with an introduction to the partnership between these two workhorses, Excel and SharePoint. In the remainder of this book, we’ll explore this partnership in great depth so you can exploit this relationship to its maximum, including creating out-of-the-box solutions to move your business forward.


C H A P T E R 2
■ ■ ■
Working with Lists in
SharePoint
Every SharePoint site consists of three elements: web pages and web parts, document libraries, and lists. Lists can be used for everything from displaying contact information to real-time tracking of issues. Lists can contain static, read-only content or be populated by dynamic, collaborative content that changes every second.
Although lists can reside solely on the SharePoint site, through the integration of Microsoft Excel and SharePoint, you can combine the power of Excel lists with the collaboration features of SharePoint for a powerful new way to track and maintain data. You can publish Excel lists to SharePoint sites using powerful synchronization tools that allow for editing on the site or directly in the Excel workbook. By maintaining the list on a SharePoint site, team members can easily review the list’s contents, modify the list when appropriate, and use database features such as sort and filter to analyze the list.
In this chapter, we examine SharePoint lists, including how to create a list, how to set list permissions, how to publish a list from Excel to SharePoint, and how to synchronize and manage lists.
Exploring SharePoint Lists
A SharePoint list is a collection of columns (fields) and rows (records) of data. You can create a list in SharePoint using one of the standard list templates, you can modify a standard list or create a custom list with your own columns, and you can import a preexisting list from Excel. What makes a list especially valuable in SharePoint is not in the creation of the list but in how you can display the data the list contains. By setting list permissions and creating custom views of SharePoint lists, you can control who sees the data and give authorized users the ability to view the data in the way that’s most helpful to them.
SharePoint comes with the following standard list templates to help you get started:
19

20C H A P T E R 2 ■ W O R K I N G W I T H L I S T S I N S H A R E P O I N T
•Links: Hyperlinks to documents or to internal and external web pages
•Announcements: News and other short bits of information
•Contacts: Name and address information, which can be linked to Microsoft Outlook
•Events: Meetings and other date-specific data, which can be displayed in a calendar format and linked to Microsoft Outlook
•Tasks: Items you want to track that need to be completed by the team
•Issues: Issues related to a project that you want to track
In addition to these standard lists, you can choose three additional methods to create lists:
•Custom List: A standard custom list where you create your own columns
•Custom List in Datasheet View: A custom list that’s displayed in datasheet or spreadsheet view by default
•Import Spreadsheet: A custom list you create by importing a preexisting spreadsheet from Excel
Creating a SharePoint List
To create a list, choose the template or method that most closely resembles the list you want. Whichever you choose, you can customize the list after you create it by adding columns, choosing the order of the columns, defining sort order, filtering data, and adding totals. Depending on the type of list, you might also be able to group it and choose a display style.
To create a new list, follow these steps:
1.Click Create in the Windows SharePoint Services (WSS) top navigation bar or in SharePoint Portal Server (SPS), click Manage Content in the Actions menu, and then click Create to see a list of standard list templates.
2.Click the type of list you would like to create from the available templates.
3.On the New List page that opens, enter a name for the list. This is the name that site visitors see, so make it descriptive. However, because it becomes part of the URL (Uniform Resource Locator or address) to the list, it’s better to make the list name as short as possible while still identifying the list.
4.Enter a description of the list. In addition to text that will help to distinguish the list, include any names in the Description text box that team members might use to search for the list.

C H A P T E R 2 ■ W O R K I N G W I T H L I S T S I N S H A R E P O I N T |
21 |
5.Select No if you don’t want a link to the list to appear on the Quick Launch bar on the left side of the site’s home page. For example, select No if you’re creating a list that will be used to supply data to a lookup field in another list or document library. If you want users to have easy access to the list, leave the default option set to Yes.
6.Click Create.
A new web page is created to display the list. The columns that display on the list page depend on the type of list you chose to create. The type of list also determines which views appear in the Select a View list on the left of the page.
If you already have a list in Excel, you don’t have to re-create it in SharePoint. You can use SharePoint’s Import Spreadsheet option to import the list directly from Excel to SharePoint. The steps for importing a spreadsheet are essentially the same as they are for creating a new list, with just a few exceptions.
To import a preexisting list from a spreadsheet, follow these steps:
1.Click Create in the WSS top navigation bar or in SPS, click Manage Content in the Actions menu, and then click Create to see a list of templates.
2.Select Import Spreadsheet from the list of available options.
3.On the New List page that opens, enter a name for the list.
4.Enter a description of the list.
5.Click Browse at the bottom of the New List page.
6.Choose the workbook that contains the list from the Choose File dialog box, and then click Open.
7.Click Import on the New List page.
8.In the “Import to Windows SharePoint Services list” dialog box, select the type of range that contains the list from the Range Type drop-down list, and then select the corresponding range:
•List Range refers to a Microsoft Excel list (see Appendix A for information about creating and using Excel lists). If the workbook has only one list, SharePoint selects it automatically. If the workbook has multiple lists, select the list you want from the Select Range drop-down list.
•Range of Cells is any selected range of cells in any worksheet in the workbook. To select a range, click the Collapse button on the right end of the Select Range field, select the range of cells you want to import, and click the Expand button (see Figure 2-1) to return to the “Import to Windows SharePoint Services list” dialog box (see Figure 2-2).

22 C H A P T E R 2 ■ W O R K I N G W I T H L I S T S I N S H A R E P O I N T
Figure 2-1. Click the Expand button to return to the Import to Windows
SharePoint Services list dialog box.
Figure 2-2. Use the WSS "Import to Windows SharePoint Services list” dialog box to select the cells in a worksheet you want to import.
•Named Range refers to a named range within the workbook. Select the named range from the Select Range drop-down list.
9.Click Import.
The contents of the Excel list are displayed in the new list on the SharePoint site.

C H A P T E R 2 ■ W O R K I N G W I T H L I S T S I N S H A R E P O I N T |
23 |
■Note When you create a list using Import Spreadsheet, the option to display a link to the list in the Quick Launch bar is inexplicably missing from the New List page. When you import a spreadsheet, the link doesn’t appear in the Quick Launch bar, by default. If you’d like to include a link after you create the list, see the upcoming section “Changing General Settings.”
You’re now ready to add records to the list, customize the columns in the list, or modify other list settings. To learn how to create custom views of any list you create, refer to Chapter 4.
Modifying a List’s Settings
After you create a list, you can make changes to the list’s general settings, such as its name and description; set list permissions; add or modify columns; and configure views of the list.
Changing General Settings
To change a list’s general settings, click Modify Settings and Columns in the Actions menu on the left side of the list’s page. This opens the Customize page. In the WSS General Settings section, shown in Figure 2-3, you can do the following:
•Change general settings
•Save list as template
•Change permissions for this list
•Delete this list

24 C H A P T E R 2 ■ W O R K I N G W I T H L I S T S I N S H A R E P O I N T
Figure 2-3. Use the General Settings options to modify a list’s name, description, security, and other settings.
■Note In SPS, permissions are managed on the area level rather than the list level. Instead of Change permissions for this list, you’ll find an option to Select a portal area for this document library. For more about changing permissions on a SPS portal, see “Managing SPS Security” later in this chapter.
Click Change general settings to modify the properties of the list, including its name and description. This opens the List Settings page.
Here’s a description of the settings you can change:
•Name and Description: Change the list’s name or modify the description.
•Navigation: Change whether you want a link to the list displayed on the Quick Launch bar.
•Content Approval: Select Yes if you’d like to require that before items are posted to a list, you’d like them approved by a site administrator or other team member with Manage List rights (see the section “Setting List Permissions” for more about WSS list permissions). The default option is No.
•Attachments: Specify whether file attachments to items in a list are enabled or disabled. Attachments are enabled by default.
•Item-Level Permissions: Specify which items in a list users can read—all items or only their own—and if they can edit all items, only their own, or no items.

C H A P T E R 2 ■ W O R K I N G W I T H L I S T S I N S H A R E P O I N T |
25 |
Saving a List As a Template
You might decide that after you’ve customized a list to meet your needs, you might want to designate it as a template so that it can be reused for future lists. To do this, click Save list as template on the list’s Customize page. Enter the following:
•File name: Enter a file name for the template. It’s a good idea to keep this name short and avoid spaces to minimize the length of the template’s URL.
•Template title: The title appears on the Create page in the list of available list types. Make it friendly and descriptive so users know what they’re selecting.
•Template description: The description appears on the Create page in the list of available list types.
•Include content: Select this checkbox if you want to include the data from the current list in any lists based on this template. Don’t select this checkbox if the data contained in the list should be kept confidential. List permissions don’t carry over from the original list to the template.
The new template is available in the Lists list on the Create page when you click Create in the top navigation bar in WSS, or when you click Manage Content in the Actions menu in SPS, and then click Create.
To modify or delete a template you’ve created, follow these steps:
1.Click Site Settings on the top navigation bar.
2.Click Go to Site Administration in the Administration section of the Site Settings page.
3.Click Manage list template gallery in the Site Collection Galleries section of the Top-Level Site Administration page.
4.To delete:
a.Click the Edit icon next to the template.
b.Click Delete.
5.To edit:
a.Click Modify Settings and Columns in the Actions list.
b.Make changes as you would to any list.
c.When you’re finished making changes, click Go back to List Template Gallery.