

Beginning SharePoint With Excel - From Novice To Professional (2006)
.pdf36C H A P T E R 2 ■ W O R K I N G W I T H L I S T S I N S H A R E P O I N T
5.In the second step of the wizard, verify that the data is being converted correctly. SharePoint supports a limited set of data types: Text (single line), Text (multiple lines), Date, and Numeric. All data in a column must conform to a single data type. SharePoint determines this based on the data in the first row. Any data in the column that doesn’t conform to this data type is designated in the Key Cell column. If a value appears in the Key Cell column, you might want to close the wizard and verify that the data in that cell can be converted without creating problems. If it cannot, convert the data type of the column before attempting to publish again.
6.Click Finish to publish the list.
Figure 2-8. The Publish List to SharePoint Site wizard walks you through the steps for publishing an Excel list to SharePoint.
When the list is published, a Windows SharePoint Services dialog box opens that includes a link to the list on the SharePoint site. Click the link to see the published list.
Working with Lists on the SharePoint Site
The published list works the same way as any other SharePoint list. You can view the list in Datasheet or Standard view. Even if the list is linked to the Excel workbook, you can rearrange the columns and manipulate the data using all the Datasheet view features described in the section “Working with SharePoint List Data” earlier in this chapter.
C H A P T E R 2 ■ W O R K I N G W I T H L I S T S I N S H A R E P O I N T |
37 |
Modifying a List
If you didn’t choose to create a link between the Excel and SharePoint lists when you published the list, you can modify the data in either list without impacting the other list. If you created a link, you can modify the data in either list and then synchronize the lists to update the data in both lists.
Synchronizing a List
After you’ve made changes to the Excel or SharePoint lists, you can synchronize the changes between the two lists. From Excel, click the Synchronize button on the List toolbar. This writes any changes from either list to the other.
After you’ve synchronized a list in Excel, click Refresh Data on the SharePoint list toolbar to view the changes in SharePoint.
Resolving Conflicts
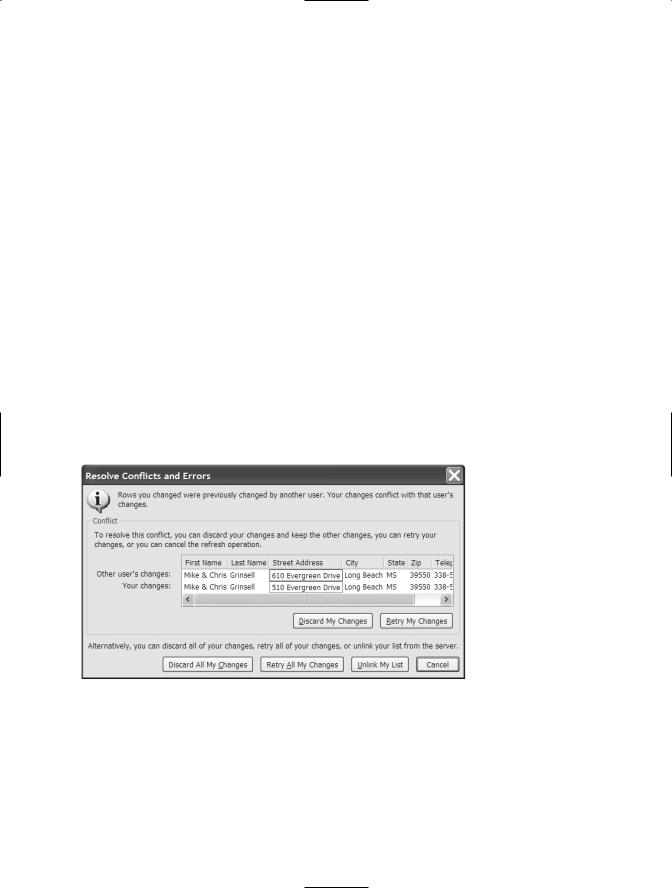
If the same cell is changed on both the Excel list and the SharePoint list, a conflict is identified that must be resolved. Figure 2-9 shows a typical conflict.
Figure 2-9. When a conflict arises because the same cell is changed between lists, you can use the Resolve Conflicts and Errors dialog box to resolve the conflict.
You can choose to discard your changes or retry your changes. If you realize that you shouldn’t have been making any changes to the list, you can choose to Discard All My Changes, or if you want your changes to win over the other changes made, you can choose
38 C H A P T E R 2 ■ W O R K I N G W I T H L I S T S I N S H A R E P O I N T
Retry All My Changes. You can also choose to unlink the lists (Unlink My List) so both changes are preserved and the lists can function independently of each other.
Refreshing a List and Discarding Changes
If you’ve been working in the Excel list and want to discard changes you’ve made, click Refresh List and Discard Changes on the List toolbar. The list reverts to the last saved version of the workbook.
Setting External Date Range Properties
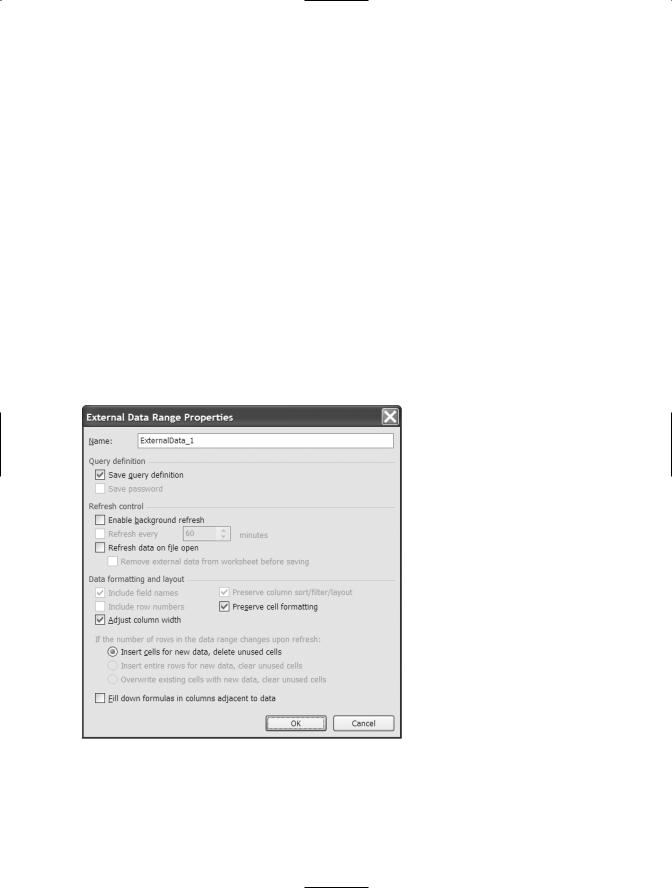
When you create a list in Excel and then publish it to SharePoint, SharePoint uses Microsoft Query functionality to synchronize and maintain the lists. You can change some of the Microsoft Query properties to control how the list refreshes. On the List toolbar in Excel, click the List button and choose Data Range Properties to open the dialog box shown in Figure 2-10.
Figure 2-10. In the External Data Range Properties dialog box, you can control Refresh and other properties related to the link.

C H A P T E R 2 ■ W O R K I N G W I T H L I S T S I N S H A R E P O I N T |
39 |
To synchronize the data automatically at regular intervals, select Enable background refresh. To refresh data every time you open the file, click Refresh data on file open. You can also change options in the “Data formatting and layout” area to adjust column widths and preserve cell formatting.
Breaking the Link
If you decide that you want to unlink the Excel list from the SharePoint list, you can break the link between the two. On the List toolbar in Excel, click the List button and choose Unlink List. You’re warned that this change cannot be undone. Click OK to verify that you want to continue. When the link is broken, the two lists function independently of each other, and changes in one list don’t appear in the other one.
Summary
SharePoint offers a number of tools to manage lists, from easy-to-use sorting and filtering features to synchronizing with an Excel worksheet. Assigning permissions through the use of site groups gives you an organized way to grant the appropriate permissions to site users. By publishing an Excel list to a SharePoint site, you provide users with a helpful way to access data while preserving control over who can change the data, and how the data can be changed. In the next chapter, you’ll learn how to modify list views in SharePoint to provide users with the data they need, in exactly the layout and format in which they need it.


C H A P T E R 3
■ ■ ■
Working with SharePoint Lists in Excel
Corporate America is littered with Excel data that needs to be updated by multiple users: shared Excel workbooks stored on network drives, attachments e-mailed from one manager or administrative assistant to the next, and workbooks that are copied and then need to be consolidated or merged. Excel and SharePoint together provide superior support for multiuser lists, including offline editing and conflict resolution. This chapter will help you rethink your strategies for shared Excel lists.
Taking SharePoint Data Offline with Excel
One of the most useful yet least used SharePoint features is the ability to take list data offline in Excel. You can export any SharePoint list to Excel for offline use, including Contacts and Events lists that also integrate with Outlook.
Exporting to Excel from a Datasheet View
To export to Excel from a datasheet view, follow these steps:
1.In a datasheet view, use the task pane to export the list.
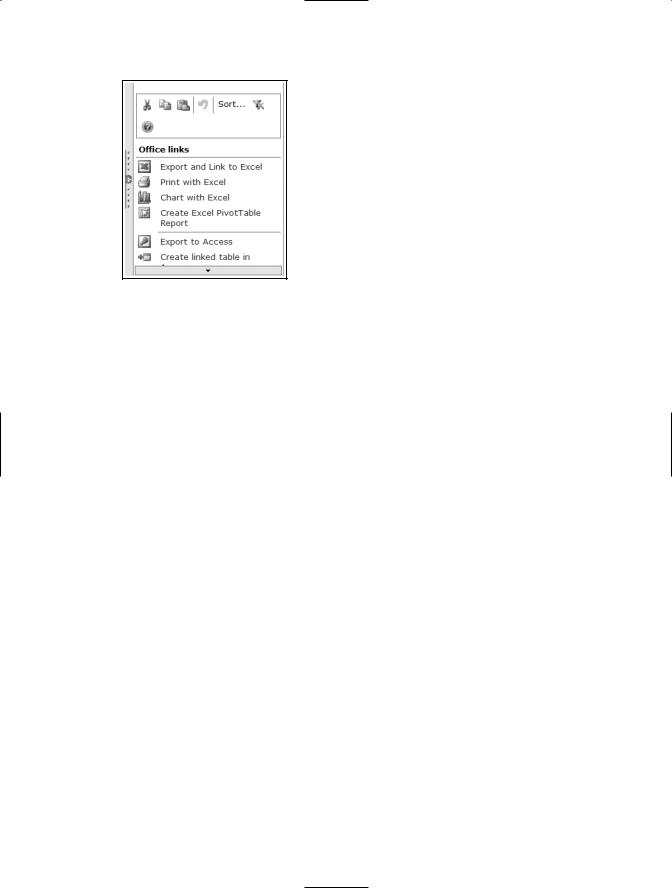
2.Click the Task Pane button to open the task pane (shown in Figure 3-1), and then click the Export and Link to Excel link to launch Excel.
41
42 C H A P T E R 3 ■ W O R K I N G W I T H S H A R E P O I N T L I S T S I N E X C E L
Figure 3-1. Open the Datasheet view task pane to export a list to Excel.
3.When the Open Query dialog box appears, click the Open button to export the SharePoint data to Excel.
Exporting to Excel from a Standard View
To export to Excel from a standard view, follow these steps:
1.Choose a standard view that includes the columns of data you want to export. If a suitable view doesn’t exist, create it (see Chapter 4 for detailed instructions on creating views). Don’t worry about grouping or totals—they won’t be included in the exported data.
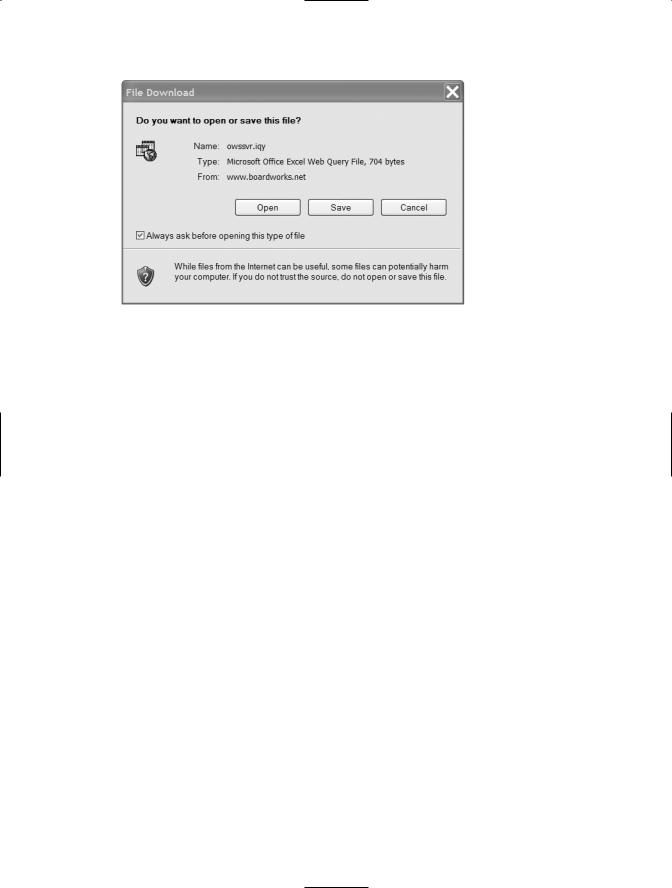
2.With your view selected, click the Export to Spreadsheet link on the Actions list on the left side of the screen to open the File Download dialog box, shown in Figure 3-2.
C H A P T E R 3 ■ W O R K I N G W I T H S H A R E P O I N T L I S T S I N E X C E L |
43 |
Figure 3-2. Export the list to Excel or save the query separately in the File Download dialog box.
3.To export the data to Excel, click the Open button.
4.After Excel launches, you’ll be prompted to open or save the query. Click Open to export the SharePoint list data to Excel.
Saving and Using a Query
The Export to Spreadsheet link in the Datasheet view task pane creates a query and automatically opens the query in Excel to export the data. Exporting from a standard view provides an additional useful option. Instead of choosing Open in the File Download dialog box, you can save the query definition as a separate file. The query file can be used in Excel, Microsoft Query Editor, Access, or any other application that can process a query (IQY) file. If you have a SharePoint list that you want to use in more than one Excel worksheet, it’s more efficient to save the query file separately.
Click the Save button in the File Download dialog box to save the query file. If you’ll be the only person using the query, save it in the My Documents\My Data Sources folder on your computer, the default location for queries. (If other people will use the query, save it in a network shared folder. Choose a file name that accurately describes the data source rather than the name of the SharePoint site, which might have more than one list you’ll want to query.)
After you’ve saved the query, follow these steps to use the query to create an offline copy of the SharePoint list data in Excel:

44C H A P T E R 3 ■ W O R K I N G W I T H S H A R E P O I N T L I S T S I N E X C E L
1.Open the Excel workbook where you want to display the SharePoint list data.
2.Choose Data Import External Data Import Data to open the Select Data Source dialog box, shown in Figure 3-3.
Figure 3-3. Choose your query in the Select Data Source dialog box.
3.Select the query and click Open.
4.In the Import Data dialog box, choose a location for the query results: a new worksheet or a single cell in an existing worksheet (see Figure 3-4).
Figure 3-4. Choose a location for the query results in the Import Data dialog box.
C H A P T E R 3 ■ W O R K I N G W I T H S H A R E P O I N T L I S T S I N E X C E L |
45 |
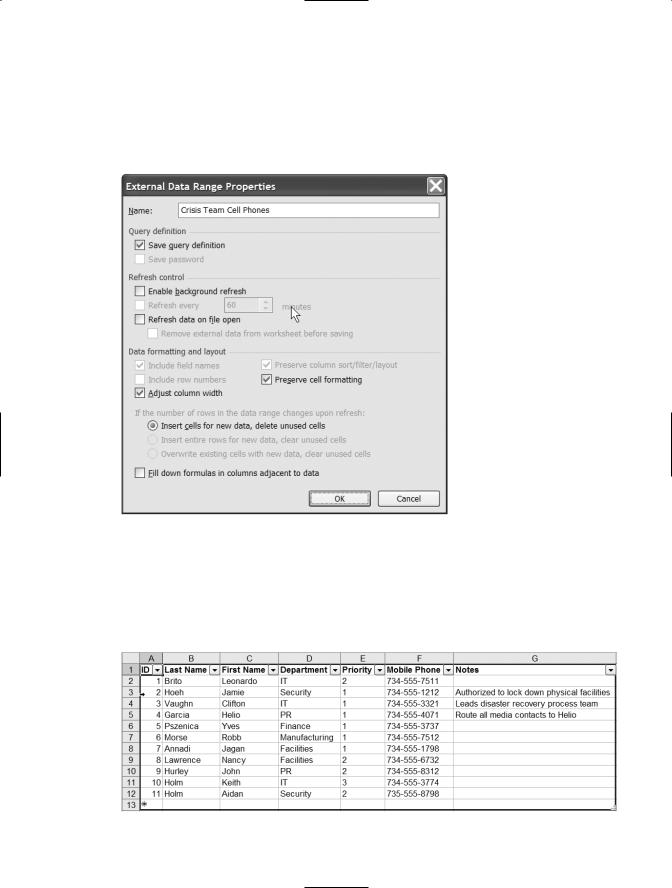
5.Click the Properties button to open the External Data Range Properties dialog box, shown in Figure 3-5. If you want Excel to refresh the query automatically every time you open the workbook, select the Refresh data on file open checkbox. Click OK to close the dialog box.
Figure 3-5. Set options for the query in the External Data Range Properties dialog box.
6.Click OK to close the Import Data dialog box and insert the query results into the Excel worksheet, as shown in Figure 3-6.
Figure 3-6. The SharePoint data, imported as an Excel list