

Plugging In to Remote Data with Linux Programs Quickly |
71 |
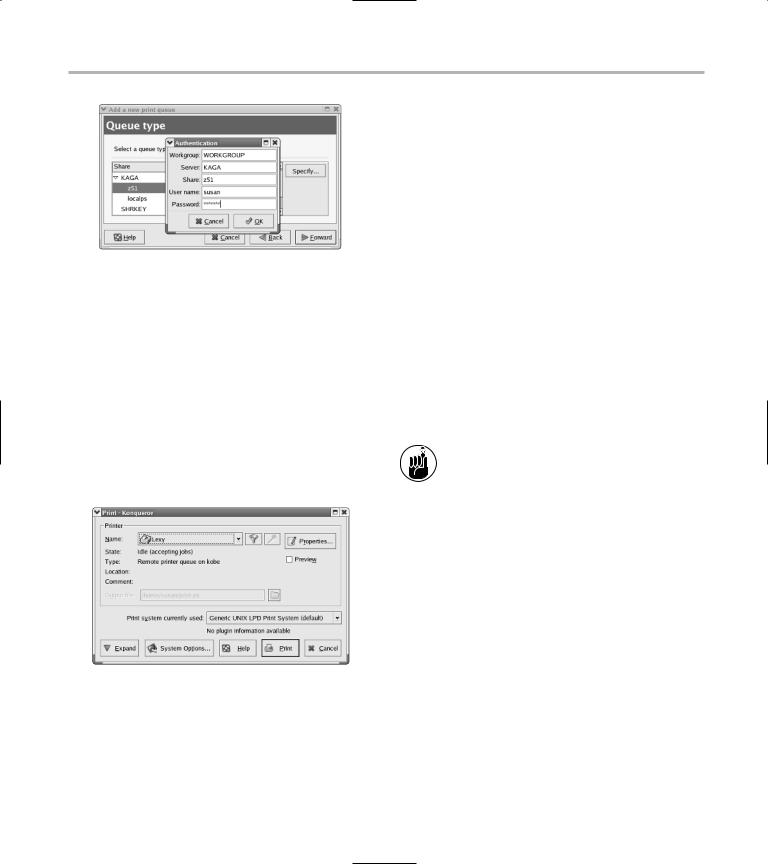
•Figure 11-4: The Authentication dialog.
9.Enter the user name and password you use to log into the Windows computer and click OK.
10.In the next dialog that opens, use the list box (initially labeled Generic) to choose your printer type and model.
11. Click Finish, and print a test page to verify that the printer is properly configured.
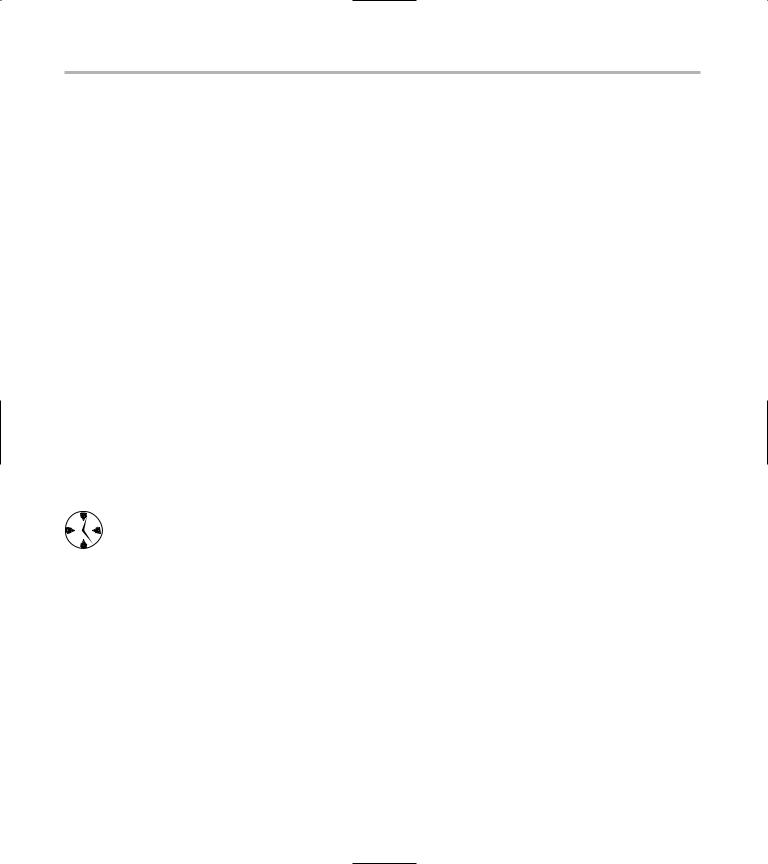
To print on the remote printer, just click the printer button usually found on the toolbar, or navigate through the File menu. The Print dialog opens to let you adjust the properties of your print job
(see Figure 11-5).
• Figure 11-5: The Print setup dialog.
Plugging In to Remote Data with Linux Programs Quickly
Mounting a remote directory on your local system is a great way to use your favorite Linux programs with
Windows data (or data stored on another Linux computer). Just add a quick line or two to the /etc/ fstab file, and Linux mounts a network share with just one command.
In a typical Linux system, you have to hold superuser privileges to mount a file system. That’s very secure, but not very convenient. If you want a nonprivileged user to be able to mount his or her own home directory, you need to give some extra privileges to the SMB mount program (see Technique 27 for more information about file permissions and privileges):
1. At the command line, give yourself superuser privileges.
2. Change permissions for smbmnt:
chmod u+s /usr/bin/smbmnt
3. Change ownership for smbmnt:
Chown root /usr/bin/smbmnt
Granting privileges to programs (instead of to users) can create security risks should some hacker discover a flaw in the smbmnt program. Be sure to check out Technique 57 to decide whether privileged programs are right for you.
Now, if you add a line or two to your /etc/fstab file, mounting a remote SMB share is a snap. To edit the file, follow these steps:
1. Open a terminal window and give yourself superuser privileges with the su command.
2. Type kwrite /etc/fstab and press Enter.
A KWrite window opens, with /etc/fstab displayed.
3. Add a line at the end of the file that reads like this:
//bastille/freddie /mnt/bastille \ smbfs noauto,user 0 0
72 Technique 11: Sharing Files and Printers in a Windows World
You need to customize the entry in this step as follows:
The first field, //bastille/freddie, describes the device to be mounted. This is the computer name, followed by the remote directory name.
The second field, /mnt/bastille, defines the mount point. This is the directory on your computer where the content of the remote directory will appear. The mount point can be anywhere in your directory tree that you would like your share to be, but you need to create the directory and set the privileges before you mount it.
The third field is the file system type: smbfs. Many file system types work with Linux, but smbfs is the choice for what you’re doing.
The fourth field, noauto,user, describes the options to invoke for this mount. Set the noauto option to tell Linux not to mount this file system at boot time (you never want to auto-mount a network share), and set the user option to permit a nonprivileged user to mount the share.
The fifth field works with the backup command. You don’t want to be backing up this share remotely, so set it to 0.
The sixth field indicates whether the file system of the share should be checked at boot time. Again, pass on this option and set it to 0.
4. Save the file and close KWrite.
You’re ready to mount a share!
Need more information about the fstab file? For the fastest route to this info, type man fstab at the command line and press Enter. All the documentation is at your fingertips. Use the upand down-arrow keys to scroll through the documentation, and when you’re finished, press q to quit.
Need the documentation in a nicer format? Double-click the Start Here icon on your desktop and enter man:/ in the Location line. You might need to search a bit for the documentation, but it’s more readable and includes hyperlinks to other information related to your topic. Oh, and fstab is documented in Section 5.
Now, to mount the new share, just use the mount command at the command line:
$ mount //bastille/freddie
Access your new share just like it’s a part of your local machine. You can work on it with all your favorite Linux programs or copy files back and forth effortlessly.
If you’re graphically inclined, use Konqueror to navigate your new file system. It works just like a part of your local machine now.

12 Finding What
You Need
Technique
Save Time By
Locating files by name
Finding files by their qualifications and attributes
Finding out who’s hogging the disk space
Executing simple com-
mands with find and exec
Building complex commands with find and xargs
We’ve all been there — you create a new file, and then you forget where you put it and what you called it. How do you find it again? Fortunately Linux has a few options for finding lost data fast.
In this technique, we introduce you to the find command. find can search through your file system looking for files based upon a diverse set of qualifications that you can combine to create complex searches. With find, you can search for your file based on information like the modification date, the file size, ownership, and other file attributes. find also works with the xargs command to build complex commands based on search results. We also show you how to use the locate command to search through a system-maintained catalog of files and how to update that catalog to be sure it contains current entries.
We’ve also included a diskusage utility that you can use in conjunction with find to play “find the disk hog.” If you need to free up resources, this is a quick way to find out who’s using all the space.
This technique is all about finding files fast, with whatever information you have on hand. You know what you need to find. You might not remember it’s name, but we’ll help you find it anyway.
Finding Files with locate
Every night, an automatically scheduled program waltzes across your disk drive(s) and records all the filenames it can find in a database. The locate command searches through that database to find files with a particular name.
If you find your installation of Linux is missing the locate command, you can add it by installing the appropriate RPM package: for SuSE, install findutils-locate-version.rpm; for Mandrake, install slocate-version.rpm; for Fedora, install slocate-version.rpm.
74 Technique 12: Finding What You Need
You can use locate to find data files, directories, or programs. For example, if you can’t remember where the ifconfig program is located, just type locate ifconfig and press Enter. You instantly see a list of all the files on your system whose names include ifconfig:
$ locate ifconfig /usr/share/man/man8/ifconfig.8.gz /usr/share/man/de/man8/ifconfig.8.gz /usr/share/man/fr/man8/ifconfig.8.gz /usr/share/man/pt/man8/ifconfig.8.gz /sbin/ifconfig
That’s pretty close but not exactly what you were looking for. Save some time by using a regular expression (also known as a filename pattern) to narrow down the results:
$ locate -r “/ifconfig$” /sbin/ifconfig
The -r flag tells locate to expect a regular expression. In this case, you want a list of all filenames where /ifconfig appears at the end of the name. ($ means end of name; see man -S 7 regex for a complete list of valid regular expressions.)
The locate command runs quickly because it searches through a database rather than the complete file system. It’s a great tool for simple filename searches.
Like anything that’s simple and easy, the locate command has a few drawbacks:
The database becomes outdated quickly if you add, delete, or rename many files during the day. If you have superuser privileges, you can update the database yourself. Use the same command that the nightly update job executes:
/etc/cron.daily/slocate.cron.
The database is incomplete because the nightly database update excludes several directories (/tmp, /var/tmp, /usr/tmp, /afs, and /net) and remote file systems.
If you don’t have superuser privileges, or your search requirements are more complex than the simple filename matching that locate provides, you need to use the find command, which is discussed next.
Finding Files with find
The find command is one of the most complex and useful commands that you’ll find in Linux. find searches through a file system looking for files that fit a pattern (which you define) and then performs an action on those files. The most frequently used find command searches for a file with a specific name, starting in the current directory:
$find . -name drinks.txt -print ./recipes/ drinks.txt
When you use the find command, you have to provide three pieces of information:
Location: Where to start searching. Typically, you specify . to start searching in the current directory or / to start searching at the root of your file system tree. If you list multiple directory names, find searches in all those directory trees.
Qualifications: Which files should be included in the result. In the example, freddie is looking for a file named drinks.txt. See the next section for details on handy qualifiers.
Actions: What you want find to do when it locates a qualifying file. In the example, -print simply echoes the relative pathname of the file. See “Acting on What You Find,” later in this chapter, for details on putting actions to good use.