


22 Spring Cleaning
Essentials
Technique
Save Time By
Customizing your runlevels
Disabling unused services to close extra, open ports
Removing unused services with the Service Configuration Tool
Cleaning up after ex-users
Cleaning up is an essential part of running a secure and efficient system. You can use resources most efficiently if your system doesn’t have an abundance of unused services hanging around in the back-
ground, tying up CPU time. Unnecessary services are also an invitation to hackers. Can hackers exploit an open port you’ve forgotten about? In this technique, we explain the best ways to avoid these pitfalls by
Tidying up the runlevel you work in most often: Linux runlevels are collections of services that define your system’s capabilities. Each runlevel has a purpose. You can choose from the predefined runlevels or customize runlevels for your use. Shutting down the extra services in the runlevel you’re using saves CPU time and system resources.
Shutting down unused services: When you leave an unattended service running, listening for a client’s request, it can accept a request from either an approved user or a hacker. Shutting down the services that don’t need to be running is a good way to tighten system security. That’s because when you shut down services, you close off the extra open ports you’re not using — and hackers can’t use them either.
Getting rid of old users’ stuff: Old files are another waste of resources — why take up good disk space for outdated data? When users move on and you clean up, be sure to remove all their old files; otherwise, you’re just wasting space by storing data that’s unlikely to be used again.
The following sections are about cleaning house. By doing so, you’ll keep your work environment neat, secure, and productive; and everyone will save time!
Running Down the Runlevels
You can save time and make better use of your system resources by running at the minimum runlevel you need. A runlevel is a collection of services. You can customize the services available at each runlevel to make the most of your system resources.
138 Technique 22: Spring Cleaning Essentials
Runlevel basics
Most Linux distributions define the following runlevels:
0Halt
1Single-user mode
2User-definable — nongraphical
3Multiuser command line environment
4User-definable — nongraphical
5Multiuser graphical environment
6Reboot
The different runlevels are used for different reasons. If you need the system all to yourself for repairs or system maintenance, booting into runlevel 1 guarantees that you’re the only user on the system. However, you have to work from a terminal window because runlevel 1 doesn’t support a graphical interface.
If you need to save on the system load and your users don’t need a graphical interface, you can boot your system into runlevel 3. If your application software doesn’t need graphics capabilities, your users will recognize the boost in speed they get from running at the lower runlevel.
For all the bells and whistles of a graphical environment, boot your system into runlevel 5. It’s definitely the most comfortable user environment. You can use the command line if you want, but the graphical options are also available. (Runlevel 5 is the default runlevel for Fedora, Mandrake, and SuSE systems.)
Customizing runlevels in Fedora
Customizing a runlevel is easy in Fedora or SuSE Linux, but it’s a little trickier in Mandrake. In this section, we show you how to use Fedora’s runlevel editor. If you’re a SuSE or Mandrake user, skip ahead to the appropriate section.
To turn Fedora services on or off or to edit the services included in your runlevel, follow these steps:
Before you make any changes to your configuration, be sure that you have a working emergency repair disk. If you don’t, you might lock yourself out of your computer without giving yourself a way back in. See Technique 24 for details on making a boot disk.
1. From the Main Menu, choose System Settings Server Settings Services.
You’re prompted for the superuser password.
2. Enter the superuser password and click OK.
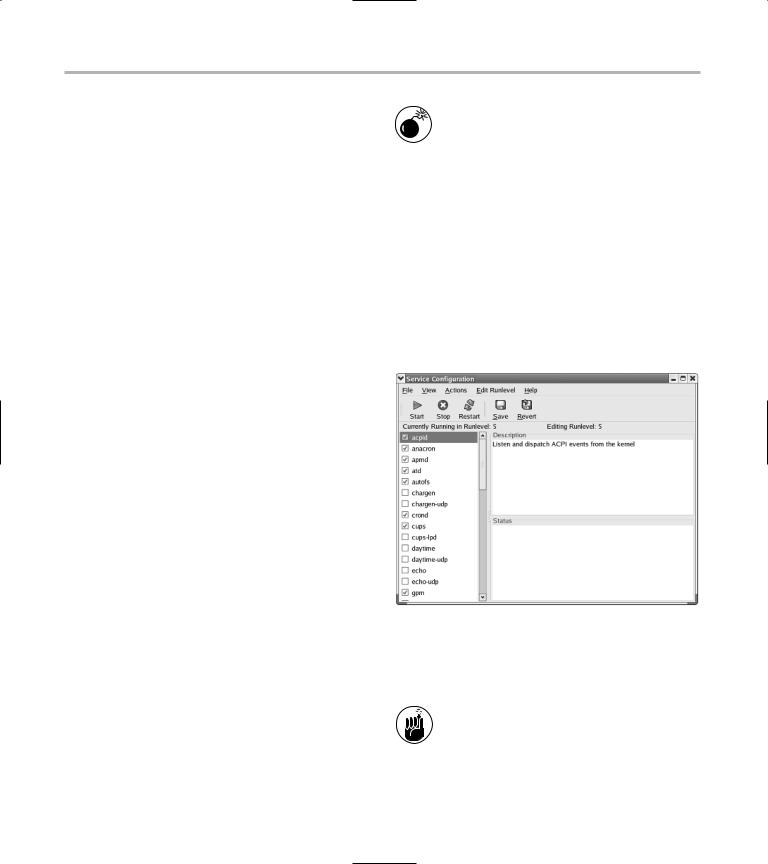
The Service Configuration window opens, as shown in Figure 22-1. Use the Service Configuration Tool to edit the services that are enabled for your runlevel or to create a new runlevel.
•Figure 22-1: The Service Configuration window.
3.To modify a runlevel other than the default (5), choose Edit Runlevel on the menu bar and select the runlevel you want to customize.
Runlevels 2 and 4 are user-definable — Fedora set them aside just for you. Be aware that they’re not graphical, so you’ll be working at the command line. If you’re managing a Web server, database server, or e-mail server, configure runlevel 4 to run only the services you
Running Down the Runlevels 139
need — you can still switch to runlevel 5 (and a graphical desktop) when you need to manage your system.
Defining a runlevel with only the services you need to run on your system gives you a leaner, meaner machine. Your users will thank you for the extra speed.
4. Look at the Editing Runlevel indicator above the description frame to make sure the runlevel displayed is correct. (You don’t want to accidentally edit the wrong runlevel.)
5. To edit the runlevel services, scroll through the list and disable the services your users don’t need or enable services that would be handy.
You can enable or disable a service by checking or unchecking the check box to the left of the service. If the box is checked, the service is on.
You can get a quick description of the service by highlighting the service name and looking at the description box. Most of the descriptions are pretty informative.
6. After you’ve changed the services for your new custom runlevel, click the Save icon on the toolbar.
You now have a leaner, meaner runlevel to work in.
Customizing runlevels in SuSE
SuSE Linux supports runlevels 1 through 6, but you can’t modify runlevel 4 without resorting to a command-line interface. SuSE also adds a few
new runlevels: Runlevel B corresponds to the boot process, and runlevel S is another single-user runlevel (just like runlevel 1, but you can customize the services to create two distinct single-user runlevels).
We strongly recommend that you don’t change any of the services in runlevel B (boot) or runlevel 0 (halt), or your system may become inoperable.
If you need to customize runlevel 4 for some reason, see the man page for the chkconfig command.
To turn SuSE services on or off, or edit the services included in each runlevel, follow these steps:
Before you make any changes to your configuration, be sure that you have a working emergency repair disk. A working boot disk will give you a way back into your system if you accidentally lock yourself out. See Technique 24 for details on making a boot disk.
1. From the main menu, choose System YaST.
You’re prompted for the superuser password.
2. Enter the superuser password and click OK.
3. When the YaST Control Center appears, click
System (in the left-hand pane).
4. Click Runlevel Editor, and then click Expert
Mode.
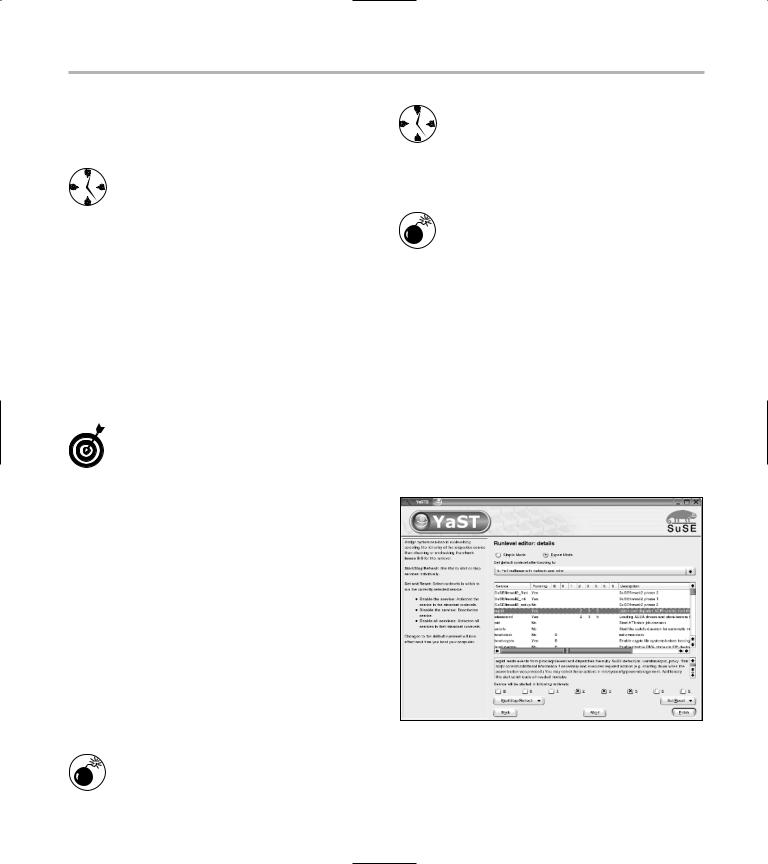
The Runlevel Editor displays the services installed on your computer, as shown in Figure 22-2.
•Figure 22-2: SuSE’s Runlevel Editor.
5.To start or stop a service, highlight the service and click the Start/Stop/Refresh button (near the bottom of the window).
140 Technique 22: Spring Cleaning Essentials
The column labeled Running displays Yes if a given service is currently running or No if the service is not running.
The columns labeled B, 0, 1, 2, 3, 5, 6, and S indicate whether the service is enabled or disabled for that runlevel.
6. To enable or disable a service, check (enable) or clear (disable) the check box next to the runlevel you want to change.
The check boxes are displayed below the list of services (refer to Figure 22-2).
7. When you’re done customizing the runlevels, click Finish.
8. When prompted, click Yes to save your changes and close the YaST Control Center.
Customizing runlevels in Mandrake
Mandrake Linux offers a runlevel editor that’s a bit different. The graphical runlevel editors in Fedora and SuSE Linux let you customize the set of services enabled for each runlevel. Mandrake’s graphical editor lets you enable or disable services for all runlevels. In other words, if you disable a service using Mandrake’s editor, you’ve disabled that service for all runlevels. You can customize individual runlevels, but you have to resort to the command line to do it. See the next section for the details.
To enable or disable services using the Mandrake Control Center, follow these steps:
1. From the Main Menu, choose System Configuration Configure Your Computer.
You’re prompted for the superuser password.
2. Enter the superuser password and click OK.
3. When the Mandrake Control Center appears, click System.
4. Click Services.
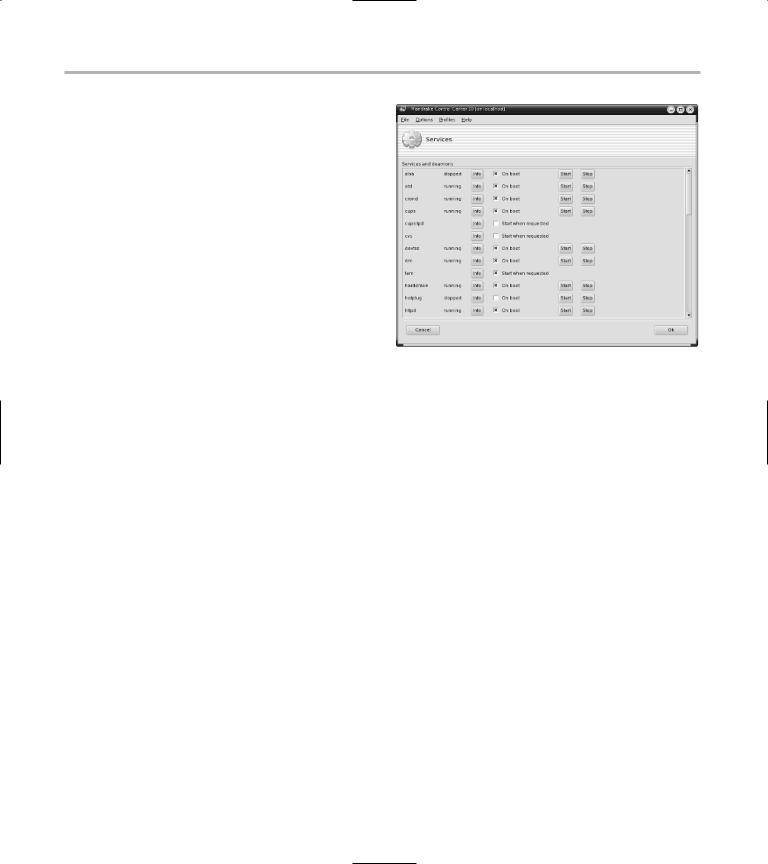
The Services editor displays the services installed on your computer, as shown in Figure 22-3.
• Figure 22-3: The Mandrake Services editor.
The name of each service is listed down the lefthand side.
5. If you’re not sure what a particular service does, click the Info button to see a short description.
6. To start or stop a service, click the Start or Stop button on that row.
7. To enable a service, check the box next to the words On Boot or Start When Requested. To disable a service, clear the check box.
Remember, you’re enabling (or disabling) the service for multiple run levels, not just the current runlevel.
The services labeled Start When Requested are network servers that start when a client tries to connect to those services. If you disable a network service, the client will typically display a message such as Connection Refused. The services labeled On Boot are background processes that run all the time.
8. When you’re finished, click OK to save your changes or Cancel to discard your changes, and then close the Mandrake Control Center.
Your changes will take effect the next time you boot your computer.