

152 Technique 23: Taking Good Care of Your Kernel
Adding and Removing Kernel
Modules
Linux contains some handy commands you can use to manipulate your kernel while it’s running. The kernel module tools make it easy to experiment with kernel changes without making any lasting or permanent changes.
These commands don’t make permanent changes to your kernel; the changes last only until you reboot. To automatically implement a change at boot time, you need to add the change to a startup script. For the quickest way to make a change to your system startup script, check out Technique 26, where we show you a couple of easy-to-follow examples in the section about closing down security gaps with /proc.
To use the kernel tools, you need to open a terminal window and give yourself superuser privileges with the su - command. Be sure to include the hyphen, which ensures that the module tools are on your $PATH search path.
Learning about modules
You can find out what kernel modules are on your system by entering the following command:
# ls -R /lib/modules/$(uname -r)
If you don’t have the kernel module that you need to control a device or configure a piece of hardware, do a Google search for the kernel module you need. Lots of modules are available on the Web.
The modinfo command displays all sorts of information about a kernel module, as shown in Listing 23-1.
LISTING 23-1: VIEWING MODULE INFORMATION WITH MODINFO
# modinfo iforce filename: /lib/modules/
2.4.22-1.2115.nptl/kernel/ drivers/char/joystick/iforce.o
description: “USB/RS232 I-Force joysticks and wheels driver”
author: “Vojtech Pavlik <vojtech@suse.cz>, Johann Deneux <deneux@ifrance.com>”
license: “GPL”
Installing a module with insmod
The insmod command installs a module into a running kernel (or at least tries to). The typical command syntax is
# insmod modulename
Taking care of dependencies automatically with modprobe and depmod
We said that insmod tries to install a module, but it’s not always successful. Some modules depend on other modules. For example, if you want to load the Iforce joystick driver, you must first load the generic serial joystick driver and USB driver. If you try to load a module with unsatisfied symbols, you see error messages like this:
unresolved symbol serio_close_R393d70c3 unresolved symbol serio_open_R17abfb2f unresolved symbol serio_unregister_device unresolved symbol serio_register_device
Deciphering these messages can be nearly impossible.
Fortunately, modprobe solves dependency problems for you. The modprobe command works with the information computed by depmod to automatically load any dependent modules.
Adding and Removing Kernel Modules |
153 |
depmod computes the interdependencies among kernel modules and writes the results to /lib/ modules/$(uname -r)/modules.dep. The modprobe command reads dependency information from that file. depmod runs each time you boot your system so the dependency database is always up-to-date, unless you build or install a new module. To rebuild the dependency database, use the following command:
# depmod -a
As we mention earlier, modprobe uses the information gathered by depmod to automatically load any modules dependent on the one you want to use. The syntax for modprobe is essentially the same as the syntax for insmod:
# modprobe modulename
If any of the dependencies can’t be resolved, modprobe gives up and undoes any of the work it’s already done.
Loading a module for a slightly different kernel with insmod and modprobe
Because modprobe automatically resolves any dependencies for you, why would you ever want to use insmod? Every kernel module is compiled for a specific kernel version. Occasionally, you run into a module that’s compiled for the wrong kernel, but you’re pretty sure it will work with your version. (For example, you may find a great sound card driver compiled for kernel version 2.4.22-1.2115. nptl, and you’re running 2.4.22-1.2116.nptl.) If you try to modprobe a module with the wrong version, modprobe won’t do it. You can force insmod to load the module (even though it’s been built for the wrong version) by including the --force option on the command line:
# insmod --force iforce
But, insmod will still complain about unresolved dependencies. Don’t give up — you can still use
modprobe to do the hard work for you. Just use the -n and -v options:
# modprobe -n -v iforce insmod input.o
insmod usbcore.o insmod serio.o insmod iforce.o
When you use the -n and -v options, modprobe shows you the insmod commands that you need in order to load dependent modules in the correct order (but it doesn’t actually execute those commands). Now you can execute those commands yourself; just be sure to include the --force option when you load the mismatched module:
#modprobe -n -v iforce insmod input.o
insmod usbcore.o insmod serio.o insmod iforce.o
#insmod input.o
#insmod usbcore.o
#insmod serio.o
#insmod --force iforce.o
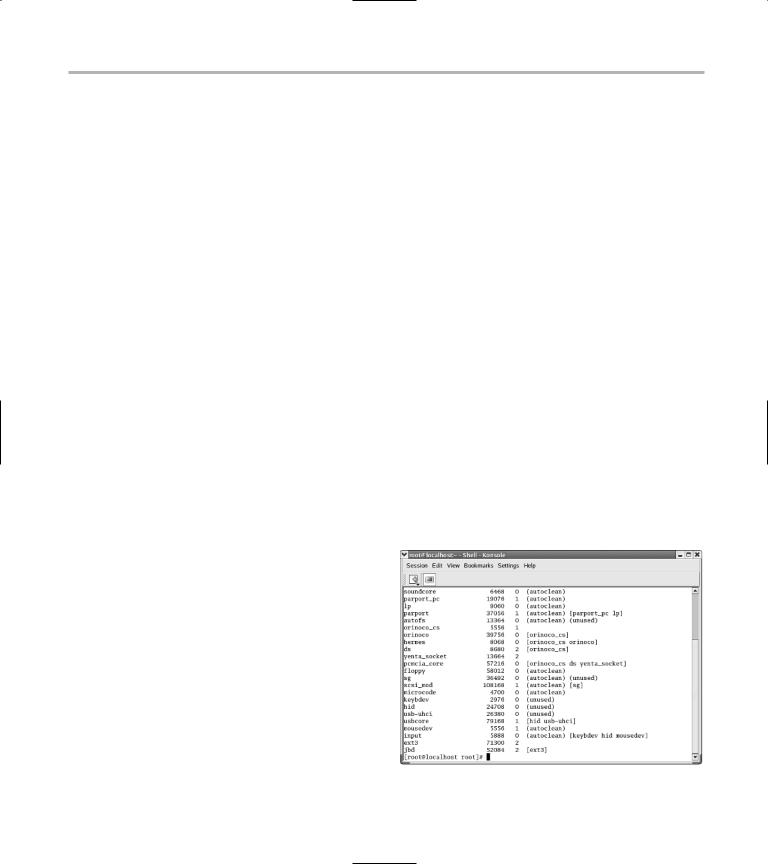
The lsmod command displays a list of the modules that are currently loaded on your system (see Figure 23-1).
• Figure 23-1: Currently loaded kernel modules.

154 Technique 23: Taking Good Care of Your Kernel
Removing modules with rmmod
The rmmod command removes a loadable module from the kernel. You can’t remove a module if it’s in use (lsmod will tell you whether or not the module is being used). To remove a module, use the following command:
# rmmod modulename
When you delete a module, it’s still on your computer; it’s just not loaded into the kernel.
kernel arguments (note, you have only a few seconds before the boot loader starts your kernel). If you’re running Mandrake or SuSE Linux, press the Esc key (while the boot selection screen is displayed) to reach the Linux boot prompt.
If you have multiple kernels or multiple operating systems installed on your system, they’re displayed on the boot loader selection screen.
The Linux kernel supports a huge variety of options and parameters, but you only need to know about a few of them.
Manipulating Boot Time
Parameters
The Linux kernel is a program just like any other program (well, maybe that’s a bit of oversimplification): It has a command line, and you can specify options and parameters to the kernel when you boot your system.
Each time you boot your system, the boot loader pauses for a moment at the boot selection screen — you usually hit Enter (or just wait for the built-in timer to expire) when you see the selection screen, and your computer happily boots the Linux kernel using the default boot parameters. Linux can do a lot more.
If you’re running Fedora Linux, press the A key while the boot selection screen is displayed to modify the
TABLE 23-1: FEDORA BOOT-LINE PARAMETERS
To find a complete (though slightly unattractive) list of boot time parameters, install the kernel-doc RPM package, which is included with most Linux distributions. You find the list in /usr/src/linux-$(uname -r)/ Documentation/kernel-parameters.txt. Just open the file with your favorite editor.
The default command line for Fedora is as follows:
grub append> ro root=LABEL=/ rhgb
If you’re running Mandrake or SuSE Linux, the default command line will differ slightly.
Table 23-1 lists various parameters that you may want to use to alter the default command line. You can change the kernel command line to modify the way your Linux kernel boots, or to change the way the Linux kernel runs after it’s done booting.
To Do This |
Make This Change to the |
Timesaving Bonus Info |
|
Default Linux Command Line |
|
View detailed boot |
Remove the rhgb (Red Hat |
messages (Fedora only). |
Graphical Boot) from the |
|
end of the command line. |
Removing rhgb saves a little bit of boot time, and you have a better starting point if you have to investigate a boot problem.

|
|
Manipulating Boot Time Parameters |
155 |
To Do This |
Make This Change to the |
Timesaving Bonus Info |
|
|
Default Linux Command Line |
|
|
|
|
|
|
View detailed boot |
Remove splash=silent from |
Enabling detailed boot messages can help you pinpoint |
|
messages (SuSE or |
the command line. |
the cause of a boot problem. |
|
Mandrake). |
|
|
|
Make a menu of screen size |
Add the vga=ask option to the |
Choose a larger screen resolution to fit more text on the |
|
options appear when you |
end of the command line. |
screen. If you like a certain text size, you can make the |
|
boot. |
For example: |
change permanent by changing the menu.lst file in the |
|
|
grub append> ro root= |
/boot/grub directory. To do so, open the file with your |
|
|
LABEL=/ rhgb vga=ask |
favorite text editor and append your changes to the line |
|
|
|
starting with the word kernel. Save the file when you’re |
|
|
|
finished, and next time you boot, the changes take effect. |
|
|
|
Be careful when you change this file because it’s easy to |
|
|
|
make your system hard to boot. |
|
Include more details in the |
Add the word debug to the |
If you’re having problems booting, this is a quick way |
|
boot process as the system |
command line. |
to find the problem. |
|
boots. |
For example: |
|
|
|
grub append> ro root= |
|
|
|
LABEL=/ rhgb debug |
|
|
If you don’t use any USB |
Add the no usb command. |
You may gain a bit of CPU performance. Warning: Make |
|
devices, you can turn off |
For example: |
sure you don’t depend on USB devices (like mice) |
|
the USB device modules. |
grub append> ro root= |
before you disable this module. |
|
|
LABEL=/ rhgb no usb |
|
|
Turn off powermanagement control features.
Boot into a runlevel other than the default.
Boot into single-user mode without a password.
Add the acpi=off command to the GRUB command line. For example:
grub append> ro root= LABEL=/ rhgb acpi=off
Add the runlevel (1–5) to the end of the command line. For example:
grub append> ro root= LABEL=/ 5
Add an S to the end of the command line.
For example:
grub append> ro root= LABEL=/ rhgb S
You may want to do this if your laptop powers off intermittently or has battery problems (even when it’s plugged in).
Server machines typically don’t need a graphical environment most of the time (why run X Windows on a mail or Web server?). Specify the runlevel on the command
line if you need to do system maintenance work and want a friendly desktop environment. See Technique 22 for more information about runlevels.
This is incredibly handy if you forget the root password. When you’re at the command line, you can change the root password with the command sh-2.05b# passwd. Enter a new password and confirm the new password when prompted. When you’re finished, type the command sh-2.05b# reboot to reboot the system so you can log in with your newly assigned password. Warning: Anyone can use the S option. Be sure you know who has physical access to your computer because with this tidbit of knowledge, anyone can bypass the root password.
(continued)

156 |
Technique 23: Taking Good Care of Your Kernel |
||
TABLE 23-1 (continued) |
|
|
|
|
|
|
|
To Do This |
|
Make This Change to the |
Timesaving Bonus Info |
|
|
Default Linux Command Line |
|
|
|
|
|
Boot into emergency repair |
Add the word emergency to the |
Boot into emergency mode if you discover a problem |
|
mode. |
|
end of the command line. |
that prevents you from booting into single-user (or multi- |
|
|
For example: |
user) mode. When you boot into emergency mode, Linux |
|
|
grub append> ro root= |
does not run any of the normal startup scripts — you’re |
|
|
LABEL=/ emergency |
dumped at a command line, and you’re ready to fix what- |
|
|
|
ever it is that’s gone wrong. |
|
|
|
|

24 Creating a Custom
Kernel
Technique
Save Time By
Building a custom kernel that suits your needs
Adding the kernel source code and dependencies in one easy step with the Package Manager
Adding device drivers or new file systems to your kernel
Fedora is a collection of applications, daemons, and drivers with a Linux kernel at the core. The kernel deals with hardware and provides basic functions such as creating processes, managing privi-
leges, and managing file systems.
In most cases, you don’t need to build your own kernel — plenty of wellconfigured kernels are available for use. You may need features that aren’t currently supported by the kernel included in the most recent Fedora release. You may want to
Add support for unusual hardware — USB scanners, cameras, joysticks, and sound cards.
Use additional encryption features that aren’t part of the standard Fedora kernel.
Explore alternative file systems.
Omit drivers for devices you may never have.
Omit amateur radio support — unless you’re really into amateur radio.
Many kernel features are included in the form of modules — chunks of code that are not loaded until you actually use the features. Modules don’t take up a lot of space if you don’t use them, but removing the unused modules will save you time when you’re rebuilding the kernel. You can also gain some security by omitting modules that you don’t need.
In this technique, we show you how to build a kernel customized for your needs, based on a safe and sound prototype, and with all the drivers that you need to get your work done quickly.