

The Ajax login |
429 |
|
|
11.3 The Ajax login
The first action we need to take care of is the login procedure to access our portal. To do this, we create the database table, the server-side code to handle the request, and the client-side code that obtains the login information from the user and processes the request. The first step is to design our user table in the database.
11.3.1The user table
The first table we will look at in the database is the users table. It contains three columns. We are using only the bare minimum of information for this project, but we can add more depending on our needs. The three columns in our user table are id, username, and password, and they are created with the basic SQL statement in listing 11.1. Figure 11.5 shows the table in design view mode with the SQL Squirrel database client program (http://squirrel-sql.sourceforge.net).
Listing 11.1 The users table schema
create table users(
id int primary key unique not null, username varchar(50) not null, password varchar(50) not null
);
Now that we have created the table, we need to add some users. In this case, we hard-code in the usernames and passwords. As you can see in figure 11.6, two users have been added to the table with the ID numbers of 1 and 2. Those ID numbers will be important later on in this chapter.
Next, we need to set up the user accounts for the users in the table. As it stands, the portal doesn’t present an administrative user interface for adding new users, and this would have to be done manually using the database tool of your
Figure 11.5
The users table properties in SQL Squirrel, the graphical database explorer

430CHAPTER 11
The enhanced Ajax web portal
Figure 11.6
The contents of the users table
choice. Developing an Ajax-based user administration front-end is possible, but we don’t have the space to explore it here.
The last step is to make sure that we assign the permissions to the table. The user accounts that will be accessing the table must have the read and write permission set. Without setting the permissions, we would have trouble using our SQL query since we would get errors.
Now that we have our users table, let’s write the code for the login process, starting with the server.
11.3.2The server-side login code: Java
The server-side code for the Ajax portal is simple in nature, but it will have numerous steps by the time we get finished because of all the functionality that the portal contains. Right now, we are concerned with coding the login portion of the Ajax portal.
Let’s review the process. When the user logs into the portal, the client-side code sends a request to the server, passing the user’s credentials with the request. The server-side process that intercepts this request will determine whether the credentials that were sent to the server are correct. If they are correct, we start to process the building of the portal windows. If the user’s credentials are incorrect, we pass an error message back to the client page.
Because we are developing in Java, we’ll use a servlet filter to secure all our interactions with the server. To those unfamiliar with the term, a filter is simply a bit of logic that can be assigned to one or more resources, which is given the opportunity to modify a request before it reaches its destination servlet. We discussed using filters for security in chapter 7. If you’re using a system that doesn’t support filters, you can simply create a helper object or function that checks to see whether the user is logged in and invoke it manually at the top of each page that you want to protect. Listing 11.2 shows our login filter.
The Ajax login |
431 |
|
|
Listing 11.2 LoginFilter.java : server-side login code
public class LoginFilter implements Filter {
public void init(FilterConfig config) throws ServletException { }
public void doFilter( ServletRequest request, ServletResponse response, FilterChain filterChain)
throws IOException, ServletException { boolean accept=false;
HttpSession session=( (HttpServletRequest)request).getSession(); User user=(User)
(session.getAttribute("user")); b Check session for User object
if (user==null){ |
c Authenticate request |
|
accept=login(request); |
||
}else{ |
d Let them in |
|
accept=true; |
||
} |
|
|
if (accept){ filterChain.doFilter
(request,response); e Proceed }else{
Writer writer=response.getWriter(); writer.write
(JSUtil.getLoginError()); f Return error code writer.flush();
writer.close();
}
}
private boolean login(ServletRequest request){
String |
user=request |
|
|
.getParameter("username"); |
|
g Get credentials |
|
|
|||
String |
password=request |
|
from request |
.getParameter("password"); |
|
|
|
User userObj=findUser(user,password); if (userObj!=null){
HttpSession session= ((HttpServletRequest)request).getSession(true);
session.setAttribute("user",userObj); |
h Store in session for future use |
} |
|
return (userObj!=null); |
|
} |
|
private User findUser(String user, String password) { User userObj=null;
Connection conn=DBUtil.getConnection();

432CHAPTER 11
The enhanced Ajax web portal
try{
String sql="SELECT id FROM users WHERE username='"
+user+"' AND password='"+password+"'"; i Build SQL statement Statement stmt=conn.createStatement();
ResultSet rs=stmt.executeQuery(sql); if (rs.next()){
int id=rs.getInt("id");
userObj=new User(id,user); j Create User object
}
}catch (SQLException sqlex){
}
return userObj;
}
public void destroy() { }
}
In this case, we will apply a filter that checks to see whether a User object is already held in session b. If it is, then we accept it d; otherwise, we authenticate it against the username and password supplied in the request c. If the request is accepted, it is passed on to the servlet e; otherwise, it will return an instruction to display an error message f. We have wrapped all generated JavaScript up into an object called JSUtil. The method that generates the error message is shown here:
public static String getLoginError() { StringBuffer jsBuf=new StringBuffer()
.append("document.getElementById('spanProcessing')\n")
.append(" .innerHTML = ")
.append("'The Username and Password are invalid';\n"); return jsBuf.toString();
}
The login() method in listing 11.2 provides the details on authentication. We extract the username and password from the request g and then invoke findUser(), which contacts the database for a matching row i. (We’ve abstracted away the details of the database behind a DBUtil object here.) If a row matching the user is found, the function returns a User object j, which is then stored in session h for the next time we pass through this filter. On subsequent passes through this filter, we won’t need to provide the username and password in the querystring, because the User object will already be in session.

The Ajax login |
433 |
|
|
Another nice feature of this approach is that it makes it easy to log the user out. All we need to do is remove the User object from session.
The User object itself is a simple representation of the database structure, as shown in listing 11.3.
Listing 11.3 User.java
public class User { private int id=-1;
private String userName=null;
public User(int id, String userName) { super();
this.id = id; this.userName = userName;
}
public int getId() { return id;}
public String getUserName() { return userName;}
}
We do not store the password field in this object. We won’t need to refer to it again during the lifecycle of our portal, and having it sitting in session would be something of a security risk, too! So, that’s our login framework from the server side. Nothing very unusual there. Let’s move on now to see how our client-side code interacts with it.
11.3.3The client-side login framework
The client-side login framework consists of two parts. The first is the visual part, which the user is able to view and interact with. We will dynamically create this with HTML; you’ll see how easy it is to create a layout with divs, spans, and CSS.
The second part is our Ajax or our JavaScript code, which sends the request to the server and also processes the data. In this case, we are going to introduce JavaScript’s eval() method. The eval() method evaluates the string passed to it as JavaScript code. If the string contains a variable name, it creates the variable. If the eval input contains a function call, it will execute that function. The eval() method is powerful, but its performance can be slow depending on the complexity of the operation.
The HTML layout
As in previous chapters, we are not using a table to do our layout. Table layouts lengthen the page-rendering time, and since we are using Ajax, we would like everything to be faster and more responsive. We need to place a textbox, a pass-
434CHAPTER 11
The enhanced Ajax web portal
word field, and a submit button on a form that we can submit to the server. We also need a span so that we can display the error message from the server if the username or password is invalid. By putting the entire form inside divs and spans, we format the HTML to produce the portal’s header. Listing 11.4 shows the basic HTML framework of our login header.
Listing 11.4 HTML login layout
<form name="Form1"> |
b |
Define form |
|
|
|
|
||
<div id="header"> |
c |
Add header |
|
|
|
|
||
<span id="login"> |
|
d Insert login span |
|
|
||||
Name: |
|
|
|
|
|
|
e Add username textbox |
|
<input type="text" name="username"> |
||||||||
<br>Password: |
|
|
|
|
|
|
f Add password element |
|
<input type="password" name="password"> |
||||||||
<br/> |
|
|
|
|
|
g Insert processing span |
||
<span id="spanProcessing"></span> |
||||||||
<input type="button" name="btnSub" value="login" |
||||||||
onclick="LoginRequest()"> h Add submit button |
||||||||
</span> |
|
|
|
|
|
|
i Append slogan |
|
<span id="sloganText">Ajax Portal</span> |
||||||||
</div> |
|
|
|
|
|
|
|
|
<div id="defaultContent"> |
|
|
j Add default |
|||||
|
|
|||||||
|
|
|
|
|
||||
<p>Some text goes here!</p> |
|
|
content |
|||||
</div> |
|
|
|
|
|
|
|
|
<div id="divSettings" class="hidden"></div> |
||||||||
</form> |
|
|
|
|
|
|
|
|
|
|
|
|
|
|
|
|
|
|
|
|
|
|
|
|
|
|
First, we add our form bto our HTML document. The form provides a semantically meaningful container for the textboxes. It also provides a degradation path for a non-Ajax-based authentication via normal form submission. We create a header div c, which surrounds all our content. A span dis then added to house our username textbox e or password field f, our processing span g, and our submit button h.
The button we use to submit the data back to the server needs an onclick event handler. The onclick event handler initializes the Ajax by calling a JavaScript function, LoginRequest(). LoginRequest() is explained in the section “The JavaScript login code.”
The only things left for the header are to add the slogan ifor the portal and to add a place for the default content j to be shown when the page is loaded. Any message can be displayed inside the div defaultContent. In this example, we just put in a string of text, but we can add links, images, text, or whatever we think

436CHAPTER 11
The enhanced Ajax web portal
content in a more dynamic manner. We can also adjust any of the font properties as we think necessary.
We take the login information d and move it to the right side of the screen. We use the float property and set the value to right. To make the text boxes uniform, we use the text-align property so that the content within the span is also aligned on the right margin. This gives our textboxes a more uniform look. Without it, the textboxes would not line up correctly since the string name is shorter than the password. We can also add some margins to adjust the position of the login information so that its right edge is not directly on the border of our header div.
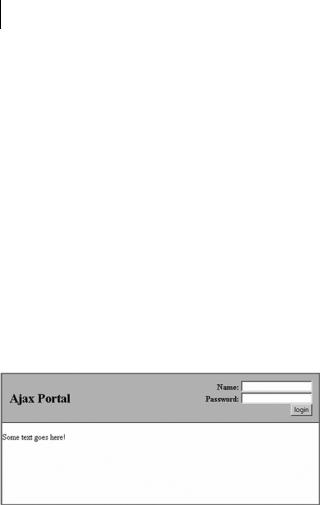
The last thing to style in our header is the slogan e. By setting the lineheight to the height of the div, we are allowing the slogan to be centered vertically in the header. We also set the font properties to make the text noticeable. Just as we did for the login span, we add a margin so the A in Ajax is not directly sitting on the edge of the header. After applying the CSS to our header, we can save the document and view how the CSS has changed the look and feel of the header, as shown in figure 11.8.
Figure 11.8
Ajax portal’s login page with the CSS stylesheet attached
Here you can see that our textboxes are aligned on the right side and that our slogan is on the left side. We have taken the basic HTML structure and created an attractive login header that did not require a table. Now that the header is styled, we can add some functionality to this form. We need to add our JavaScript functionality so that we can make a request back to the server without submitting the entire page.
The JavaScript login code
The JavaScript login code will use the power of Ajax to allow us to send only the username and password to the server without having to submit the entire page. In order to do this, we need to reference our external JavaScript file, net.js,

The Ajax login |
437 |
|
|
which contains the ContentLoader object, so we can use Ajax to send and retrieve the request:
<script type="text/javascript" src="net.js"></script>
The ContentLoader file does all of the work of determining how to send the information to the server, hiding any browser-specific code behind the easy-to- use wrapper object that we introduced in chapter 3. Now that the net.js file is referenced, we are able to perform the request. The request is initiated by the button click from our login form. The login form needs to perform three actions. The first is to inform the user that his request is being processed, the next is to gather the information, and the third is to send the request to the server (listing 11.6).
Listing 11.6 The XMLHttpRequest login request
function LoginRequest(){ document.getElementById("spanProcessing").innerHTML =
" Verifying Credentials";
var url = 'portalLogin.servlet';
var strName = document.Form1.username.value; var strPass = document.Form1.password.value; var strParams = "user="+strName
+ "&pass=" + strPass
var loader1 = new net.ContentLoader( url,CreateScript,null,"POST",strParams
);
}
Before we send the information to the server, we display a message to the user saying that his action of clicking the button is allowing him to log into the system. This keeps the user from clicking the button repeatedly, thinking that nothing happened.
We obtain the username and password field values and place them into a string that we will submit to the server. We submit the values to the server with our ContentLoader object, which accepts our parameters for the URL, the function to call for success, the function to call for an error, the POST form action, and the string containing the parameters to post. Let’s look at the function we call when the server returns success: CreateScript(). It will process the data returned from the server-side page:
function CreateScript(){
strText = this.req.responseText; eval(strText);
}

438CHAPTER 11
The enhanced Ajax web portal
When we built the server-side code, we returned text strings that contained JavaScript statements in the responseText of our returned object. In order to effectively use the JavaScript statements, we must process them with the eval() method, which determines exactly what the strings contain and executes it. In this case, the string is either going to contain the error message generated by the LoginFilter failing, or the code to build the windows, if the filter lets us through to the SelectServlet (see listing 11.8).
What does the string consist of? In this application, we are not going to be sending back an XML document, as we have done in many of our examples. Instead, we will be sending back structured JavaScript statements with which we will be able to use the eval() method. Using the terms that we developed in chapter 5, we would say that our solution here is script-centric rather than data-centric. Again, we’ve chosen this approach simply for variety’s sake. A portal solution could equally well be coded using XML or JSON as the communication medium.
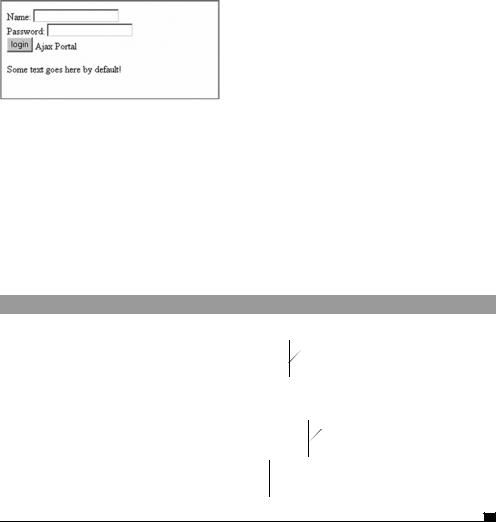
We can now save the portal and run it to see if our login procedure is working correctly. As you can see in figure 11.9, the wrong username and password were entered into the fields.
The text beside the login button in figure 11.9 shows an error message to the user, informing her that the credentials that were provided are incorrect.
If, on the other hand, the login is successful, then the request will be forwarded to the main portal page. In this case, the next step is to build our windows. This will require a large amount of DHTML to develop our rich user interface, but the hard work is already done for us because we are using a prewritten JavaScript DHTML library.
Figure 11.9 An error message is displayed because of invalid credentials.