

PC Recording Studios for Dummies (Jeff Strong)
.pdf222 Part IV: Revving Up the Recording Process
Editing regions
Regions are visual representations of your audio within your song file. These are the waveform blocks you see in the Arrange window in Pro Tools (see Figure 10-18, top) and Logic Pro (see Figure 10-18, bottom). These regions can be sliced and diced, shuffled, deleted, copied, and pasted, to name but a few of the things you can do with them when you have them selected. (See the preceding section for all the selection stuff.)
Figure 10-18:
Regions are the visual representations of the audio you recorded for your song.
Being able to edit these regions without altering your original audio file lets you take sections of your performances and move them around at will. For example, say you have drum performance that you like for the first verse that you want to use again during the second verse. With a good audio recording program, you can get this job done in a few simple steps.
Pro Tools does it this way:
1.Select the section you want to duplicate.
Check out the preceding section for directions on how to select material.
TEAM LinG - Live, Informative, Non-cost and Genuine !

Chapter 10: Recording and Editing Audio 223
2.Separate your selection from the existing region by choosing Edit
Separate Region.
You now have three regions: the stuff leading up to the Start point you selected; the stuff between the Start and End points (the verse, in this example); and the stuff after the End point of your verse. Your selection — which is now its own region — is highlighted.
3.Choose Edit Copy to make a copy of the selection.
4.Click the Slip icon in the upper-left section of the Edit window to make sure you’re in Slip edit mode.
In case you’re curious, the other modes are Shuffle, Spot, and Grid. You don’t want those modes — you want Slip.
5.Click the start of the second verse where you want to put your drum section.
6.Choose Edit Paste to place the first verse into the second.
Your first verse is placed in your track, and your original second verse is eliminated as a region, but the original audio data is still there if you want to use it later. The material before and after the place where you put your selection is turned into two more regions. At this point, your drum track now has five regions instead of the one it started with. These are: the stuff from the beginning of the song to the start of the first verse; the first verse; the stuff between the first and second verse, the second verse (which now has the same audio data as the first verse); and the material from the end of the second verse to the end of the song.
Editing regions involves these basic skills and can be done in almost all audio recording programs. The steps are obviously a little different, but the end result is the same.
Being able to edit regions like this without changing your original audio data makes it possible for you to try a variety of different arrangements in your songs. It also lets you restore your performance to the way they were without any loss in sound quality. This is called nondestructive editing. In the olden days of analog recording, by the time you’ve cut up a section of your performance you’ve essentially shredded the tape to the point that putting it all back together again is very difficult. (And even if you are physically able to do it, you’ll discover that the sound of your track has been compromised to a great degree.)
Nondestructive editing is the single biggest advantage of computer-based recording and one that can be abused very easily if you’re not careful. By being able to cut and paste your performances at will, you might be tempted to try to make your tracks “perfect” from a technical perspective. The danger in this is that you run the risk of making your performance soulless. When
TEAM LinG - Live, Informative, Non-cost and Genuine !
224 Part IV: Revving Up the Recording Process
you start editing regions in your songs, be aware not only of the technical aspects of what you’re doing, but also of the artistic side. Sometimes the less- than-perfect performance has the most feel and makes the best artistic statement. I’m a big fan of erring on the side of the artistic over the technical when it comes to editing regions.
Editing audio data
Aside from being able to edit the regions representing your audio data, you can edit the audio data itself, if you so choose. Depending on your audio recording program, you can perform a stunning variety of audio editing operations. These include such things as:
Copying data: This makes a copy of your original file.
Redrawing the waveform: This changes the shape of the sound-wave that is recorded.
Stripping silence: This erases a section of your track to get rid of unwanted noise.
Normalizing: This changes the volume of your tracks at the data level.
Quantizing: This adjusts the timing of a section of your data to fit a grid.
Reversing: This makes a section play in reverse.
Copying your track data
Performing editing operation alters your original audio data file permanently. Before you do this and end up regretting what you’ve done, make a copy of your file to work from. This gives you a backup of the original file in case you don’t like what your edits have done to your music. Every audio program does backups a little differently. Here’s how it’s done in Pro Tools:
1.Select the region you want to work on.
2.Choose AudioSuite Duplicate.
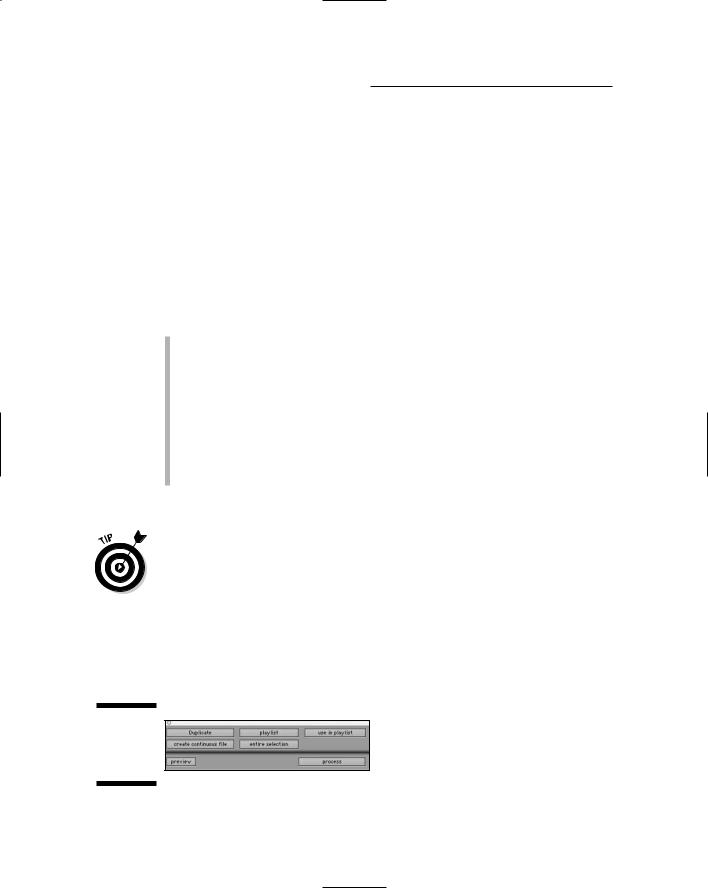
The Duplicate dialog box appears, as shown in Figure 10-19.
Figure 10-19:
The Duplicate dialog box.
TEAM LinG - Live, Informative, Non-cost and Genuine !
Chapter 10: Recording and Editing Audio 225
3.Enable the Use in Playlist option on the right; make sure that the Playlist option (located in the top center) is enabled.
4.Click the Process button at the lower right.
You now a have a copy of the original region — a copy that’s put in the track in place of the original.
When you have your copy, you can edit at will and not risk losing your original data.
Redrawing a waveform
Being able to redraw a waveform lets you get rid of a clipped note (distortion from overloading the converters in your computer). In Pro Tools, you take care of this little task with the help of the Zoomer and Pencil tools:
1.Find the area in the region that you want to edit.
2.With the Zoomer tool enabled, click repeatedly on the spot you want to edit until you get into the sample level.
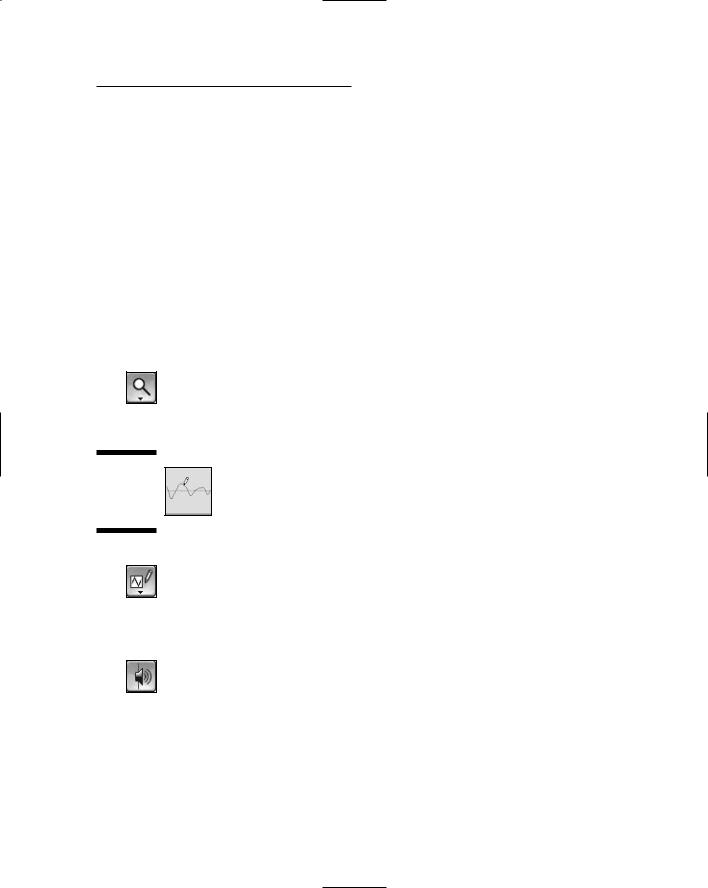
The waveform looks like a single wavy line. (See Figure 10-20.)
Figure 10-20:
The Pencil
tool in
action.
3.Select the Pencil tool.
4.Locate the exact spot to edit.
Your target, typically a moment of distorted sound, is usually easy to see because it looks like a sharp peak in the waveform. (See Figure 10-21, left.)
If you have trouble seeing the problem, use the Scrub tool to listen to the audio.
5.Draw over the waveform to round over the spot that was chopped off when the note got clipped (as shown in Figure 10-21, right).
Take it easy on making changes to the waveform. All you want to do is smooth out the peak, not change the sound too much.
TEAM LinG - Live, Informative, Non-cost and Genuine !

226 Part IV: Revving Up the Recording Process
Figure 10-21:
On the left is the cropped peak. On the right you see the fixed waveform.
Silencing a section of your track
Many times when you record you get unwanted noises on your tracks. These can include chair squeaks, coughs, loud breathing, and other distractions during the sections where you don’t play your instrument. The quick-and- easy way to get rid of these sounds is to silence them at the audio data level. This saves you from having to use the faders while you mix, and it reduces the size of the data file on your hard drive, giving you more room for other things. This process is very easy (in Pro Tools, anyway). Here’s how it’s done:
1.With the Selector tool enabled, click and drag across the section of the region you want to select.
Note: You access the Selector tool by clicking the Selector button at the top of the Edit window.
2.Choose Edit Insert Silence or press Shift+Ô+E (on a Mac) or
Shift+Ctrl+E (on a PC).
The selected section is silenced.
Exploring other editing operations
The two preceding editing sections give you a good idea how easy it is to do some pretty useful editing operations by using a computer-based audio recording program. I’d love to walk you through how to perform a bunch of other operations, but I have to pass due to space limitations. (What? No 700-page book?)
I encourage you to look closely at the audio recording software you’re considering for your studio to see what types of audio editing it can do. Most programs available can do a lot (probably more than you’re going to do regularly). I cover the basics of the editing capabilities of the most popular programs in Chapter 7 insofar as how well they do compared to other programs out there, so check out that chapter for more insight into this area.
TEAM LinG - Live, Informative, Non-cost and Genuine !

Chapter 11
Using MIDI
In This Chapter
Understanding MIDI ports and channels
Setting up your MIDI devices
Recording MIDI tracks
Editing your performance data
MIDI (Musical Instrument Digital Interface) is a digital communication protocol that allows your MIDI-equipped gear to send information back
and forth through your system. MIDI handles the transmission of performance and system data; you, in conjunction with your recording program, can then record, edit, and transform this data into the music you hear in your head.
In this chapter, I introduce you to MIDI recording and editing within a computer program. I offer some basic information about MIDI ports and channels and help you get your system configured so that you can record MIDI in your computer. I also walk you through the process of recording your tracks, overdubbing, and editing your data. Finally, this chapter offers a brief discussion of some of the many ways you can manipulate your MIDI data when it’s in your computer.
Not all recording programs are equal in their implementation of MIDI. Some programs, such as Logic, are MIDI powerhouses; others, such as Pro Tools, are of the more minimalist variety. If MIDI recording and editing is important to you, make sure that you get a program that can do what you want it to do. Check out Chapter 8 for a look at many of the popular recording programs available and how they do MIDI.
Making Sense of MIDI
MIDI has been around for a while (about 20 years) and, even though it’s considered old technology by today’s standards, it’s still employed a lot in musicmaking. This section gets you up to speed on the basic concepts of MIDI.
TEAM LinG - Live, Informative, Non-cost and Genuine !

228 Part IV: Revving Up the Recording Process
Perusing MIDI ports
Three types of MIDI ports exist: In, Out, and Thru. The In port receives incoming messages, and the Out port sends those messages further on their way. You use the Thru port when you create a daisy chain, which means you connect more than two MIDI devices together. The Thru port sends the messages that one device receives directly to the In port of another instrument.
You can connect MIDI gear in various ways by using these three ports, but for most recordists recording into a computer, a MIDI configuration usually consists of an external keyboard or controller (Chapter 4 details these pieces of hardware) connected to a MIDI interface attached to your computer. Depending on which type of device you use, you make the physical connection one of two ways:
By using an external keyboard/synthesizer: An external keyboard is a keyboard that has MIDI ports in it and produces its own sounds. In this case, you make the connection by using a MIDI cable plugged into the Out port of your keyboard which is then plugged into the In port of your MIDI interface. Your interface is then connected to your computer. How that connection actually gets made depends on the type of MIDI device it is. For example, a USB MIDI interface attaches to one of the USB ports in your computer.
This connection does get the MIDI data into your computer, but if you want the computer to actually play the sounds located in your keyboard — what a concept — you need to make sure that you have a MIDI cable going from your MIDI interface’s Out port to the In port of your keyboard.
Also, in order to hear the sound of your keyboard in your computer, you need to connect the analog outputs from your keyboard to the analog inputs of your audio interface.
By using a MIDI controller: Unlike an external keyboard, a MIDI controller doesn’t contain its own sounds. Instead, you use the controller to trigger (play) the sounds of software synthesizers in your computer. (Chapter 13 has more on soft-synths.) The connection you make depends on the type of controller you have. Most external controllers use either USB connections or MIDI Out ports (many have both). If you use the USB connection, just plug a USB cable from your controller to your computer. You don’t need a MIDI cable or other hardware. If you use the MIDI Out port, though, you do need a MIDI cable and some sort of external MIDI interface.
Understanding MIDI channels
MIDI protocol allows you to have a bunch of different MIDI devices hooked up at the same time using the same MIDI cables and have them play only the
TEAM LinG - Live, Informative, Non-cost and Genuine !

Chapter 11: Using MIDI 229
data that you want each device to play. To accomplish this stunning feat, MIDI uses 16 different channels, where each device is assigned a different channel and responds only to MIDI messages that are sent along that channel.
If you have an external keyboard and use it to play back more than one MIDI track at a time, you need to assign a MIDI channel to each track in your song. I describe this procedure in the “Setting inputs, outputs, and MIDI channels” section later in this chapter.
Setting Up MIDI in Your Computer
The process of setting up your MIDI device varies according to whether you use a Mac or a PC. Either way, though, setting up a MIDI device takes only a couple minutes. This section walks you through the process.
Enabling MIDI devices in Mac OS X
Before you can record MIDI in Mac OS X, you need to do three separate things: a) set up your MIDI devices in OS X, b) enable the MIDI channels so you can choose the MIDI channels that each device receives and sends data on, and c) enable the input devices in your recording software so that you can use those devices in your computer.
To configure your MIDI devices in OS X, follow these steps:
1.Use your MIDI cables to connect the devices you want to use with your computer to your MIDI Interface.
Chapter 4 has more on the different types of MIDI interfaces.
2.Click the Audio MIDI Setup icon (see margin) in the Dock.
The Audio MIDI Setup window opens.
3.Click the MIDI Devices tab of the Audio MIDI Setup window.
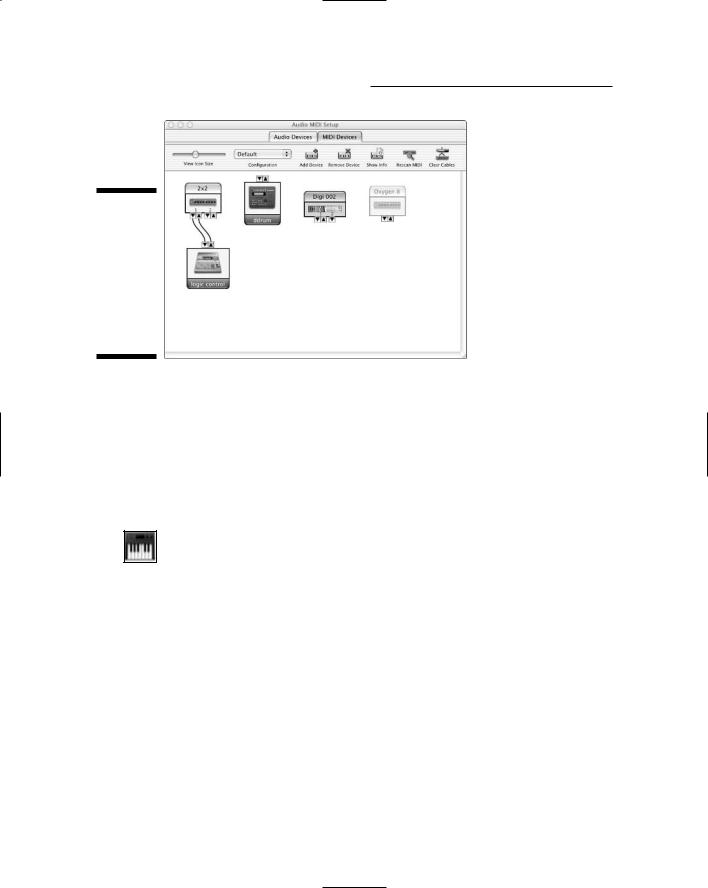
A message appears telling you that your system is being scanned. After the scan is complete, your MIDI interface should appear in the tab’s window, along with any devices connected to it, as shown in Figure 11-1.
4.If any of your devices don’t appear, double-check your cables to make sure they’re properly connected and then click the Rescan MIDI icon.
5.If your device still doesn’t appear, click the Add Device button.
6.In the dialog box that appears, enter the name, manufacturer, and model number of the device in the appropriate fields, and then click OK.
TEAM LinG - Live, Informative, Non-cost and Genuine !
230 Part IV: Revving Up the Recording Process
Figure 11-1:
The Audio MIDI Setup window shows the MIDI devices connected to your MIDI interface.
7.After your devices appear on the MIDI Devices tab of the Audio MIDI Setup window, close the window by choosing Audio MIDI Setup
Quit Audio MIDI Setup.
You can also close this window by pressing Ô+Q or clicking the red X in the upper-left corner.
After configuring your MIDI devices, you still need to enable their MIDI channels. The following list shows you how:
1.Click the Audio MIDI Setup icon (see margin) in the Dock.
The Audio MIDI Setup window opens. (Refer to Figure 11-1.)
2.Click the MIDI Devices tab of the Audio MIDI Setup window.
All MIDI devices connected to your MIDI interface should appear in the tab’s window.
3.In the MIDI Devices tab of the Audio MIDI Setup window, double-click the device for which you want to activate MIDI channels.
The device window appears.
4.Click the More Properties tab to expand the window.
The window expands to include Basic and Expert tabs containing a broad range of settings for your device.
5.Click the Basic Tab.
6.In the Transmits and Receives section of the Basics tab, click the channel number(s) that you want to be able to transmit and receive data through.
TEAM LinG - Live, Informative, Non-cost and Genuine !
Chapter 11: Using MIDI 231
Blue-highlighted channels are active.
7.Click OK to close the device window.
8.Close the Audio MIDI Setup window by clicking the red X in the upper-left corner or by pressing Ô+Q.
Some recording programs — Pro Tools, for example — add a few steps to this process because you need to enable the devices in your system within the program. Here’s how you do it in Pro Tools:
1.Choose MIDI Input Devices.
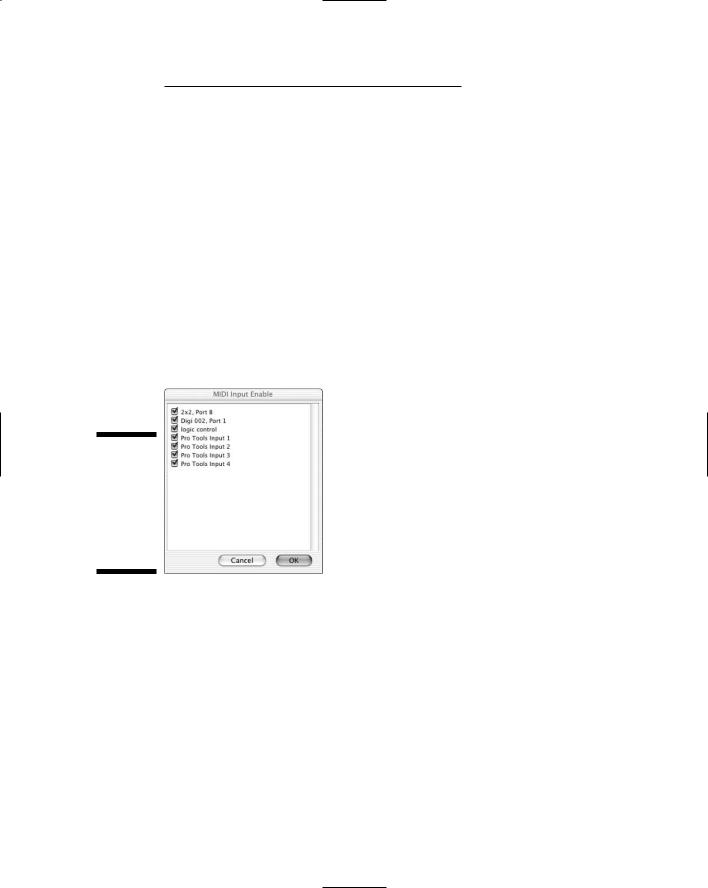
The MIDI Input Enable dialog box opens, as shown in Figure 11-2, displaying all the MIDI ports in your system.
2.Select the check boxes for the devices you want to use.
3.Click OK.
Figure 11-2:
The MIDI Input Enable dialog box lets you select your MIDI devices.
Enabling MIDI devices in Windows XP
Enabling MIDI devices is as easy as adding a printer to your system.
To configure MIDI devices in Windows XP:
1.Install the drivers for your MIDI device as the device’s manual describes.
If your audio interface has MIDI ports (such as the Digidesign 002), this step was already done when you installed the software, as I describe in Chapter 8.
TEAM LinG - Live, Informative, Non-cost and Genuine !