

PC Recording Studios for Dummies (Jeff Strong)
.pdf232 Part IV: Revving Up the Recording Process
2.Use your MIDI cables to connect the devices you want to use with your software to your MIDI interface.
3.Turn on the power for the device.
At this point, your device should show up in your MIDI tracks’ Input and Output selector pop-up menus. If not, restart your computer. If this still doesn’t work you, you might need to go into the Device Driver menu and manually move the driver for your device into the Device Driver folder.
Some programs, such as Pro Tools, require that you enable your input devices before you can use them in your program. This process is the same for Windows XP as it is for a Mac. To wit:
1.Choose MIDI Input devices.
The MIDI Input Enable dialog box opens, showing the MIDI ports in your system.
2.Select the check boxes for the devices you want to use.
3.Click OK.
Getting Ready to Record
Setting up MIDI tracks involves first creating the tracks for your session and then setting the inputs, outputs, and MIDI channels for the tracks you created. This section spells out how to do all these tasks.
Creating MIDI tracks
Of course, before you can manipulate a MIDI track, you’ve got to have one. Creating a MIDI track is a pretty easy task in most recording programs. In Pro Tools, for example, you just do the following:
1.Choose File New Track.
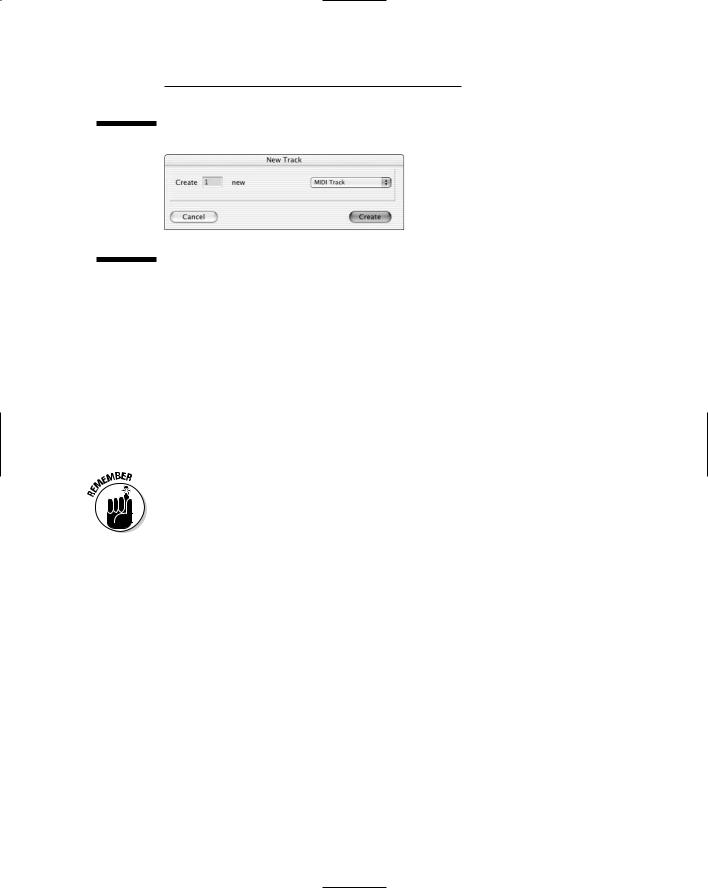
The New Track dialog box appears, as shown in Figure 11-3.
2.Enter the number of tracks you want to create.
3.Select MIDI Track from the middle drop-down list.
4.Click Create.
Your new track(s) appear in both the Edit and the Mix windows.
TEAM LinG - Live, Informative, Non-cost and Genuine !
Chapter 11: Using MIDI 233
Figure 11-3:
The New Track dialog box in Pro Tools lets you create new MIDI tracks.
When you create a new track in Pro Tools, the track receives a default name — something not entirely useful (like MIDI 1). You can rename this track by following these steps:
1.Double-click the track name in the Pro Tools Edit window.
The Name Track dialog box appears.
2.Type in the new name and add any comments about the track in the appropriate places.
3.Click OK to close the window.
Your track gets a — hopefully more helpful — new name.
Some programs — Logic, for example — open with a bunch of MIDI tracks already created so you don’t have to go through these steps before recording your MIDI performances.
Setting inputs, outputs, and MIDI channels
For MIDI tracks, like with audio tracks, you need to select the input and outputs sources for your MIDI data in order to be able to record and play back your tracks. MIDI tracks differ from audio tracks in that, depending on your recording program, you might also need to set the MIDI channel(s) through which the MIDI data for each track travels. Here’s how you do it in a program like Pro Tools:
1.Choose Display Edit Window Shows I/O View to open the I/O section of the Edit window.
The I/O section shows the inputs and outputs for each track.
TEAM LinG - Live, Informative, Non-cost and Genuine !
234 Part IV: Revving Up the Recording Process
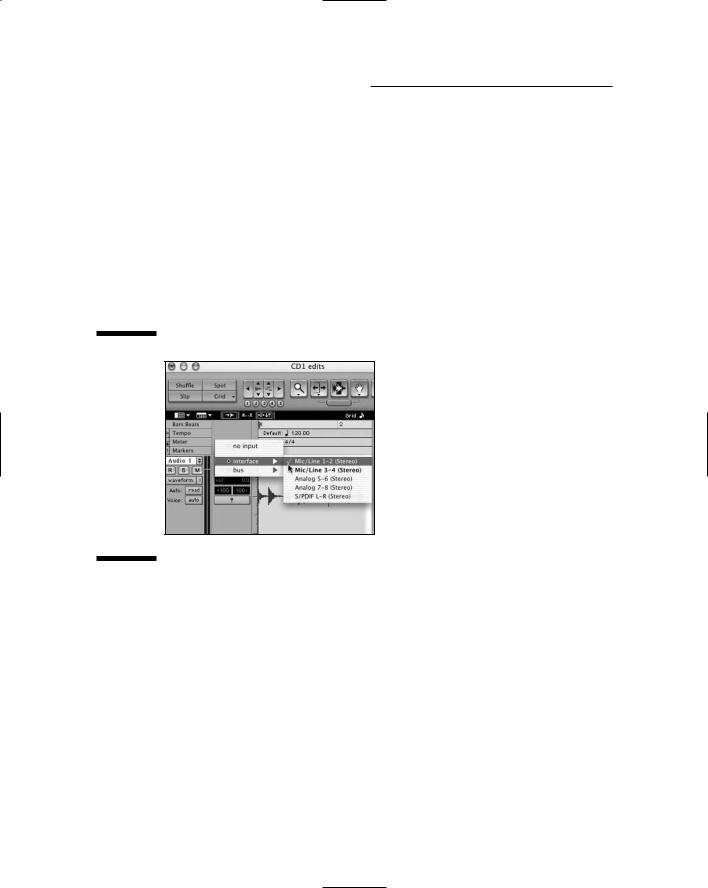
2.Within the I/O section of your track in the Edit window, click and hold on the Input selector until the Input contextual menu pops up.
3.While still holding down your mouse button, move the mouse over the Input menu until it rests on the MIDI port and channel you want, as shown in Figure 11-4.
4.Release the mouse button to select your choice.
The Input contextual menu closes your selection appears in the Input selector.
Choosing your outputs requires pretty much the same procedure, although to do that you start things off by clicking the Output selector in Step 2 instead.
Figure 11-4:
Assigning an input (or output) in Pro Tools is done by clicking and holding the Input or Output selector to open a contextual menu.
Logic offers a variety of ways to assign your inputs and outputs. Here’s the one I use:
1.In the Arrange window, click the track whose inputs and outputs you want to set.
The track becomes highlighted, and its channel strip appears on the left side of the window.
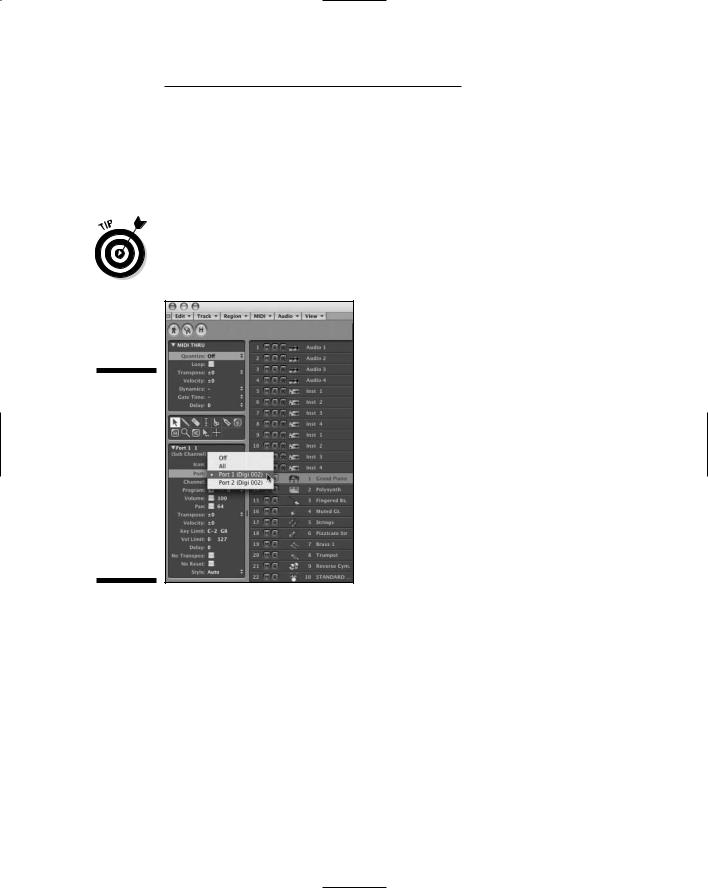
2.Within the Subchannel section of the track’s channel strip (located on the leftmost side of the Arrange window) click and hold on the Port selector until the MIDI Port menu pops up.
3.While still holding down your mouse button, move the mouse over the MIDI Port menu until it rests on the MIDI port that you want, as shown in Figure 11-5.
TEAM LinG - Live, Informative, Non-cost and Genuine !
Chapter 11: Using MIDI 235
4.Release the mouse button to select your choice.
The menu closes, and your selection appears in the input selector.
Assigning your track’s output follows the same basic procedure, although you click and hold the Output selector in Step 2.
You use the output of the MIDI track only if you want to send the MIDI data back out of the computer again to use the sounds contained on an external keyboard. If you use a software synthesizer, follow the procedures listed in Chapter 13.
Figure 11-5:
Assign a MIDI port in Logic by clicking and holding the Port selector in
the Arrange window’s track channel strip.
Recording MIDI Performances
Chapter 10 pretty much tells you the basics about recording MIDI performances — the process is very similar to recording audio tracks. The only significant difference is that you can set your system to wait until
it receives MIDI data before starting to record. (This keeps you from having to press the Record button in the Transport window.) You also have to go through a few steps so that you can actually hear the sound from your MIDI device while you record.
TEAM LinG - Live, Informative, Non-cost and Genuine !
236 Part IV: Revving Up the Recording Process
Enabling recording for MIDI tracks
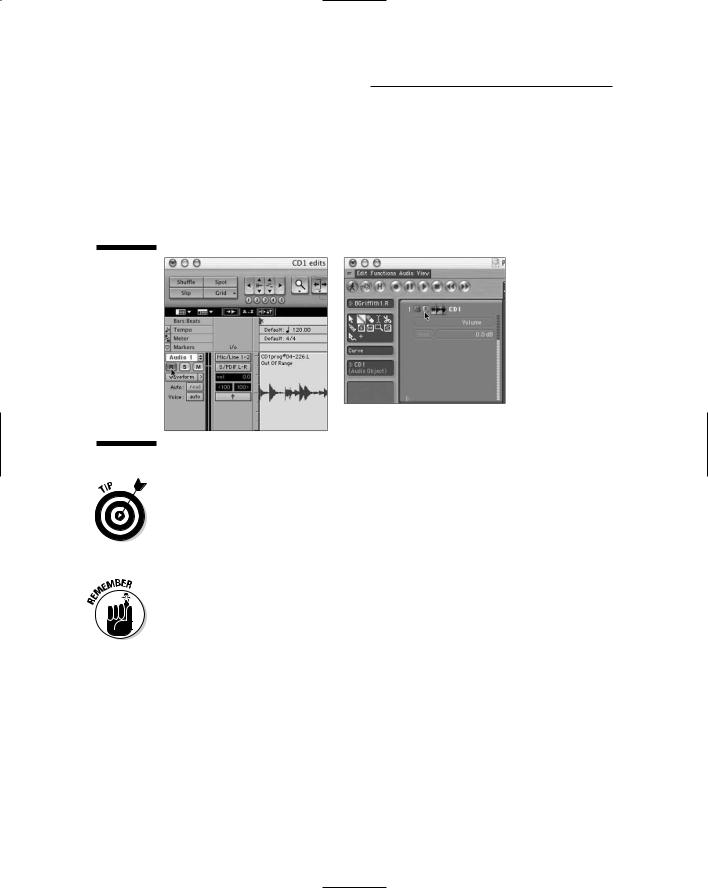
You can record-enable your MIDI tracks the same way you enable recording for audio tracks. This process is simple: Just click the Record Enable button (labeled R) for that track. Figure 11-6 shows the Record Enable button in Pro Tools (left) and Logic (right). After you click it, the button glows red.
Figure 11-6:
Click the track’s Record Enable button (in Pro Tools, left, and Logic, right) to enable the track for recording.
As I describe in Chapter 10, how your enabled tracks act when you enable another track to record depends on your particular recording program. For example, in Logic your track stays enabled for recording when you click another track’s Record Enable button, and in Pro Tools the default is that it doesn’t remain enabled (enable turns off) when you click the Record Enable button on another track.
This is an important aspect of your recording program to understand. Check your application’s manual to see how it treats this process. I can’t tell you how depressing it is to think you’ve recorded a track when, in fact, it wasn’t record enabled. I’ve lost some really good takes (performances) this way.
Monitoring MIDI inputs
Some recording programs contain internal sounds that allow you to hear your MIDI performances without having to plug in your external sound source, such as your synthesizer keyboard. I cover the steps to get sound from this approach in Chapter 14. Some programs, such as Pro Tools, require that you connect your external keyboard’s analog outputs to your computer
TEAM LinG - Live, Informative, Non-cost and Genuine !

Chapter 11: Using MIDI 237
in order to hear what you’re playing. You do this by connecting your keyboard to an analog input in your audio interface and routing the input to an audio track in your recording program. Here’s the process for Pro Tools:
1.Connect the analog output of your MIDI device to one of the analog inputs in your Digidesign hardware.
2.Choose File New Track.
The New Track dialog box appears.
3.Use the drop-down lists of the dialog box to enter the number of tracks you want (1), the type (Audio), and whether you want your track in mono or stereo.
4.Using the new track’s Input selector, select the analog input that your device is connected to in your Digidesign interface.
5.Using the new track’s Output selector, select the main outputs for your session.
See the “Setting inputs, outputs, and MIDI channels” section earlier in this chapter for more on Steps 4 and 5.
6.Record-enable this track by clicking the Record Enable button in either the track’s channel strip (Mix window) or the track menu (Edit window).
Now you should hear the sound coming out of your MIDI device as you play your MIDI performance. Yes, it’s an extra track, and it is being recorded at the same time as your MIDI track. But this I’ve-got-to-hear- what-I’m-playing track is separate; you can erase it without fear after you’re done recording the take.
Recording MIDI tracks
After you’ve record-enabled your MIDI track(s) (see the “Enabling recording for MIDI tracks” section, earlier in this chapter), you can begin recording. Follow these steps to record one or more MIDI tracks:
1.Click the Record Enable button located in either the track channel strip (Mix window) or track menu (Edit window) to record-enable the track(s).
2.To make sure you’ll hear your music the way you want to hear it, set the level of the instruments in your session by using the fader for each audio track associated with your MIDI devices.
The faders are found in the Channel strip located in the Mix window.
TEAM LinG - Live, Informative, Non-cost and Genuine !
238 Part IV: Revving Up the Recording Process
3.Enable the click track and the pre-roll if you’re using them.
See Chapter 10 for more on click tracks and pre-rolls.
4.Click the Return to Zero button in the Transport section of the Transport window.
Doing so ensures that you start recording at the beginning of the session.
5.Click the Record button in the Transport section of the Transport
window.
This step gets you ready to record; it doesn’t start the actual recording process.
6.Click the Play button in the Transport section of the Transport window.
Pro Tools starts recording.
7.When you’re done recording, click the Stop button in the Transport section of the Transport window or press the spacebar.
The finished take appears in the MIDI Regions list as a new region.
Playing Back Your Tracks
After you record a track, most likely you’ll want to listen to it to make sure that it sounds the way you want it to sound. You do this by toggling off the Record Enable button on your MIDI tracks — click it to make the red light disappear — and then clicking the Play button. If you routed your external keyboard to an audio track in order to hear yourself, leave the audio tracks associated with the MIDI devices in Record-Enable mode. Doing so allows you to hear the playback of the MIDI device from the recorded MIDI data instead of hearing the audio that you recorded as a result of monitoring the analog output of your external keyboard. You can adjust the volume by moving the fader in the channel strip for the audio track associated with your MIDI device up and down.
Overdubbing MIDI Performances
After you record some MIDI performances, you can easily add to or change them. The time-honored name for this kind of recording is overdubbing. Overdubbing MIDI performance data is similar to overdubbing your audio data. Most programs allow you to overdub in several ways: manually punching in and out, punching automatically, and loop punching. In addition,
TEAM LinG - Live, Informative, Non-cost and Genuine !
Chapter 11: Using MIDI 239
because MIDI is strictly performance information without any actual sound, most recording programs offer you the ability to either replace or merge existing MIDI data when you overdub.
Using MIDI Merge/Replace
When you overdub to a MIDI track, many recording programs offer you the option to either replace existing material or add new data to it. For example, in Pro Tools you make this selection by using the MIDI Merge/Replace button. This button is located in the Transport window, as shown in Figure 11-7. Here’s how it works:
When the Merge/Replace button is engaged (MIDI Merge mode), new material is merged with any existing MIDI data on the record-enabled track(s).
When the Merge/Replace button is disengaged (MIDI Replace mode), new MIDI data replaces any existing information on record-enabled track(s).
To engage MIDI Merge in Pro Tools, do the following:
1.Open the MIDI controls section of the Transport window by choosing Display Transport Window Shows MIDI Controls.
The Transport window expands to include the MIDI controls section.
2.Click the MIDI Merge button.
The button becomes highlighted.
Figure 11-7:
Add new data without erasing what’s there.
Logic has a similar function, but by default any overdubs you do are placed in a new sequence — leaving the original intact. You do have the choice, however, of having your overdub replace or merge with existing material. To merge your overdub, follow these steps:
TEAM LinG - Live, Informative, Non-cost and Genuine !
240 Part IV: Revving Up the Recording Process
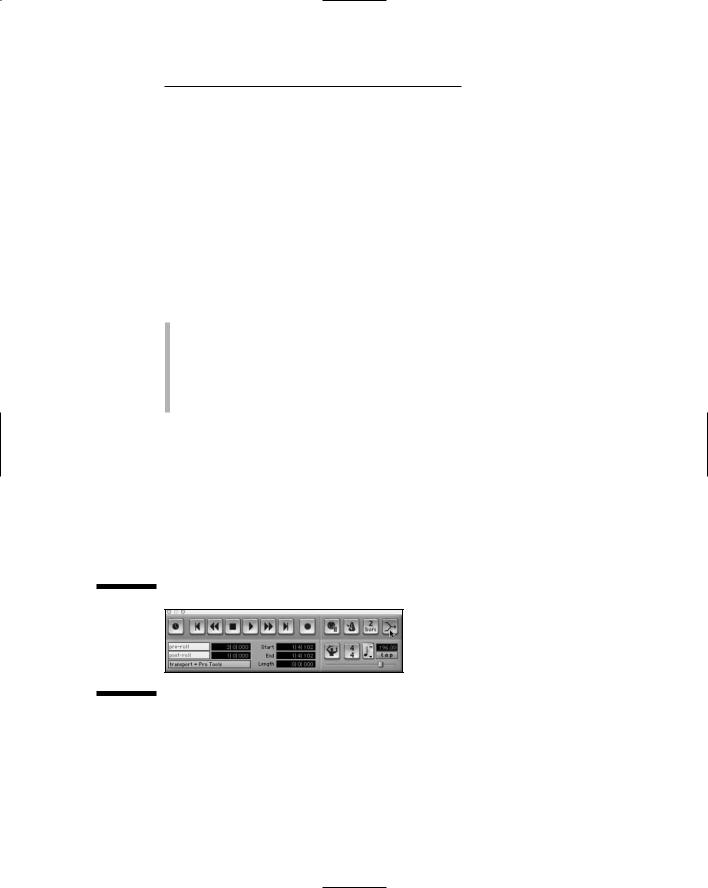
1.Choose File Song Settings Recording Options to open the Recording
Options toolbar.
2.Select the Merge New Recording With Selected Sequences option at the top of the Recording Options toolbar, as shown in Figure 11-8.
3.Click OK to accept the setting and close the window.
Now when you record, your new data is merged with the old.
Figure 11-8:
Choosing
the Merge
New
Recording
With
Selected
Sequences
option lets
you add to
an existing
track in
Logic.
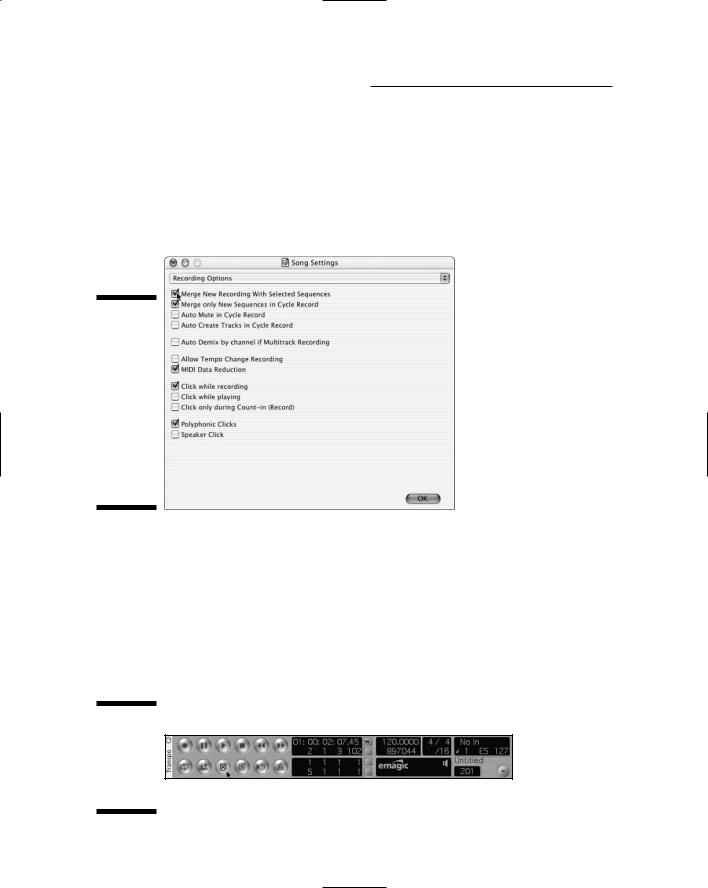
To replace existing data, follow these steps:
1.Click and hold the arrow at the bottom-right corner of the Transport window and select either All Elements Horizontal or All Elements Normal from the pop-up menu that appears.
The Recording Options toolbar appears in the Transport window.
2.Click the Replace button on the Recording Options toolbar to engage the Replace function, as shown in Figure 11-9.
Figure 11-9:
Replace existing MIDI data with new data.
TEAM LinG - Live, Informative, Non-cost and Genuine !

Chapter 11: Using MIDI 241
Punching in and out
If you like some of your initial take and want to record over only part of it, you can set points at which to start and stop recording within the session. This is called punching in and out, a process that I cover in some detail in Chapter 10 — although there I spell out how to punch in and out of audio tracks.
As is this case with audio tracks, most programs allow you to punch in to MIDI tracks in several ways. These include punching in and out manually, automatically, and repeatedly (looping).With the exception of being able to choose to merge your punched data with your original performance or being able to replace it, punching into and out of MIDI tracks is the same as punching into and out of audio tracks. I detail the exact procedures for performing these punches in Chapter 10.
Editing MIDI Data
MIDI editing has two basic types of functions: You can edit the notes manually or you can perform certain MIDI operations/functions, such as quantizing and transposing. This section offers an overview of these different functions.
Manual MIDI editing
Editing your MIDI data manually is a great way to go if you want to do any of the following tasks:
Add notes or controller data.
Delete notes or controller data.
Change pitch.
Change duration.
Change velocity (volume).
Change time location.
Depending on your recording program, you can make these edits a number of ways. I describe a simple way to do this in Pro Tools — one of the more basic MIDI applications — later in this section. Aside from the simple way, many programs offer a variety of different editing windows to help you work the way you want. For example, Logic — one of the more powerful MIDI programs out there — offers several windows. These include:
TEAM LinG - Live, Informative, Non-cost and Genuine !