

PC Recording Studios for Dummies (Jeff Strong)
.pdf102 Part II: Choosing and Installing Computer Hardware
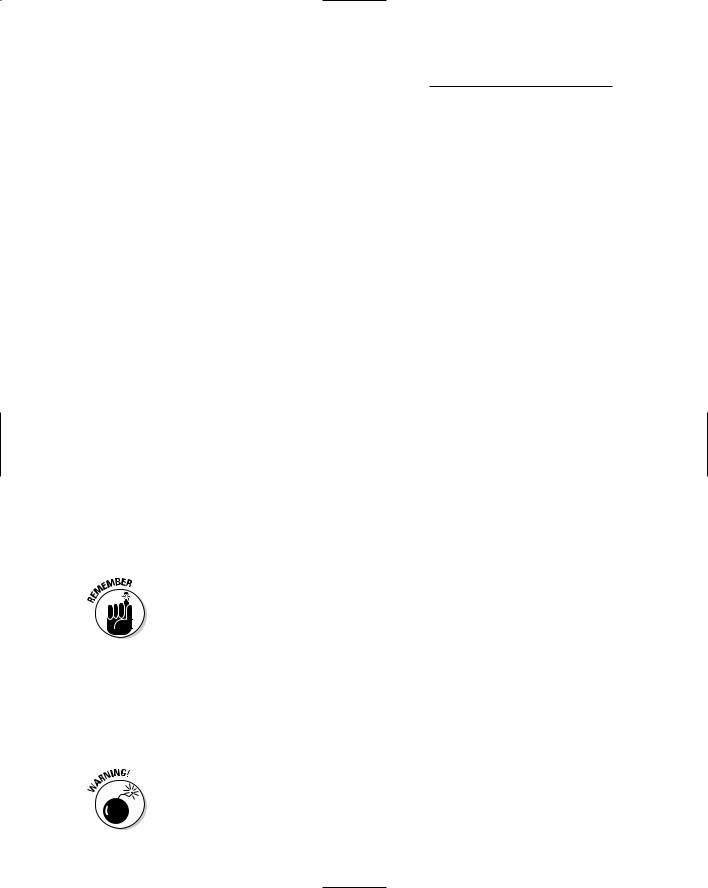
Figure 5-5:
An RCA plug is used mainly on consumer stereo and some semipro audio equipment.
Digital
Because you’re sure to be using a digital audio interface in combination with your computer when recording, you’re going to get comfortable with digital connectors. Digital audio equipment is a recent invention — no one standard has emerged. Because of this lack of standardization, a variety of digital connectors are on the market, only a few (or one) of which might be equipment that you own or intend to purchase. Regardless, knowing about the most common connectors and their purposes will help you decide what equipment is right for you.
MIDI
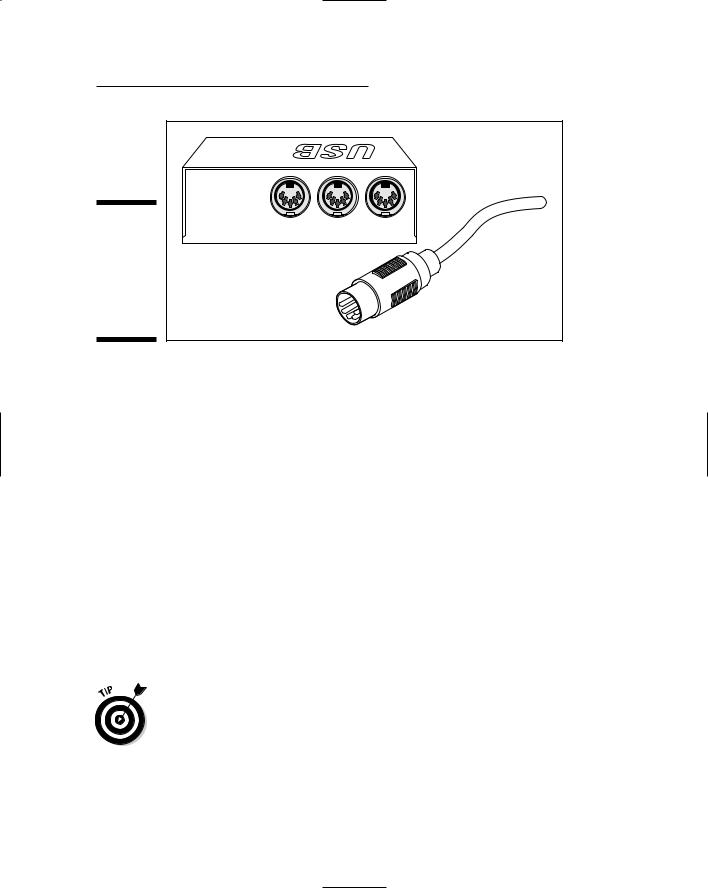
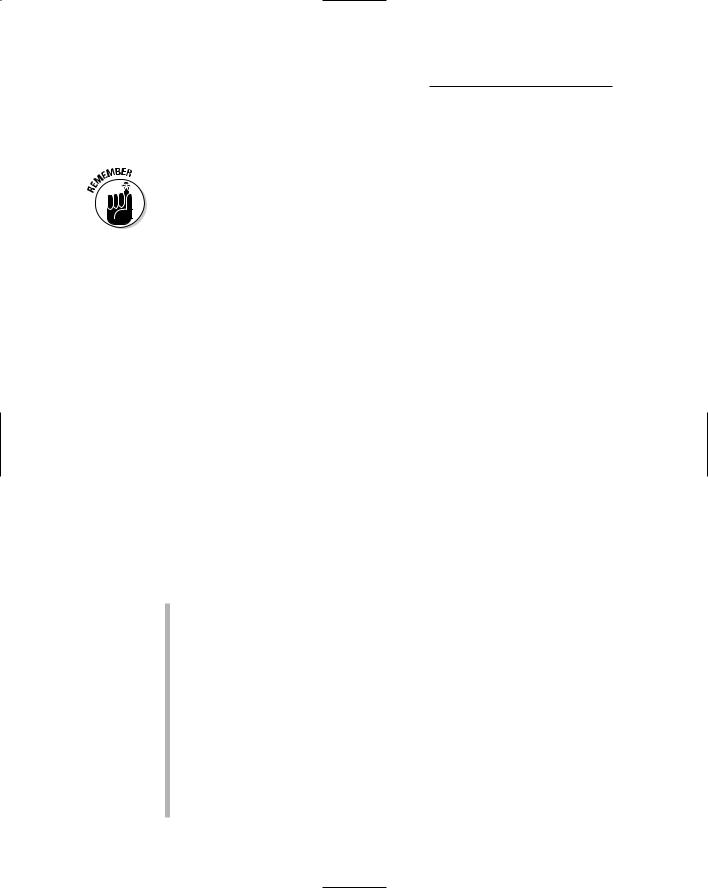
MIDI, short for Musical Instrument Digital Interface, is a handy communication protocol that allows musical information to pass from one device to another. To allow for the free passage of such information, MIDI jacks are located on a whole host of electronic instruments — synthesizers, drum machines, sound modules, and even some guitars have MIDI jacks. And, in order to connect all these instruments, you need some MIDI cables. The MIDI cable contains five pins (male) that plug in to the female MIDI jack (port) on the instrument or device. (See Figure 5-6.)
Some audio interfaces, such as the Digidesign Digi 002, have MIDI ports in them, but others, such as the MOTU 896, don’t. If you want to use MIDI and you have an interface without MIDI ports, you obviously need to buy a separate MIDI interface. Regardless of which audio or MIDI interface you have, you will need to buy the cable for those ports separately.
TEAM LinG - Live, Informative, Non-cost and Genuine !
Chapter 5: Connecting Your Hardware 103
Figure 5-6:
MIDI |
OUT-A |
IN-B |
OUT-B |
|
|
|
connections have two male ends. The device contains the female jack.
AES/EBU
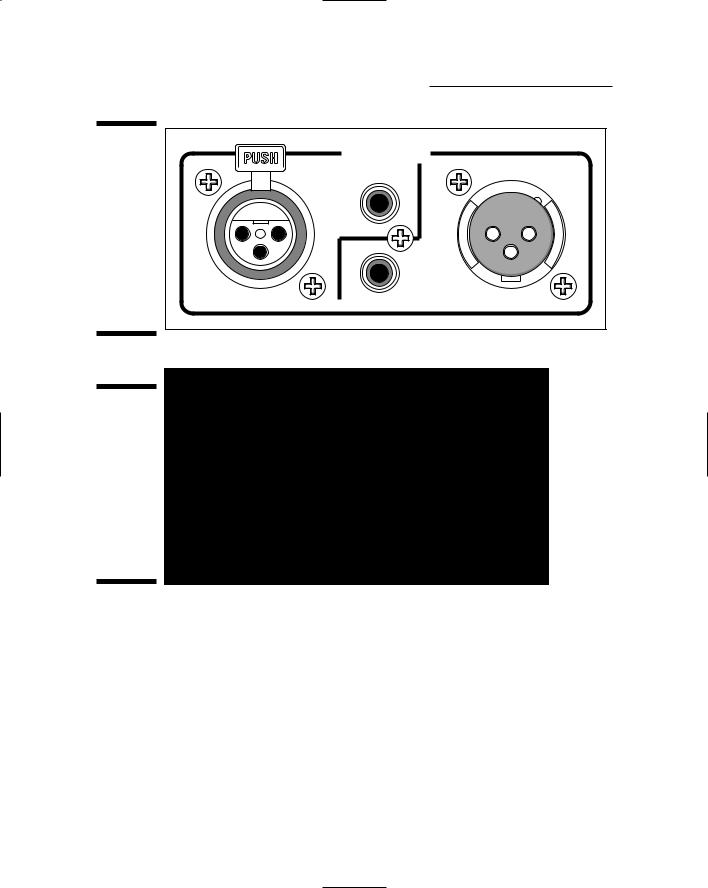
AES/EBU (Audio Engineering Society/European Broadcasting Union) cables are much like S/PDIF cables (see the following section). The AES/EBU standards require that these cables transmit two channels of data at a time. They differ from S/PDIF connectors in that they consist of XLR plugs and use balanced cables. (See Figure 5-7.) The AES/EBU standards were developed to be used with professional audio components, hence the use of balanced connections — the kinds used in professional-level equipment.
S/PDIF
S/PDIF (short for Sony/Phillips Digital Interface Format) connectors consist of an unbalanced coaxial cable (one wire and a shield) and RCA plugs. (See Figure 5-7.) They can also be made from fiber-optic cable and a Toslink connector (also called an ADAT optical connector; see Figure 5-8). The S/PDIF format can transmit two channels of digital data at once. S/PDIF protocols are very similar to AES/EBU standards, except S/PDIF was originally designed for the consumer rather than the professional market — which explains why unbalanced cords are used. Even so, you can find S/PDIF connectors on a lot of pro recording gear along with (or instead of) AES/EBU.
If you want to use cords longer than about 3 or 4 feet when you’re using a S/PDIF connection — or about 15 feet for AES/EBU connections — your best bet is to use video or digital audio cables. Regular audio cables degrade the sound at longer distances because they can’t transmit the type of signal that digital equipment produces without affecting the quality of the sound. If you use regular audio cables for longer distances, the sound loses some definition, becoming what some people describe as grainy.
TEAM LinG - Live, Informative, Non-cost and Genuine !
104 Part II: Choosing and Installing Computer Hardware
Figure 5-7: |
DIGITAL I/O-A |
S/PDIF and |
|
AES/EBU |
OUT |
connectors look the same as RCA and XLR connectors, respectively, but are marked as digital.
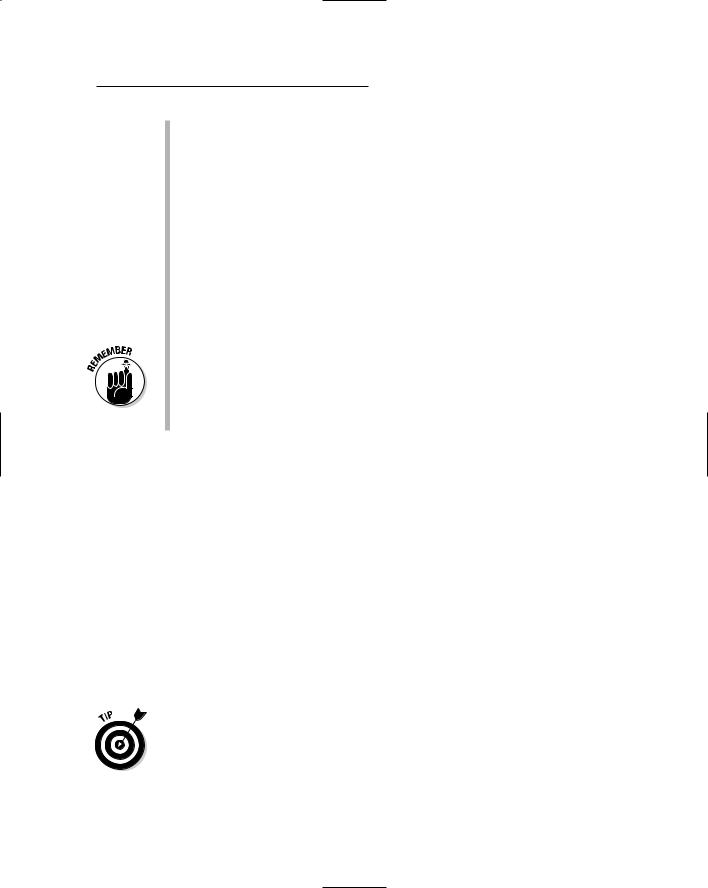
Figure 5-8:
Optical connectors have a fiberoptic cable and a special plastic connector called a Toslink connector.
ADAT Optical
The ADAT (Alesis Digital Audio Tape) Optical (also known as lightpipe) format can send eight tracks of digital audio at once. Developed by Alesis, ADAT Optical has become a standard among digital audio products. It consists of a fiber-optic cable using a special Toslink connector (see the “S/PDIF” section earlier). Audio interfaces allow you to use the ADAT optical for either eight channels of ADAT information or for Optical S/PDIF connections — but you can generally only use one or the other at one time. You choose your preference from your audio recording software hardware menu.
TEAM LinG - Live, Informative, Non-cost and Genuine !
Chapter 5: Connecting Your Hardware 105
USB
USB stands for Universal Serial Bus and is a common component of nearly all computers currently made. Chances are good that your computer has more than one USB jack and you’ve plugged a USB cord into a jack more times that you’d like to remember.
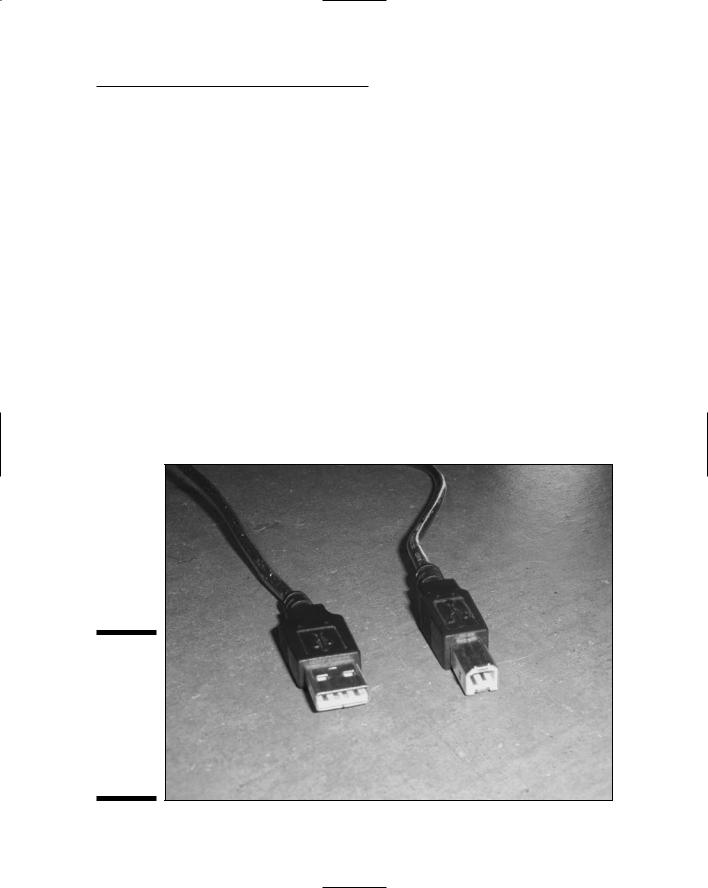
In case it’s been a while since you’ve had to mess with your USB connection, take a look at Figure 5-9. As you can see, USB has two different plugs for two different jacks: rectangular and square. The rectangular connection is called the “A” connection and is for any receiving device such as your PC or a USB hub. The square connection is called the “B” connection and is used for a sending device, such as your USB audio interface or printer.
Aside from two different types of jacks and plugs, USB also has two different standards: USB 1.1 and USB 2. USB 1.1 can handle a data rate of up to 12 Mbps (megabits per second), and USB 2 can handle 40-times that rate — 480 Mbps. Currently, USB interfaces primarily use USB 1.1 and, because of the relatively slow transfer speed, have limited input and output options. USB 2 has considerable faster transfer rates, so expect audio interfaces to use this approach more in the future. (Chapter 4 has more on audio interfaces.)
Figure 5-9:
USB uses two types of connections: the “A” connection (left) and the “B” connection (right).
TEAM LinG - Live, Informative, Non-cost and Genuine !

106 Part II: Choosing and Installing Computer Hardware
FireWire
Developed by Apple Computer, FireWire (also known as IEEE 1394 or iLink) is a high-speed connection that many audio interfaces, hard drives, digital cameras, and other devices use. Even though FireWire was developed by Apple, you can find FireWire ports on devices from many manufacturers. FireWire connectors (see Figure 5-10), unlike USB connectors (see the preceding section), are the same on both ends.
Figure 5-10:
FireWire is a high-speed data transfer protocol.
Like USB, FireWire supports two types: FireWire 400 (the regular one) and FireWire 800. FireWire 400 supports data transfer speeds up to 400 Mbps, and FireWire 800 can handle transfer rates of, yep, you guessed it, 800 Mbps. A lot of audio interfaces currently use FireWire 400 as a way to connect with your computer. These interfaces can handle quite a few inputs and outputs without any problems. I expect that you’ll soon see interfaces supported by FireWire 800 in the not-too-distant future. (I’ll admit that this isn’t exactly a risky assumption.)
TEAM LinG - Live, Informative, Non-cost and Genuine !
Chapter 5: Connecting Your Hardware 107
Getting Hooked Up
Hooking up all your gear can be a truly rewarding experience. That is, if you get everything working without a hassle. Getting hooked up properly isn’t rocket science, you need to take some issues into consideration when doing it to make sure that you don’t break anything and that you don’t degrade the sound of your system. This section walks you through the process.
Connecting your computer
A computer has lots of different connectors; which ones you actually have to mess with depends on the type of other gear (such as an audio interface) that you have. Here are some things to remember when plugging into and unplugging from your computer:
USB and FireWire can be hot-swapped. In other words, you can plug and unplug stuff from these ports without having to turn off your computer. You computer senses the change in components when you switch and adjust accordingly.
Always turn off and unplug your computer before opening the computer’s case. Your computer has a lot of electrical components inside it, and touching them when your computer is plugged in can cause electrocution.
For many audio interfaces, you don’t need to worry about opening your computer. However, in the case of adding RAM or connecting a PCI interface (see Chapter 4) you need to open the case.
De-static yourself before touching any internal components. Before you touch any of the computer components inside the computer case, touch the metal of the computer’s case to ground yourself and release any built-up static electricity. Touching a component without releasing the static first can case a static charge to damage the component.
If you put your computer’s CPU unit in another room (Chapter 2 has more on this), make sure that you get the proper cable and signal boosters so that your signal doesn’t degrade. For example, USB cables can be run for about 15 feet before you need a powered hub to boost the signal. Likewise, the Mac LCD displays are powered by the computer and can only handle a 10-foot extension to the cable before the signal drops to the point of being unreliable.
TEAM LinG - Live, Informative, Non-cost and Genuine !
108 Part II: Choosing and Installing Computer Hardware
Interface
The audio interface is the core of your audio recording computer. It contains all the components that you need to turn your analog music into something your computer can work with. And it also turns the digital bits back into your music again. As important as this piece of equipment is, it’s extremely easy to hook up.
As I describe in Chapter 4, several different types of audio interfaces exist, and each one connects to your computer differently. The following sections describe each type and show you how to connect the interface to your computer.
PCI-based systems
PCI-based interfaces require that you install the PCI card into an available PCI slot inside your computer. For some people, opening up a computer to connect the PCI card can be nerve-wracking. These instructions cut the problem down to size:
1.Shut down your computer and unplug it from the wall outlet.
You’re going to be messing around inside the computer case and you really don’t want any power connected to it.
2.Open the case.
This step usually requires removing a couple screws from the rear of the case to allow removal of the side panel on the left.
3.Touch the metal frame of your computer.
This step discharges any static electricity you might have built up.
It takes only a small spark of static electrical discharge to ruin sensitive electronics on the card or in your computer. So, whenever you handle electronic components, be certain to discharge any built-up static charges, and never touch anything inside your computer case — or
on the PCI card — that you don’t absolutely have to.
4.Remove the interface’s PCI card from its static-free bag.
Grip it from the edges (like holding a CD of your favorite music) and be careful not to drop it.
5.Locate an open PCI slot (consult your computer’s manual if you don’t know where this is) and gently push the PCI card into the slot — it goes in only one way.
Be careful not to bend the card or use excessive force, but make certain you have it fully seated into the PCI slot. If you’re unsure where the PCI slots are or how the PCI card fits, consult both your computer’s manual as well as the manual that came with the audio interface you’re using.
TEAM LinG - Live, Informative, Non-cost and Genuine !

Chapter 5: Connecting Your Hardware 109
Take your time and don’t rush this step. I’ve seen more than one audio interface that had intermittent problems because of an improperly installed card.
6.Screw in the screws for the PCI card to fully seat the card.
7.Close your computer case.
If your interface doesn’t have a break-out box, you’re ready to boot up and install your software. Chapter 8 has the details for this procedure.
On the other hand, if your PCI interface consists of a PCI card and a break-out box (Chapter 4 has more on these items), you need to connect the PCI card to the break-out box. This particular type of audio interface unit comes with a special cable to do this and involves these simple steps:
1.Attach one end of the cable to the long connector on the back of the PCI card (which you can now find at the back of your computer).
2.Connect the other end to the connector (generally labeled Computer) on the back of the break-out box.
3.Double-check your connections to make sure the cable is securely connected.
4.Plug in your computer’s power cord and boot up your computer if you don’t have any other installations to make.
You’re ready to install the software. Consult Chapter 8 (or your interface and software manuals) for the specifics.
FireWire
Compared to connecting a PCI interface, hooking up a FireWire interface to your computer is child’s play:
1.Shut down your computer.
Although FireWire can be hot-swapped, your system needs to be turned off before you make the connection the first time. The disconnection allows your computer to find the new device when you turn it on. After the first time, you can plug and unplug the interface even with the computer turned on.
2.Attach the FireWire cable to the FireWire connector on the back of the interface.
3.Plug in the other end of the cable to the FireWire connector on your computer.
TEAM LinG - Live, Informative, Non-cost and Genuine !
110 Part II: Choosing and Installing Computer Hardware
4.Connect the power cable to your FireWire interface and plug it into the wall power socket.
5.Turn your computer back on and install your software.
Most manufacturers recommend that you avoid using any FireWire hubs and instead connect the interface directly to a FireWire port on your computer.
USB
Even though USB ports are hot-swappable, it’s a good idea to turn off your computer before you install your USB interface for the first time. Here are the steps:
1.Shut down your computer.
2.Attach the included USB cable to your interface’s USB jack.
3.Plug in the other end of the cable to the USB connector on your computer.
Don’t use a USB hub; plug the cable directly into your computer. This keeps your signal from being interrupted by having too much data trying to get through one USB line.
4.Turn your computer back on and install your software.
Input devices
Your keyboard, guitars, and mics need to be plugged in somewhere. For most home recordists just starting out — people unlikely to have external mixers, preamps, and direct boxes — the plug-in place of choice will be the audio interface. Here’s a quick rundown on how to connect these input devices:
Keyboards and other electronic instruments: Plug an instrument cable from the output of your instrument to one of the instrument inputs of your interface. This type of input usually lacks a preamp and sometimes doesn’t even have an input gain (volume) control, but depending on your interface it might be an input with a preamp and/or gain control in it.
If your interface’s input doesn’t have a gain control, you use the main volume control on your instrument to control the volume level going to your computer. If your interface’s input has a gain control — either with a preamp or not — you need to balance the level of your instrument output to the level of your input gain control so that you get a good sound. Chapter 9 details this process.
Guitars and other string instruments with electric pick-ups: Plug a guitar cable from the output of your guitar (or other instrument) to an input in your interface that can handle guitar signals. Which type of
TEAM LinG - Live, Informative, Non-cost and Genuine !
Chapter 5: Connecting Your Hardware 111
input this ends up being depends on your interface. Most interfaces can handle a guitar in one of the preamp inputs, but many can also handle it in one of the instrument inputs. (You can often tell whether this is the case by the instrument inputs having a gain (volume) control on them — no gain no way, yes gain yes way.) Check your interface’s manual to see which inputs can handle the signal from a guitar.
When you record, you adjust both the guitar output and the interface’s input gain to get the level you want. Chapter 10 offers more detail on this process.
Microphones: Plug an XLR microphone cable from the output of your mic to one of the preamp-equipped inputs of your interface. You use the gain control on your interface and the placement of your mic to set the level of your mic signal. Again, check out Chapter 10 for tips on getting a good signal level all the way to your computer.
If you use an external preamp to record your mic signals, you plug your mic cable’s output into the preamp’s input and run the appropriate cable (usually an unbalanced TS or a balanced TRS, depending on your equipment) from the output of your preamp to one of the instrument inputs of your interface. The level is adjusted at the external preamp and not your audio interface.
Monitors
Hooking up your monitors is the last step in the process of being able to get your sound into and back out of your computer. How you connect your monitors to your audio interface depends on whether you have powered or unpowered monitors and the type of connectors that are included in your monitors.
Powered
Powered (active) monitors can be connected directly to your audio interface’s main outputs. For most home recording equipment, this means using either a TS instrument cable or balanced TRS cable. Some interfaces and monitors can handle both — check the manual for each of these components to see what you need to buy.
If your interface and monitors only use TS connectors, keep the length of your cords as short as possible because long runs of unbalanced cords can develop noise. If you have the option of balanced cords, go that route. Also, and this is getting kinda tweaky, use the same length cords for both monitors even if one monitor sits closer to the interface than the other. This ensures that the sound gets to both monitors at the same microsecond. (I told you this is kinda tweaky.)
TEAM LinG - Live, Informative, Non-cost and Genuine !