

PC Recording Studios for Dummies (Jeff Strong)
.pdf72 |
Part II: Choosing and Installing Computer Hardware |
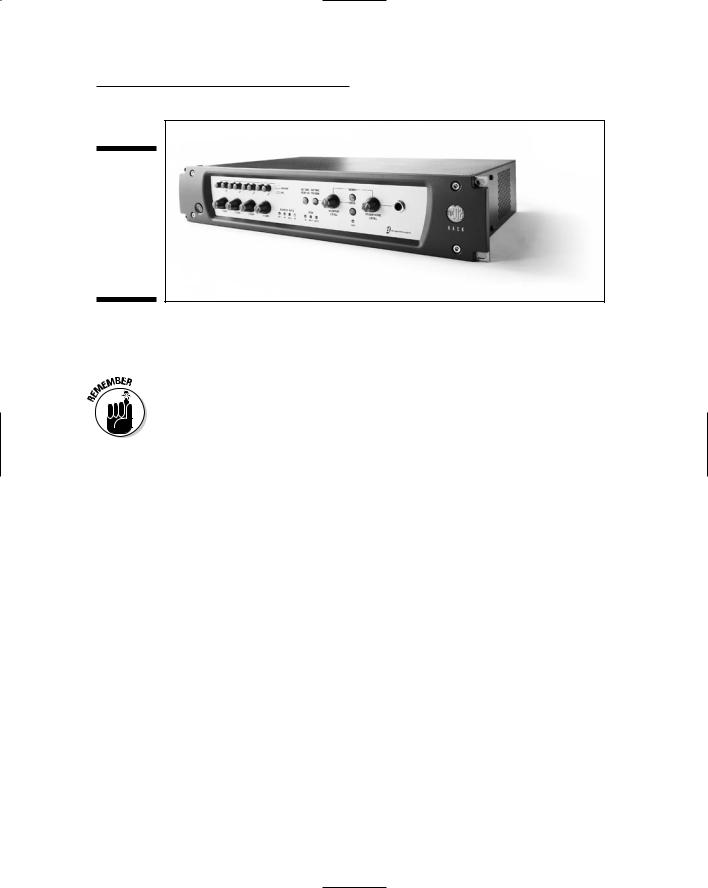
Figure 4-3:
The MOTU HD192 is a PCI interface with a break-out box for the analog
components.
If you have a laptop and can’t go with a PCI-based system and you want the high transfer speed of PCI, some makers of audio interfaces have a card that uses the PCMCIA card-slot. Of course, this works only if you have a laptop equipped with a PCMCIA jack.
If you want to go the PCI route, make sure that your computer has PCI slots that are compatible with the PCI interface that you’re considering because not all computers have such slots. For example, the Digidesign 001 doesn’t work with the PCI slots that you find in the Mac G5 computers.
Quite a few PCI-based audio interfaces are available on the market, and they range from just a couple hundred dollars up to a couple thousand.
FireWire interfaces
FireWire interfaces connect to the FireWire port in your computer. (Figure 4-4 shows a typical FireWire interface.) FireWire ports are inexpensive and available on laptop computers as well as desktops, which makes FireWire interfaces more versatile than PCI-based systems. For example, you can move the interface from computer to computer easily. If you have a laptop and a desktop computer, using a FireWire interface allows you to switch between the two computers by simply moving the FireWire cable from one to the other. If you want to do some location recording, this is a big plus because you can take your interface and laptop to a great recording room, record the drums or whatever, and then bring it all back home for mixing and editing in your studio.
Even though PCI-based systems have a faster pathway for sending and receiving audio data, FireWire is fast enough for most users. With FireWire, the latency that you can expect — the delay between the origin of the sound and when it gets into the computer and then back out again to your monitors — is only marginally more than what you’d get with PCI-based systems.
TEAM LinG - Live, Informative, Non-cost and Genuine !
Chapter 4: Examining Audio Components |
73 |
Figure 4-4:
A FireWire interface, like the Digi 002, connects to
the FireWire port in your computer.
FireWire interfaces generally come with 8 to 10 inputs and outputs and run from around $500 to $1,500.
The only thing to be aware of when using a FireWire interface — and you want a lot of inputs and/or outputs — is the potential problem that might arise if you also have a FireWire hard drive that you want to record audio to. Basically, having the FireWire interface and the Fire Wire hard drive on the same FireWire bus is asking for trouble because you’re sure to hit the limits of the speed of FireWire data transfer. So make sure that the two FireWire devices are on different busses (data channels).
USB interfaces
USB interfaces (see Figure 4-5) are handy because most computers have at least one USB port, so finding a place to plug one in is easy. They also represent a low-cost solution for people needing only a couple inputs and outputs. The only problem with USB for recording audio is the relatively slow transfer speed. This slower transfer speed translates into latencies higher than either FireWire or PCI-based interfaces. The latency is significant enough that you’re very likely to hear it when you record.
To get around this deficit, most makers of USB interfaces have incorporated some sort of “no latency monitoring” option. With such an option, you can record without hearing a delay between the tracks that you’ve already recorded and the one you’re currently recording. The problem here is that, with such an option, your newly recorded track gets placed out of synch with the previously recorded tracks. Correcting the synchronization requires you to move your overdubbed tracks within your song file. Admittedly, this process is pretty easy, but it does take time. (I explain how to do this in detail in Chapter 11.) If you don’t want the hassle of messing with the latency in USB interface-based systems, your best bet is to go either the PCI, FireWire, or (see the next paragraph, please) the soon-to-be-readily-available USB2 route.
TEAM LinG - Live, Informative, Non-cost and Genuine !
74 |
Part II: Choosing and Installing Computer Hardware |
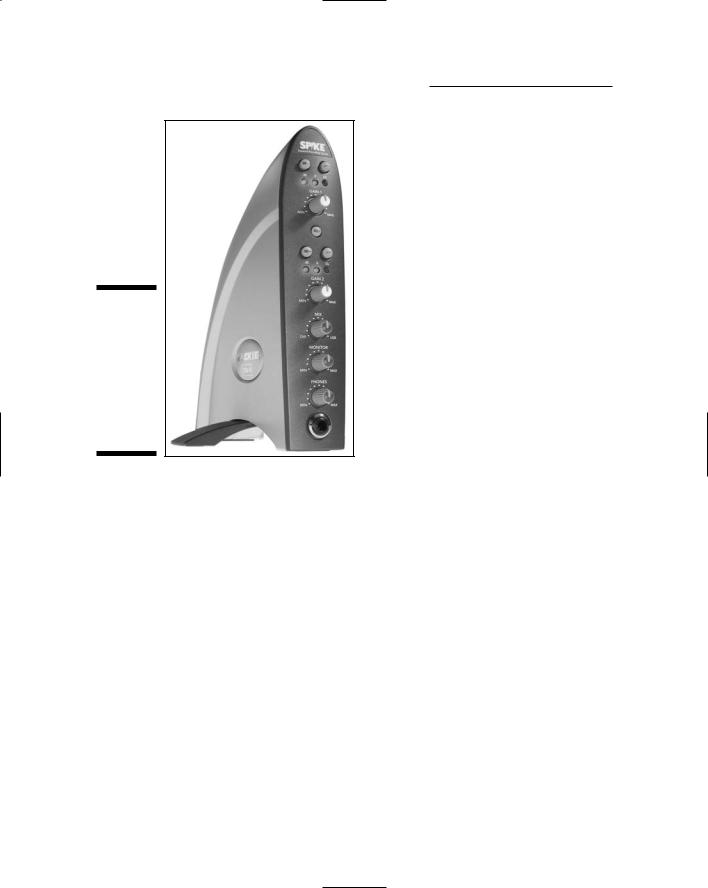
Figure 4-5:
A USB interface, like the Mackie Spike-XD2, connects to your computer’s USB port.
USB2 interfaces, at the time of this writing, are just becoming available. USB2 has a much higher transfer speed, so the latency issue is, well, a non-issue. As more options appear, you might find that USB2 is the way you want to go.
USB interfaces can be found for under $200, and USB2 interfaces (well, the only one currently available) run about $700.
Controller-based interfaces
Both FireWire and USB interfaces are offered with additional functionality in the form of controllers. These can be keyboard controllers or mixer controllers.
A keyboard controller interface is usually USB-connected and has a couple octaves of keyboard keys as well as two inputs (with preamps) and two outputs. This can be a handy solution if you intend to do a lot of recording with software-based keyboard sounds (called soft-synths — Chapter 13 has more on this) because this type of controller doesn’t actually contain any keyboard sounds — the keyboard simply triggers the MIDI sequencer within your recording program. Figure 4-6 shows this type of controller.
TEAM LinG - Live, Informative, Non-cost and Genuine !

Chapter 4: Examining Audio Components |
75 |
Figure 4-6:
A keyboard controller interface, such as the M-Audio Ozonic, offers a MIDI keyboard and a couple audio inputs and outputs.
Mixer controllers, like the one shown in Figure 4-7, contain multiple audio inputs and outputs along with typical mixer functions — track faders and transport functions, to name just two — that give you the feel of an analog mixer while at the same time allowing you to use your audio recording software program to control the mixer parameters.
Figure 4-7:
The mixer controller interface gives you the ability to control your software mixer with physical controls.
TEAM LinG - Live, Informative, Non-cost and Genuine !

76 |
Part II: Choosing and Installing Computer Hardware |
Finding the right interface for you
Over a hundred different audio interfaces are available on the market, with new ones coming out almost daily. As you can imagine, having so many choices out there can make deciding on the perfect one for your studio rather difficult. This section offers some insights based on your needs, the available options, and my ideas about what’s important.
Exploring your needs
To help you get clear on your needs and desires — well, at least your audio interface needs and desires — here are some things to consider:
Budget: For most people, cost is the primary consideration when looking for a computer interface. Just remember that, when you tote up the price for your new interface, you need to figure in the additional cost of a decent audio recording program. Many people think that the free program that comes with many interfaces is going to be adequate for their needs — and it usually doesn’t take long for them to be proven wrong.
Most interfaces (aside from the Digidesign ones) come with a basic, entry-level program that you’ll likely outgrow very quickly.
Musical style: The style of music that you want to record can have an impact on the type of interface that you can use. For example, if you’re in a rock band and see yourself recording live — just so you can get the feel of the music to come through in all its in-your-faceness — you might need a lot of inputs and outputs. This pretty much necessitates a PCI or FireWire interface with at least eight analog inputs. On the other hand, if you’re into electronic music, a USB keyboard controller interface might be the best solution.
The computer: Your choice of computer will play a role in your final decision on an interface. For example, if you have a laptop, you won’t be able to go the PCI route, and if you have an older computer without a FireWire port, you obviously can’t go that route unless you put one in your computer. In this case, you can use a USB interface, assuming that you have USB ports in your computer or you use one of the very few PCMCIA cards if your laptop has one of these connectors.
Audio and MIDI capabilities: Your decision on whether or not you want to do any MIDI recording is going to determine what type of gear you need. Many interfaces come with a single MIDI port. For some people, a single port is just fine, but if you intend to do a lot of MIDIing, you might need more than that. In this case you’ll need to budget in a separate MIDI interface.
TEAM LinG - Live, Informative, Non-cost and Genuine !

Chapter 4: Examining Audio Components |
77 |
Examining some options
The following list clues you in on some of the major manufacturers of audio interfaces, and it highlights the flagship products in their lines:
Aardvark: (www.aardvarkaudio.com) Aardvark makes several different audio interfaces, most of which are PCI-based. (Okay, they do have one USB interface.) All their interfaces come bundled with the Cubase LE audio recording software program and cost from about $300 to over $1,000. (Cubase LE is the entry-level version of Cubase. Check out Chapter 7 for more information about Cubase software.)
Digidesign: (www.digidesign.com) Digidesign is the maker of Pro Tools software. (See Chapter 6 for more on Pro Tools.) Currently, Digidesign makes two FireWire interfaces (the Digi 002 and Digi 002 Rack) and one USB interface (the Mbox). The Digi 002 interface is also a mixer controller. All these interfaces come bundled with Pro Tools LE software (the entry-level version of Pro Tools), and individually they range in price from about $500 to $2,400.
ECHO: (www.echoaudio.com) ECHO makes PCI-based interfaces as well as PCMCIA interface cards for laptop computers. Their prices range from under $200 for a PCMCIA 2 input/2 output card to almost $1,000 for an
8 input/8 output system. ECHO interfaces come bundled with Tracktion software.
Edirol: (www.edirol.com/products/audio.html) Edirol makes several interfaces, including USB versions, FireWire versions, and the only USB2 interface on the market. Edirol also has some interfaces with effects units built inside them and a keyboard controller interface. As of this writing, Edirol products don’t come with any bundled software and run from about $300 to $1,000.
E-Mu: (www.emu.com) E-Mu makes a number of PCI-based interfaces, some with analog inputs and outputs in the card itself and others with a separate break-out box for the analog components. A FireWire port is also included with the highest-end model (the 1820M) that lets you plug in a peripheral such as a hard drive. Prices range from under $200 to $600, depending on the number of inputs and outputs you want. Recording software isn’t included, but E-Mu includes effects processors that don’t rely on the processor power of your computer — the effects use a DSP card in the 1820 model instead.
Lynx Studio Technology: (www.lynxstudio.com) Lynx Studio Technology makes high-end PCI cards. These cards consist of 2, 4, or 6 analog inputs and outputs and no preamps. The lack of preamps isn’t a problem for most of their users because the kind of folks interested in such high-end cards usually want to use their own converters and analog components (preamps, compressors, and so on) and therefore
TEAM LinG - Live, Informative, Non-cost and Genuine !

78 |
Part II: Choosing and Installing Computer Hardware |
get these cards to act as the sound card only. All but one of its cards has two digital inputs and outputs. Prices range from around $500 to well over $1,000 depending on your input and output needs. These cards don’t come with any software.
M-Audio: (www.m-audio.com) M-Audio makes quite a few interfaces, including PCI, FireWire, USB, and keyboard controller options. Prices range from under $200 to around $600. The M-Audio interfaces come bundled with some software — usually Abelton Live Delta, Reason Adapted, and/or others. Check with your dealer to see which software is being offered.
MOTU (Mark of the Unicorn): (www.motu.com) MOTU makes both PCI and FireWire interfaces. MOTU is at the higher-end of the complete interface spectrum, which gets reflected in its cost — from about $750 to around $1,800, depending on the number of inputs, outputs, and preamps you want. MOTU interfaces come bundled with the Audio Desk software program, which can be upgraded to Digital Performer for a couple hundred dollars. (Chapter 7 has more on these software programs).
RME: (www.rme-audio.com) RME originally made only high-end PCI sound cards that use just digital inputs and outputs. Lately, it has included analog inputs and outputs in some of its products and has added both a PCMCIA card for laptops and a FireWire interface to its line. Prices range from under $300 for the PCMCIA card to over $1,000 for a PCI-based interface with analog input and outputs. RME products don’t come with any recording software.
TASCAM: (www.tascam.com) TASCAM makes several USB and FireWire interfaces — and many with a mixer controller included. Prices range from about $200 for a simple 2-channel USB interface to around $1,300 for a mixer controller FireWire unit. TASCAM units come with an entrylevel version of the Cubasis recording software.
Making your choice
Choosing between all the options out there can be difficult. My advice is pretty simple: Choose the software and get hardware that works with it. The software is where you’re going to do your work. The interface is just the way to get the sound to and from the software. If you choose the best software for your long-term needs, you can update and upgrade your hardware as your budget and experience allow.
Check out how your initial decision about what software to use can help you focus on the right interface for you. If you want to work with Pro Tools software, for example, you need to use Digidesign hardware, so right there you’ve narrowed down the wide world of interface choices to just three models. (Okay, okay, this probably isn’t that fair an example because most software
is much more forgiving when it comes to the hardware you can use, but it
TEAM LinG - Live, Informative, Non-cost and Genuine !

Chapter 4: Examining Audio Components |
79 |
makes a dramatic point, so I use it anyway.) Now if your budget is tight or you need only two inputs at a time, your three choices have suddenly become just one — an Mbox from Digidesign will get you going just fine.
Here’s the beauty of it: As your needs grow — say that you decide that you want to record your whole band and need eight inputs — all you have to do is upgrade your hardware to a Digi 002 or Digi 002 Rack. By choosing an interface based on the software, your transition from the two-input USB interface to the eight-input (analog) FireWire interface is as simple as unplugging the Mbox and plugging in the Digi 002 (or Digi 002 Rack). All your existing songs are still accessible to you, and you don’t have to learn new software.
On the other hand, if you choose an interface based solely on the hardware features — on the specs, how cool it looks, or what it costs — you might find that the software you want to run doesn’t work so well with the interface you bought (or doesn’t work at all in the case of Pro Tools). And, as I discuss in Chapter 7, not all software or hardware works well on both computer platforms (Mac and Windows).
Choose the software first. This will dictate, depending on your choice, which computer platform you’ll use and will steer you in a direction for an audio interface. The maker of the software lists the types of computers and hardware that will work with its program. Check out the manufacturer’s Web site to help you narrow down your choices.
Also, in most cases, the software that’s bundled with the audio interface is worth precisely what you paid for it — nothing, or at least close to it. If you plan on recording for months or years to come, you’ll find that most of these bundled programs are severely limited, and you’ll outgrow them about as fast as you get comfortable using them.
I don’t mean to sound negative, but in my experience with helping people set up their studios, I’ve seen too many people end up spending a lot of time figuring out the free software only to have to start over again with a new program. I suggest that you spend some time going through Chapters 6 and 7 and researching the best software for your needs before you choose the hardware to run it. (This includes computers as well as audio components.)
Making Use of MIDI
Many people who want to record on a computer end up recording MIDI as well as audio. MIDI stands for Musical Instrument Digital Interface and is a way for you to control one MIDI-equipped instrument from another or from a
TEAM LinG - Live, Informative, Non-cost and Genuine !

80 |
Part II: Choosing and Installing Computer Hardware |
computer that has MIDI sequencing software. (See Chapter 6.) This lets you record your musical ideas into your computer and edit the data later on. This can be an advantage when the time comes to edit out any performance mistakes you might have committed. Because a MIDI recording is simply performance information — no sound is contained in the files — you can edit any clonkers pretty easily. For example, say you play your part with incredible feeling but you missed a couple notes here and there. With a MIDI recording, you can simply change those incorrect notes into the right ones by dragging them with your mouse. (See Chapter 11 for more details.) If this happens with an audio file, you have to re-record the botched notes by using a punching process, a procedure that I talk about in more detail in Chapter 10. This process takes more time and is more work than fixing a bad MIDI note.
Understanding MIDI
MIDI is a protocol (a set of agreed-upon standards) for issuing commands to MIDI-equipped devices (such as your keyboards and your computer) through a cabled connection and a common digital language. This arrangement allows each MIDI device to understand the other, regardless of manufacturer or instrument. All that’s required is an instrument equipped with MIDI ports (jacks).
MIDI data is different from an audio recording because it contains no sound as such; rather, it’s limited to performance information. This can be information about various performance characteristics, which (for keyboards, at least) includes the following:
Note-on and note-off: What note is played and when.
Velocity: How hard someone presses a key.
After-touch: Whether the key pressure changes after the initial press.
Vibrato and pitch bend: Whether the pitch changes while a key is pressed.
This information allows the MIDI musician to potentially create a performance that is as rich in texture as those of the world’s finest players.
Digital messages sent from one device to another across a cable (called the MIDI cable, of course) create MIDI data. The cable connects to MIDI ports on each device, and the messages are sent in the form of binary digits. Each instrument can understand and respond to these messages.
TEAM LinG - Live, Informative, Non-cost and Genuine !

Chapter 4: Examining Audio Components |
81 |
Gearing up
Okay, so this MIDI thing sounds kind of interesting to you, and you want to know just what you’re going to need to buy to do some MIDIing yourself. Because you’re going to use a computer to record, this can be pretty simple. Here’s a list of the basics for a computer-based system:
A sound generator: This device has locked within it all the wonderful sounds that you want to use to create beautiful music together; it can be a synthesizer, drum machine, sound module, software synthesizer, sampler, or any other MIDI-equipped sound-making device.
A MIDI interface: You use a MIDI interface to enable your computer to send and receive MIDI data to external MIDI instruments. A number of audio interfaces contain MIDI ports (jacks for connecting MIDI cables; see Chapter 5), but you’ll come across some that don’t. If the interface has one, it’ll generally contain just one input and output. For many people this is enough to get the job done, but for people who want to do a lot of MIDI work, you might need to get a dedicated MIDI interface.
A MIDI controller: This is the device you use to control the sound generator (“playing” it, essentially) as part of recording your MIDI performance data. This can be a synthesizer, any MIDI-capable keyboard, or one of a number of controllers created specifically to control the softsynths in your computer.
A sequencer: This device records and plays the MIDI performances that are programmed into it. The sequencer allows you to program your part into the synthesizer and have it play back automatically (much like the old-time player piano). The sequencer will be part of your audio/MIDI recording software. Check out Chapters 6 and 7 for suggestions on finding the right software for your needs.
In the following sections, I detail each of these basic components so that you have a better sense of what features to look for when you do your MIDI shopping.
Sound generators
The sound generator is the core of the MIDI studio. This is what produces the sounds that you hear. Without it, you might as well skip the rest of the stuff because, of course, you won’t hear any of your work.
Sound generators can come in many different shapes and sizes: software synthesizers (soft-synths), the fully functional keyboard synthesizer, the independent drum machine, the standalone sound module, and samplers. Each of these devices has its strengths and weaknesses. (Continue on for the details.)
TEAM LinG - Live, Informative, Non-cost and Genuine !