

Editing the Properties of Nodes
Node properties are edited in the Configuration Editor. A number of different properties can be set such as the node type, the network to which it is connected and the program title information. Node properties can only be edited while offline.
To edit the properties of a node
Do one of the following:
Select a node in the Hardware Architecture or Link Architecture views, right-click and choose Properties.
From the Edit menu, choose Properties.
The Properties window appears.
In the Node, Network, and Program sections, enter the required information.

Set or change the required properties and press Ok.
See Also
Selecting Nodes
Nodes
Developing Applications
![]()
Editing Node Descriptions
A text description can be defined for any node in a project within the Configuration Editor.
To view or edit a node description
1. Select a node.
2. From the Edit menu, choose Node Description.
The Edit Description window appears.
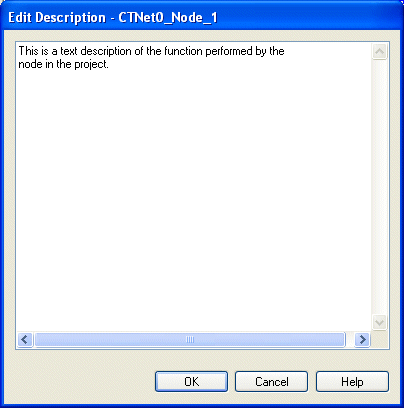
Make any required changes and press OK.
See Also
Selecting Nodes
Nodes
Developing Applications
Defining a Project Header
![]()
Deleting Nodes
Nodes can be deleted from the Hardware Architecture view of the Configuration Editor.
|
Note: |
When a node is deleted from the Configuration Editor any program for the node will also be deleted. |
To delete a node
1. Select the node to delete.
2. From the Edit menu, choose Delete.
When prompted, confirm that the node is to be deleted. The node, any associated options and programs are then removed from the project.
See Also
Selecting Nodes
Nodes
Developing Applications
![]()
Cutting, Copying, and Pasting Nodes
You can cut, copy, and paste nodes in the Hardware Architecture view of the Configuration Editor. Copied nodes contain the same option modules and programs as the original node except that the nodes are automatically assigned new names and node addresses.
To cut nodes
1. Select the node (drive or option) to cut.
2. Press Ctrl+X or from the Edit menu, choose Cut.
The node is cut.
To copy nodes:
1. Select the node (drive or option) to copy.
2. Press Ctrl+C or from the Edit menu, choose Copy.
The node including its defined option modules is copied.
To paste nodes:
1. Select a node or the new node hotspot at the far right of a network rail.
2. Press Ctrl+V or from the Edit menu, choose Paste.
The Properties window appears showing the details for the pasted node. Confirm that the details are acceptable and press OK. The node is pasted into the project.
See Also
Selecting Nodes
Nodes
Developing Applications
![]()
Rearranging Nodes
You can change the order in which nodes appear in the Hardware Architecture view of the Configuration Editor by dragging nodes to different positions or rails. This has no effect on the operation of the system.
To rearrange nodes
1. Select the node to move.
2. Drag the selected node and drop at the required location -either at the position of an existing node or at the end of a network rail.
|
Note: |
It is not possible to drag and drop Unidrive SP options. |
See Also
Selecting Nodes
Nodes
Developing Applications
Splitting Network Rails
![]()
Networks
Networks provide the means for communication between the PC running SYPT and the nodes in the project. Networks also provide the means for exchanging cyclic data between nodes on CTNet. The supported network types are CT-RTU (serial), CTNet, and MD29Mon (serial).
A project configuration can hold up to 10 CTNet networks but only one CT-RTU (serial) or MD29Mon (serial) network. When a project configuration holds more than one network, you can choose to connect the PC to any network. For example the following show a project with three networks - one CT-RTU and two CTNet. The PC can be connected to any of the networks.
The PC connected to a CT-RTU network:

The PC connected to a CTNet network:

When SYPT goes online and begins communicating with targets it will use the network/ protocol to which the PC is connected in the Configuration Editor. Further communications settings, e.g. the PC COM port to use can be specified by selecting the PC in the Configuration Editor and displaying its properties.
CT-RTU to CTNet Routing
If the PC is connected to a CT-RTU network and talking to Unidrive SPs with SM-Applications options, the PC will be able to route communications requests through the SM-Applications options onto their connected CTNet networks. For example in the following project, the PC will be able to communicate with the Unidrive/ UD75 even though there is no direct cable between the PC and the drive.

CTNet Network ID
Note that each CTNet network in a project will be assigned a unique network ID. When SYPT goes online and begins communicating with targets the network ID will be used to distinguish between nodes. As can be seen in the following picture with multiple CTNet networks in a project it is possible to have duplicate node addresses. In the picture there are two nodes with address 1 and two nodes with address 2.

The PC distinguishes between the nodes using the Network ID. Note that the network ID is only returned to the PC by the SM-Applications options. The ID of the network on which an SM-Applications option is connected is set in parameter 22 in its setup menu (see the SM-Applications user guide for more details). It should be noted that it is the user's responsibility to set the network ID in the setup menu - there is no way for the option to physically get the ID of the network to which it is fitted. If the network IDs are set incorrectly SYPT may have trouble identifying nodes in a project when it goes online.
|
Note: |
With a single CTNet network, the default values for the network ID in the project (0) and the default value for parameter 22 in the SM-Applications module (0) will give the correct expected behaviour. |
You can perform the following tasks when managing networks in a project:
Inserting Networks
Selecting Networks
Deleting Networks
Editing the Properties of Networks
PC Communications Settings
Rearranging Networks
Splitting Network Rails
Merging Network Rails
See Also
Unreachable Nodes
Developing Applications
Building and Downloading Applications
Going Online - Communicating with Targets
________________________________________________________________________________