

236 Part II — Increasing Your System’s Performance
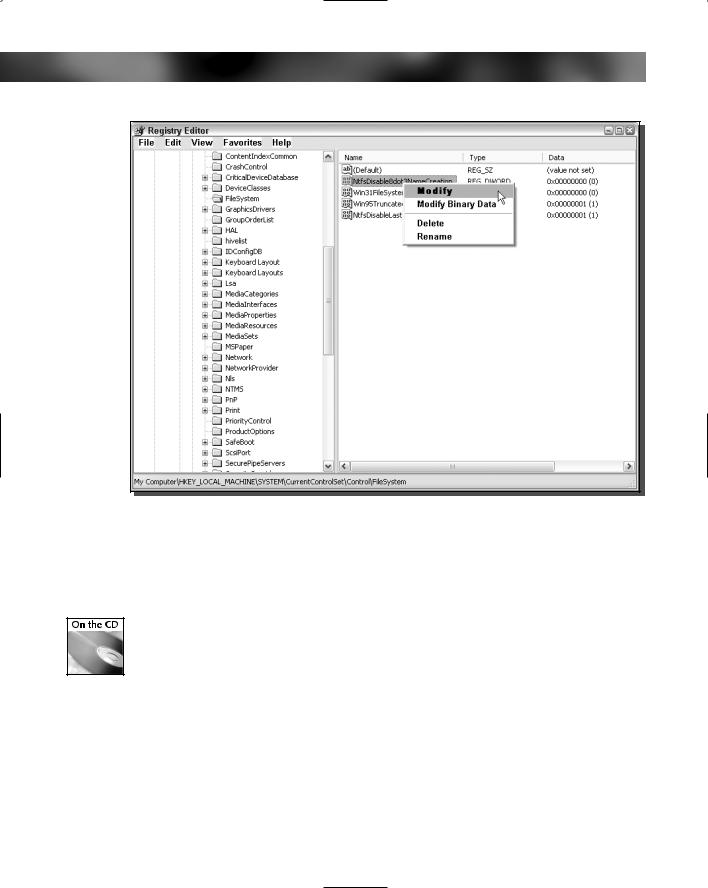
FIGURE 10-2: Changing NTFS 8.3 compatibility with regedit.
Once your computer restarts, the new settings will be in effect. If you ever experience any of the aforementioned problems with older applications and installers, the first thing you should do is re-enable the compatibility feature to see if it is the culprit.
To make this easier for you to do, I have included a registry file on the companion CD in the Chapter 10 folder so that you can just import the registry file into the registry instead of repeating all of the preceding steps to enable and disable the feature.
Speeding Up the User Interface
Various features built into Windows XP slow down the performance of the system. The new look and effects degrade overall system performance. If you have a very fast computer, leaving these features enabled will not slow down your computer very much, but you will still notice a difference if you have some of them disabled.

Chapter 10 — Making Your Computer More Responsive 237
On top of taming some of the new features, you can also fine-tune some of the other settings, such as menu delay, to make your computer more responsive by eliminating unnecessary delays.
The following paragraphs show you how to do this—so dig in!
Reducing the menu delay
Whenever you move your mouse over an item that expands in the Start Menu, you have to wait for the system to expand that menu and show you the submenu. By default, your system is configured to wait 400 milliseconds before it automatically expands any submenu. Navigating through the Start Menu is when you will notice this delay the most.
Using the system Registry Editor, you can hack the System Registry to modify the amount of time that the computer waits before it automatically expands a submenu.
The best value for the menu delay is different for every person. You might like the submenu to show up instantly, although others might like it to appear after the mouse hovers over the item for a little while, or vice versa. The best way to fine-tune this setting is by testing it a few times with different values. If you want the submenu to show up instantly, then set the delay to 0.
This may have a bad effect for some that do not have very fast computers, as just dragging your mouse over the Start Menu will cause your computer to open up every submenu over which the mouse is dragged. Doing so will cause your computer to do a lot of work, and if your computer’s hardware is slow, then everything on your computer will slow down as a result when the menus are expanding. If you have a fast computer, then your computer will have no problem keeping up. I prefer to set my menu delay to 100 milliseconds because this does not open up any menu that the mouse moves over but still gives a very fast response.
Now that you know a little about what the best values for the delay are, follow these steps to change the menu delay on your computer:
1.Start up the Registry Editor by clicking the Start Menu and selecting Run. Then type regedit in the box and click OK.
2.Once the Registry Editor has opened, navigate to HKEY_CURRENT_USER, Control Panel, and then Desktop.
3.Look for the MenuShowDelay entry and right-click it and select Modify, as shown in Figure 10-3.
4.Enter the new value in the box and click OK.
5.Close the Registry Editor and restart your computer to see the new changes.
In the Chapter 10 folder, you will find an undo script to reset the menu delay back to the default value of 400ms.
You may have to repeat the preceding directions a few times so that you get the menu delay just the way you like it.
238 Part II — Increasing Your System’s Performance
FIGURE 10-3: Registry Editor showing how to edit MenuShowDelay.
If you ever have problems after changing your menu delay, such as the submenus never showing up, then go back into the System Registry and make sure that you did not type in a large value by accident. Remember that the default value is 400 milliseconds, in case you want to revert to the default.
Working with the performance options
All of the new visual effects that Windows XP includes can be customized so that you can turn off the ones you don’t need or like. This capability allows you to find a balance between performance and appearance.
Some of the visual effects are very taxing on systems that are not very powerful. This section will help you identify the graphical effects that are slowing down your system and will show you how to manage them.
Hidden away under System Properties is a Settings panel that allows you to enable and disable each effect or feature. Follow these steps to get to the Settings screen:
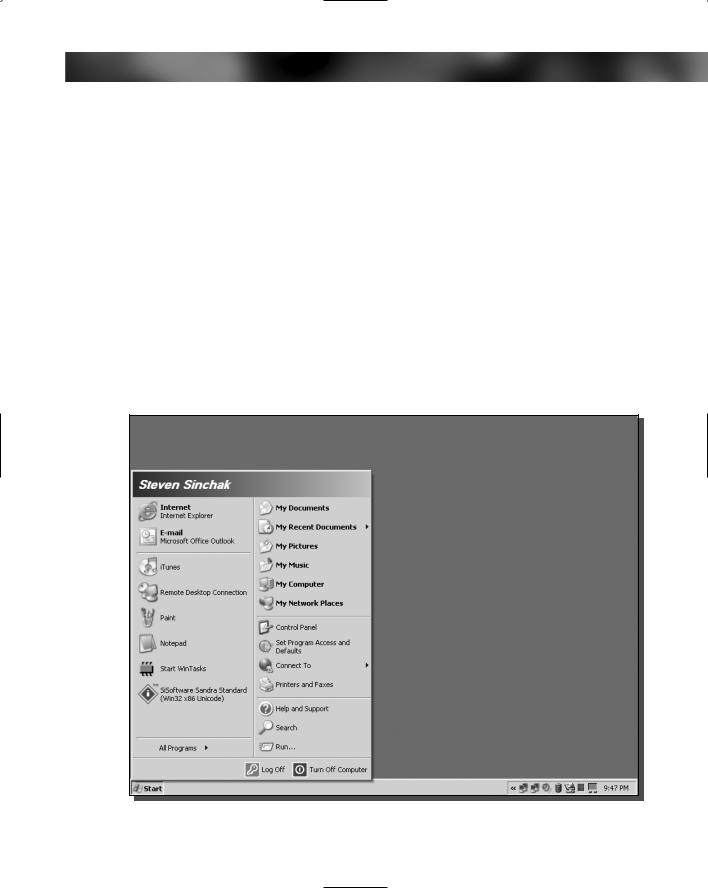
1.Right-click the My Computer icon in the Start Menu or on the desktop and select Properties.
Chapter 10 — Making Your Computer More Responsive 239
2.Then, click the Advanced tab and click Settings under the Performance section.
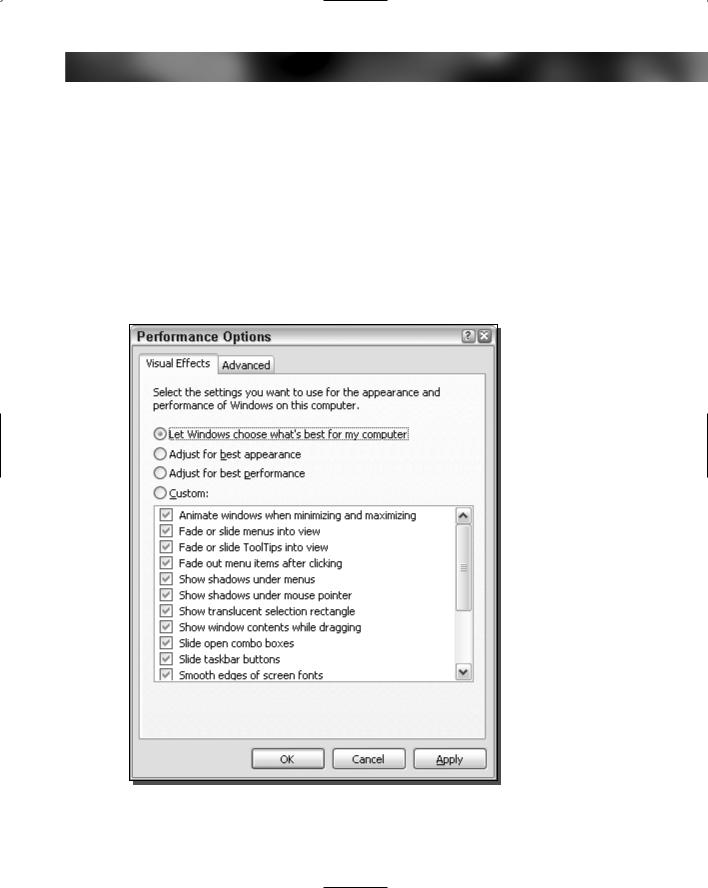
3.This will launch the Performance Options screen, as shown in Figure 10-4. Click the Visual Effects tab, if the tab is not already displayed.
4.Now that you have the Visual Effects settings screen on your screen, you will notice four different settings: Let Windows Choose What’s Best for My Computer, Adjust for Best Appearance, Adjust for Best Performance, and Custom. The Let Windows Choose What’s Best for My Computer setting does not seem to work very well, because I have not seen Windows choose to disable anything on any computer, even on some very old machines. The Adjust for Best Appearance setting enables all options, whereas the Adjust for Best Performance setting disables all options. The Custom setting is the best setting to use on your computer. Click the Custom radio button to enable this setting.
FIGURE 10-4: Performance options.

240 Part II — Increasing Your System’s Performance
5.Now you will be able to manually check and uncheck the various boxes listed below for each of the different effects. Refer to the following list for recommendations on each of the effects. Once you are finished, click the OK buttons and you are set.
The following is a list of different effects, along with my recommendations on what to do for the best balance between appearance and performance.
Animate windows when minimizing and maximizing : This effect will animate the title bar along with the border by enlarging and shrinking instead of instantly changing the size of the active window. This effect is not very heavy on the system. When the effect is disabled, no change can be detected in the system, such as the amount of memory used and the CPU usage. You would think that the CPU usage would decrease, but compared to when the effect is disabled, the usage of the CPU to minimize and maximize a window is the same. Even though there is no performance change in the numbers, your system will appear to be running faster because the windows will instantly resize and be displayed. Because of that, I recommend that you disable this effect.
Fade or slide menus into view : This effect allows the menus that pop up throughout the system to fade in. You will experience this when you navigate through a menu bar or when you right-click something. This effect does not affect the performance of the system except for when the effect is called on. Some users that have older computers and slower video cards can experience better performance with this effect off.
Fade or slide ToolTips into view : This effect will allow the yellow ToolTips in various parts of the system to slowly fade in when either an event occurs or you hold your mouse over an object. This effect has no effect on the system performance of most users, but once again, those with older systems should disable this effect for better performance.
Fade out menu items after clicking : This effect will fade the submenus in the Start Menu out after you click an item within the menu. This effect, just like the other fade effects, is slower on older systems and should be disabled for best performance.
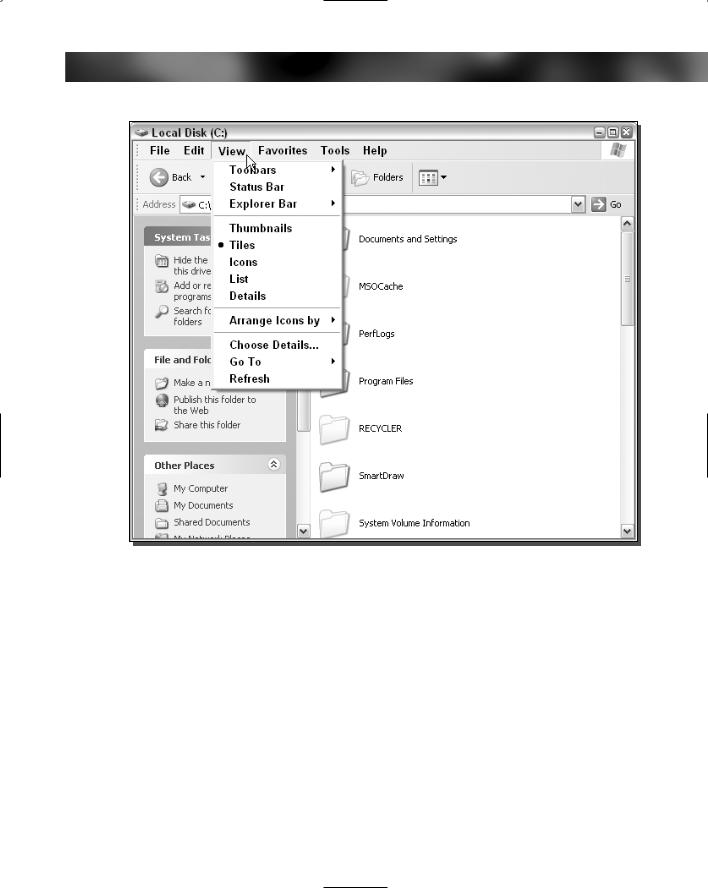
Show shadows under menus : This effect will display a light shadow when pop-up menus are displayed, giving more of a 3D appearance to the flat interface, as shown in
Figure 10-5. My analysis of the system data when the effect is enabled and disabled resulted in such a small difference that this effect does not matter if it is or isn’t on for the average user. Also, just like the fade effects, this is something that users of older machines can disable to get better performance.
Show shadows under mouse pointer : This effect allows the mouse to have that semi-3D effect. However, it is not applied to the mouse when the mouse is over certain applications, such as Microsoft Word. The shadow under the mouse seems to have no influence on the system performance for the average computer. However, just as with the shadow and fade problems mentioned earlier, older machines may have problems with this effect too.
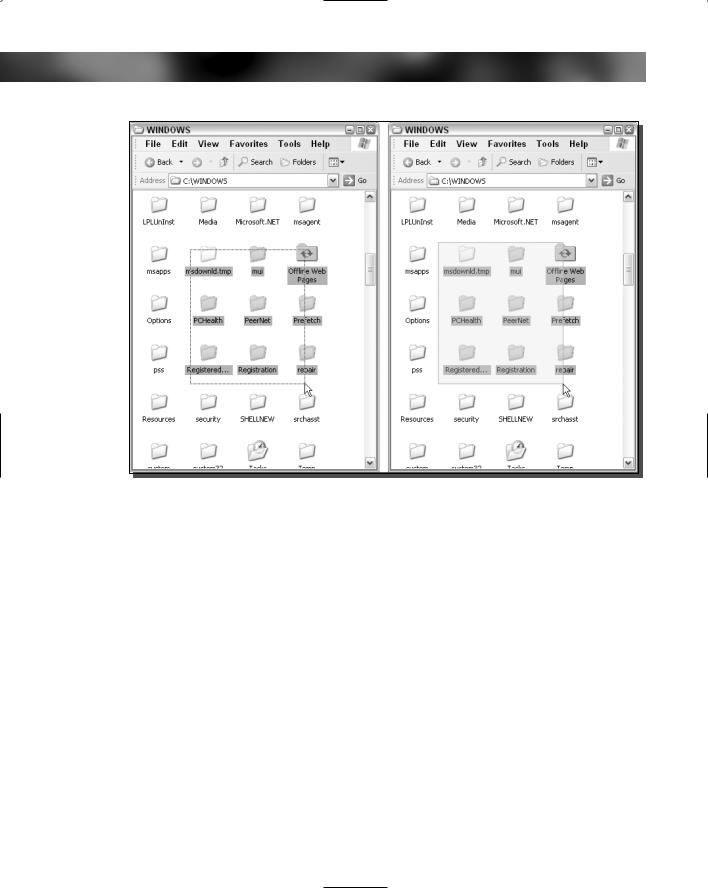
Show translucent selection rectangle : When this effect is enabled, you will see a nice-looking blue border with a semi-transparent blue interior when you drag the mouse to select items, instead of the old dotted line box as we have all seen in older versions of Windows. Figure 10-6 shows the two different types of selection rectangles. On older machines, I have seen this effect working very slowly and often interfering with the mouse’s selection
Chapter 10 — Making Your Computer More Responsive 241
FIGURE 10-5: Shadows under menus.
of items because it seems to use up a lot of the CPU. On the average computer, this effect presents no problems at all. If you have a slow machine, then disable this effect, but if you have an average machine, then keep it enabled and enjoy the nicer look.
Show window contents while dragging: This effect will not slow down the average computer but will cause some problems for users of older machines. On my older desktop that runs Windows XP, I have disabled this effect, and the system is now much more responsive.
Slide open combo boxes : This effect has no effect on performance at all. I do not see why anyone would want to disable this effect, but if you are the type of person that cannot wait an extra 50 milliseconds to view the contents of the combo box, then knock yourself out disabling this one.
Slide taskbar buttons : This feature has very little effect on system performance, but it may affect system responsiveness on older machines when the machine is doing a lot of work. You will notice this when you are doing something in the background and you can slowly
242 Part II — Increasing Your System’s Performance
FIGURE 10-6: Left: Normal selection rectangle; right: translucent selection rectangle.
see the taskbar items for open programs resizing. If you ever have that experience, go ahead and disable this effect.
Smooth edges of screen fonts : This feature seems to depend more on your video card than your system. Use of any type of font smoothing will require it to do more work. On older machines, I would disable this effect. Also, if you have a cathode ray tube type monitor, you will not benefit all that much by having this enabled. The font smoothing effects, especially ClearType, work best on TFT (Thin Film Transistor, also known as Active Matrix)–based flat panel monitors.
Smooth-scroll list boxes : This effect has no effect on performance based on my tests. You would have to be crazy to disable this effect, because it is just so cool.
Use background image for each folder type : This effect has a small effect on the performance of browsing through folders. On faster computers you won’t notice anything, but on the average and older computers, this is something that you can live without. On top of that, some of the background images are so light that they do not show up on some monitors, such as my old laptop’s LCD panel that does not have good contrast with light colors. My advice is to get rid of them.
Use common tasks in folders : This feature is nice–looking and makes Windows Explorer look different but it really is not very useful. It was born in Windows 98 SE and now has completely evolved into some massive navigation aid. I never find myself using the items
Chapter 10 — Making Your Computer More Responsive 243
on this menu. When you go to My Computer, it gives you the option to View System Information, Add or Remove Programs, or Change a Setting under the System Tasks block. It never seems to cross my mind to get to these features this way. Unless you are a beginner computer user, then go ahead and disable this feature. It will speed up your browsing through folders and will also allow you to view more files at once on your screen.
Use drop shadows for icon labels on the desktop : I have noticed that some older computers with bad video cards can benefit from this feature being disabled. Personally, this feature is a nice addition to Windows XP and I would always leave it enabled. However, if you don’t like the look, disable it and you will see a small benefit.
Use visual styles on windows and buttons : This effect is what makes Windows XP look so different from older versions of Windows. If you disable this effect, the whole new interface of Windows XP will be gone. If you do not like the new look and are one of the people that feel the interface was made for a child, disable this feature and you will see a big performance increase. But beware, the system will look like Windows 2000, as Figure 10-7 shows. The amount of free RAM will increase by a megabyte or two and the system will be much more responsive.
FIGURE 10-7: Windows XP naked.
244 Part II — Increasing Your System’s Performance
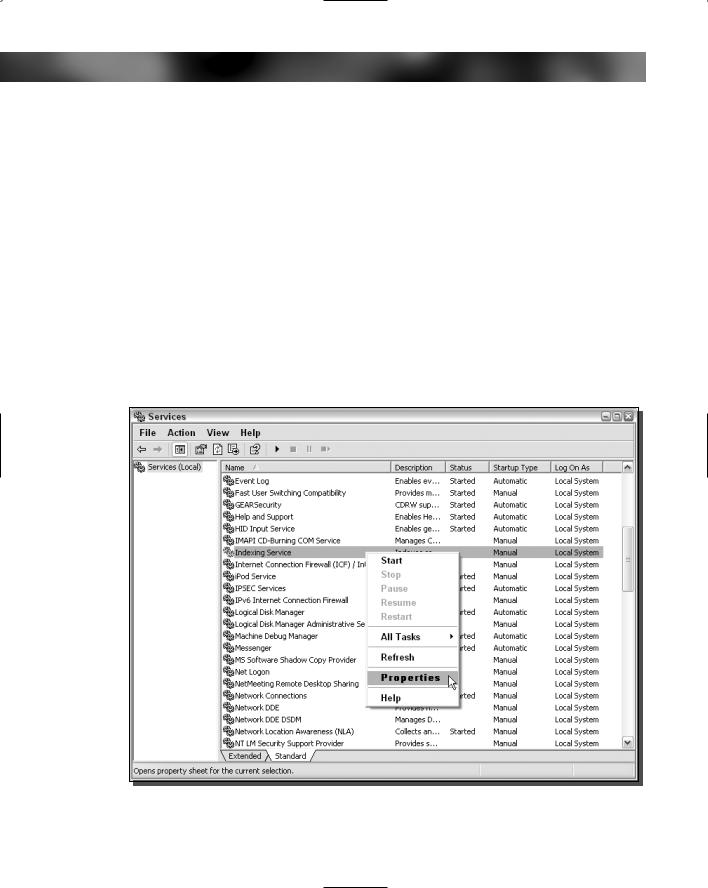
Disable Indexing Service
The Windows Indexing Service is a service that is designed to index all of the files on your computer into a database. Your computer can then search through all of your files faster. The idea behind the service is great; it will drastically cut down on the amount of time that is needed to search your hard drive. Although this is a great benefit, you have to consider the downside of this feature. In order to create a database of files, the service has to continuously monitor the files on your computer and import basic file details into its database when new files are found. The monitoring is not always done in real time, but at times you will notice it running. The most common symptom of this service working is when you are reading something on your computer and all of a sudden your hard drive starts making a lot of noise as if it is working really hard. That is because it is working hard to update the Indexing Service’s database.
Just like any other service that starts up when the system does, the Indexing Service takes up memory—quite a bit of memory compared to other services. In fact, the service takes up exactly 4364KB of memory when the service first starts up on your computer. Eventually, about 30 seconds after the service has started, the amount of memory used decreases to 306KB. This
FIGURE 10-8: Indexing Service Properties.
Chapter 10 — Making Your Computer More Responsive 245
looks good, but after you use your computer for a little while, the memory usage will start to creep up again. On average, the service takes up about 1316KB of memory.
When the service is idle on your computer, it is just taking up memory. Also, it is running at the lowest CPU priority, so you can be sure that it won’t interfere with other applications very much at all.
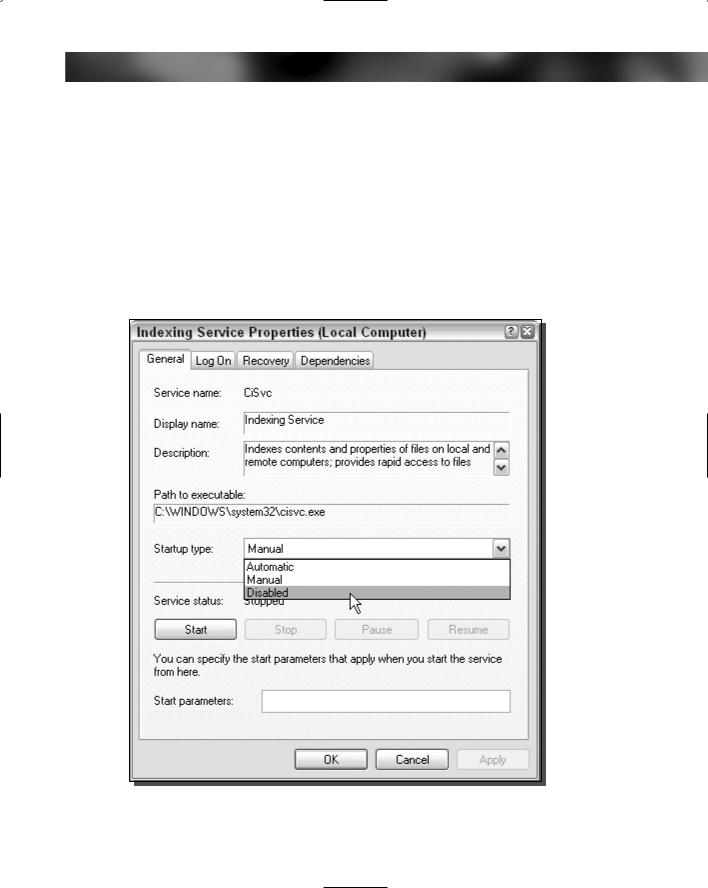
Personally, I rarely use the Search feature of Windows XP and would much rather disable the Indexing Service and take the performance hit the one time every few months that I actually do need to search for a file. In return, I get more free memory space that can be used for more useful services and applications. Follow these steps if you rarely search for files and would like some more free memory:
FIGURE 10-9: Setting the Indexing Service to Disabled.