

When browsing Roland disks, only Samples referenced by the selected Preset are displayed, unlike the Emulator where all Samples contained in the Bank are displayed.
_ Complete Roland Volumes cannot be loaded because they may contain multiple MIDIMaps. Load “All Patches” instead.
2 - Master Menu
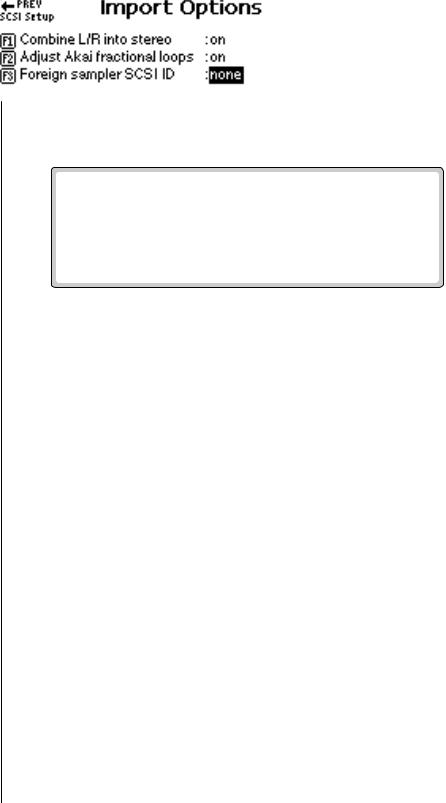
Import Options
Import Options
EOS can read Akai™ S1000, S1100, S3000 and Roland™ S-700 series disks. Samples, partials, patches, performances and volumes are automatically mapped into the appropriate Emulator parameters.
There are a few differences between these samplers and the Emulator. For this reason, some program parameters may be ignored during the conversion process. In most cases however, the converted programs and samples should sound and behave very much like the originals.
In the Roland disk structure, objects are allowed to exist outside of a containing parent object. For example in EOS, Samples are contained by Presets, which are contained by Banks and so on. In the Roland, samples can be saved by themselves outside a bank. To deal with this difference, a special browser item is added at the end of the Folder, Bank, Preset and Sample lists. These special objects are labeled “All” (as in All Patches) and contain all items of a particular type on the disk. This allows all objects on the disk to be browsed, including stray samples, presets or banks.
The following are descriptions of the EOS import options.
Combine L/R into Stereo: When this option is enabled, the Akai or Roland key groups are scanned for left/right samples that can be combined into a single stereo sample. If the first ten characters of the 12 character sample name match, and the last two characters are “-L” and “-R”, as in Akai stereo samples, they will be combined into a single stereo sample (if the loop lengths match, otherwise the samples will be kept separate, as they are in the Akai.)
Roland Stereo Conversion - Program parameters for the new stereo sample are taken from the left sample. The right side parameters are ignored. When this function is disabled, each sample is placed in a separate voice.
Akai Conversion: Allows you to select between a basic or full conversion.
•Basic - Converts samples and keymaps only. Use this option when you just want the samples converted and placed on the keyboard. (Without all the preset programming.)
•Full - Assembles complete presets, simulating the originals as closely as possible.
EOS 4.0 Software Manual 93

2 - Master Menu
Import Options
Limitations for Roland Imports
•Supports 512 byte/sector devices only.
•Translates tuning, keymap, velocity switching and positional crossfade only. No envelopes, modulation filter settings cords, etc.
•Imports only one forward loop.
Adjust Fractional Loops: The Akai S1000 implements sample looping differently than the Emulator. Because of this difference, some loops may “tick” slightly or appear out of tune after being transferred from the Akai. This function automatically repairs any incorrect sample loops after being transferred. Be advised that the transfer may take slightly longer (up to 15% more time) with Adjust Fractional Loops turned enabled.
Foreign Sampler SCSI ID: If you have a brand of sampler other than the Akai or Roland connected to the SCSI bus, EOS needs to know its SCSI ID in order to avoid SCSI conflicts. The Foreign SCSI ID should be entered before physically connecting the sampler onto the SCSI chain. You do NOT have to set this parameter for Akai or Roland formatted storage devices. EOS recognizes them automatically.
v To Set the Import Options:
1.Press the Master button. The LED illuminates and the Memory Statistics screen appears.
2.Press the Setup function key (F3). A second row of function keys appears.
3.Press the Import function key (F4). The Import Options menu appears.
4.Move the cursor to the desired option using the cursor buttons and change the parameter using the Data Entry Control or the INC/DEC buttons.
5.Press the Exit button twice to return to the Memory Statistics screen.
94 E-MU Systems

2 - Master Menu
Memory Configuration
Memory Configuration
Presets and Sequences are stored in CPU RAM. CPU RAM is totally unrelated to the amount of Sample RAM you have in your machine.
The E-IV, E4K, e-64 and e-6400 come with 1 MB of CPU RAM. The E4Xand E-Synth come with 4 MB of CPU RAM. The Ultra series contain 8 MB of CPU RAM. CPU RAM is used by sequences, presets and the system. The amount of usable RAM on a 1 MB machine is approximately half a megabyte. A unit containing 4 MB of CPU RAM has about 2.6 MB of usable CPU RAM. Ultras contain about 4 MB of usable CPU RAM.
The Memory Configuration control lets you adjust the balance of CPU RAM allocated between the sequencer and the presets. If you find that a sequence is too large to be loaded, you can increase sequence memory size. If you run out of preset space, simply increase the amount of RAM allocated to presets.
v To Set the Memory Configuration:
1.Press the Master button. The LED illuminates and the Memory Statistics screen appears.
2.Press the Setup function key (F3). A second row of function keys appears.
3.Press the Memory function key (F6). The Memory Configuration screen appears.
4.Adjust the Preset and Sequence Memory Size using the Data Entry Control or the INC/DEC buttons.
5.Press the Save button to save the changes or Cancel to return to the Memory Statistics screen.
EOS 4.0 Software Manual 95