

Introduction
Saving
O Save to an Empty Bank if you have edited presets and want to save the old bank as well as the edited bank.
O To save a single preset to a bank see “Export Preset” in the Preset Manage module.
Saving
When presets are loaded into the bank, you are free to edit any parameter in any preset. When you have everything the way you want it, SAVE the entire bank to the hard disk. Since nothing is made permanent until you Save it, you can play around with the presets to your heart’s content without worrying about ruining something.
When you get something you want to keep, then it's time to Save. If you don't save the bank, all changes will be lost as soon as you switch off power or load another bank.
v To Save a Bank:
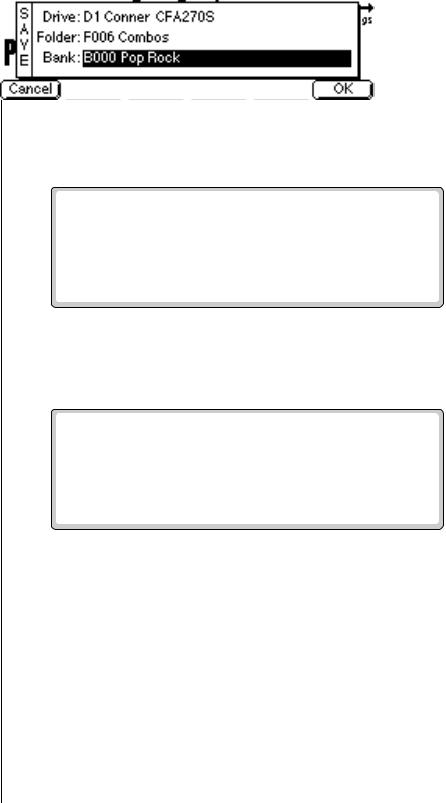
1.From the Main screen shown above, press the button directly under “Save…” on the screen (F5). The following screen appears.
2.Select the Bank location. The bank field defaults to the bank currently loaded. Press OK to overwrite the bank or select an empty bank if you want to save the bank as a new bank.
You can also save the bank to another folder or disk drive (if connected). Use the up/down cursor buttons to advance the cursor to the Folder or Drive field, then select the new destination.
3.Remember that Saving is permanent, so think twice before pressing OK. Press OK to Save the bank or Cancel to abort the operation and return to the main screen.
10 E-MU Systems

O The arpeggiated notes can be recorded into the sequencer and are transmitted on the MIDI Out port.
O The arpeggiator continues playing on the current MIDI channel if you switch to Multi mode.
None 1 Oct |
2 Oct |
3 Oct |
Introduction
Arpeggiator
Arpeggiator
An arpeggiator moves a pattern of notes sequentially over a range of the keyboard. EOS provides a performance-oriented arpeggiator which is powerful, yet quick and easy to use. It has several features including tap tempo, octave extension, note value divisor and control over how the extensions are played (up, down, or up and down or random). The arpeggiator plays on the Basic Channel and remembers the order of played notes.
v To Access the Arpeggiator:
1.From the main preset selection screen, press the Mode function key (F6). A new set of function keys appears.
2.Press the Arp function key (F5). The arpeggiator will be enabled and the function keys now control the arpeggiator functions.
|
|
|
|
|
|
|
|
|
|
|
|
|
|
|
|
|
|
|
|
Arp Off Octave |
Direction |
Note Tempo |
Go |
||||||
|
Extend |
|
|
Division |
Back |
||||
Octave Extension. The extension control shifts the arpeggio up the specified number of octaves each time the pattern is repeated. For example, suppose you played C2 with an Octave Extension value of 2. The arpeggiator advances the pattern 2 octaves in the direction specified. The extension can be set from 0-3 octaves.
v To Set the Octave Extension:
• Press the Octave Extension button (F2) to toggle between values.
2-oct Extension, Direction Up |
|
|
|
|
||||
|
|
|
|
Back |
|
|
|
|
2 |
1 |
3 |
5 |
4 |
6 |
8 |
7 |
9 |
|
|
|
Extend 1 |
Extend 2 |
||||
Played |
|
|
|
|
|
|
||
EOS 4.0 Software Manual 11
Introduction
Arpeggiator
Arpeggiator
Direction
Up 
Down
Up/Down
Random
Direction. The Direction parameter determines the direction or pattern of the arpeggiated notes. The held notes can be played forward, backward in an alternating forward/backward order or randomly. This setting also affects the order of the octave extensions.
v To Set the Arpeggiator Direction:
•Press the Direction button (F3) repeatedly until the desired direction is displayed on the screen. See the illustration at left for a description of the direction display.
Division. The speed of the arpeggiator is determined by both the tempo and the tempo divisor. The following divisors are available: 1/2 note, 1/2 note triplet, 1/4 note, 1/4 note triplet, 1/8 note, 1/8 note triplet, 1/16 note, 1/16th note triplet, 1/32 note, 1/32 note triplet. The division is particularly useful if you are synced to an external MIDI clock.
Triplets. Access the arpeggiator from Multimode and turn Triplets On. Triplets will remain on even if you switch back to Omni or Poly modes.
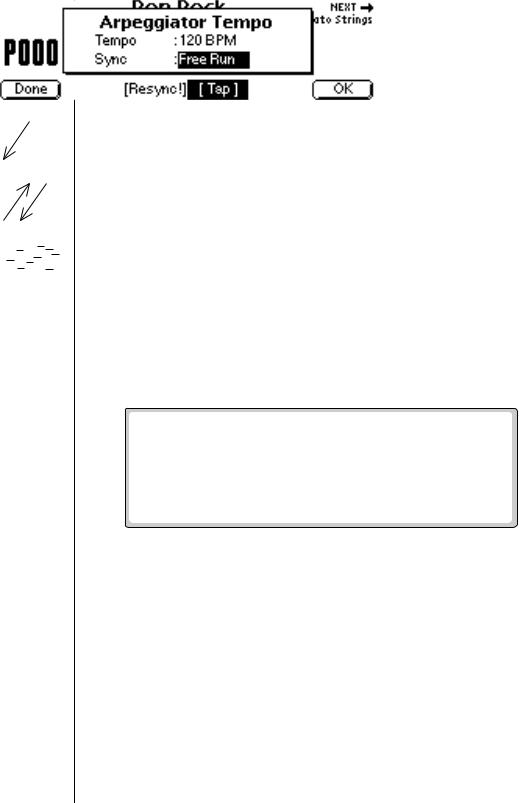
Tempo. The Tempo parameter, used with the Division parameter, determines the speed of the arpeggiator. There are two ways of defining the arpeggiator tempo; by entering it numerically or by using the Tap Tempo feature.
v To Enter the Tempo Numerically:
1.Press the Tempo function key (F5) to access the Arpeggiator Tempo screen.
2.Place the cursor over the tempo field and enter the desired tempo using the Data Entry Control, INC/DEC buttons or the Numeric Keypad.
3.Press Done (F1) or OK (F6) to return to the main Arpeggiator menu from the Tempo submenu. If you changed the status of the Sync function, it will be saved to EEPROM.
12 E-MU Systems

Introduction
Arpeggiator
v To use the Tap Tempo function:
1.Press the Tempo function key (F5) to access the Arpeggiator Tempo screen.
2.Tap the F4 button at the desired tempo at least four times to define a new tempo. After the first four taps, the tempo updates the average tempo with each subsequent tap.
3.Press Done (F1) or OK (F6) to return to the main Arpeggiator menu from the Tempo submenu. If you changed the status of the Sync function, it will be saved to EEPROM.
You can control the ReSync! Resets the Arpeggiator clock at the exact moment the Resync arpeggiator using an external button is pressed. This lets you synchronize with another beat as you play,
MIDI Clock by setting the |
even if the two clocks are not locked together. |
|
sequencer to an external clock |
|
|
(Sequencer, Global, Setup). |
Key Sync/Free Run. The Sync parameter defines when a note is played in |
|
|
||
|
relation to when the key is pressed. When set to Key Sync, the note sounds |
|
|
the instant a key is pressed. When set to Free Run, the note will not sound |
|
|
until the next arpeggiator clock cycle. The new Sync value is saved to the |
|
|
internal EEPROM. |
|
|
The arpeggiator and sequencer use the SAME CLOCK and tempo. Changes |
|
|
in either menu will affect both functions. |
|
|
v To Arpeggiate: |
|
|
1. |
Press the Mode function key (F6) from the preset selection screen. |
|
|
A new row of function keys appears. |
|
2. |
Press the Arp function key (F5). The arpeggiator is enabled and the |
O The arpeggiated notes |
|
function keys now control the arpeggiator functions. |
3. |
Play a chord. The notes you are holding should now be arpeggiating. |
|
can be recorded into the |
|
Change the note division or go to the tempo submenu to change the |
sequencer and are transmitted |
|
speed. Explore all the arpeggiator controls. Have fun! |
on the MIDI Out port. |
4. |
Press ArpOff (F1) to turn off the Arpeggiator. |
|
||
|
|
Note: You can leave the Arpeggiator menu with the Arpeggiator on. |
|
|
Simply return to the Arp menu to turn it off again. |
|
5. |
Press Run to start and Stop to stop arpeggiating. Press Done, OK, Exit |
|
|
or Enter to leave the Arpeggiator. |
EOS 4.0 Software Manual 13