

2 - Master Menu
MIDI Preferences
MIDI Preferences
This submenu contains several additional global MIDI functions.
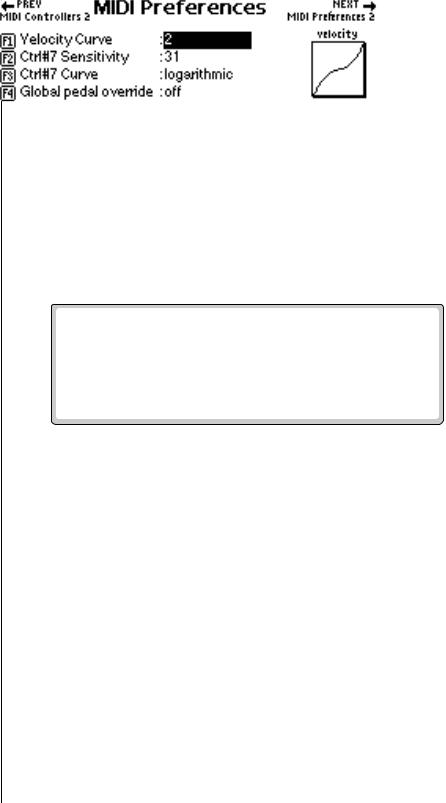
Velocity Curve
Incoming velocity values can be scaled by one of fourteen curves to better adapt to your playing style or MIDI controller. Selecting “linear” leaves the velocity data unaltered. The shape of the selected curve is displayed in the window. Select the curve that works best for you.
v To Set the Velocity Curve:
1.Press the Master button. The LED illuminates and the Memory Statistics screen appears.
2.Press the MIDI function key (F6). The MIDI Globals sub menu appears.
3.Press the Prefs 1 function key (F4). The MIDI Preferences submenu appears.
4.Move the cursor to Velocity Curve using the cursor buttons or the F1 key.
5.Set the Velocity Curve using the Data Entry Control, or INC/DEC buttons.
6.Press the Exit button twice to return to the Memory Statistics screen.
Controller #7 Sensitivity
This function allows you to modify the response curve for MIDI continuous controller #7 (Volume). This allows you to match the Emulator's response to other manufacturer's equipment. Low numbers compress the volume control range, raising the volume level at lower controller #7 values. The action of this control is displayed in the curve display on the right side of the screen.
v To Adjust MIDI Controller #7 Sensitivity:
1.Press the Master button. The LED illuminates and the Memory Statistics screen appears.
2.Press the MIDI function key (F6). The MIDI Globals submenu appears.
110 E-MU Systems

2 - Master Menu
MIDI Preferences
3.Press the Prefs 1 function key (F4). The MIDI Preferences 1 submenu appears.
4.Move the cursor to Ctrl #7 Sensitivity or use the F2 key.
5.While sending controller #7 messages adjust the sensitivity using the Data Entry Control, or INC/DEC buttons.
6.Press the Exit button twice to return to the Memory Statistics screen.
Controller #7 Curve
This is another adjustment to help match the Emulator to other manufacturer's equipment. Three curves are provided: Linear, Squared or Logarithmic. The action of this control is displayed in the curve display on the right side of the screen.
v To Adjust MIDI Controller #7 Curve:
1.Press the Master button. The LED illuminates and the Memory Statistics screen appears.
2.Press the MIDI function key (F6). The MIDI Globals sub menu appears.
3.Press the Prefs 1 function key (F4). The MIDI Preferences 1 submenu appears.
4.Move the cursor to Ctrl #7 Curve or use the F3 function key.
5.While sending controller #7 messages adjust the curve using the Data Entry Control, or INC/DEC buttons.
6.Press the Exit button twice to return to the Memory Statistics screen.
Global Pedal Override
This feature, when enabled, overrides any footpedal assignments made in the preset and forces the footpedal to become a master volume pedal which emulates the front panel volume control.
v To Turn Global Pedal Override On/Off
1.Press the Master button. The LED illuminates and the Memory Statistics screen appears.
2.Press the MIDI function key (F6). The MIDI Globals sub menu appears.
3.Press the Prefs 1 function key (F4). The MIDI Preferences 1 submenu appears.
4.Move the cursor to Global Pedal Override using the cursor buttons or the F4 function key.
5.Turn Global Pedal Override On or Off using the Data Entry Control, or INC/DEC buttons.
6.Press the Exit button twice to return to the Memory Statistics screen.
EOS 4.0 Software Manual 111

2 - Master Menu
MIDI Preferences
To Change Program Banks via MIDI, send:
1)Continuous Controller 00 = 0
2)Cont. Controller 32 = Bank #
3)Program Change
This allows you to access presets higher than 128 via MIDI.
On your sequencer: Use Continuous Controller #32
Program Change commands will not be transmitted while EOS is in Multi mode.
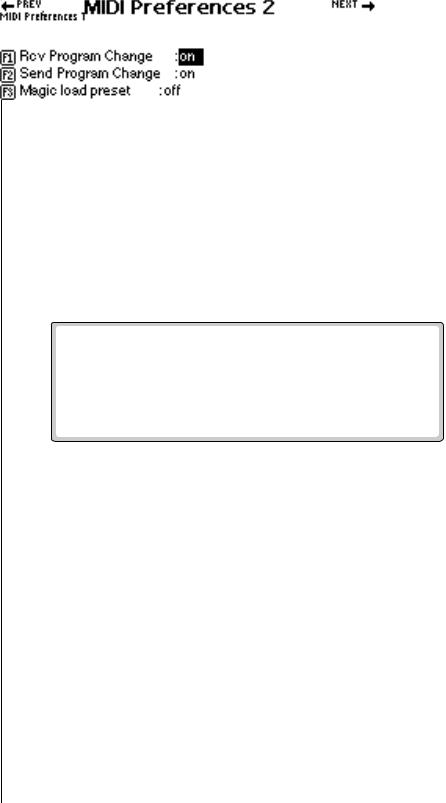
Receive Program Change On/Off
With Receive Program Change turned on, EOS applies any incoming MIDI program change commands. If disabled (turned off), MIDI program changes are ignored by the system.
v To Turn Receive Program Change On/Off
1.Press the Master button. The LED illuminates and the Memory Statistics screen appears.
2.Press the MIDI function key (F6). The MIDI Globals sub menu appears.
3.Press the Prefs 2 function key (F5). The MIDI Preferences 2 submenu appears.
4.Move the cursor to Receive Program Change On/Off using the Cursor buttons or the F1 key.
5.Turn Receive Program Change On or Off using the Data Entry Control, or INC/DEC buttons.
6.Press the Exit button twice to return to the Memory Statistics screen.
Send Program Change On/Off
With the Send Program Change enabled, MIDI program change commands are sent to the MIDI Out port. If disabled, preset change commands are not delivered to the MIDI out port. Enable this feature if you want to send MIDI Program Change commands to another instrument or unit through the MIDI out connection on the Emulator.
v To Send Program Change:
1.Press the Master button. The LED illuminates and the Memory Statistics screen appears.
2.Press the MIDI function key (F6). The MIDI Globals submenu appears.
3.Press the Prefs 2 function key (F5). The MIDI Preferences 2 submenu appears.
4.Move the cursor to Send Program Change On/Off using the cursor buttons or the F2 key.
5.Turn Send Program Change On or Off using the Data Entry Control, or INC/DEC buttons.
6.Press the Exit button twice to return to the Memory Statistics screen.
112 E-MU Systems
O Make sure to send the two program changes as separate events. Some sequencers send only one program change if the two are located on the same beat.
2 - Master Menu
MIDI Preferences
Magic Load Preset
This feature lets a MIDI command load banks from the hard disk. The “Magic Preset” is a preset number that causes the next preset change command to load that bank number from the hard disk. Therefore, to load a hard disk bank over MIDI, send two program change commands, the Magic Preset and the bank number. As an example, if the Magic Preset is set at “P85,” and the Emulator receives a preset change command of 85 followed by a preset change command of 11, the Emulator loads bank 11 from the current drive and folder on the current hard disk. The Magic Preset can be turned off or set to any preset number from 0 to 127.
v To Set the Magic Preset
1.Press the Master button. The LED illuminates and the Memory Statistics screen appears.
2.Press the MIDI function key (F6). The MIDI Globals sub menu appears.
3.Press the Prefs 2 function key (F5). The MIDI Preferences 2 submenu appears.
4.Move the cursor to Magic Load Preset using the cursor buttons or the F3 function key.
5.Set the Magic Preset using the Data Entry Control, or INC/DEC buttons.
6.Press the Exit button twice to return to the Memory Statistics screen.
EOS 4.0 Software Manual 113
2 - Master Menu
114 E-MU Systems