

5 - Sample Manage
Sample Utilities
Sample Utilities
The Sample Utilities menu contains several functions.
•Erase Sample
•Copy Sample
•Sample Dump
•Defragment Memory
Erase Sample
The Erase Sample operation erases individual samples from the bank.
v To Erase a Sample:
1.Press the Sample Manage key. The LED illuminates and the main screen appears.
2.Select the sample to be erased using the Data Entry Control, INC/DEC keys, or the numeric keypad.
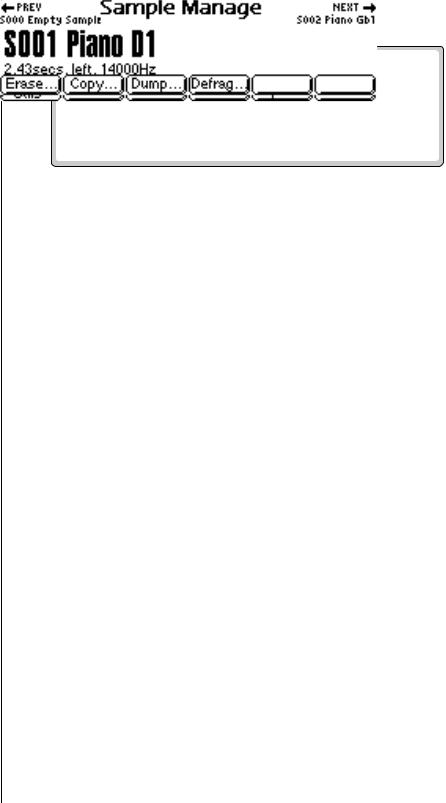
3.Press the Utils function key (F1). A second row of function keys appears.
4.Press the Erase… function key (F1). A pop-up dialog box appears asking if you want to erase the selected sample.
5.Press OK to erase the sample. Another dialog box appears asking if you want to de-fragment the memory after erasing the sample.
6.Press Yes to defragment memory and erase the sample. Press No to erase the sample without defragmenting memory, or press Cancel to cancel the entire operation.
174 E-MU Systems

5 - Sample Manage
Sample Utilities
Copy Sample
For more information Copying a sample duplicates the sample data so you can edit the copy and about Defragmenting Memory, preserve the original sample. You can copy a sample to an empty sample see“Defragment Memory” on number or overwrite an existing sample number.
page 177
v To Copy a Sample:
1.Press the Sample Manage key. The LED illuminates and the main screen appears.
2.Select the sampe you want to copy using the Data Entry Control or the INC/DEC keys. The Sample Clipboard can also be selected.
3.Press the Utils function key (F1). A second row of function keys appears.
4.Press the Copy… function key (F2). A pop-up dialog box appears asking you to select the destination sample location.
5.Select the destination sample location using the Data Entry Control, INC/DEC keys or the numeric keypad.
If you choose a destination that already contains a sample, the system asks you if you want to overwrite the existing sample before continuing.
6.Press OK to copy the sample or Cancel to cancel the operation.
Sample Dump
MIDI Sample Dump lets you transfer sample data to and from the Emulator using the MIDI Sample Dump Standard. This is a way of transferring samples to and from other samplers. Although none of the preset parameters are transferred, sample loop data is retained. If imported samples have loop problems such as “ticks or pops”, the Sample Integrity function (Sample Edit, Utilities) may be able to automatically repair them. Otherwise adjust the loop points.
Sample data can be transmitted with a word size of either 14 or 16 bits (some instruments require the use of the 14 bit word size). Use 14-bit mode for instruments that use 14 bits or less to transmit data 30% faster.
Before initiating MIDI Sample Dump, make sure that the MIDI cables are properly connected. A single MIDI cable (open-loop) is sufficient but the data transfers much faster if two MIDI cables are used (closed-loop). The closed-loop allows the two units to handshake and prevents idle time between each data packet. Connect the cables between the MIDI In and MIDI Out of both units.
In the MIDI Sample Dump Standard and in EOS, samples are assigned numbers and these numbers are maintained throughout the transfer. For example, sample #36 transferred from another device to the Emulator overwrites the existing sample #36 on the Emulator.
EOS 4.0 Software Manual 175
5 - Sample Manage
Sample Utilities
v To Send or Receive a Sample:
1.Connect the MIDI IN to the MIDI OUT connectors on both units, using MIDI cables.
2.Press the Sample Manage key. The LED illuminates and the main screen appears.
3.Select the sample to be transmitted or received using the Data Entry Control, INC/DEC keys, or the numeric keypad.
4.Press the Utils function key (F1). A second row of function keys appears.
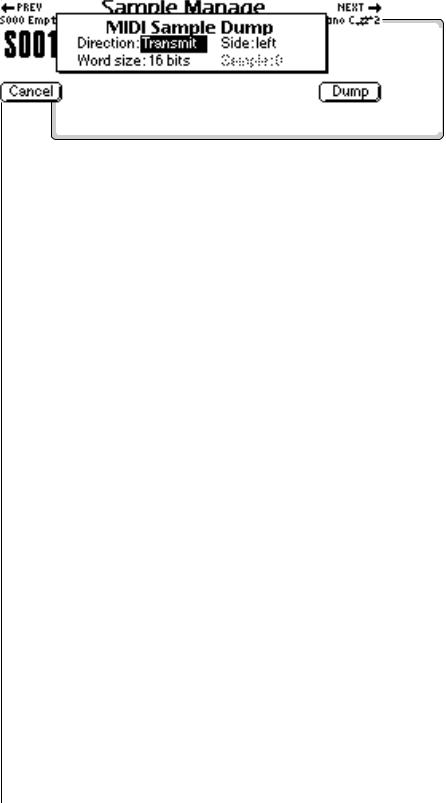
5.Press the Dump… function key (F3). A pop-up dialog box appears with several choices.
•Direction: Select Transmit or Receive.
•Word Size: Select 14 or 16 bits.
•Side: If the sample is stereo, you have the option to select the right or left side.
6.Select the sample using the Data Entry Control, INC/DEC keys or the numeric keypad.
7.Press OK to dump the sample or Cancel to cancel the operation.
When receiving a sample, the currently selected sample will be overwritten by the incoming sample.
176 E-MU Systems
5 - Sample Manage
Sample Utilities
Defragment Memory
When samples are erased or truncated, empty spaces are left in sample memory until the bank is saved to disk
Because the memory space is not filled efficiently, we call this condition “Fragmented Memory”. Fragmented memory may limit new sample size, even though you have plenty of memory left. This function allows you manually de-fragment the memory. Memory is automatically defragmented when a bank is saved to disk.
v To Defragment Sample Memory:
1.Press the Sample Manage key. The LED illuminates and the main screen appears.
2.Press the Utils function key (F1). A second row of function keys appears.
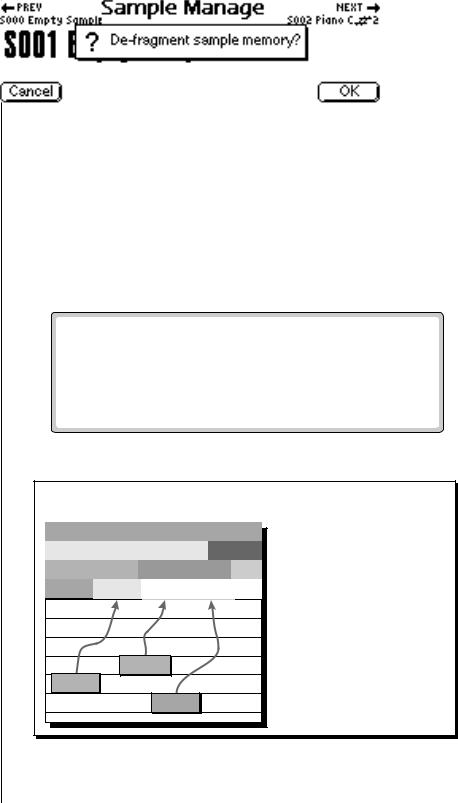
3.Press the Defrag… function key (F4). A pop-up dialog box appears asking you if you want to de-fragment sample memory.
4. Press OK to defragment memory or Cancel to cancel the operation.
Sound Memory
|
Sample |
|
|
Sample |
|
Sample |
Sample |
|
Sample |
Sample |
Sample Sample |
|
Sample |
|
Sample |
|
|
|
|
Sample |
Defragmenting Sample Memory collects stray samples and packs them together in one chunk.
EOS 4.0 Software Manual 177