

6 - Sample Edit
Loop
Tools 1
This submodule contains the basic digital processing tools listed below.
Looping: Looping repeats a section of the sample continuously as long as the key is held. This allows a short sample to sustain indefinitely.
Digital Tuning: Digitally retunes a sample within a range of ±1 octave.
Sample Rate Convert: Converts the sample to any sample rate between 7000 Hz and 200000 Hz.
Sample Calculator:.A handy utility to help you calculate the sample rates needed for perfect single-cycle loops.
Loop
If you have a difficult time finding good loop points, the Auto Correlation function can assist you. If Auto Correlation doesn’t produce acceptable results, the beginning and end of a loop can be crossfaded to help mask loop discontinuities. For more information, see “About Looping” at the beginning of this section.
•Adjust the zero crossing threshold according to the type of wave you are looping. A setting of -96 dB is most sensitive and can be used for finding the start point of a sound. Settings closer to -30 dB are less sensitive and suited for finding zero-crossings in complex waves. See Zero Crossing Threshold on page 88 for more information.
v To Set the Loop Points
1.Press the Sample Edit key. The LED illuminates and the main sample edit screen appears.
2.Select the sample that you want to loop using the Data Entry Control, INC/DEC keys, or the numeric keypad.
EOS 4.0 Software Manual 207
6 - Sample Edit
Loop
O Looping is an art which takes a bit of practice to learn. Auto Correlate works best when you have already found a fairly good loop point by ear. Several different types of tools are provided to help you loop almost any sound.
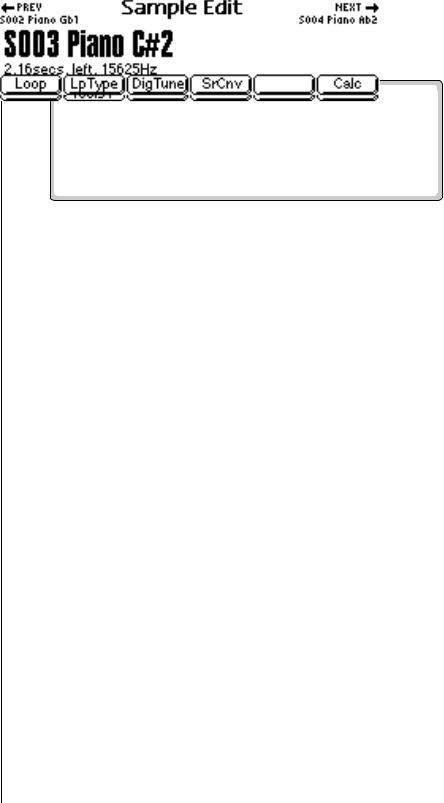
3.Press the Tools 1 function key (F2). Another row of function keys appears.
4.Press the Loop function key (F1). The following screen appears.
Waveform Display
Editing
Fields
Fix |
Zoom Zoom In |
Auto |
Loop Size |
Out |
Correlate |
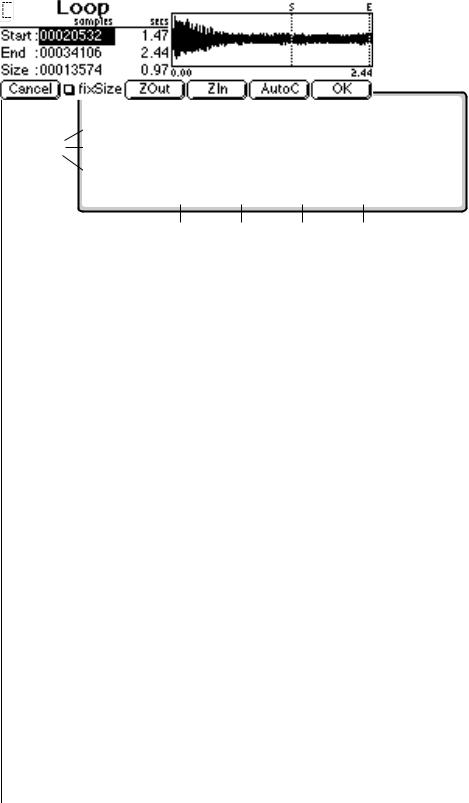
•Editing Fields: Move the cursor to the desired field to change the Start, End or Size of the loop. The Loop Start Loop End and Loop Size parameters can be independently changed. Press the Fix Size button to keep the loop size constant.
Fix Size Button: When the box is checked, the Loop Size parameter is locked at the current value. This is handy when you have found the right size loop and are looking for a better start point.
Fix Size is very useful for creating groove loops and single cycle loops.
•Auto Correlate: Analyzes the waveform to find likely loop points. With Fix Size On, the Start Point of the Loop is adjusted.
With Fix Size Off, the End Point is adjusted.
•Zoom In: Magnifies the waveform to display fine detail and brings up the loop window.
•Zoom Out: Reverses the effect of Zoom In and displays the entire sample.
When you Zoom In on the waveform, the Loop Window appears. The loop window magnifies the splice point of the loop as shown by the bracketed area in the diagrams below.
The line in the center of the magnified loop window shows the exact splice point of the loop. You can use the left and right cursor keys to select zerocrossings for the loop start.
208 E-MU Systems
6 - Sample Edit
Loop
O Use larger crossfade loop sizes with complex sounds; shorter sizes when you simply want to mask a slight tick in the loop.
You cannot Undo loop points.
5.Press the Auto Correlate function key (F5) if you want help in finding likely loop points.
6.Press OK when you have a good loop. The following screen appears with several more looping tools.
•Compress Loop: Compression “evens out” the level changes during the loop portion which are perceived as amplitude modulation or “breathing” effects.
•Truncate: (After Loop) Discards any information after the loop end point in order to conserve memory.
•Crossfade Size: (Crossfade Loop) This function smoothly crossfades between the waves on either side of the loop so that the waveform at the loop point is identical. Since Crossfade Looping alters the sound data, you may notice timbral or amplitude variations. A size of 0.00 disables crossfade looping.
|
|
Size |
|
|
|
|
|
Data from |
… into the |
||
this area is |
|
data in |
|
mixed… |
this area. |
||
Crossfade Looping
Loop |
Loop |
Start |
End |
•Crossfade Type - Equal Power: This is a weighted crossfade that produces no apparent level shift, and is the commonly used mode.
•Crossfade Type - Linear: This provides a straight mathematical crossfade. Use linear mode with samples whose splice points are already close to optimum, such as a sample that has already been auto correlated.
7.Press OK to perform the operations or continue. Press Cancel to cancel the loop operation.
EOS 4.0 Software Manual 209

6 - Sample Edit
Loop Type
_ Samples imported from the EIII having forwards/ backwards loops will play back on the Ultra. However, the loop data will be permanently modified to contain the forwards/backwards sound data. Changing the loop points on imported forwards/ backwards loops could have unpredictable results and is not recommended.
Loop Type
This submenu allows you to turn looping On or Off and to select whether the Loop in Release function is On or Off.
v To Set the Loop Type
1.Press the Sample Edit key. The LED illuminates and the main sample edit screen appears.
2.Select the sample that you want to loop using the Data Entry Control, INC/DEC keys, or the numeric keypad.
3.Press the Tools 1 function key (F2). Another row of function keys appears.
4.Press the LpType function key (F2). The following screen appears.
5.Select Loop Type as either On or Off.
•Off: The loop is disabled and the sample plays as recorded.
•On: The sample plays normally until it reaches the end of the loop. It then jumps back to the start point and replays through the loop. Upon reaching the loop end, it again replays the loop. This looping process continues for as long as the key is pressed.
6.Select whether Loop in Release is On or Off.
•Off: Lifting your finger off a key initiates the release phase of the amplifier envelope in the voice. If Loop in Release is off, the loop will not continue during the release phase. The portion of the sample after the loop will be played during release. The signal may cut off abruptly after you remove your fingers from the keys if the sample has been truncated after the loop.
•On: With Loop in Release on, the loop keeps playing—even after you lift your finger off the key—for the duration of the amplifier envelope release.
7.Press OK to enter the new values or Cancel to cancel your changes.
210 E-MU Systems