

2 - Master Menu
MIDI Mode
O The Basic Channel can also be set from the Multi mode screen on the E4K or E-Synth Keyboard. Simply select the desired channel and press the SetBCh function key (F2).
MIDI Mode
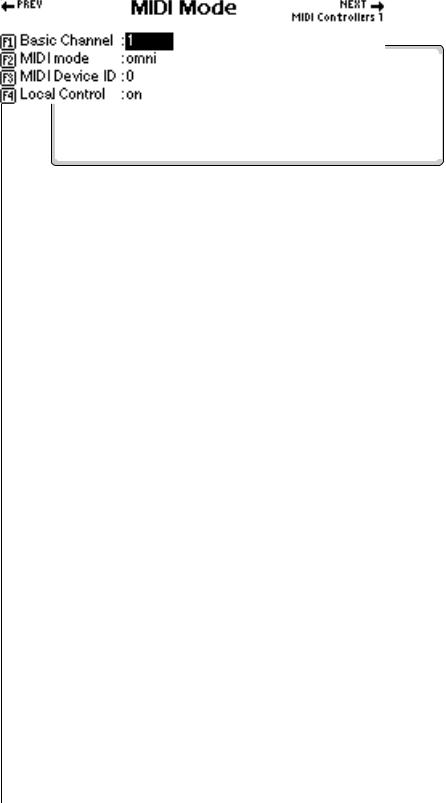
Basic Channel
The Basic MIDI Channel is the channel transmitted through the MIDI Out port (on the E4K and E-Synth Keyboard) and is the channel that will be recorded into the sequencer. It is also used in the special case of Poly mode. In Poly mode, MIDI data is only received on the selected basic channel and data on all other channels is ignored.
v To Set the Basic MIDI Channel
1.Press the Master button. The LED illuminates and the Memory Statistics screen appears.
2.Press the MIDI function key (F6). The MIDI Globals sub menu appears.
3.Press the Mode function key (F1). The MIDI Mode menu appears.
4.Move the cursor to Basic Channel using the cursor buttons or the F1 key.
5.Set the Basic MIDI channel using the Data Entry Control, or INC/DEC buttons.
6.Press the Exit button twice to return to the Memory Statistics screen.
MIDI Mode
Any of three MIDI modes can be used:
Omni Mode. Receives MIDI data on any and all channels at once and plays the current preset.
Poly Mode. Receives MIDI data only on the basic channel and plays the current preset.
Multimode. Receives MIDI data on any and all channels at once and plays the preset assigned to each MIDI channel as assigned in the main Multi mode screen.
EOS 4.0 Software Manual 103
2 - Master Menu
MIDI Mode
v To Change the MIDI Mode:
1.Press the Master button. The LED illuminates and the Memory Statistics screen appears.
2.Press the MIDI function key (F6). The MIDI Globals submenu appears.
3.Press the Mode function key (F1). The MIDI Mode menu appears.
4.Move the cursor to MIDI mode using the cursor buttons or the F2 function key.
5.Change the MIDI mode using the Data Entry Control, or INC/DEC buttons.
6.Press the Exit button twice to return to the Memory Statistics screen.
MIDI Device ID
This function allows an external SysEx programming device to distinguish between multiple Emulator units. In this case, each Emulator should have a different ID number. When transferring SysEx data between two EOS units, the ID numbers must be the same. Got it?
v To Change the MIDI Device ID:
1.Press the Master button.
2.Press the MIDI function key (F6).
3.Press the Mode function key (F1).
4.Move the cursor to MIDI Device ID using the cursor buttons or the F3 function key.
5.Change the Device ID using the Data Entry Control, or INC/DEC buttons.
6.Press the Exit button twice to return to the Memory Statistics screen.
104 E-MU Systems
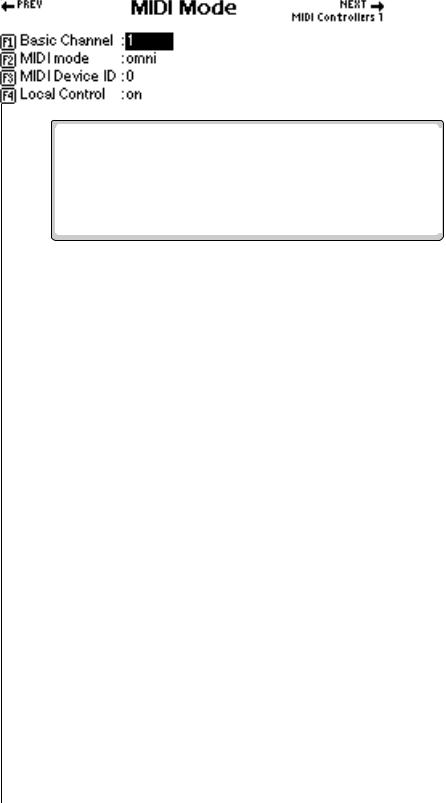
Local Control is available only on E4K and E-Synth Keyboards.
2 - Master Menu
Local Control
Local Control
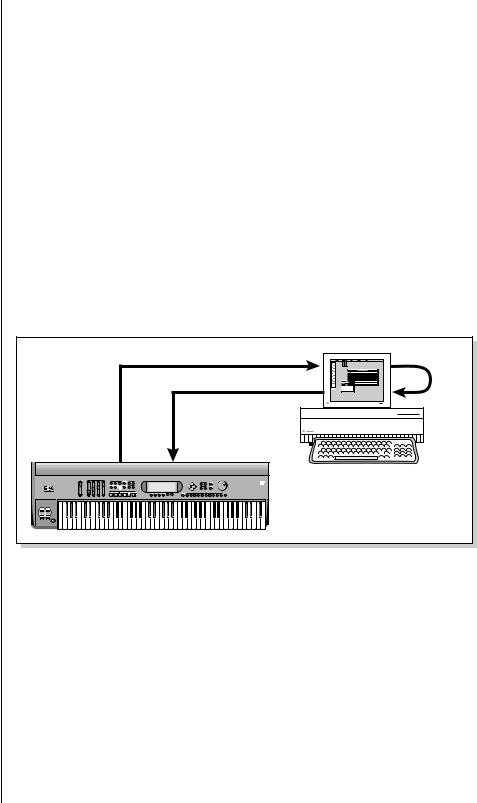
Local Control is used to disconnect the keyboard and controllers (wheels, sliders, pedals, etc.) from the sound generating section. The keyboard and controls are still transmitted over MIDI however. Local Control is normally turned Off when recording into a MIDI sequencer (set sequencer to Echo Thru).
v To Turn Local Control On or Off:
1.Press the Master button. The LED illuminates and the Memory Statistics screen appears.
2.Press the MIDI function key (F6). The MIDI Globals sub menu appears.
3.Press the Mode function key (F1). The MIDI Mode menu appears.
4.Move the cursor to Local Control using the cursor buttons or the F4 key.
5.Turn Local Control On or Off using the Data Entry Control, or INC/ DEC buttons.
6.Press the Exit button twice to return to the Memory Statistics screen.
|
KYBD Data |
|
|
Sequencer & KYBD Data |
Echo |
|
Thru |
|
|
|
Computer Sequencer |
MIDI Out |
MIDI In |
|
|
EMULATOR |
|
Turning Local Control Off allows you to use the Echo Thru feature on your sequencer while sequencing. If Local Control were turned on in the example above, notes played on the keyboard would be echoed back by the sequencer and sound twice.
EOS 4.0 Software Manual 105
2 - Master Menu
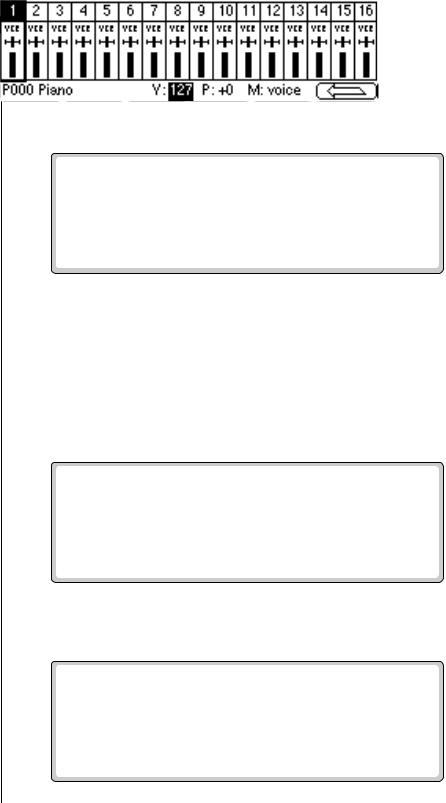
Multimode - MIDI Mix
Multimode - MIDI Mix
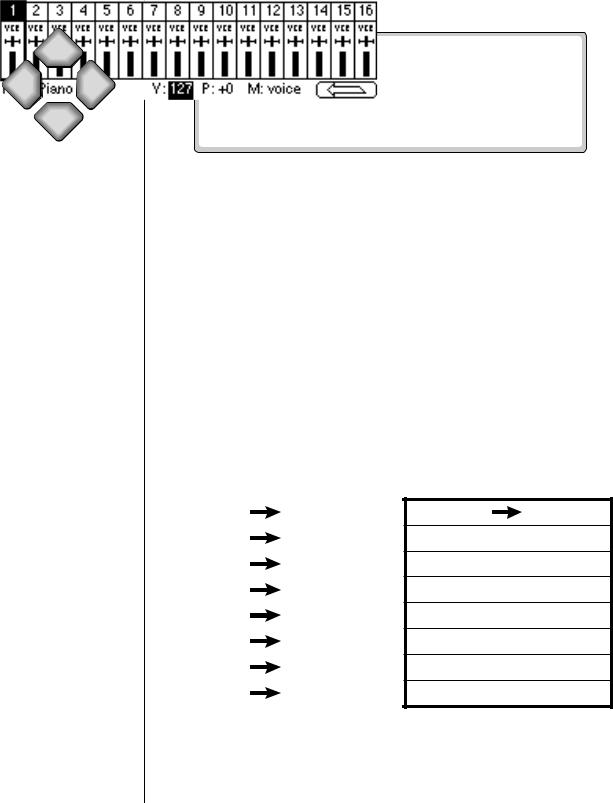
When Multimode is selected as the MIDI mode, the main display transforms from a single preset selection screen into a MIDI Mix screen. The MIDI Mix screen allows you to display and adjust the preset, volume, pan settings and output assignments for up to 32 MIDI channels. This is a useful feature to fine tune multi-timbral sequences. This screen also allows you to override the output channel programmed in the voice. Any volume, pan and preset changes made over MIDI will be reflected in this display.
Volume = MIDI continuous controller chan. #7
Pan = MIDI continuous controller chan. #10
v To Change the MIDI Mix
1.Set the MIDI mode to Multi as described on the previous page or simply select Multi after pressing the Mode button on the main preset screen.
2.Use the up/down cursor to select the MIDI channel. The selected channel will be recorded on the first track.
•Press the Right Arrow button to display (or change) the values of MIDI controllers A-H. These values can also be edited just as if you were moving the actual controller.
3.Press the View button to toggle the MIDI Mix back to graphic display mode.
106 E-MU Systems
Up
Left Right
Down
Pan ADDS to the pan setting made in the voice and is not an absolute pan setting.
To Change Program Banks via MIDI, send:
1)Continuous Controller 00 = 0
2)Cont. Controller 32 = Bank #
3)Program Change
This allows you to access presets higher than 128 via MIDI.
On your sequencer: Use Continuous Controller #32
2 - Master Menu
Multimode - MIDI Mix
4. Select the desired MIDI channel using the up/down cursor buttons.
5.Select preset, volume, pan or the output channel using the left/right cursor buttons. Change the parameter values using the Data Entry Control, the INC/DEC buttons, or the numeric keypad.
6.Set the keyboard mode to "whole" to change the main screen back to a single preset display format.
7.Press the left arrow function key (F6) and then the View function key to change the display to list view mode.
The list view screen displays the values of the pitch and modulation wheels. The amounts of the wheels can also be adjusted, just as if you were moving the wheels to the left of the keyboard.
v If you have an Ultra or a MIDI Channel Expander Card Installed:
1.Press the Next key to view the additional MIDI channels. The diagram below shows how the MIDI channels on the expander port correspond to internal channels.
Incoming |
Internal |
Chan 1 |
Chan 17 |
|
|
Chan 2 |
Chan 18 |
|
|
Chan 3 |
Chan 19 |
Chan 4 |
Chan 20 |
|
|
Chan 5 |
Chan 21 |
|
|
Chan 6 |
Chan 22 |
|
|
Chan 7 |
Chan 23 |
|
|
Chan 8 |
Chan 24 |
|
|
Incoming Internal
Chan 9 |
Chan 25 |
Chan 10  Chan 26
Chan 11  Chan 27
Chan 12  Chan 28
Chan 13  Chan 29
Chan 14  Chan 30
Chan 15  Chan 31
Chan 16  Chan 32
EOS 4.0 Software Manual 107