

16 |
Part I: Introduction to C++ Programming |
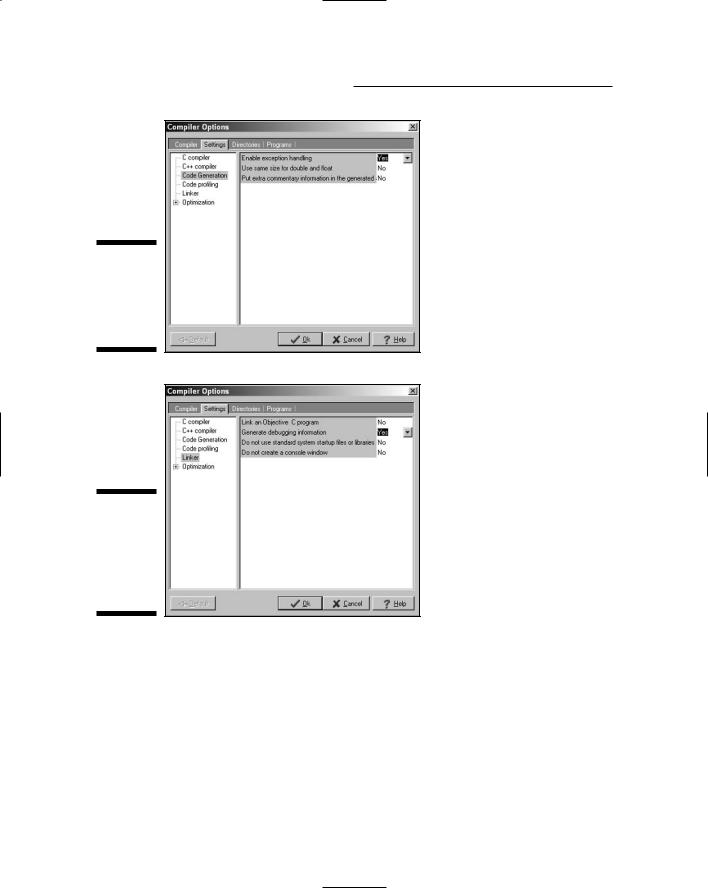
Figure 1-5:
The Enable Exception Handling option must be enabled.
Figure 1-6:
The Generate Debugging Information option must be enabled.
5.Choose OK.
Installation is now complete! (Your options are saved automatically.)
Creating Your First C++ Program
In this section, you create your first C++ program. You first enter the C++ code into a file called CONVERT.CPP, and then convert the C++ code into an exe cutable program.

Chapter 1: Writing Your First C++ Program |
17 |
Entering the C++ code
The first step to creating any C++ program is to enter C++ instructions using a text editor. The Dev-C++ user interface is built around a program editor specifi cally designed to create C++ programs.
1.Click Start Programs Bloodshed Dev-C++ Dev-C++ to start up the
Dev-C++ tool.
The Dev-C++ interface looks fundamentally like that of any other Win dows program — perhaps a little clunkier, but a Windows application nonetheless.
This is a lot of clicking. My personal preference is to create a shortcut on the desktop. To create a shortcut, double-click My Computer. Now double-click the Local Disk (C:). Finally, double-click Dev-CPP — whew! Right-click the file devcpp.exe and choose Create Shortcut from the drop down menu. Drag the Shortcut to devcpp.exe file onto your desktop (or some other easily accessible place). From now on, you can just double-click the shortcut to start Dev-C++.
2.Choose File New Source File.
Dev-C++ opens a blank window wherein you get to enter your new code. Don’t worry if you find yourself wishing you knew what to enter right now — that’s why you bought this book.
3.Enter the following program exactly as written.
Don’t worry too much about indentation or spacing — it isn’t critical whether a given line is indented two or three spaces, or whether there are one or two spaces between two words. C++ is case sensitive, how ever, so you need to make sure everything is lowercase.
You can cheat and copy the Conversion.cpp file contained on the enclosed CD-ROM in directory \CPP_Programs\Chap01.
//
//Program to convert temperature from Celsius degree
//units into Fahrenheit degree units:
//Fahrenheit = Celsius * (212 - 32)/100 + 32
//
#include <cstdio> #include <cstdlib> #include <iostream> using namespace std;
int main(int nNumberofArgs, char* pszArgs[])
{

18 |
Part I: Introduction to C++ Programming |
//enter the temperature in Celsius int celsius;
cout << “Enter the temperature in Celsius:”; cin >> celsius;
//calculate conversion factor for Celsius
//to Fahrenheit
int factor; factor = 212 - 32;
//use conversion factor to convert Celsius
//into Fahrenheit values
int fahrenheit;
fahrenheit = factor * celsius/100 + 32;
//output the results (followed by a NewLine) cout << “Fahrenheit value is:”;
cout << fahrenheit << endl;
//wait until user is ready before terminating program
//to allow the user to see the program results system(“PAUSE”);
return 0;
}
4.Choose Save As under the File menu. Then type in the program name and press Enter.
I know that it may not seem all that exciting, but you’ve just created your first C++ program!
For purposes of this book, I created a folder CPP_Programs. Within this,
I created Chap01. Finally, I saved the program with the name Conversion. cpp. Note that Dev-C++ won’t work properly with directory names that contain spaces. (It doesn’t have a problem with names longer than eight characters in length — thank goodness!)
Building your program
After you’ve saved your Conversion.cpp C++ source file to disk, it’s time to generate the executable machine instructions.
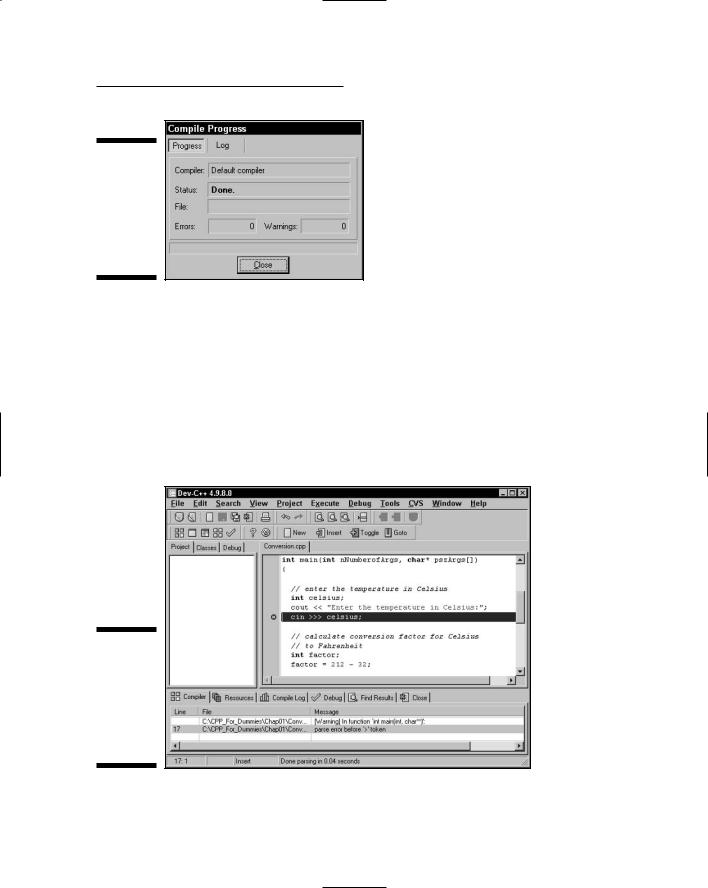
To build your Conversion.cpp program, you choose Execute Compile from the menu or press F9 — or you can even click that cute little icon with four colored squares on the menu bar (use the Tool Tips to see which one I’m talk ing about). In response, Dev-C++ opens a compiling window. Nothing will happen at first (sshh . . . it’s thinking). After a second or two, Dev-C++ seems to take off, compiling your program with gusto. If all goes well, a window like that shown in Figure 1-7 appears.
Chapter 1: Writing Your First C++ Program |
19 |
Figure 1-7:
The user is rewarded with a simple Done message if his program is error free.
Dev-C++ generates a message if it finds any type of error in your C++ program — and coding errors are about as common as snow in Alaska. You’ll undoubtedly encounter numerous warnings and error messages, probably even when enter ing the simple Conversion.cpp. To demonstrate the error-reporting process, let’s change Line 17 from cin >> celsius; to cin >>> celsius;.
This seems an innocent enough offense — forgivable to you and me perhaps, but not to C++. Dev-C++ opens a Compiler tab, as shown in Figure 1-8. The mes sage parse error before ‘> is perhaps a little terse, but descriptive. To get rid of the message, remove the extra > and recompile.
Figure 1-8:
Bad little programs generate error messages in the Compiler window.