

Chapter 3
Principles of Surgery |
3 |
|
|
F. D. Fragiskos |
|
|
|
The main concern of the dentist performing surgical procedures involves fundamental principles of surgery, asepsis and antisepsis, to prevent pathogenic microbes from entering the body as well as spread of certain infectious diseases from one patient to another.
Sterilization of instruments, as well as preparation of the patient and dentist are therefore considered necessary.
3.1
Sterilization of Instruments
The basic methods used for sterilization of instruments are: dry heat, moist heat (autoclave), chemical means, and sterilization with ethylene oxide.
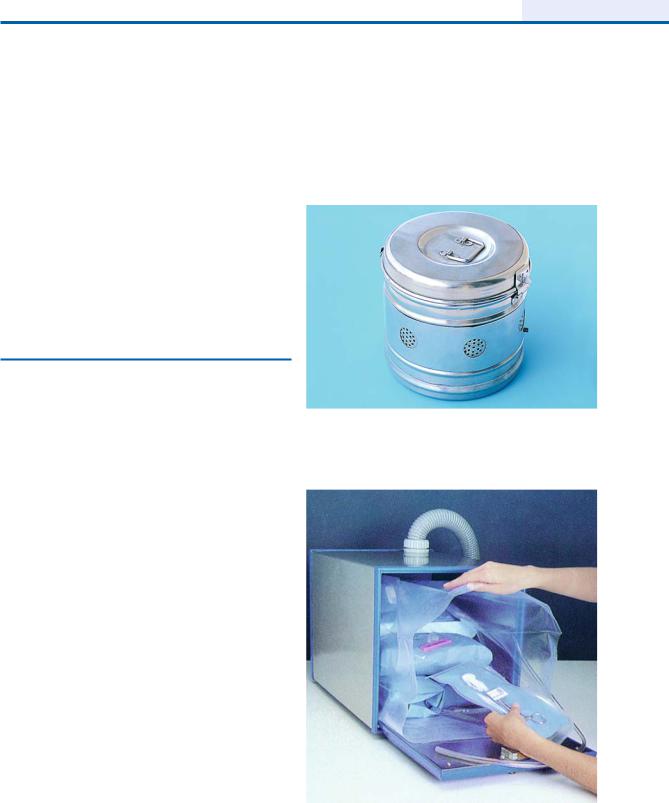
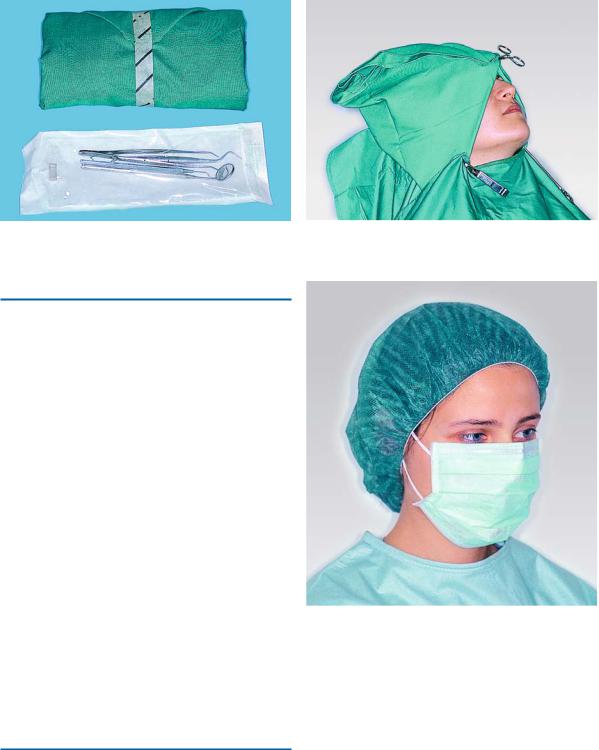
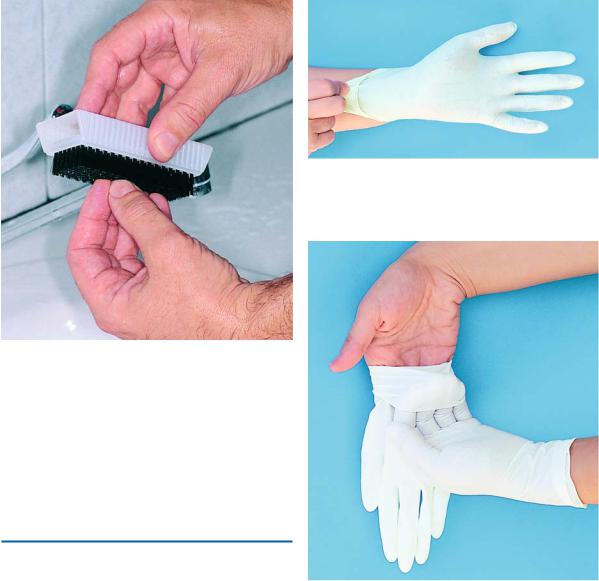
Sterilization of instruments is achieved in steel trays or the instruments are wrapped in drapes, which are placed either directly in the autoclave or in special metal containers, which have holes so that the steam may pass through during sterilization (Fig. 3.1). After sterilization, the holes of the container are sealed, so that whatever it contains remains sterilized until it is used. Wrapped instruments may also be sterilized with ethylene oxide (Fig. 3.2). This method is often used for plastic or metal instruments that are not heat resistant. Packages containing a full set of instruments necessary for each surgical procedure are considered very practical. The sterilized instruments these packages contain may be sealed and stored for a long period of time (Fig. 3.3). Packages which are opened and from which one or more instruments are removed repeatedly must be resterilized at least once a week.
All instruments and materials that are to be used for the surgical procedure are neatly arranged on the tray of the dental engine or surgery tray, after sterile drapes are placed to cover these surfaces.
Fig. 3.1. Special metallic container for sterilization of instruments. This container also ensures the maintenance of sterilization
Fig. 3.2. Ethylene oxide sterilizer
32 |
F. D. Fragiskos |
Fig. 3.3. Sterilized packages with a complete set of instru- Fig. 3.4. Covering of patient with sterile drapes ments necessary for surgery
3.2
Preparation of Patient
After the patient is seated in the dental chair, the assistant attends to disinfecting the area to be operated on. The skin around the mouth is first disinfected with gauze impregnated with antiseptic solution, and then the mucosa of the oral cavity is disinfected. The patient is then covered with sterile drapes. Three sterile drapes are required for this, approximately 80 × 80 cm.
The first sterile drape is placed on the upper part of the chair (back and headrest), where the patient lies. The second drape is folded in a triangle-shape and is placed on top of the first drape, where the patient will rest their head. The base of the triangle must be facing downwards, where the patient’s nape of the neck is, when the patient’s head is resting on the chair. The lateral corners of the triangular drape cover the head and are fastened with the aid of a towel clamp at the base of the nose. The third corner is lifted forward, over the scalp hair, and is also fastened at the base of the nose with the same towel clamp. The third drape is spread across the patient’s chest, up to the neck, and is fastened at the sides of the triangular drape with two towel clamps, leaving the area of the nose, mouth and inferior border of the mandible exposed (Fig. 3.4).
3.3
Preparation of Surgeon
The preparation of the surgeon is necessary in all surgical procedures and includes the disinfection of hands and appropriate clothing. Before this procedure
Fig. 3.5. Cap covering scalp hair and surgical mask
though, the dentist must have put on shoe covers, a cap covering the hair, and a surgical mask (Fig. 3.5).
The disinfection procedure starts with cleaning the hands with soap. Scrubbing should be restricted to critically contaminated areas. For disinfection alcoholic solutions or alternatively disinfectant soaps are recommended. Depending on the detergent a total time of 3–5 min is recommended. First hands, arms and elbows, than hands and wrists and finally the hands only are disinfected (Fig. 3.6). Care should be taken so that no non-sterile areas above the elbows are touched during this procedure.
Chapter 3 Principles of Surgery |
33 |
Fig. 3.7. Gloving without an assistant. The first glove is donned on the left hand with the help of the washed right hand, holding it by the cuff
Fig. 3.6. Scrubbing up of hands with antiseptic detergent solution
After this procedure, the dentist wears the sterile gown, which is tied by the assistant, and then dons the gloves. The first glove is held by the right hand by the cuff and is placed on the left hand, while the second glove is held by its exterior surface by the gloved hand and is placed on the right (Figs. 3.7, 3.8).
3.4
Surgical Incisions and Flaps
The following fundamental rules apply to every surgical procedure, concerning the incision and flap:
ΟThe incision must be carried out with a firm, continuous stroke, not interrupted strokes. During the incision, the scalpel should be in constant contact with bone. Repeated strokes at the same place, many times, impair wound healing.
ΟFlap design and incision should be carried out in such a way that injury of anatomic structures is avoided, such as: the mental neurovascular bundle, palatal vessels emerging from the greater palatine foramen and incisive foramen, infraorbital nerve, lingual nerve, submandibular duct, parotid duct, hypoglossal venous plexus, buccal artery (of concern when incision of an abscess of the pterygomandibular space is to be performed), facial nerve
Fig. 3.8. Donning of glove in right hand. Left hand holds exterior of right glove, avoiding contact with skin of right hand
and facial artery and vein, which are of concern basically for the drainage of abscesses performed with extraoral incisions.
ΟVertical releasing incisions should begin approximately at the buccal vestibule and end at the interdental papillae of the gingiva.
ΟEnvelope incisions and semilunar incisions, which are used in apicoectomies and removal of root tips, must be at least 0.5 cm from the gingival sulcus.
ΟThe elliptic incision, which is used for the excision of various soft tissue lesions, comprises two convex

34 F. D. Fragiskos
incisions joined at an acute angle at each end, while the depth of the incision is such that there is no tension when the wound margins are coapted and sutured.
ΟThe width of the flap must be adequate, so that the operative field is easily accessible, without creating tension and trauma during manipulation.
ΟThe base of the flap must be broader than the free gingival margin, to ensure adequate blood supply and to promote healing.
ΟThe flap itself must be larger than the bone deficit so that the flap margins, when sutured, are resting on intact, healthy bone and not over missing or unhealthy bone, thus preventing flap dehiscence and tearing.
ΟThe mucosa and periosteum must be reflected together. This is achieved (after a deep incision) when the elevator is continuously kept and pressed firmly against the bone.
ΟWhen the incision is not made along the gingival sulcus, for esthetic reasons, and especially in people with broad smiles, the scar that will result must be taken into consideration, particularly on the labial surface of the front teeth.
ΟDuring the surgical procedure, excessive pulling and crushing or folding of the flap must be avoided, because the blood supply is compromised and healing is delayed.
3.5
Types of Flaps
Various types of flaps have been described in oral surgery, whose name is based mainly upon shape. The
basic flap types are: trapezoidal, triangular, envelope, semilunar, flaps created by  and
and  incisions, and pedicle flaps.
3.5.1 Trapezoidal Flap
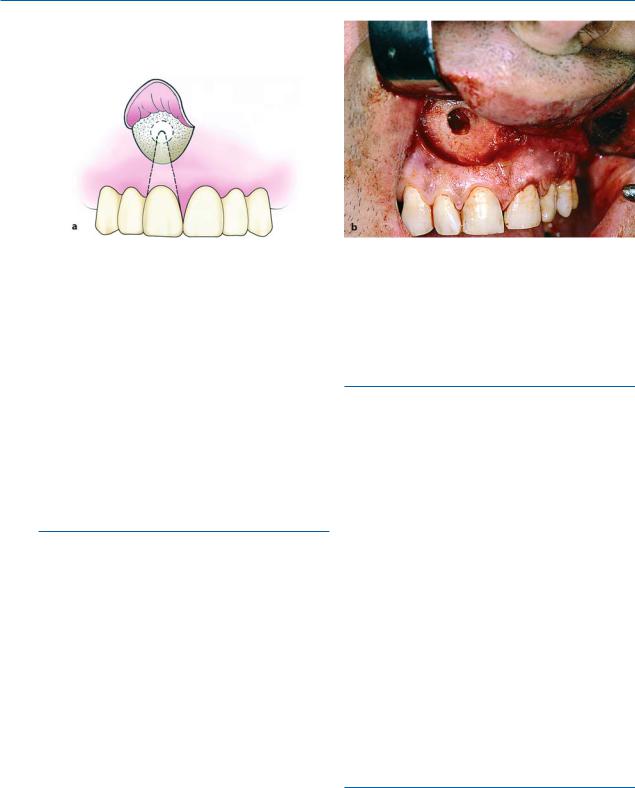
The trapezoidal flap is created after a 0-shaped incision, which is formed by a horizontal incision along the gingivae, and two oblique vertical releasing incisions extending to the buccal vestibule. The vertical releasing incisions always extend to the interdental papilla and never to the center of the labial or buccal surface of the tooth. This ensures the integrity of the gingiva proper, because if the incision were to begin at the center of the tooth, contraction after healing would leave the cervical area of the tooth exposed (Fig. 3.9a,b).
A satisfactory surgical field is ensured when the incision extends at least one or two teeth on either side of the area of bone removal. The fact that the base of the resulting flap is broader than its free gingival margin ensures the necessary adequate blood supply for the healing process. The trapezoidal flap is suitable for extensive surgical procedures, especially when the triangular flap would not provide adequate access.
Advantages. Provides excellent access, allows surgery to be performed on more than one or two teeth, produces no tension in the tissues, allows easy reapproximation of the flap to its original position and hastens the healing process.
Disadvantages. Produces a defect in the attached gingiva (recession of gingiva).
Fig. 3.9 a,b. Trapezoidal flap. a Diagrammatic illustration. b Clinical photograph. This type of flap is used in large surgical procedures, providing adequate access

Chapter 3 Principles of Surgery |
35 |
Fig. 3.10 a,b. Triangular flap resulting from L-shaped incision. a Diagrammatic illustration. b Clinical photograph. Indicated in surgical removal of root tips, small cysts and in apicoectomies
Fig. 3.11 a,b. Single-sided (envelope) flap created by a single horizontal incision along the cervical lines of the teeth. a Diagrammatic illustration (buccal). b Clinical photograph (palatal). It is primarily used in surgical procedures involv-
3.5.2 Triangular Flap
This flap is the result of an L-shaped incision (Fig. 3.10 a, b), with a horizontal incision made along the gingival sulcus and a vertical or oblique incision. The vertical incision begins approximately at the vestibular fold and extends to the interdental papilla of the gingiva. The triangular flap is performed labially or buccally on both jaws and is indicated in the surgical removal of root tips, small cysts, and apicoectomies.
Advantages. Ensures an adequate blood supply, satisfactory visualization, very good stability and reapproximation; it is easily modified with a small releasing incision, or an additional vertical incision, or even lengthening of the horizontal incision.
ing the cervical region of teeth buccally, and palatally in cases of removal of impacted teeth, as well as apicoectomies (palatal root of molar)
Disadvantages. Limited access to long roots, tension is created when the flap is held with a retractor, and it causes a defect in the attached gingiva.
3.5.3 Envelope Flap
This type of flap is the result of an extended horizontal incision along the cervical lines of the teeth.
The incision is made in the gingival sulcus and extends along four or five teeth. The tissue connected to the cervical lines of these teeth and the interdental papillae is thus freed. The envelope flap is used for surgery of incisors, premolars and molars, on the labial or buccal and palatal or lingual surface
(Fig. 3.11 a, b), and is usually indicated when the surgical procedure involves the cervical lines of the teeth
36 F. D. Fragiskos
Fig. 3.12 a,b. Semilunar flap. a Diagrammatic illustration. b Clinical photograph. It is used in apicoectomies and removal of small cysts and root tips
labially (or buccally) and palatally (or lingually), apicoectomy (palatal root), removal of impacted teeth, cysts, etc.
Advantages. Avoidance of vertical incision and easy reapproximation to original position.
Disadvantages. Difficult reflection (mainly palatally), great tension with a risk of the ends tearing, limited visualization in apicoectomies, limited access, possibility of injury of palatal vessels and nerves, defect of attached gingiva.
3.5.4 Semilunar Flap
This flap is the result of a curved incision, which begins just beneath the vestibular fold and has a bowshaped course with the convex part towards the attached gingiva (Fig. 3.12). The lowest point of the incision must be at least 0.5 cm from the gingival margin, so that the blood supply is not compromised. Each end of the incision must extend at least one tooth over on each side of the area of bone removal. The semilunar flap is used in apicoectomies and removal of small cysts and root tips.
Advantages. Small incision and easy reflection, no recession of gingivae around the prosthetic restoration, no intervention at the periodontium, easier oral hygiene compared to other types of flaps.
Disadvantages. Possibility of the incision being performed right over the bone lesion due to miscalculation, scarring mainly in the anterior area, difficulty of
reapproximation and suturing due to absence of specific reference points, limited access and visualization, tendency to tear.
3.5.5
Other Types of Flaps
Other types of flaps are the result of a  -shaped and an
  -shaped incision. These flaps are used in surgical procedures of the palate, mainly for the removal of exostoses (torus palatinus).
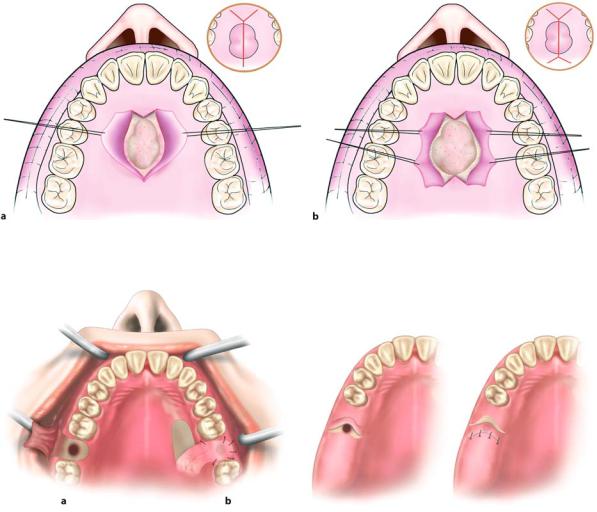
Flap Resulting from  -shaped Incision. An incision is made along the midline of the palate, as well as two anterolateral incisions, which are anterior to the canines (Fig. 3.13 a). This type of flap is indicated in surgical procedures involving the removal of small exostoses.
Flap Resulting from  -shaped Incision. This type of flap is used in larger exostoses, and is basically an extension of the
  -shaped incision (Fig. 3.13 b). The difference is that two more posterolateral incisions are made, which are necessary for adequate access to the surgical field. This flap is designed such that major branches of the greater palatine artery are not severed.
3.5.6 Pedicle Flaps
The three main types of pedicle flaps used for closure of an oroantral communication are: buccal, palatal, and bridge flaps.
Chapter 3 Principles of Surgery |
37 |
Fig. 3.13 a,b. Flaps created by a  -shaped and b
  -shaped incisions. They are used for the removal of small and large palatal exostoses, respectively
Fig. 3.14 a,b. Pedicle flaps. a Buccal. b Palatal. These techniques are suitable for closure of oroantral communication
Buccal Flap. This is a typical trapezoidal flap created buccally, corresponding to the area which is to be covered, and is usually used on dentulous patients. It is the result of two oblique incisions that diverge upwards, and extend as far as the tooth socket (Fig. 3.14 a). After creating the flap, the periosteum is incised transversally, making it more elastic so that it may cover the orifice that results from the tooth extraction. The oblique buccal flap is a variation of the buccal flap. It is the result of an anteroposterior incision, so that its base is perpendicular to the buccal area, posterior to the wound. The flap is rotated about 70°–80° and is placed over the socket. Both cases require that, before placing the flap, the wound margins must be debrided.
Palatal Flap. This type of flap is used in edentulous patients so that the vestibular depth is maintained.
Fig. 3.15. Pedicle bridge flap, used for closure of oroantral communication
The resulting palatal mucoperiosteal flap is rotated posteriorly and buccally, always including the vessels that emerge from the corresponding greater palatine foramen (Fig. 3.14 b). After rotation, the flap is placed over the orifice of the socket, the wound margins are debrided, and the flap is sutured with the buccal tissues. A gingival dressing is applied for a few days at the void created and healing is achieved by secondary intention.
Pedicle Bridge Flap. This flap is palatobuccal and is perpendicular to the alveolar ridge (Fig. 3.15). After creation, the flap is rotated posteriorly or anteriorly, to cover the orifice of the oroantral communication, without compromising the vestibular fold. This type of flap is used only on edentulous parts of the alveolar ridge.