


Working with TestCase |
29 |
|
|
2.6.1Managing resources with a fixture
Some tests require resources that can be a bother to set up. A prime example is something like a database connection. Several tests in a TestCase may need a connection to a test database and access to a number of test tables. Another series of tests may require complex data structures or a long series of random inputs.
Putting common setup code in your tests doesn’t make sense. You are not testing your ability to create a resource—you just need a stable background environment in which to run tests. The set of background resources that you need to run a test is commonly called a test fixture.
DEFINITION fixture—The set of common resources or data that you need to run one or more tests.
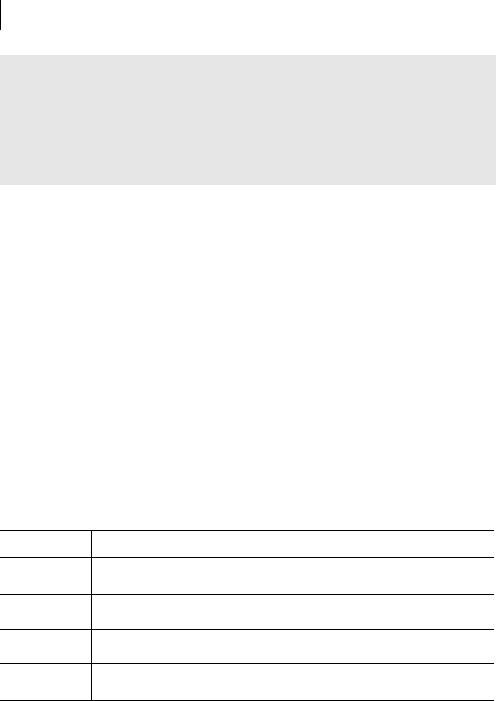
A fixture is automatically created and destroyed by a TestCase through its setUp and tearDown methods. The TestCase calls setUp before running each of its tests and then calls tearDown when each test is complete. A key reason why you put more than one test method into the same TestCase is to share the fixture code. The TestCase life cycle is depicted in figure 2.6.
In practice, many developers now use mock objects or stubs to simulate database connections and other complex resources. For more about mock objects and stubs, see chapters 6 and 7, respectively.
A database connection is a good example of why you might need a fixture. If a TestCase includes several database tests, they each need a fresh connection to the database. A fixture makes it easy for you to open a new connection for each test without replicating code. For more about testing databases, see chapter 11. You can also use a fixture to generate input files; doing this means you do not have to carry your test files with your tests, and you always have a known state before the test is executed.
JUnit also reuses code through the utility methods provided by the Assert interface, as we’ll explain in the next section.
setUp() |
testXXX() |
tearDown() |
Figure 2.6 The TestCase life cycle re-creates your fixture, or scaffolding, for each test method.
30CHAPTER 2
Exploring JUnit
JUnit design goals
When it is easy to reuse a fixture between tests, you can write tests more quickly. Each time you reuse the fixture, you decrease the initial investment made when the fixture was created. The TestCase fixtures speak to JUnit’s third design goal:
The framework must lower the cost of writing tests by reusing code.
2.6.2Creating unit test methods
Fixtures are a great way to reuse setup code. But there are many other common tasks that many tests perform over and over again. The JUnit framework encapsulates the most common testing tasks with an array of assert methods. The assert methods can make writing unit tests much easier.
The Assert supertype
In listing 2.2, we introduced the Test interface that both TestSuite and TestCase implement. The Test interface specifies only two methods, countTestCases and run. But in writing the TestCalculator case, you also used an assert method inherited from the base TestCase class.
The assert methods are defined in a utility class named (you guessed it) Assert. This class contains many of the nuts and bolts you use to construct tests.
If you look at the Javadoc or the source, you’ll see that, with 38 signatures, the Assert interface is longer than most. But if you look a little closer, you’ll notice that Assert has only eight public methods, as shown in table 2.3.
Table 2.3 The eight core methods provided by the Assert superclass
Method |
Description |
|
|
assertTrue Asserts that a condition is true. If it isn’t, the method throws an AssertionFailedError with the given message (if any).
assertFalse Asserts that a condition is true. If it isn’t, the method throws an AssertionFailedError with the given message (if any).
assertEquals Asserts that two objects are equal. If they are not, the method throws an AssertionFailedError with the given message (if any).
assertNotNull Asserts that an object isn’t null. If it is, the method throws an AssertionFailedError with the message (if any).
continued on next page

Working with TestCase |
31 |
|
|
Table 2.3 The eight core methods provided by the Assert superclass (continued)
Method |
Description |
|
|
assertNull Asserts that an object is null. If it isn’t, the method throws an AssertionFailedError with the given message (if any).
assertSame Asserts that two objects refer to the same object. If they do not, the method throws an AssertionFailedError with the given message (if any).
assertNotSame Asserts that two objects do not refer to the same object. If they do, the method throws an AssertionFailedError with the given message (if any).
fail |
Fails a test with the given message. |
The Javadoc is bulked up by convenience forms of these eight methods. The convenience forms make it easy to pass whatever type you need in your test. The assertEquals method, for example, has 20 forms! Most of the assertEquals forms are conveniences that end up calling the core assertEquals(String message, Object expected, Object actual) form.
The TestCase members
Along with the methods provided by Assert, TestCase implements 10 methods of its own. Table 2.4 overviews the 10 TestCase methods not provided by the Assert interface.
Table 2.4 The 10 additional methods provided by TestCase
Method |
Description |
|
|
countTestCases |
Counts the number of TestCases executed by run(TestResult result). (Spec- |
|
ified by the Test interface.) |
|
|
createResult |
Creates a default TestResult object. |
|
|
getName |
Gets the name of a TestCase. |
|
|
run |
Runs the TestCase and collects the results in TestResult. (Specified by the |
|
Test interface.) |
|
|
runBare |
Runs the test sequence without any special features, like automatic discovery of |
|
test methods. |
|
|
runTest |
Override to run the test and assert its state. |
|
|
setName |
Sets the name of a TestCase. |
|
|
setUp |
Initializes the fixture, for example, to open a network connection. This method is |
|
called before a test is executed. (Specified by the Test interface.) |
|
|
continued on next page

32CHAPTER 2
Exploring JUnit
Table 2.4 The 10 additional methods provided by TestCase (continued)
Method |
Description |
|
|
tearDown |
De-initializes the fixture, for example, to close a network connection. This method |
|
is called after a test is executed. (Specified by the Test interface.) |
|
|
toString |
Returns a string representation of the TestCase. |
|
|
In practice, many TestCases use the setUp and tearDown methods. The other methods in table 2.4 are mainly of interest to developers creating JUnit extensions. Used together, the 18 methods in tables 2.3 and 2.4 provide you with all the functionality you need to write tests with JUnit.
Keeping tests independent
As you begin to write your own tests, remember the first rule: Each unit test must run independently of all other unit tests. Unit tests must be able to be run in any order. One test must not depend on some side effect caused by a previous test (for example, a member variable being left in a certain state). If tests begin to depend on one another, you are inviting trouble. Here are some of the problems with codependent tests:
■Not portable—By default, JUnit finds test methods by reflection. The reflection API does not guarantee an order in which it returns the method names. If your tests depend on an ordering, then your suite may work in one Java Virtual Machine (JVM) but fail in another.
■Hard to maintain—When you modify one test, you may find that a number of other tests are affected. If you need to change the other tests, you spend time maintaining tests—time that could have been spent developing code.
■Not legible—To understand how co-dependent tests work, you must understand how each one works in turn. Tests become more difficult to read and harder to maintain. A good test must be easy to read and simple to maintain.
2.7Stepping through TestCalculator
Let’s demonstrate how all the core JUnit classes work together, using the TestCalculator test from listing 2.1 as an example. This is a very simple test class with a single test method:
import junit.framework.TestCase;
public class TestCalculator extends TestCase