- •contents
- •preface
- •acknowledgments
- •about this book
- •Special features
- •Best practices
- •Design patterns in action
- •Software directory
- •Roadmap
- •Part 1: JUnit distilled
- •Part 2: Testing strategies
- •Part 3: Testing components
- •Code
- •References
- •Author online
- •about the authors
- •about the title
- •about the cover illustration
- •JUnit jumpstart
- •1.1 Proving it works
- •1.2 Starting from scratch
- •1.3 Understanding unit testing frameworks
- •1.4 Setting up JUnit
- •1.5 Testing with JUnit
- •1.6 Summary
- •2.1 Exploring core JUnit
- •2.2 Launching tests with test runners
- •2.2.1 Selecting a test runner
- •2.2.2 Defining your own test runner
- •2.3 Composing tests with TestSuite
- •2.3.1 Running the automatic suite
- •2.3.2 Rolling your own test suite
- •2.4 Collecting parameters with TestResult
- •2.5 Observing results with TestListener
- •2.6 Working with TestCase
- •2.6.1 Managing resources with a fixture
- •2.6.2 Creating unit test methods
- •2.7 Stepping through TestCalculator
- •2.7.1 Creating a TestSuite
- •2.7.2 Creating a TestResult
- •2.7.3 Executing the test methods
- •2.7.4 Reviewing the full JUnit life cycle
- •2.8 Summary
- •3.1 Introducing the controller component
- •3.1.1 Designing the interfaces
- •3.1.2 Implementing the base classes
- •3.2 Let’s test it!
- •3.2.1 Testing the DefaultController
- •3.2.2 Adding a handler
- •3.2.3 Processing a request
- •3.2.4 Improving testProcessRequest
- •3.3 Testing exception-handling
- •3.3.1 Simulating exceptional conditions
- •3.3.2 Testing for exceptions
- •3.4 Setting up a project for testing
- •3.5 Summary
- •4.1 The need for unit tests
- •4.1.1 Allowing greater test coverage
- •4.1.2 Enabling teamwork
- •4.1.3 Preventing regression and limiting debugging
- •4.1.4 Enabling refactoring
- •4.1.5 Improving implementation design
- •4.1.6 Serving as developer documentation
- •4.1.7 Having fun
- •4.2 Different kinds of tests
- •4.2.1 The four flavors of software tests
- •4.2.2 The three flavors of unit tests
- •4.3 Determining how good tests are
- •4.3.1 Measuring test coverage
- •4.3.2 Generating test coverage reports
- •4.3.3 Testing interactions
- •4.4 Test-Driven Development
- •4.4.1 Tweaking the cycle
- •4.5 Testing in the development cycle
- •4.6 Summary
- •5.1 A day in the life
- •5.2 Running tests from Ant
- •5.2.1 Ant, indispensable Ant
- •5.2.2 Ant targets, projects, properties, and tasks
- •5.2.3 The javac task
- •5.2.4 The JUnit task
- •5.2.5 Putting Ant to the task
- •5.2.6 Pretty printing with JUnitReport
- •5.2.7 Automatically finding the tests to run
- •5.3 Running tests from Maven
- •5.3.2 Configuring Maven for a project
- •5.3.3 Executing JUnit tests with Maven
- •5.3.4 Handling dependent jars with Maven
- •5.4 Running tests from Eclipse
- •5.4.1 Creating an Eclipse project
- •5.4.2 Running JUnit tests in Eclipse
- •5.5 Summary
- •6.1 Introducing stubs
- •6.2 Practicing on an HTTP connection sample
- •6.2.1 Choosing a stubbing solution
- •6.2.2 Using Jetty as an embedded server
- •6.3 Stubbing the web server’s resources
- •6.3.1 Setting up the first stub test
- •6.3.2 Testing for failure conditions
- •6.3.3 Reviewing the first stub test
- •6.4 Stubbing the connection
- •6.4.1 Producing a custom URL protocol handler
- •6.4.2 Creating a JDK HttpURLConnection stub
- •6.4.3 Running the test
- •6.5 Summary
- •7.1 Introducing mock objects
- •7.2 Mock tasting: a simple example
- •7.3 Using mock objects as a refactoring technique
- •7.3.1 Easy refactoring
- •7.3.2 Allowing more flexible code
- •7.4 Practicing on an HTTP connection sample
- •7.4.1 Defining the mock object
- •7.4.2 Testing a sample method
- •7.4.3 Try #1: easy method refactoring technique
- •7.4.4 Try #2: refactoring by using a class factory
- •7.5 Using mocks as Trojan horses
- •7.6 Deciding when to use mock objects
- •7.7 Summary
- •8.1 The problem with unit-testing components
- •8.2 Testing components using mock objects
- •8.2.1 Testing the servlet sample using EasyMock
- •8.2.2 Pros and cons of using mock objects to test components
- •8.3 What are integration unit tests?
- •8.4 Introducing Cactus
- •8.5 Testing components using Cactus
- •8.5.1 Running Cactus tests
- •8.5.2 Executing the tests using Cactus/Jetty integration
- •8.6 How Cactus works
- •8.6.2 Stepping through a test
- •8.7 Summary
- •9.1 Presenting the Administration application
- •9.2 Writing servlet tests with Cactus
- •9.2.1 Designing the first test
- •9.2.2 Using Maven to run Cactus tests
- •9.2.3 Finishing the Cactus servlet tests
- •9.3 Testing servlets with mock objects
- •9.3.1 Writing a test using DynaMocks and DynaBeans
- •9.3.2 Finishing the DynaMock tests
- •9.4 Writing filter tests with Cactus
- •9.4.1 Testing the filter with a SELECT query
- •9.4.2 Testing the filter for other query types
- •9.4.3 Running the Cactus filter tests with Maven
- •9.5 When to use Cactus, and when to use mock objects
- •9.6 Summary
- •10.1 Revisiting the Administration application
- •10.2 What is JSP unit testing?
- •10.3 Unit-testing a JSP in isolation with Cactus
- •10.3.1 Executing a JSP with SQL results data
- •10.3.2 Writing the Cactus test
- •10.3.3 Executing Cactus JSP tests with Maven
- •10.4 Unit-testing taglibs with Cactus
- •10.4.1 Defining a custom tag
- •10.4.2 Testing the custom tag
- •10.5 Unit-testing taglibs with mock objects
- •10.5.1 Introducing MockMaker and installing its Eclipse plugin
- •10.5.2 Using MockMaker to generate mocks from classes
- •10.6 When to use mock objects and when to use Cactus
- •10.7 Summary
- •Unit-testing database applications
- •11.1 Introduction to unit-testing databases
- •11.2 Testing business logic in isolation from the database
- •11.2.1 Implementing a database access layer interface
- •11.2.2 Setting up a mock database interface layer
- •11.2.3 Mocking the database interface layer
- •11.3 Testing persistence code in isolation from the database
- •11.3.1 Testing the execute method
- •11.3.2 Using expectations to verify state
- •11.4 Writing database integration unit tests
- •11.4.1 Filling the requirements for database integration tests
- •11.4.2 Presetting database data
- •11.5 Running the Cactus test using Ant
- •11.5.1 Reviewing the project structure
- •11.5.2 Introducing the Cactus/Ant integration module
- •11.5.3 Creating the Ant build file step by step
- •11.5.4 Executing the Cactus tests
- •11.6 Tuning for build performance
- •11.6.2 Grouping tests in functional test suites
- •11.7.1 Choosing an approach
- •11.7.2 Applying continuous integration
- •11.8 Summary
- •Unit-testing EJBs
- •12.1 Defining a sample EJB application
- •12.2 Using a façade strategy
- •12.3 Unit-testing JNDI code using mock objects
- •12.4 Unit-testing session beans
- •12.4.1 Using the factory method strategy
- •12.4.2 Using the factory class strategy
- •12.4.3 Using the mock JNDI implementation strategy
- •12.5 Using mock objects to test message-driven beans
- •12.6 Using mock objects to test entity beans
- •12.7 Choosing the right mock-objects strategy
- •12.8 Using integration unit tests
- •12.9 Using JUnit and remote calls
- •12.9.1 Requirements for using JUnit directly
- •12.9.2 Packaging the Petstore application in an ear file
- •12.9.3 Performing automatic deployment and execution of tests
- •12.9.4 Writing a remote JUnit test for PetstoreEJB
- •12.9.5 Fixing JNDI names
- •12.9.6 Running the tests
- •12.10 Using Cactus
- •12.10.1 Writing an EJB unit test with Cactus
- •12.10.2 Project directory structure
- •12.10.3 Packaging the Cactus tests
- •12.10.4 Executing the Cactus tests
- •12.11 Summary
- •A.1 Getting the source code
- •A.2 Source code overview
- •A.3 External libraries
- •A.4 Jar versions
- •A.5 Directory structure conventions
- •B.1 Installing Eclipse
- •B.2 Setting up Eclipse projects from the sources
- •B.3 Running JUnit tests from Eclipse
- •B.4 Running Ant scripts from Eclipse
- •B.5 Running Cactus tests from Eclipse
- •references
- •index
Using JUnit and remote calls |
325 |
|
|
</enterprise-beans>
</jbosscmp-jdbc>
These are the kind of errors you have to solve when you perform real integration unit testing.
Let’s now imagine that you have fixed all the deployment errors. It’s high time to write the TestPetstoreEJB test class.
12.9.4Writing a remote JUnit test for PetstoreEJB
The principle is simple: The test is a client of the remote Petstore EJB. Listing 12.22 demonstrates how to write such a test.
Listing 12.22 TestPetstoreEJB.java
package junitbook.ejb.service;
import java.util.Date;
import javax.naming.InitialContext; import javax.rmi.PortableRemoteObject;
import junit.framework.TestCase; import junitbook.ejb.util.JNDINames;
public class TestPetstoreEJB extends TestCase
{
public void testCreateOrderOk() throws Exception
{
Properties props = new Properties(); props.put(Context.INITIAL_CONTEXT_FACTORY,
"org.jnp.interfaces.NamingContextFactory"); props.put(Context.PROVIDER_URL, "localhost:1099"); props.put(Context.URL_PKG_PREFIXES,
"org.jboss.naming:org.jnp.interfaces"); InitialContext context = new InitialContext(props);
b
Object obj = |
context.lookup(JNDINames.PETSTORE_HOME); |
c |
PetstoreHome petstoreHome = |
|
|
(PetstoreHome) PortableRemoteObject.narrow( |
|
|
obj, PetstoreHome.class); |
|
Petstore petstore = petstoreHome.create();
Date date = new Date();
String item = "item 1";
int orderId = petstore.createOrder(date, item); assertEquals(date.hashCode() + item.hashCode(), orderId);
}
}
326CHAPTER 12
Unit-testing EJBs
bYou’re making an out-of-JVM call to the container, so you need to specify the JNDI properties.
cPerform a JNDI lookup to retrieve the PetstoreEJB home instance.
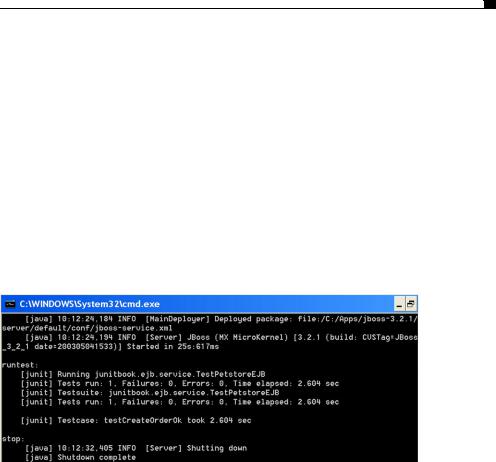
At this stage, you have the deployment working and the test case written. If you try running the tests by typing ant test, you’ll discover that it still fails. You still need to adjust the JNDI names: You must match the JNDI names you use to look up objects with the JNDI names under which JBoss publishes the objects.
12.9.5Fixing JNDI names
The JNDI names used in the application are defined in JNDINames.java, as shown in listing 12.23.
Listing 12.23 JNDI names used to look up the J2EE objects
package junitbook.ejb.util;
public abstract class JNDINames
{
public static final String QUEUE_CONNECTION_FACTORY = "ConnectionFactory";
public static final String QUEUE_ORDER = "queue/petstore/Order";
public static final String ORDER_LOCALHOME = "ejb/petstore/Order";
public static final String PETSTORE_HOME = "ejb/petstore/Petstore";
}
In order to publish the objects under these names, you need to define a JBossspecific jboss.xml file (see listing 12.24) that matches the JNDI names defined in
JNDINames.java.
Listing 12.24 jboss.xml with JNDI names matching JNDINames.java
<jboss> <enterprise-beans>
<session> <ejb-name>Petstore</ejb-name>
<jndi-name>ejb/petstore/Petstore</jndi-name> <resource-env-ref>
<resource-env-ref-name>
→ jms/queue/petstore/Order</resource-env-ref-name> <jndi-name>queue/petstore/Order</jndi-name>
</resource-env-ref>
Using JUnit and remote calls |
327 |
|
|
</session>
<entity> <ejb-name>Order</ejb-name>
<local-jndi-name>ejb/petstore/Order</local-jndi-name> </entity>
<message-driven> <ejb-name>OrderProcessor</ejb-name> <destination-jndi-name>
→ queue/petstore/Order</destination-jndi-name> </message-driven>
</enterprise-beans> </jboss>
You must also modify the ejbjar Ant target so that it picks the new JBoss-specific files you have added (changes are in bold):
<target name="ejbjar" depends="compile"> <jar destfile="${target.dir}/ejb.jar">
<metainf dir="${conf.dir}">
<include name="ejb-jar.xml"/>
<include name="jbosscmp-jdbc.xml"/>
<include name="jboss.xml"/>
</metainf>
<fileset dir="${target.classes.java.dir}"/> </jar>
</target>
12.9.6Running the tests
At last, you’re ready to run the tests. They should now execute fine. Typing ant test generates the results shown in figure 12.7.
Figure 12.7 Successful execution of pure JUnit tests calling the running container remotely
328CHAPTER 12
Unit-testing EJBs
12.10 Using Cactus
Let’s now use Cactus to run some EJB unit tests. Cactus has several advantages over a pure JUnit solution:
■Cactus lets you unit-test Enterprise Beans using local interfaces, because Cactus tests run inside the container. For example, you have not been able to perform integration unit tests for the Order CMP entity bean (which uses a local interface). We’ll demonstrate how to do this using Cactus.
■The Ant scripts were a bit complex because you had to script the container’s start and stop (JBoss, in this case). Cactus provides an Ant integration that simplifies this operation. In addition, this Cactus Ant task supports several containers out of the box (JBoss, Tomcat, Resin, Orion, WebLogic, and so on), making it easy to run the tests on any container.
At this time of this writing, Cactus doesn’t yet provide EJB Redirectors you can use to directly write tests against EJBs as you have done for servlets, taglibs, and filters in previous chapters.3 Thus, you can’t yet perform fine-grained integration tests, such as testing exceptions cases.
12.10.1Writing an EJB unit test with Cactus
The current Cactus solution consists of transparently using the Cactus servlet Redirector so that the tests are executed within the context of the web container. For the pure JUnit solution, the tests perform a lookup on the EJB to unit-test and call its method to test. The difference is that this lookup is performed from the web container context and thus also works for local interfaces.
Let’s demonstrate this on the OrderEJB CMP entity bean (listing 12.25).
Listing 12.25 OrderEJB unit test as a Cactus ServletTestCase
package junitbook.ejb.domain;
import java.util.Date;
import javax.naming.InitialContext;
import junit.framework.TestCase; import junitbook.ejb.util.JNDINames;
public class TestOrderEJB extends ServletTestCase
3The addition of EJB redirectors is scheduled for Cactus 1.6 or later (it is on the todo list: http://jakarta.apache.org/cactus/participating/todo.html).